
During Apple's Worldwide Developers Conference in June 2020, Apple announced a significant shift in Mac hardware architecture - namely, that macOS will now run on an ARM-based Apple processor, replacing the Intel chip it has been using for nearly two decades.
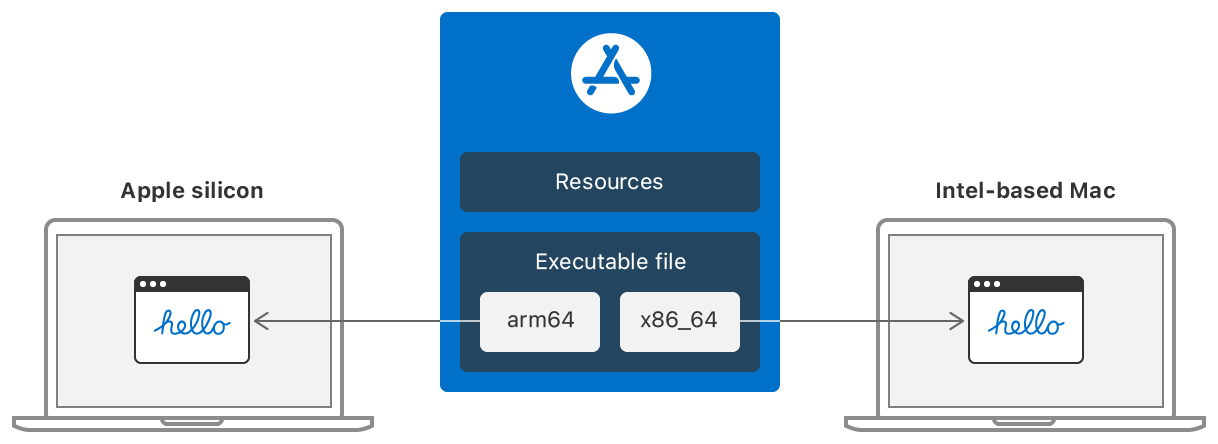
In addition, Apple announced a two-year timeline to migrate its fleet from Intel to Apple silicon. Apple said the transition would be the most significant leap the Mac has ever taken. With Rosetta 2, Apple silicon-based Macs can run Intel-based applications, and Xcode includes native compilers, editors, and debugging tools for Apple silicon.
The process of transitioning on this scale can be challenging. Developers will need to make changes to their code and recompile it.
Using Rosetta 2, most macOS software built for Intel – especially software that Apple produces directly — will work on Apple silicon. The Rosetta 2 interpreter translates binary code for Intel machines into the variety of instructions Apple silicon anticipates.
Nevertheless, Rosetta does not translate these executables:
- Kernel extensions
- Virtual Machine apps that virtualize x86_64 computer platforms
In order to assist you during the transition process, we have created this guide.
The transition checklist
✨Highly recommend: Before moving to the CI step stage, we highly recommend having an Apple silicon machine available internally to test the migration.
To make the transit process smooth and easy for the team, the following steps are recommended:
- Review Apple's official documentation
- Make sure that your Xcode version Xcode 13.3 or above supports the Apple silicon chip
- Update Homebrew, Ruby, and RubyGems with the latest versions
- Configure build settings and Architectures
- Update dependencies
- Make sure any third-party libraries or SDKs you use have Apple silicon support
- Test your app with Simulators and real devices locally
- Address any problems that may arise
- Use Instruments or Xcode debugging tools to monitor the app for crashes, memory leaks, or other issues
- Check the compatibility issues and performance
Transitioning to Apple silicon
Apple's Apple silicon chip is based on the ARM architecture, which differs from the x86 architecture used by Intel chips. As a result, you need to ensure your apps are compatible with the new architecture.
To get started with the migration process, here are the steps to migrate your iOS app from an Intel to an Apple silicon:
- Open your project in Xcode and go to the project settings. Select your target, and select Build Settings.
- Under the Architectures section, set the ‘Build Active Architecture Only’ to YES for debug and release builds. This ensures that the compiler generates the binary for only one architecture.
- Update your app’s architecture build settings to support building macOS, iOS, watchOS, and tvOS apps on Apple silicon.
- Set the "Architectures" setting to "Standard Architectures (Apple Silicon, Intel)." This will allow your app to be built for both Intel and ARM-based Macs, as shown in the following image.

ℹ️More information can be found in this helpful article about Resolving architecture build errors on Apple silicon.
Update dependencies
Ensure that all third-party libraries, frameworks, and other dependencies your app relies on are updated and compatible with the ARM architecture. This may require updating or replacing specific Carthage, SPM, and/or CocoaPods dependencies.
- Ensure to update or replace any libraries and frameworks incompatible with Apple silicon.
- Ensure you use the latest versions of Apple's system libraries and frameworks, as they should already be compatible with Apple silicon.
Here are migration assistant steps we can take to update our dependencies:
Carthage
Update your dependencies
- Navigate to your project directory containing the Cartfile.
- Run the command carthage update --use-xcframeworks to update all dependencies in your Cartfile to their latest compatible versions.
Replace a specific dependency
- Open the Cartfile.
- Replace the line containing the old dependency with the new one, specifying the desired version or branch.
- Save the file and close the editor.
- Run the command carthage update in the Terminal to fetch the new dependency and build the frameworks.
CocoaPods
- Open the Podfile.
- Replace the line containing the old dependency with the new one, specifying the desired version or branch using the syntax pod 'NewDependency', '~> version'.
- Save the file and close the editor.
- Run the command pod update NewDependency in the Terminal to install the new dependency and update your project's workspace.
Swift Package Manager
In Xcode, select "File" > “Packages" > "Update to Latest Package Versions" from the menu.
Review any custom build scripts or tools used in your project
- Some tools may need to be updated, replaced, or recompiled for the ARM architecture.
- Ensure that any developer tools and utilities you use during development or for testing are compatible with Apple silicon.
Examples include code analyzers and other development tools. You may need to update or replace these tools with versions compatible with the ARM architecture.
- If your app relies on remote APIs, ensure these services are compatible and well-tested with your app running on Apple silicon. Some low-level APIs (C/C++) may indeed be broken. Here are some examples for migrating away from specific technologies and porting Your macOS Apps to Apple silicon.
- If your app supports plug-ins or extensions, you may need to update or replace these components or provide guidelines for third-party developers to update their plug-ins or extensions.
Build and run your app. Thoroughly test the app's functionality to ensure no issues or crashes related to the new architecture.
If you encounter issues during testing, identify and address the root causes. This may involve updating your code, fixing bugs, or optimizing the app for the new architecture.
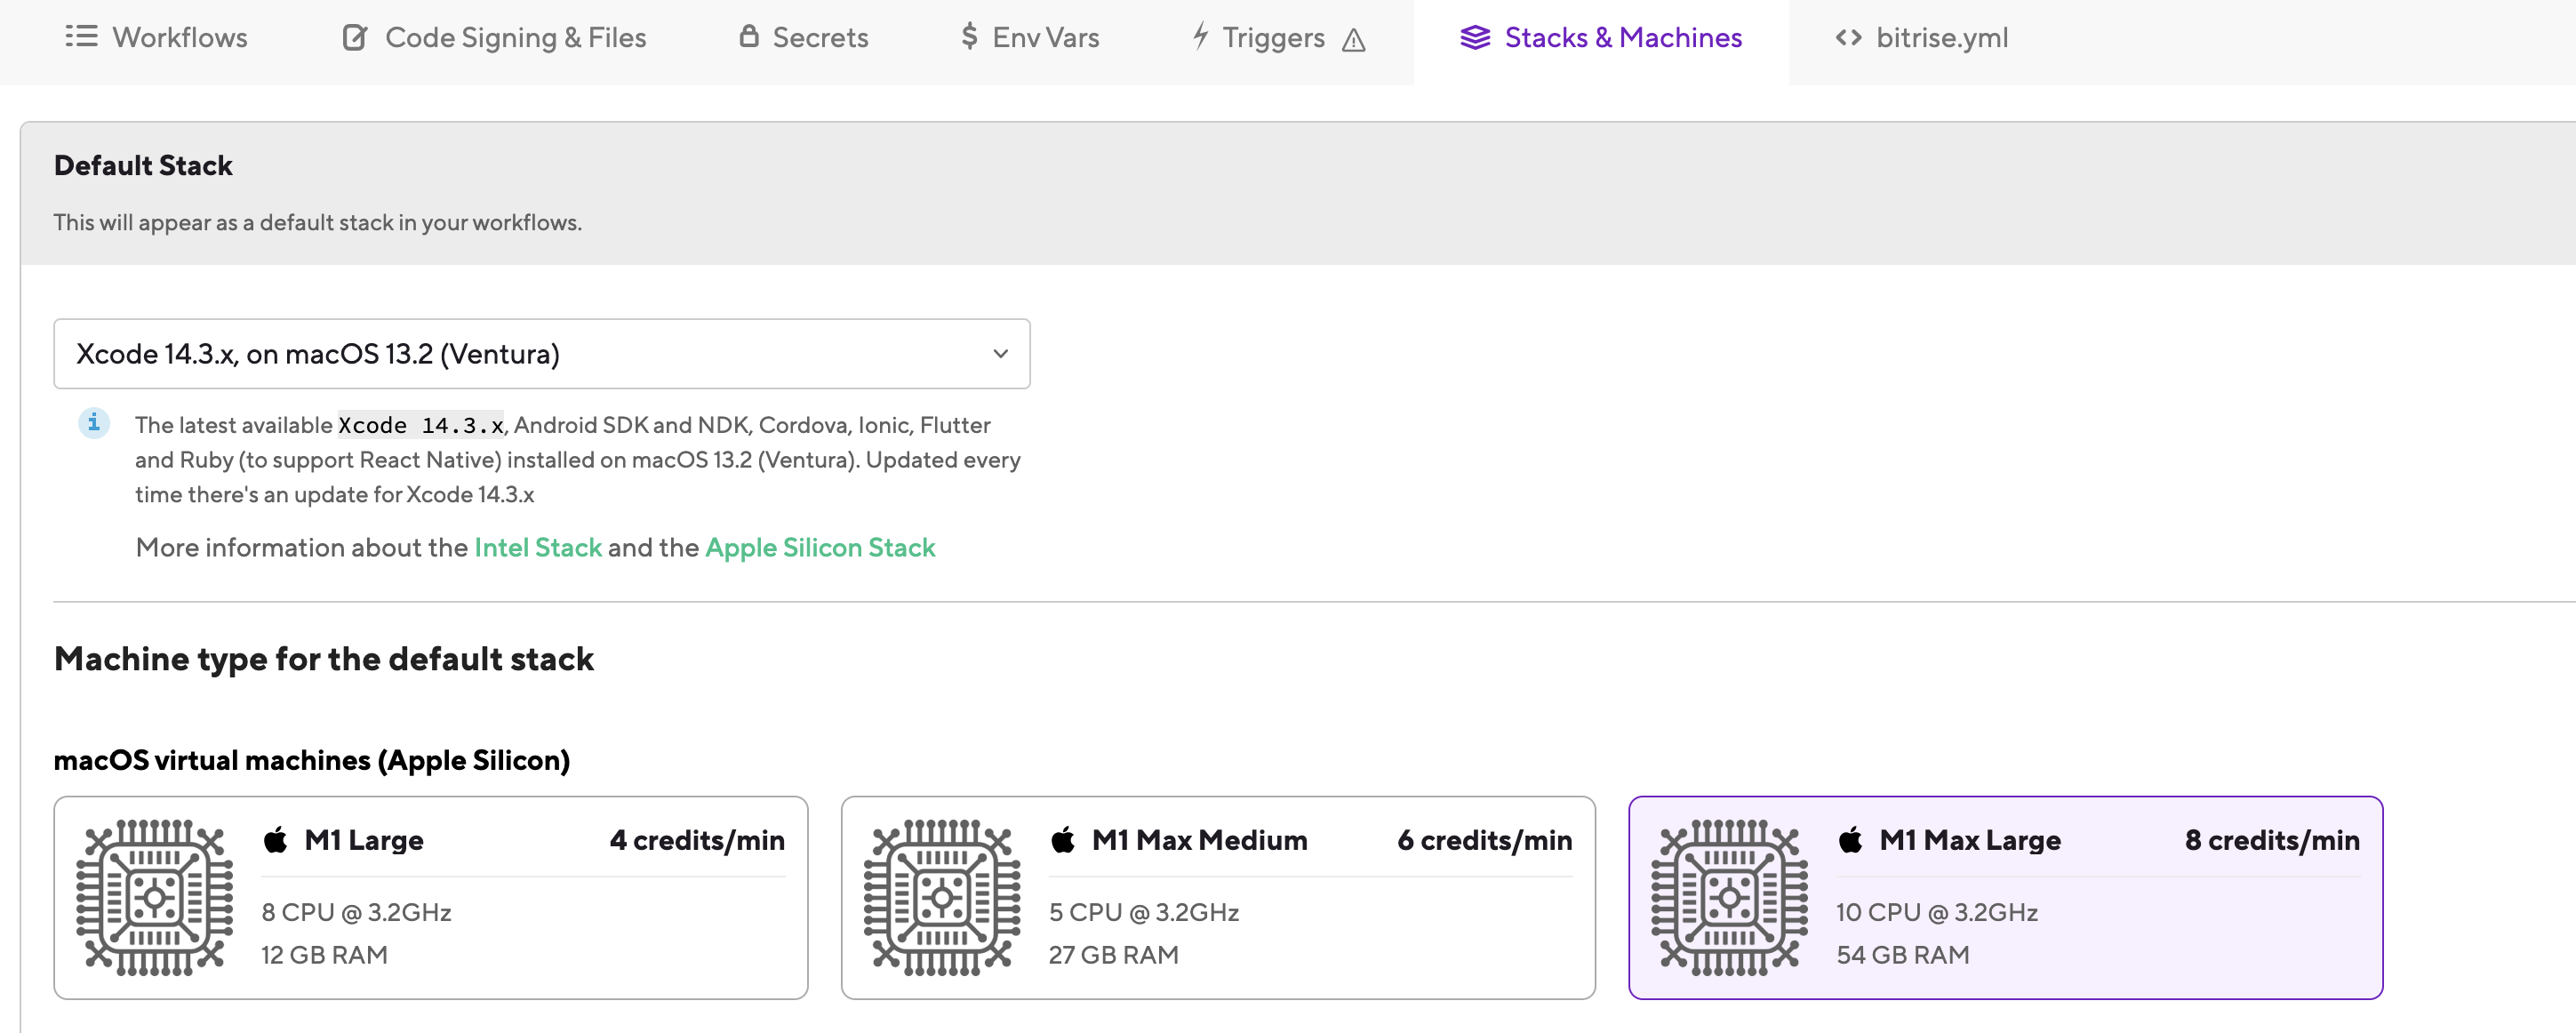
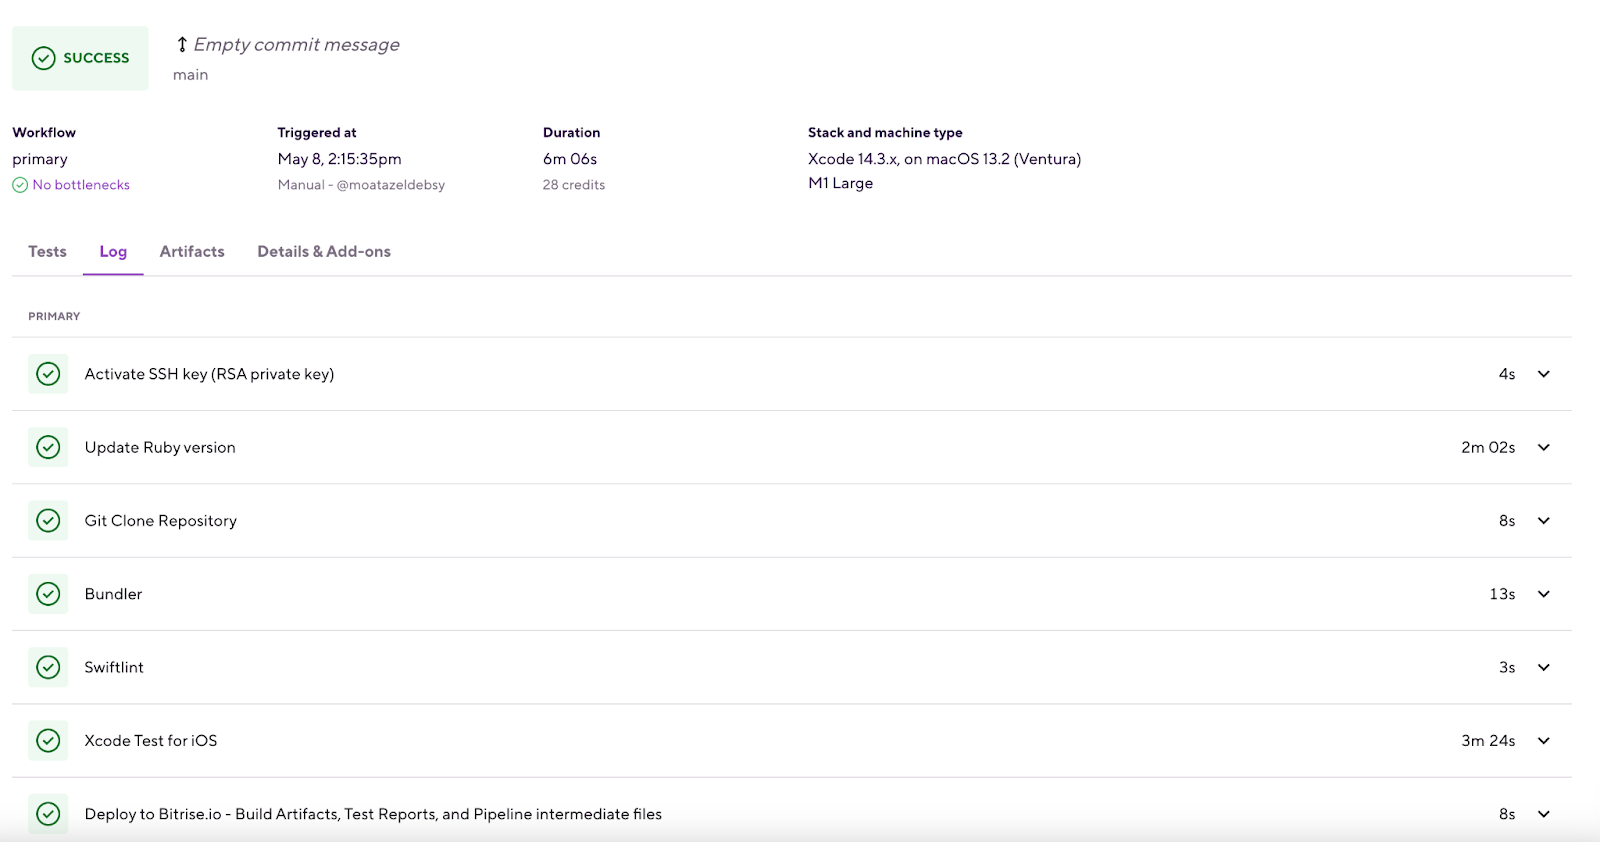
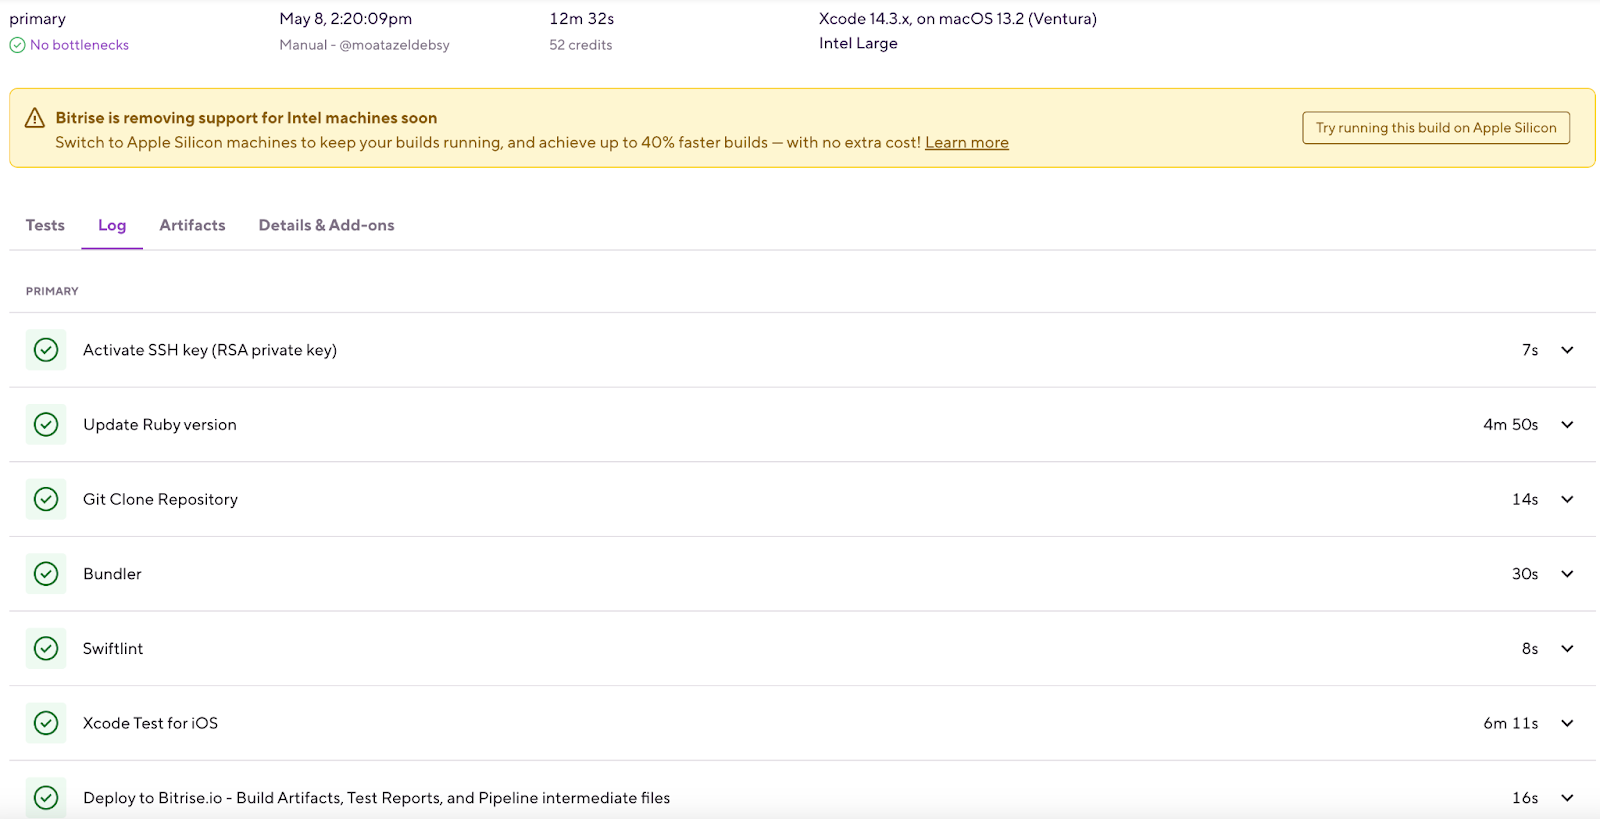
After you have done all the required steps internally, it’s time to move to the CI stage and run your app on M1 machines on Bitrise to ensure everything is working properly.
Building on Apple silicon and Bitrise
Apple silicon in the cloud, built for continuous integration and delivery. Fully virtualized, scalable from zero to dozens of concurrencies in seconds, and faster than ever. The following image shows you can run your iOS CI/CD pipelines on M1 and M1 Max in the Cloud.
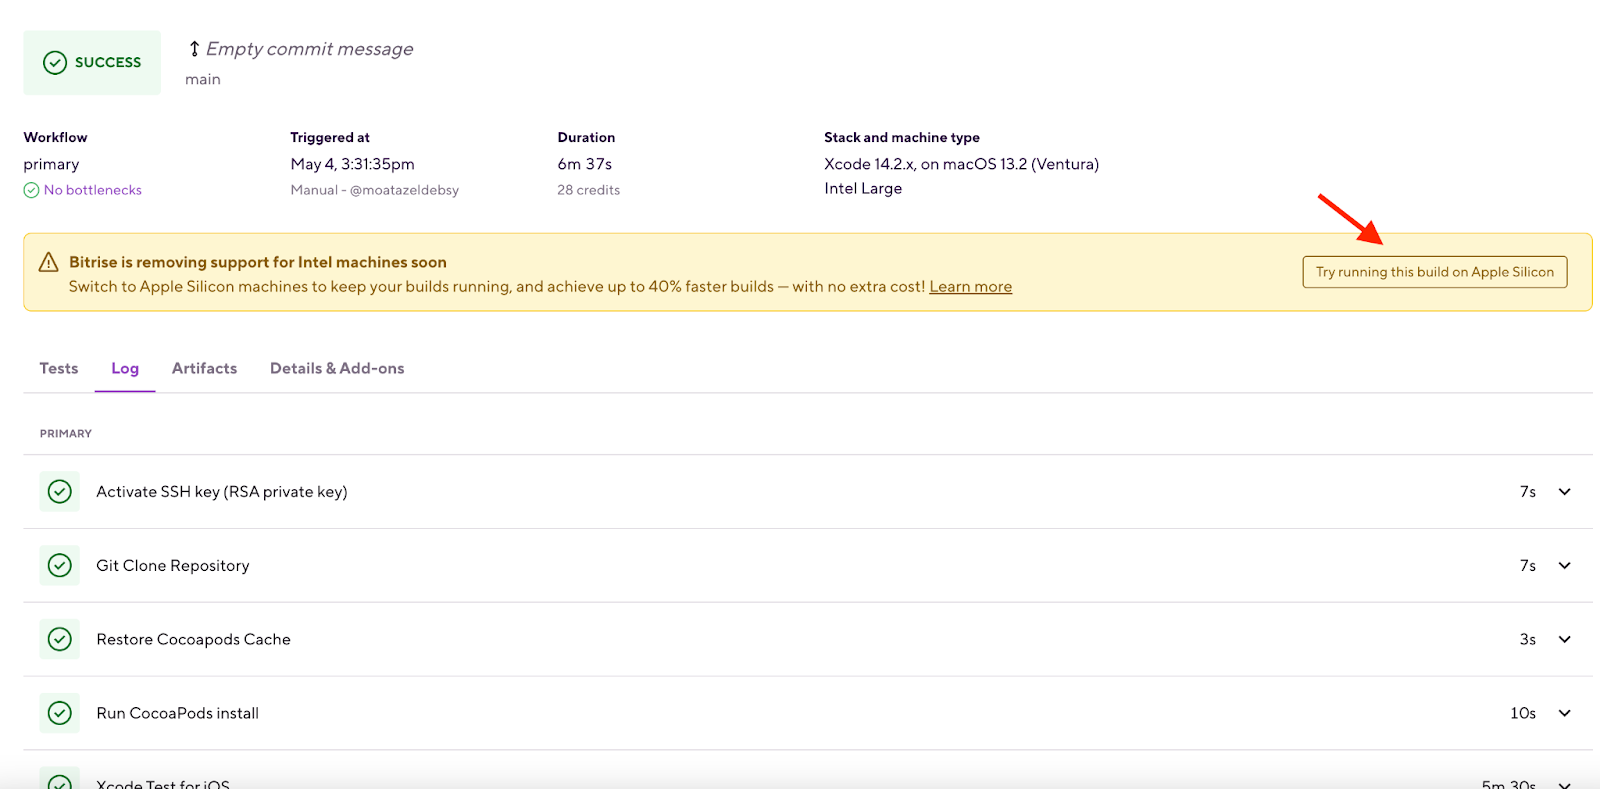
If your app on Bitrise is still using an Intel-based virtual machine, you can re-run your latest successful build on M1 machines with a single click, as shown in the following image.
In case your first try with M1 failed, you will have another option to run your build on a Rosetta emulated stack but maybe building native extensions can be a challenge.
The Caching may have a problem since Intel caches cannot be used with Apple Silicon and vice versa. In this case, key-based caching can solve this while running both Intel and Apple silicon, as shown in the following image.

How Apple silicon improves build speed
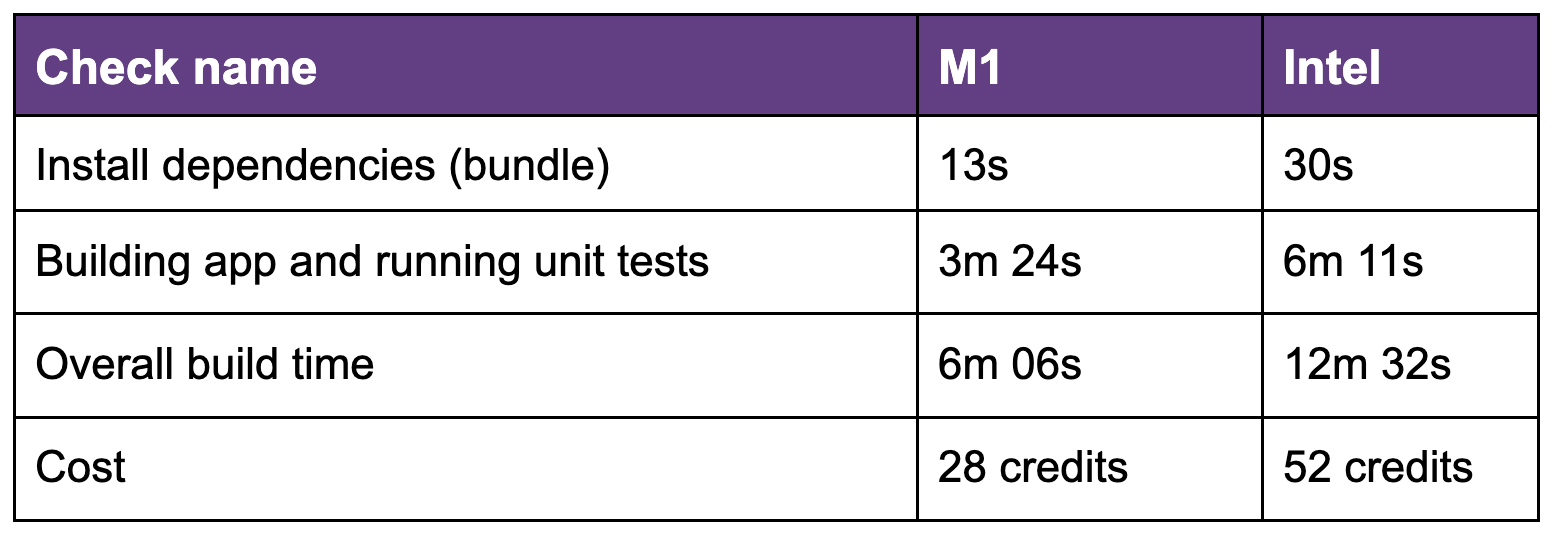
To understand the build time differences between the M1 and Intel machines and get a better idea of the superior efficiency and speed of M1, we built and run tests with the official Wikipedia iOS app. This demonstrates a real-world scenario with hundreds of tests. It’s an open-source app that you can explore yourself.
This benchmark measures the performance of installing dependencies, building the app, and running tests as shown in the following image:
The following table shows the results after running the workflow on M1 and Intel stacks
M1 build
Intel build
After clicking on the try running the build on Apple silicon button, the build will be triggered with M1 stack and you will receive a notification that your workflow is ready for Apple silicon. You will then be able to update the configuration in the Workflow Editor to make it the default stack for your app.

As you can see, the M1 build machines run significantly faster, especially when running tests. The developer will be more productive and save credits and hours by running the same tests multiple times for this app, which will also result in a more than 40% reduction in build times for this specific project.
Related resources
- Build and Test Your iOS Apps on Apple silicon Macs with Bitrise
- Build your Flutter app faster with Apple silicon
- Getting Ready for Mobile CI/CD on Apple Silicon Apple silicon
- New tiered Apple silicon machine type offering for powerful, efficient, and flexible builds
- About the Rosetta Translation Environment
- M1 stacks - Bitrise Docs


