Flaky tests are a persistent issue that can make a mobile developer's life frustrating and challenging. Failing tests that produce different results, even when the code hasn’t changed can cause confusion and setbacks. This leads to time-consuming, frustrating debugging sessions. Eliminating flaky tests is essential for ensuring a stable and reliable testing process. This article will explore the importance of tracking flaky tests with Bitrise Insights, and how to diagnose the causes behind them. Additionally, it will also discuss how Bitrise Insights can detect flaky tests, and how developers can use the tool to track, identify, and diagnose the flakiness of their tests.
What, why and how to track is a series of articles that takes you through all there is to know about build times, build failure rates, test failure rates, flaky tests and credit usage with Bitrise Insights. Watch the video, or read the article for how to monitor and optimize your slowest mobile builds.
Why is it important to track flaky tests?
First, what is a flaky test, and how is it calculated?
A test is flaky if it produces different results even when the code isn’t changed. For example, this simple code will sometimes fail and other times it’ll be successful, without any code change:
randNum := r1.Intn(100)
require.Equal(t, true, randNum > 40, "More than 40?")
Flaky tests are a special case of failing tests, and probably the most crucial ones to fix.
Flaky tests are a persistent problem that can make a developer's life frustrating and challenging. They are a unique type of failing tests that may cause confusion and setbacks even when the code change being made is functioning as intended. Unlike other failing tests, flaky tests can cause failures in seemingly unrelated parts of the code, leading to time-consuming and frustrating debugging sessions. Fixing flaky tests is essential for ensuring a stable and reliable testing process.
Eliminating flaky tests is not only important to prevent time waste, but is also crucial to improving developers' confidence in the tests. If tests fail randomly, developers will start to ignore test failures over time.
Bitrise Insights can detect when a test produces inconsistent results for the same code state. For builds that have a code commit hash information specified when triggered (e.g. all builds except manually triggered and scheduled ones), a flaky test will be identified when it detects inconsistent results across builds (e.g. where the commit hash is the same, but the test had multiple different results on the same commit hash). Insights can also detect flaky tests in a given build if the same test was performed multiple times in a single build, even if the build did not have a commit hash specified when it was triggered (common for manual and scheduled builds).
How to find flaky tests and how to diagnose what's causing it?
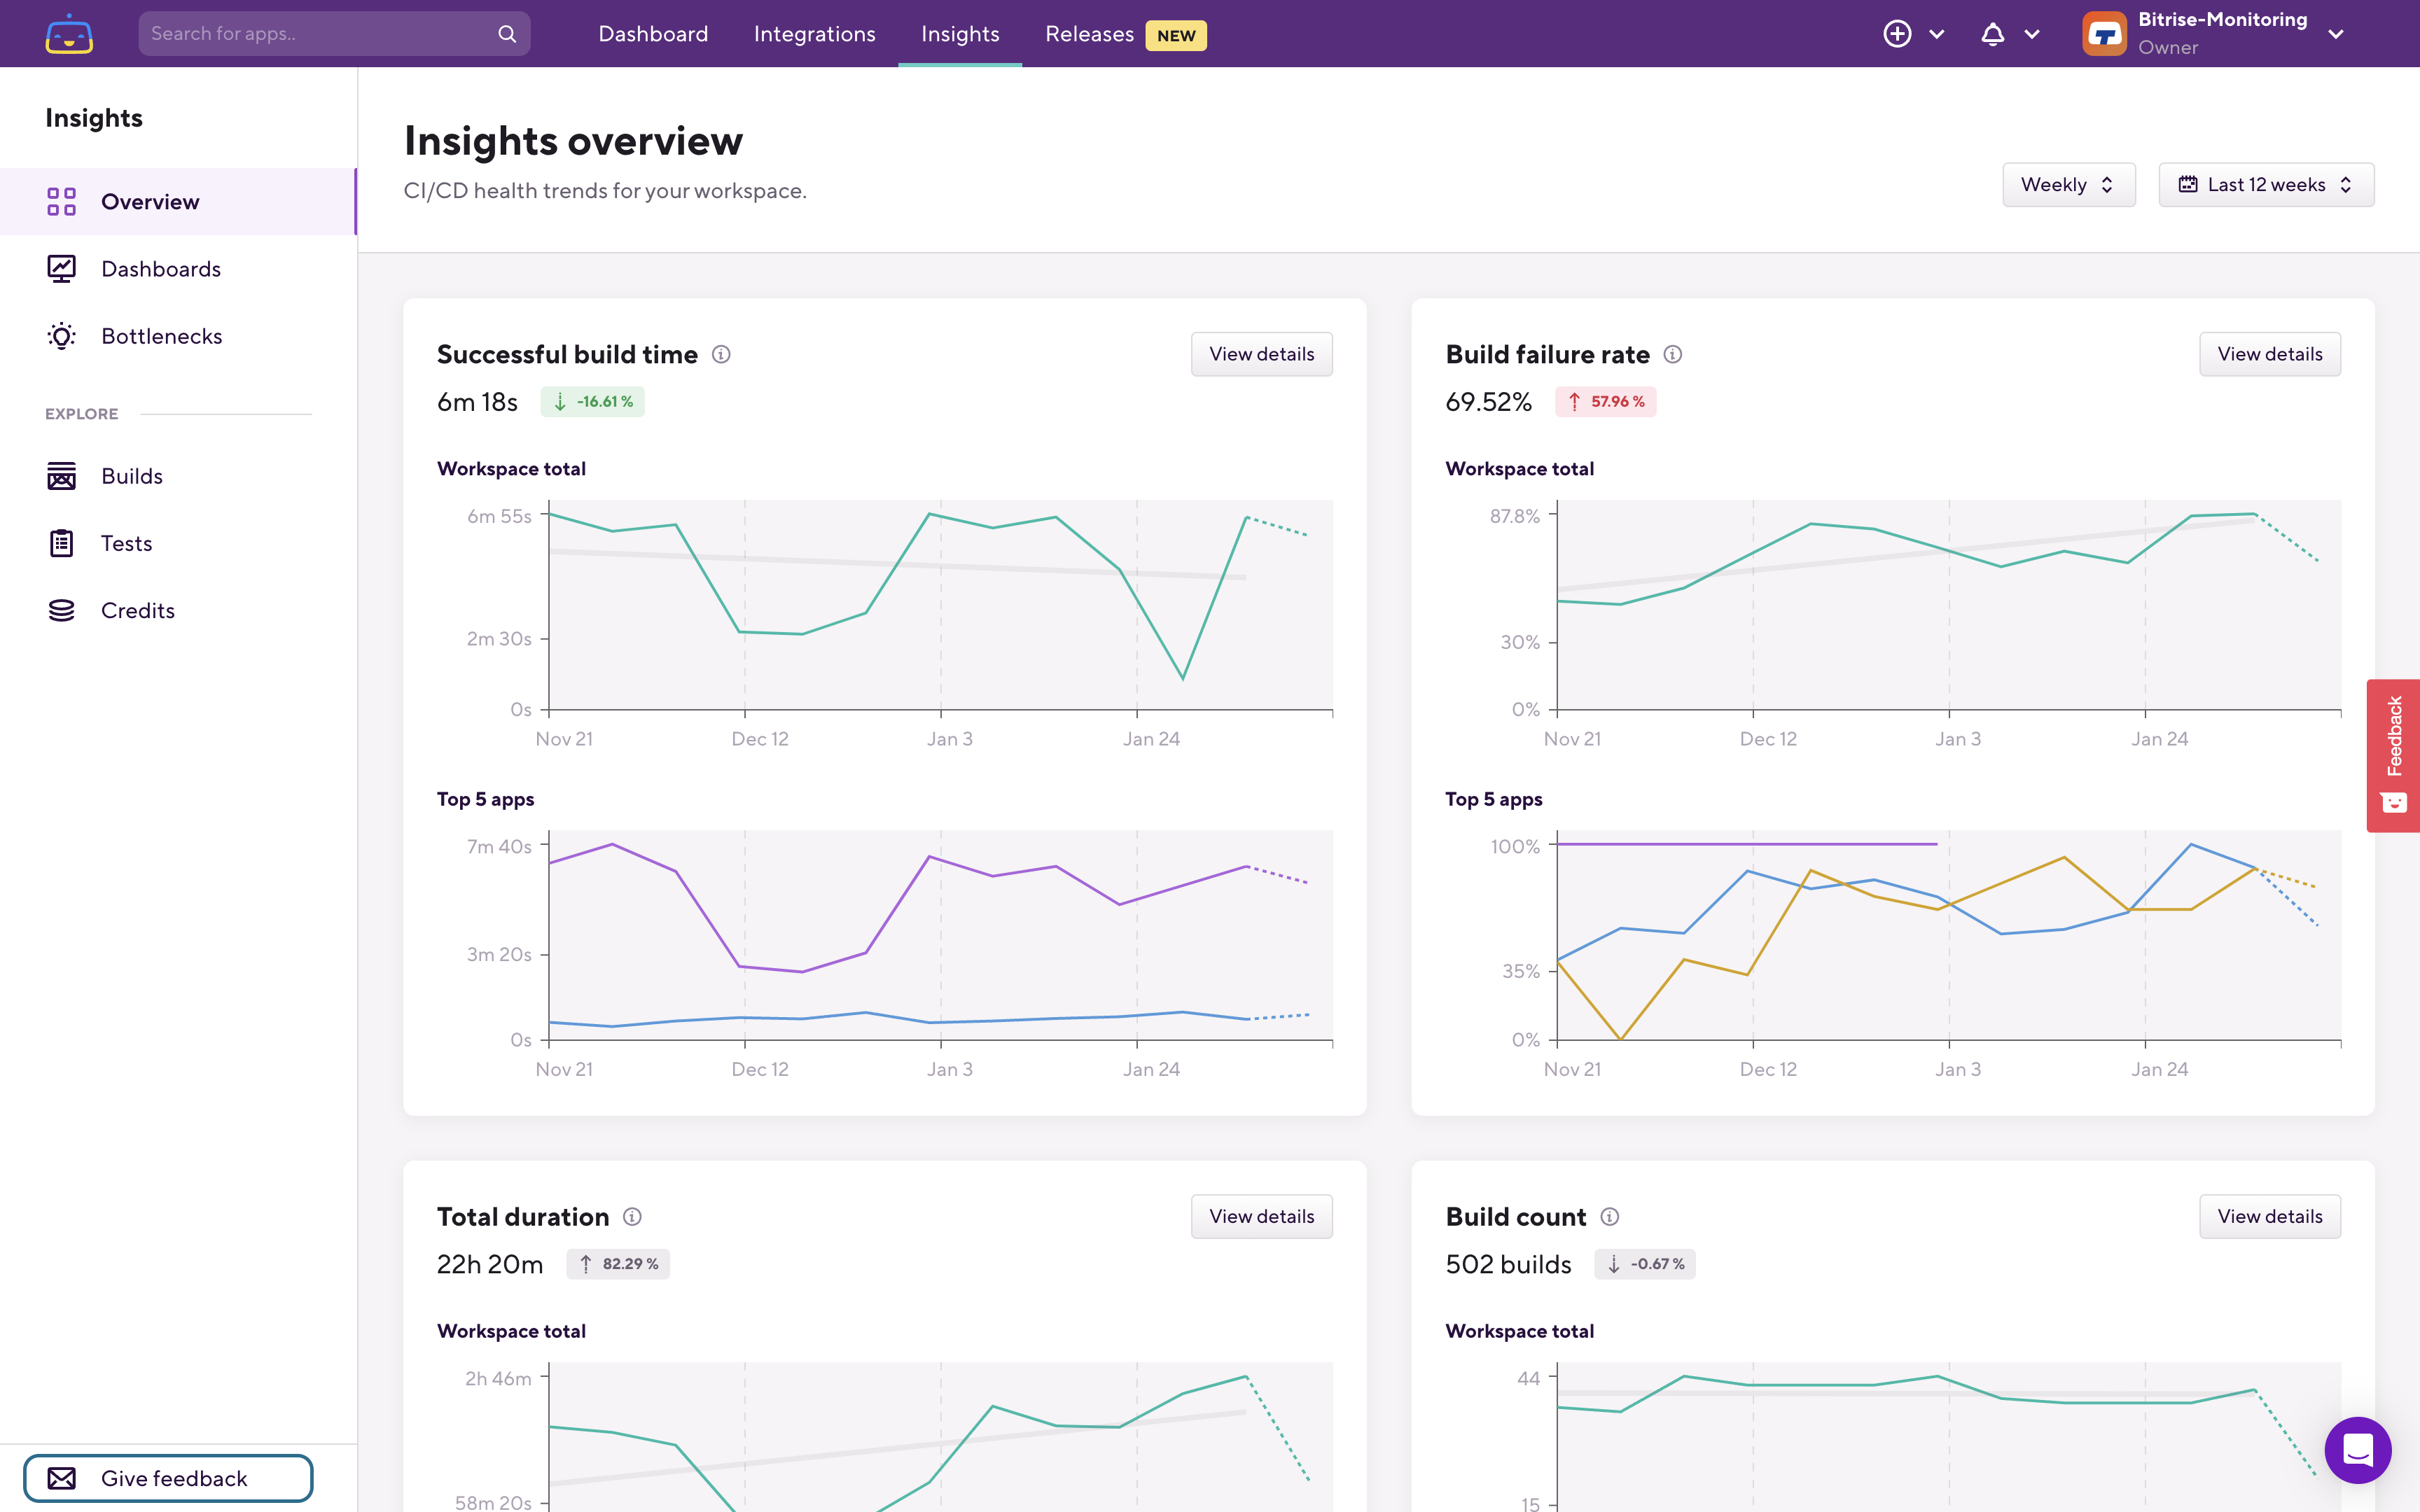
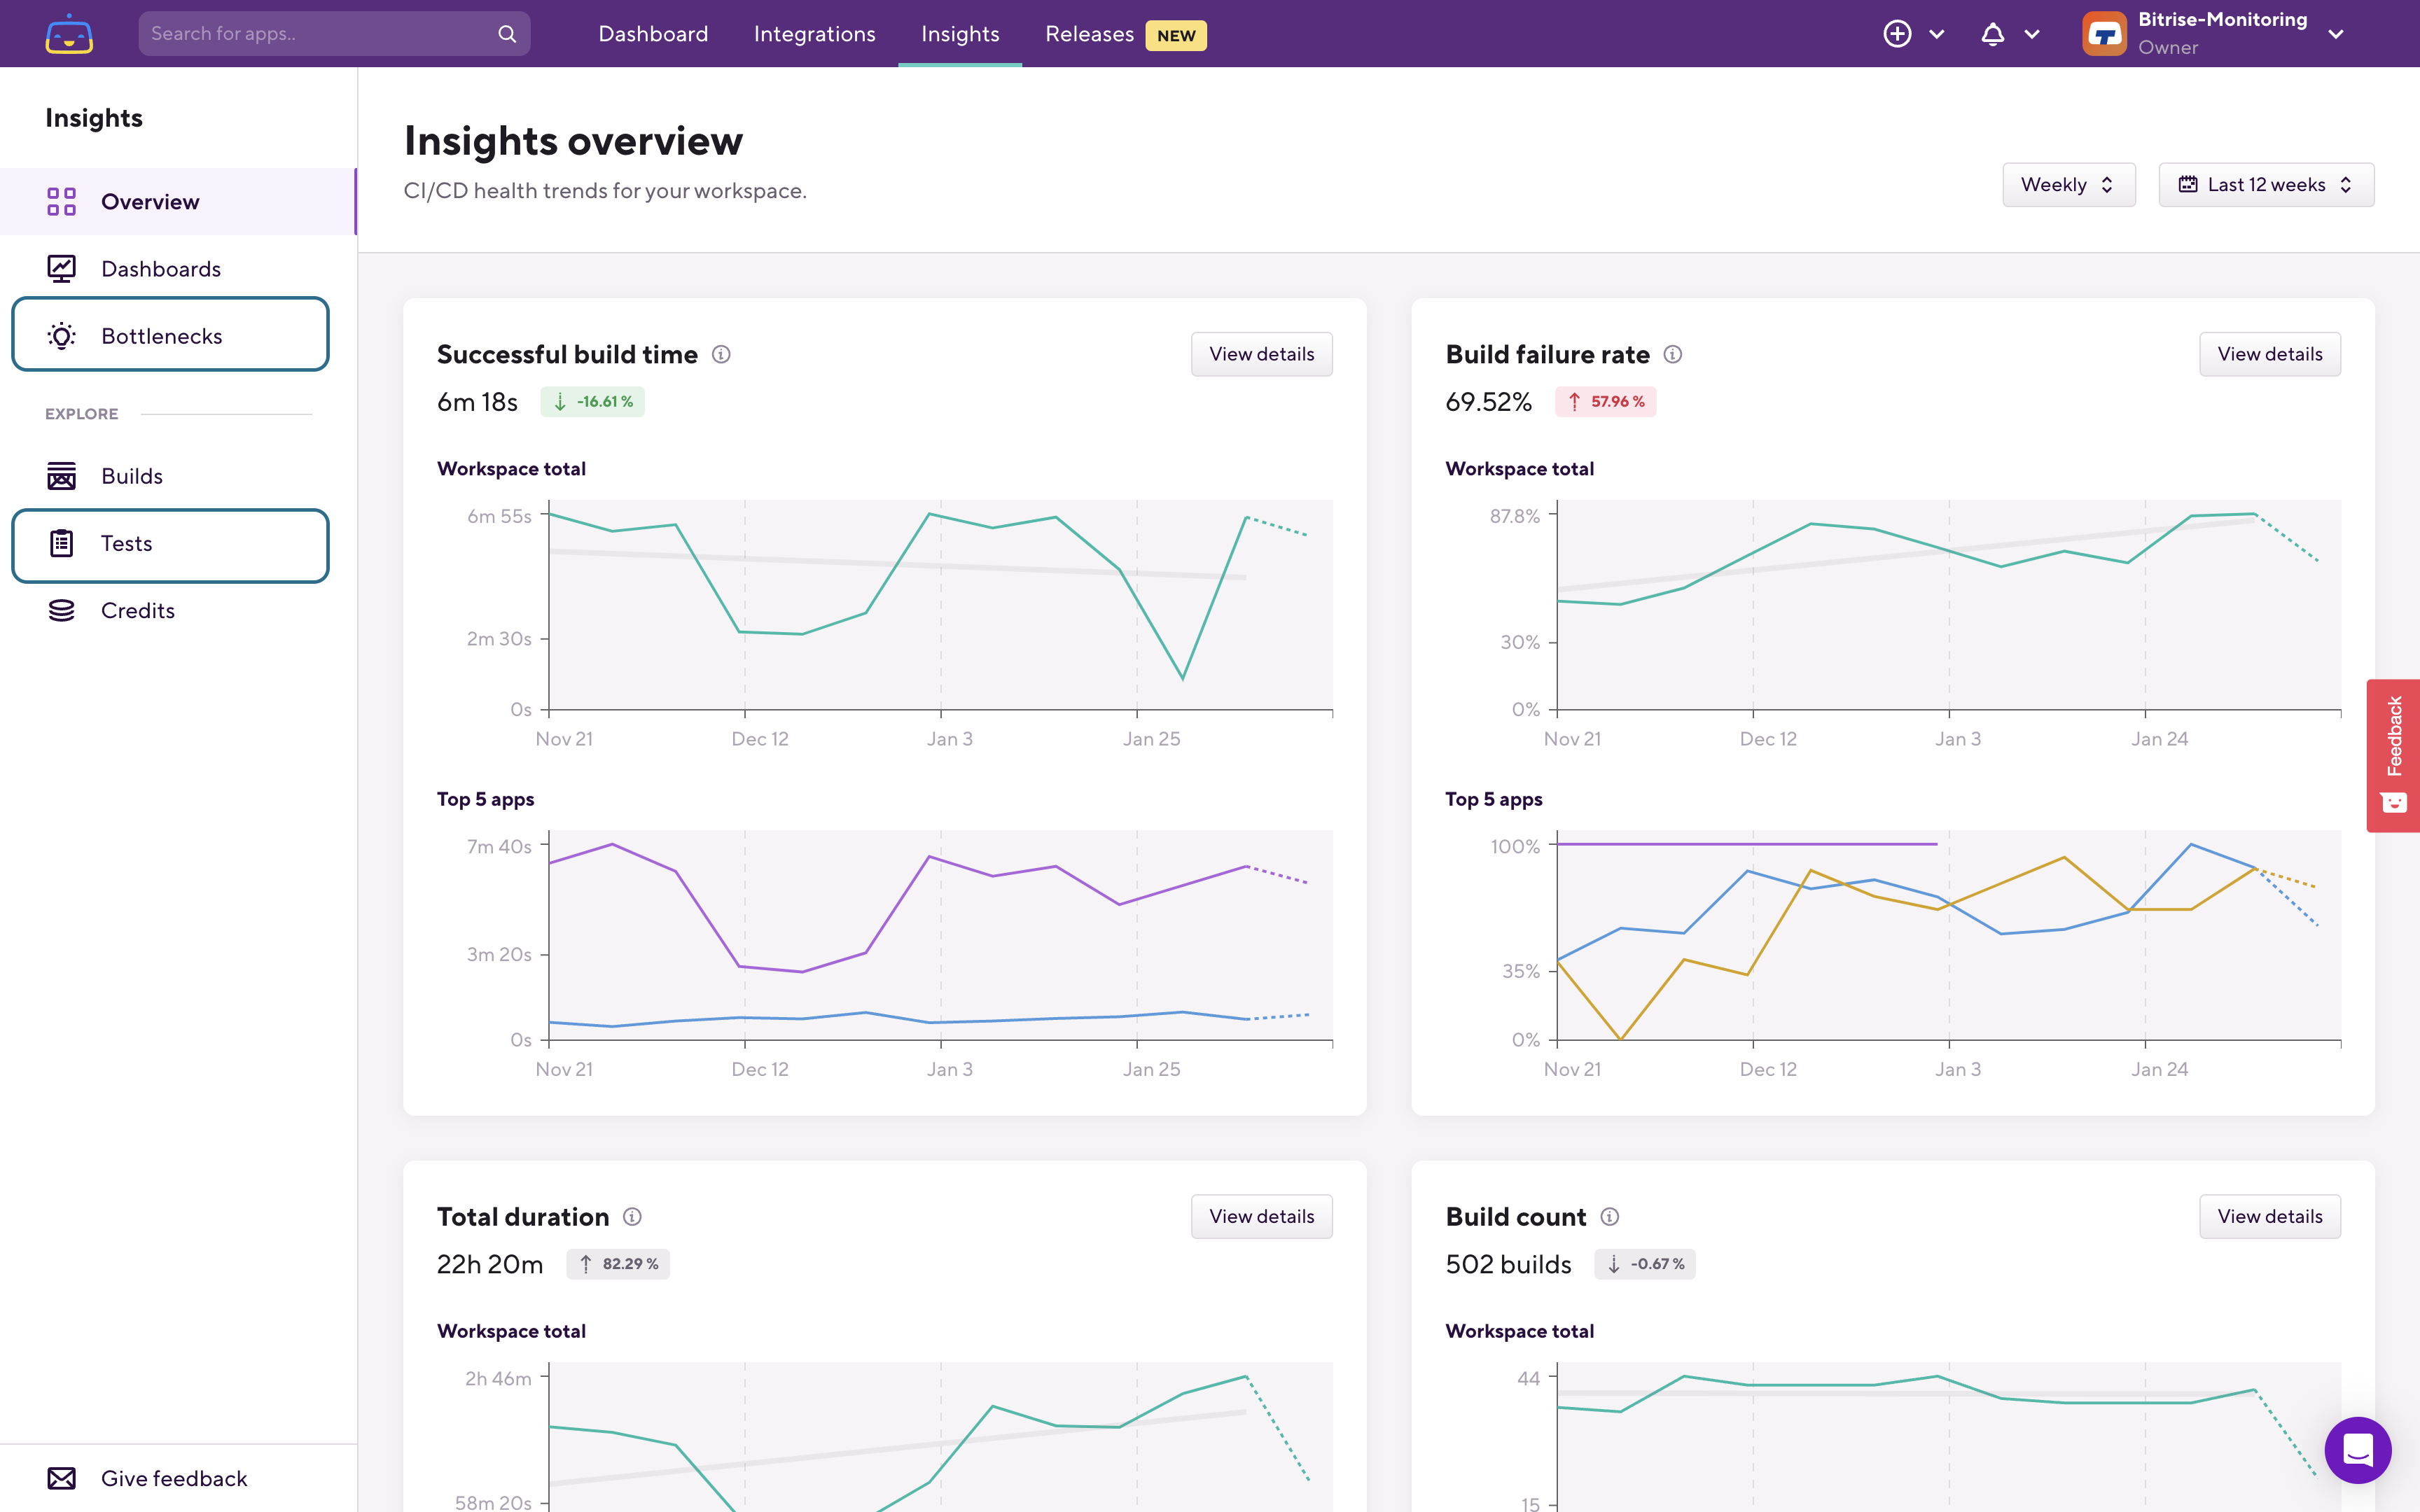
When you open Bitrise Insights you start on the Overview page. From here, you can go to either the Bottlenecks page, which lists the top 3 most flaky tests, or you can go to the Tests page under the Explore section to list and filter all your flaky tests. This will help you track and investigate flaky tests. For example:
Let’s check the Bottlenecks page first. When you open the Bottlenecks page you’ll see all the negative trends and issues Bitrise Insights detected in the last 7 days. When you’re checking flaky tests you can use the Flakiness section:
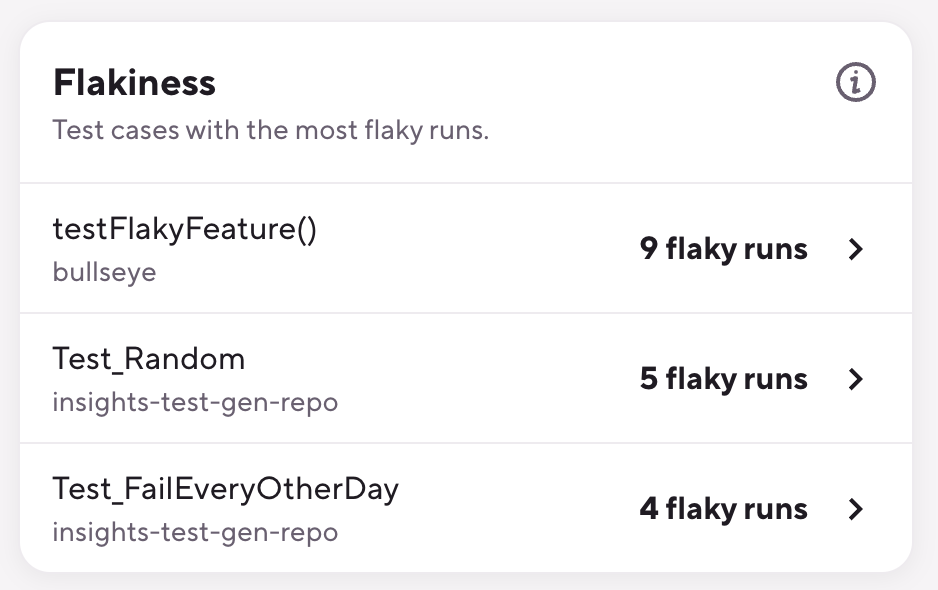
This Bottlenecks section lists the test cases which had the most flaky runs in the last 7 days. Click on any of them and you’ll land on the relevant section of the Tests Explore page.
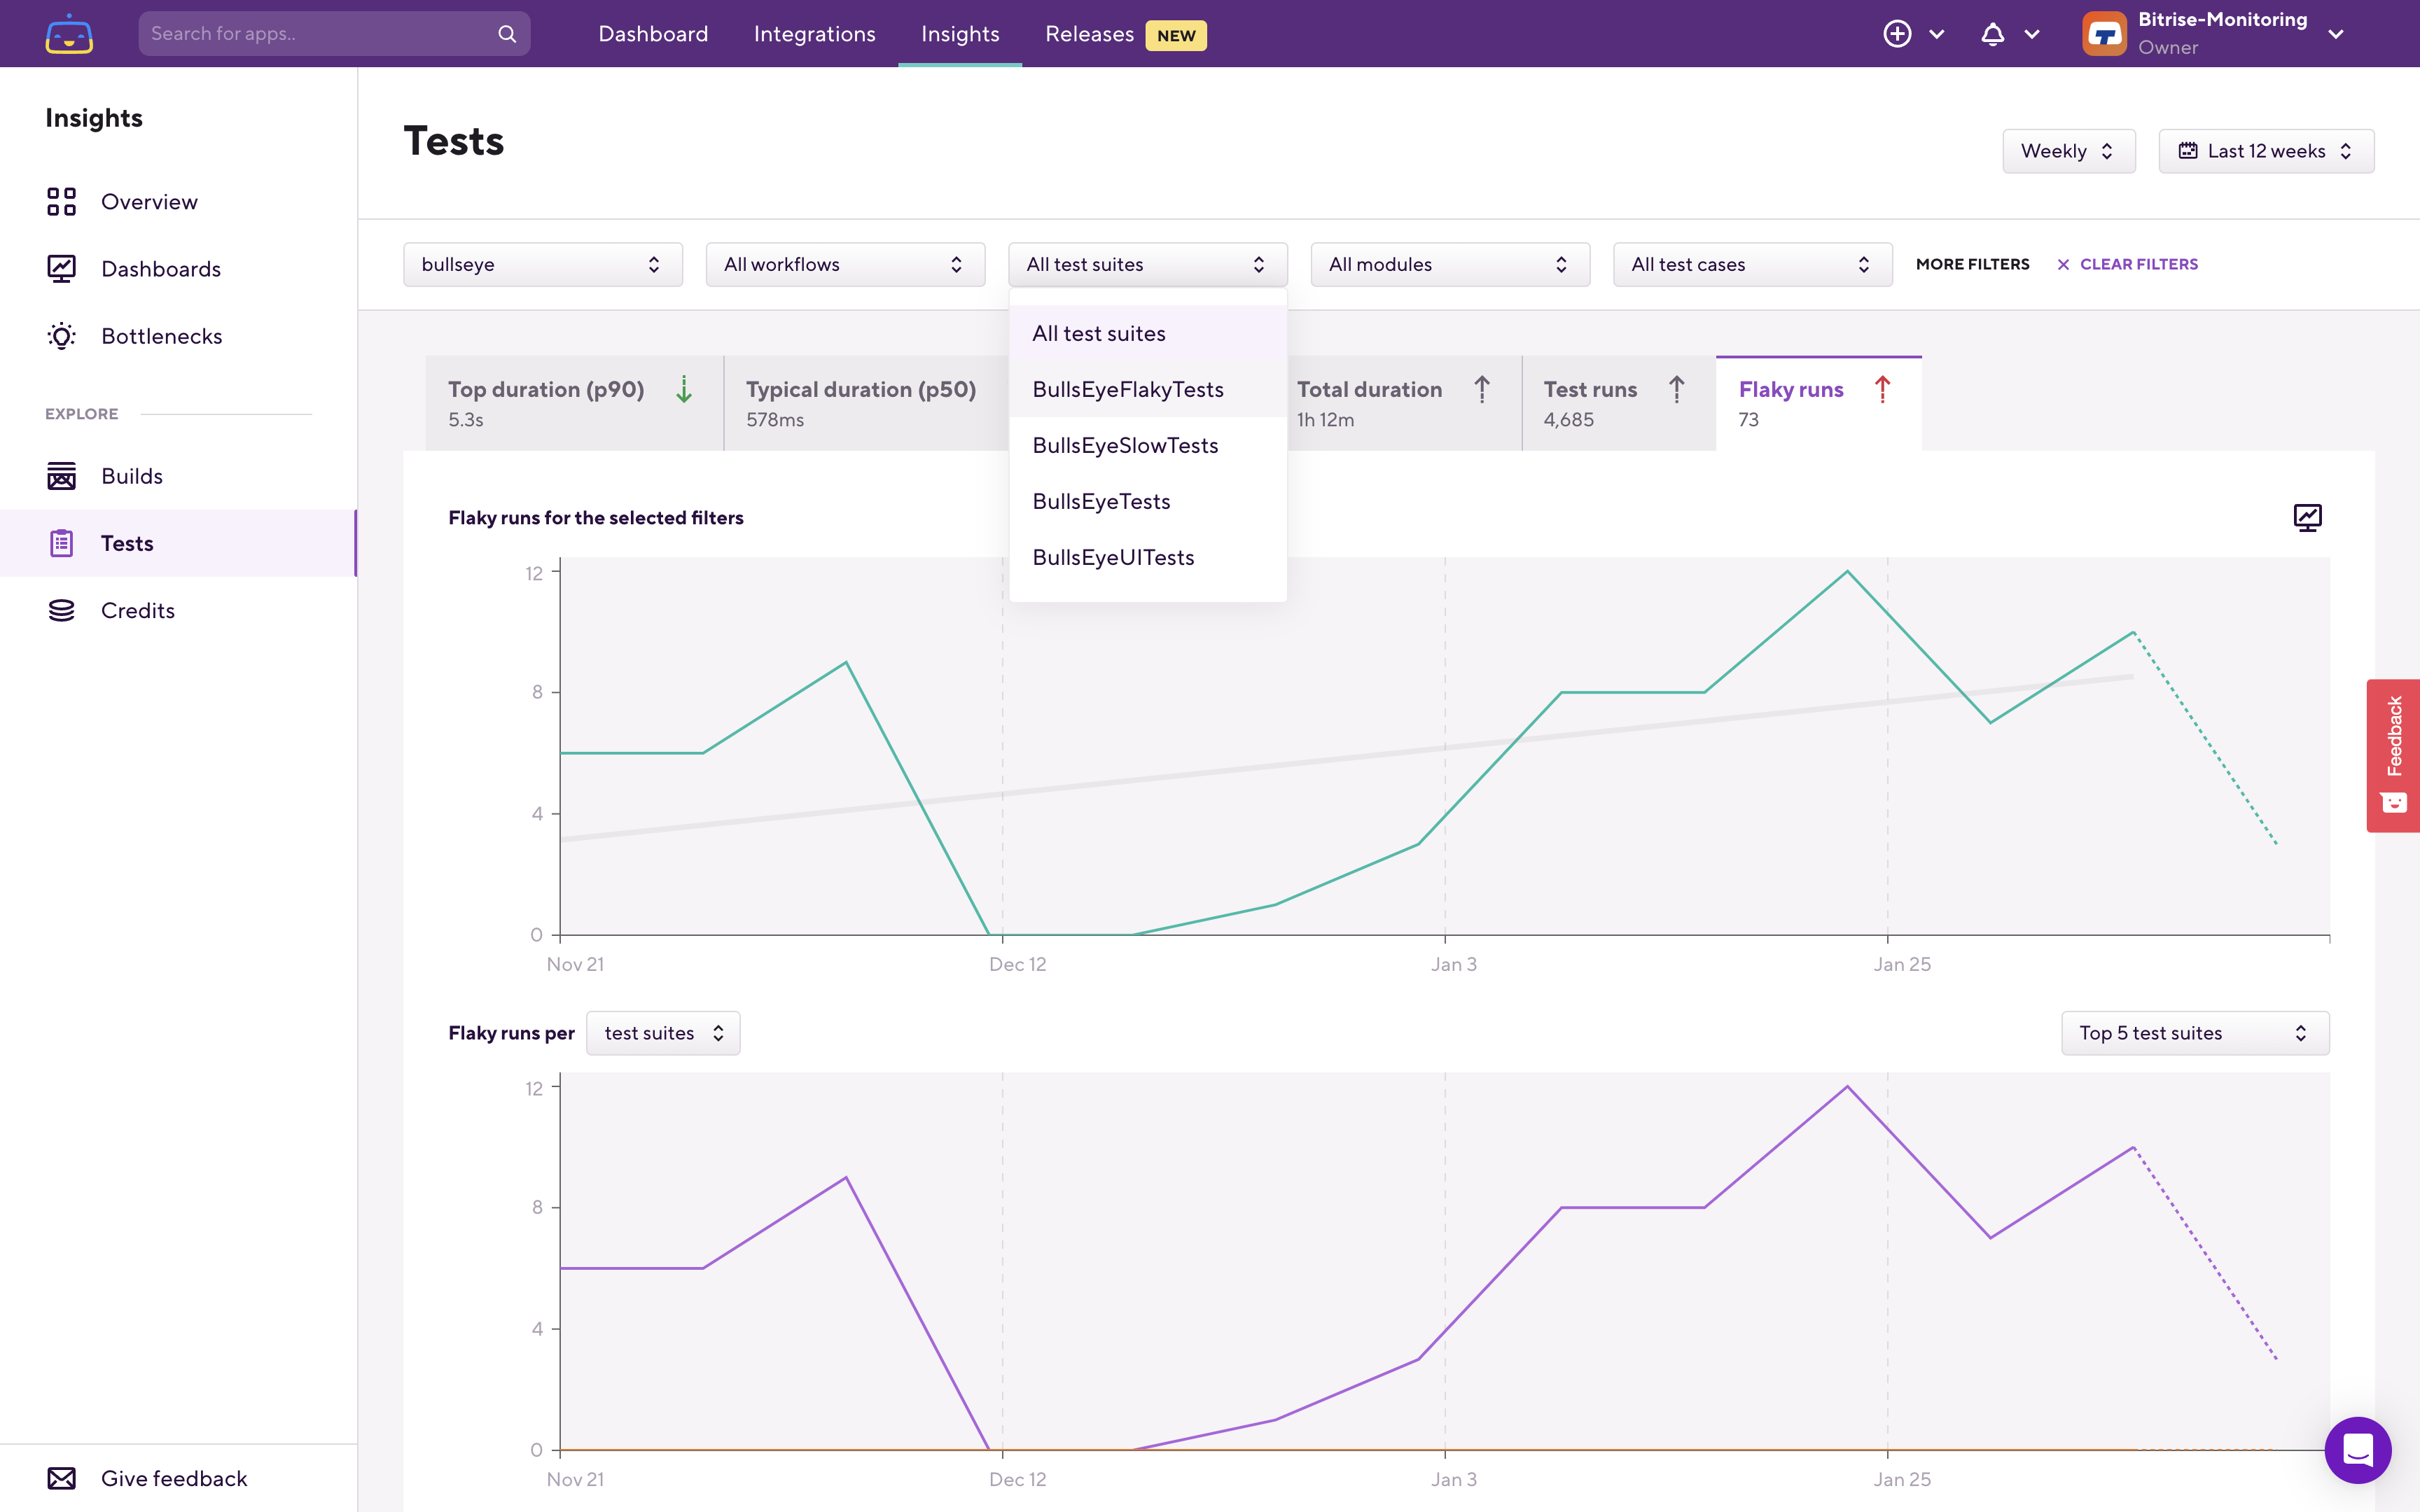
Another way to go about it is to go to the Tests Explore page and switch to the Flaky runs metric tab:

Just like on any other Tests metric page, you’ll see two charts. The upper chart always shows you data for the filters you set. The lower chart is called the breakdown chart and it shows your data “one level deeper” than what you filtered on.
If you only have a single app in your workspace, Bitrise Insights will automatically select that application when you open any of the Explore pages. If you have multiple apps in your workspace, when you open the Tests Explore page, the upper chart will show you the overall flaky runs of the workspace across all of your apps in that specific workspace.
The lower chart in this case shows you the same data but on a per-application basis. From this you can see which app had the most flaky runs in the selected time period:

Here, on the breakdown chart, you can see that we have this application that had the most amount of flaky test runs in this workspace. Filter down to that application, and on the next level you'll find the per Test Suite breakdown:

The upper chart now shows the selected filterd view, which in this case is the selected app's flaky test runs. On the lower breakdown chart, you can see which test suite had the most flaky test runs:
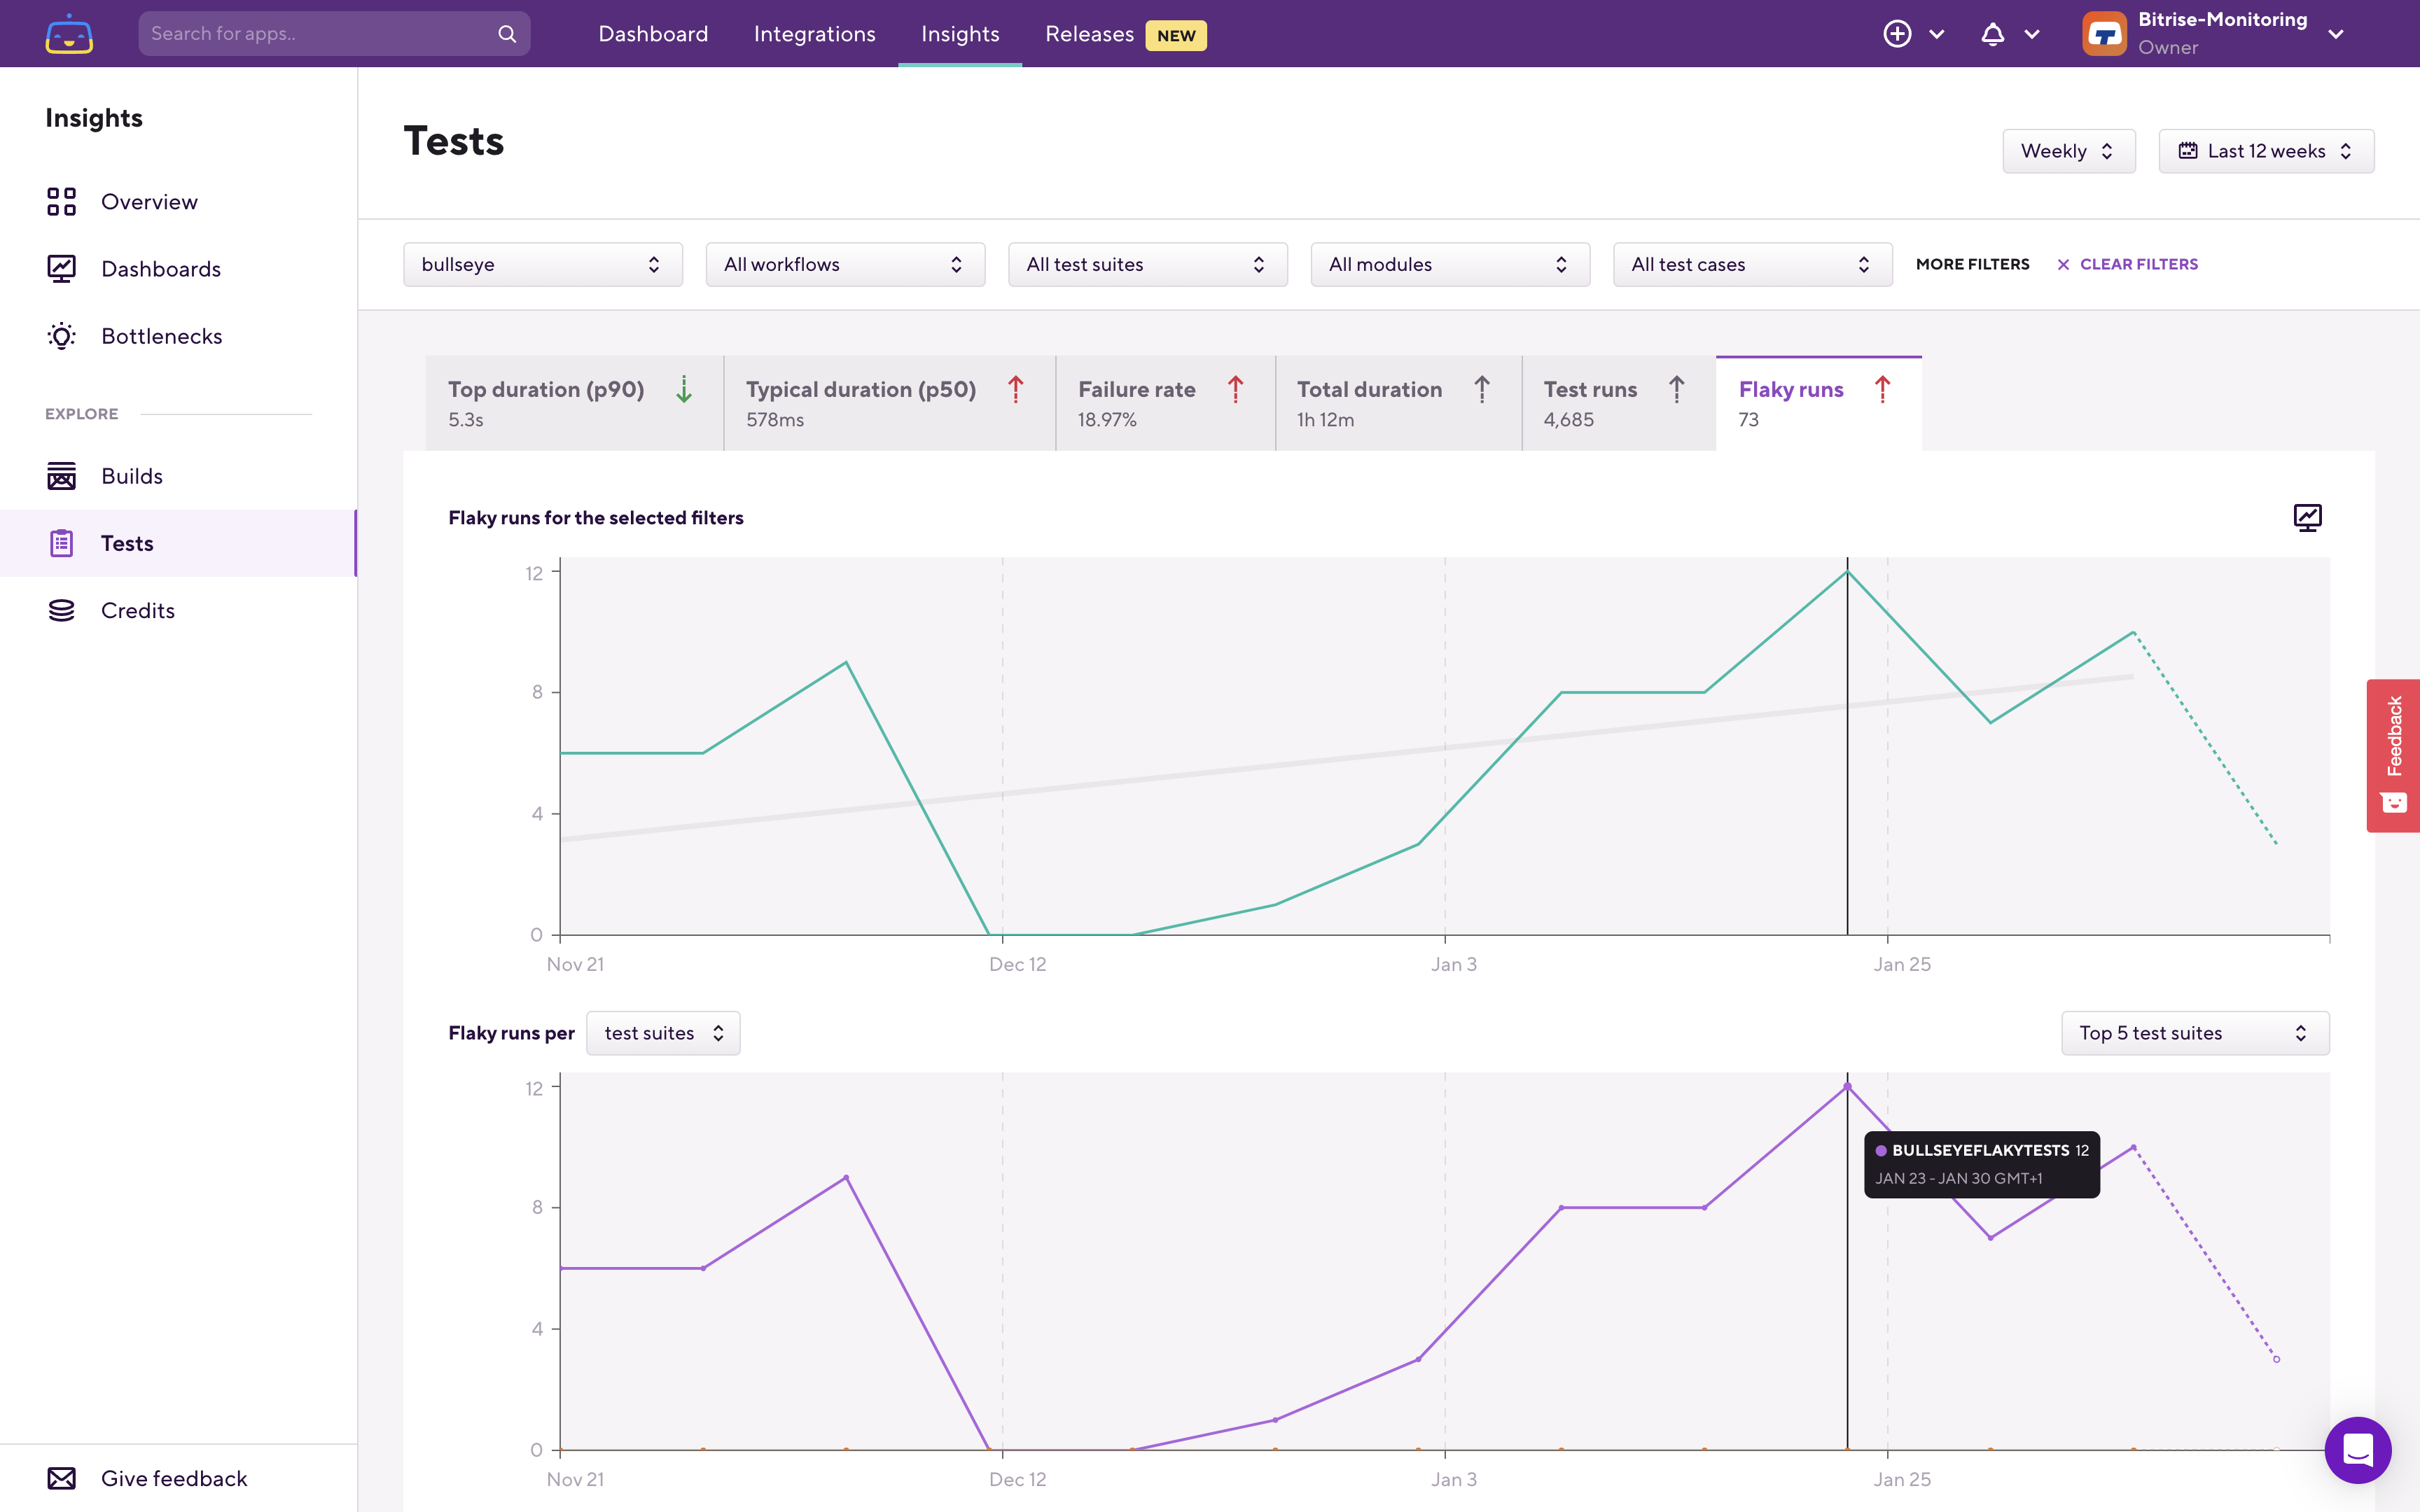
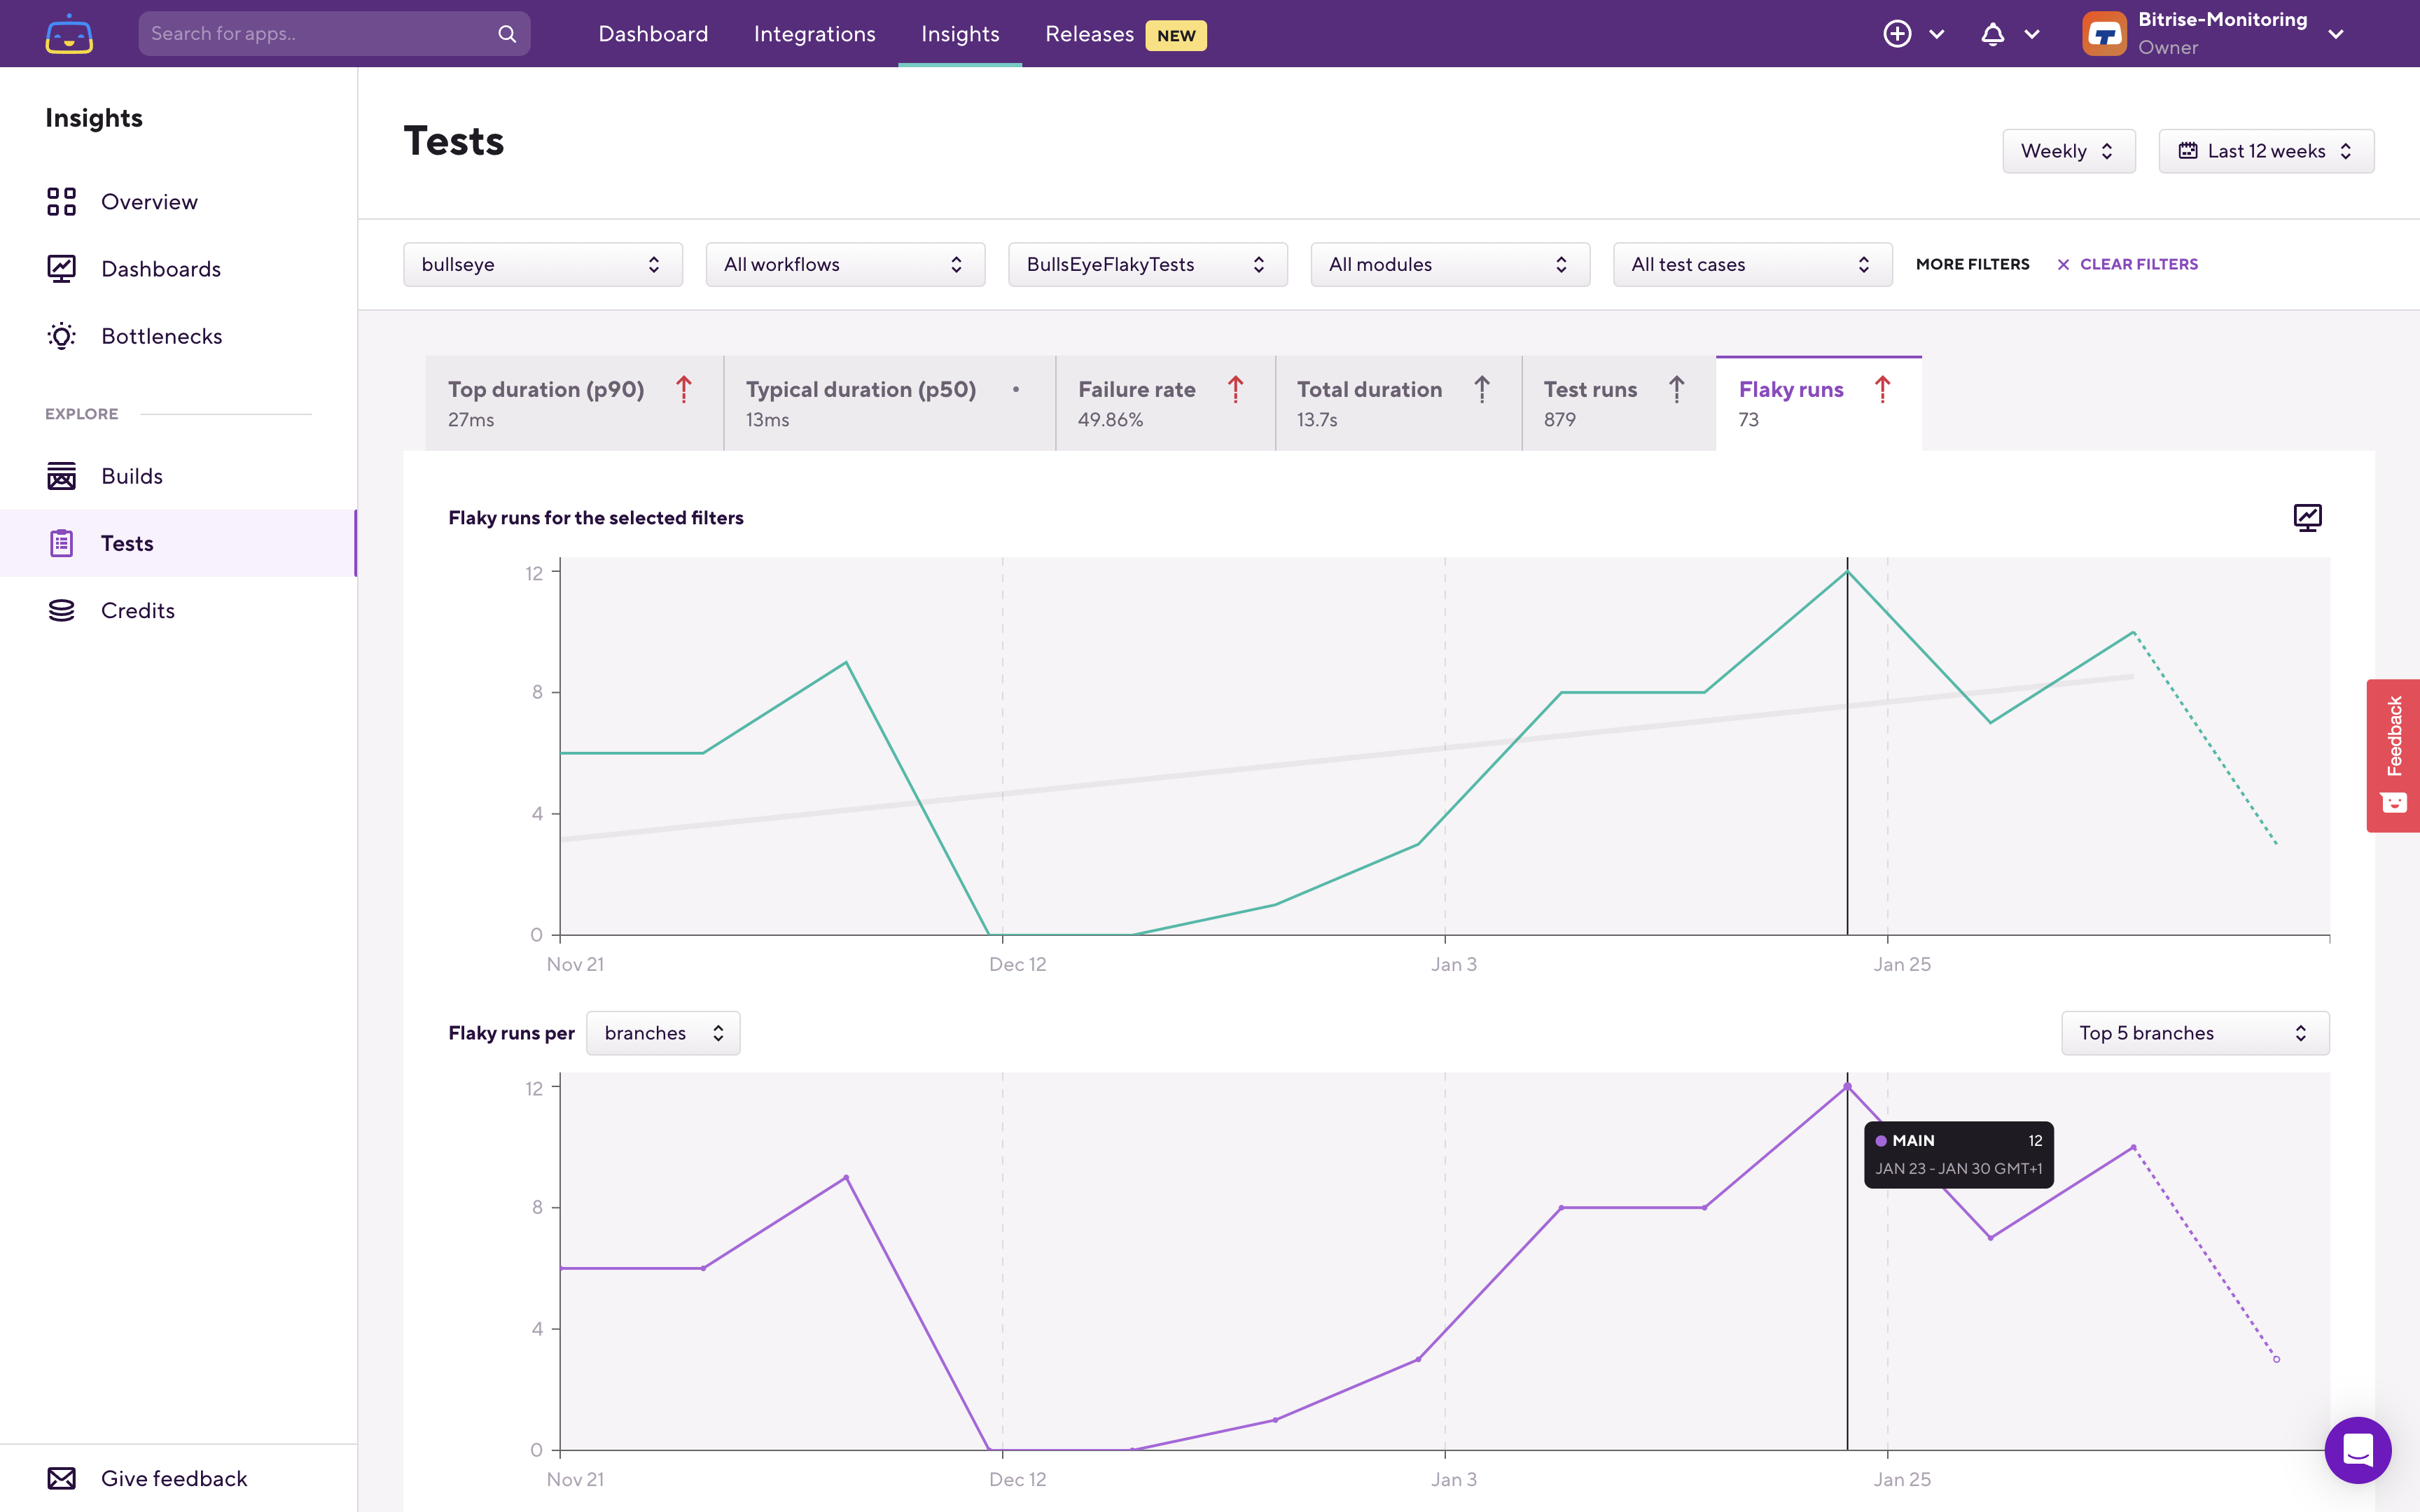
Let's filter down to that test suite to investigate it a little further:
The upper chart now reflects this filtering, and the breakdown chart switched over to per-branch flaky runs.
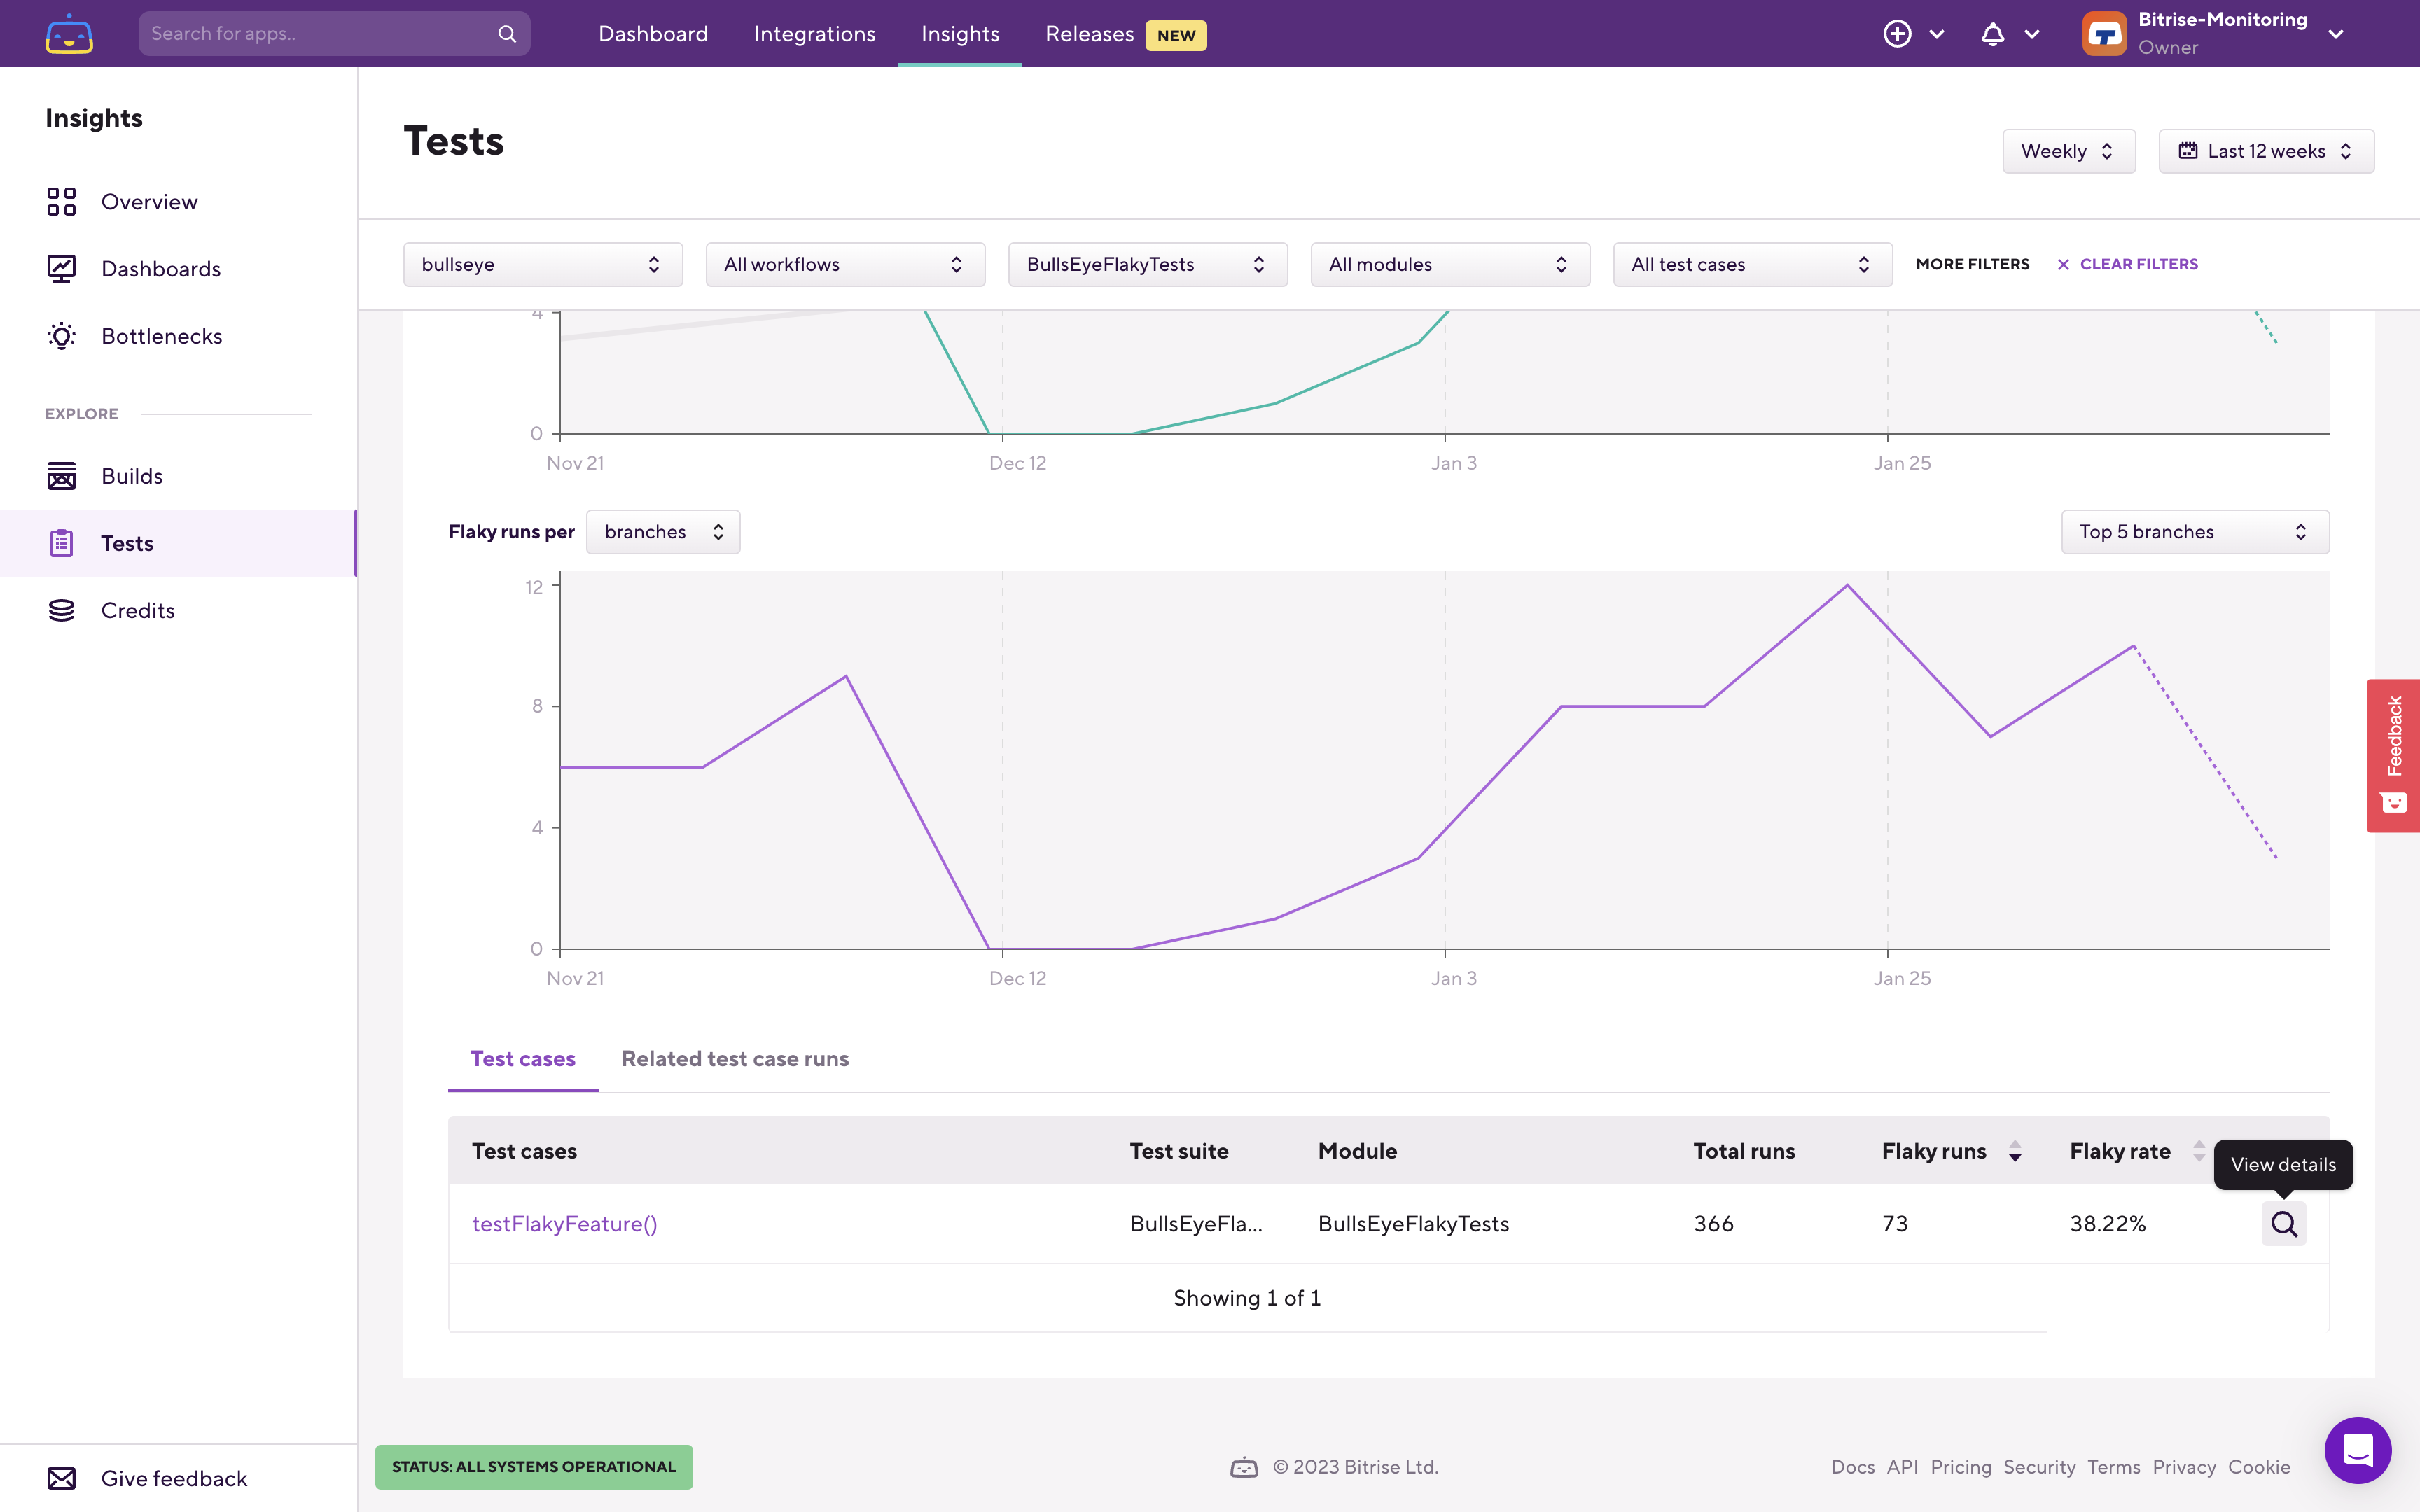
Under the graphs, you can see the Test cases list, which is filtered based on the filters that you set at the top and also on the time/date range that you set in the top right corner.

Using this Test cases table you can find which test case is flaky most frequently (Flaky rate) or which test case had the most amount of flaky runs (Flaky runs) in the selected time period, app, and test suite.
Select the test case which had the most flaky runs to continue your investigation:
This will set the relevant filters for you to focus only on this specific test case. As a result the charts at the top will now only show the flaky run trends of this specific test case:
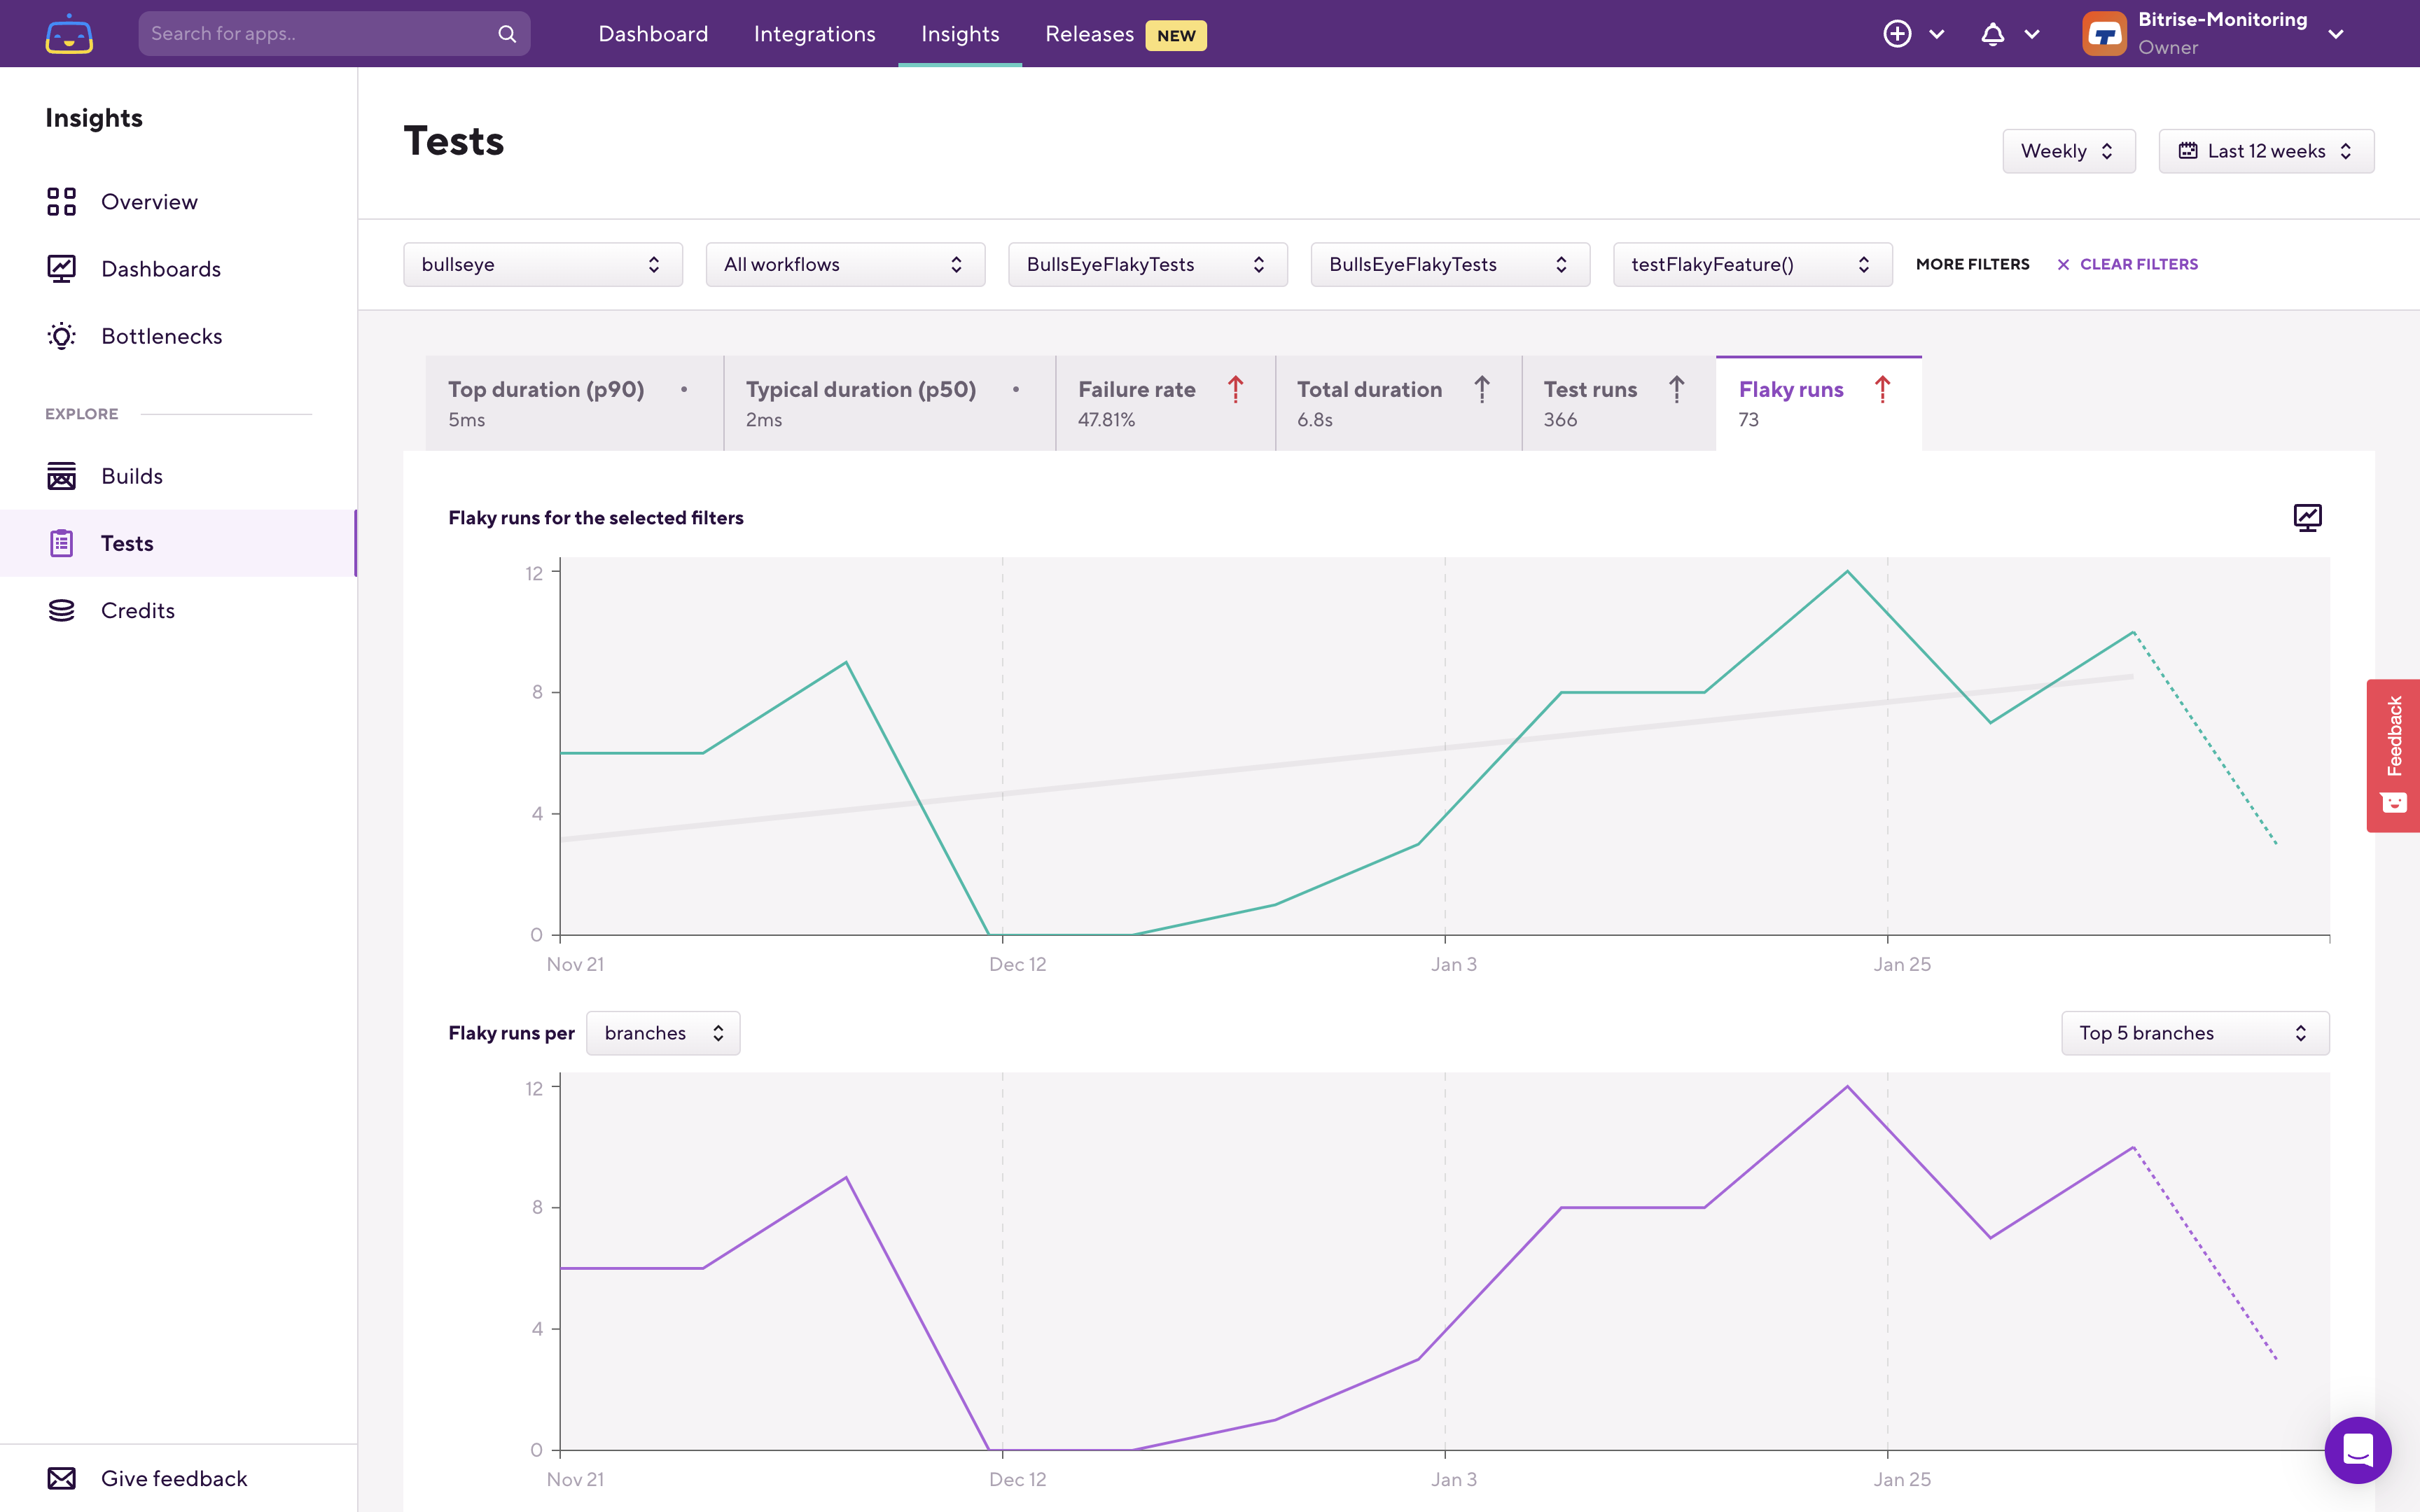
Under the charts, Bitrise Insights automatically switched over to the Related test case runs tab:
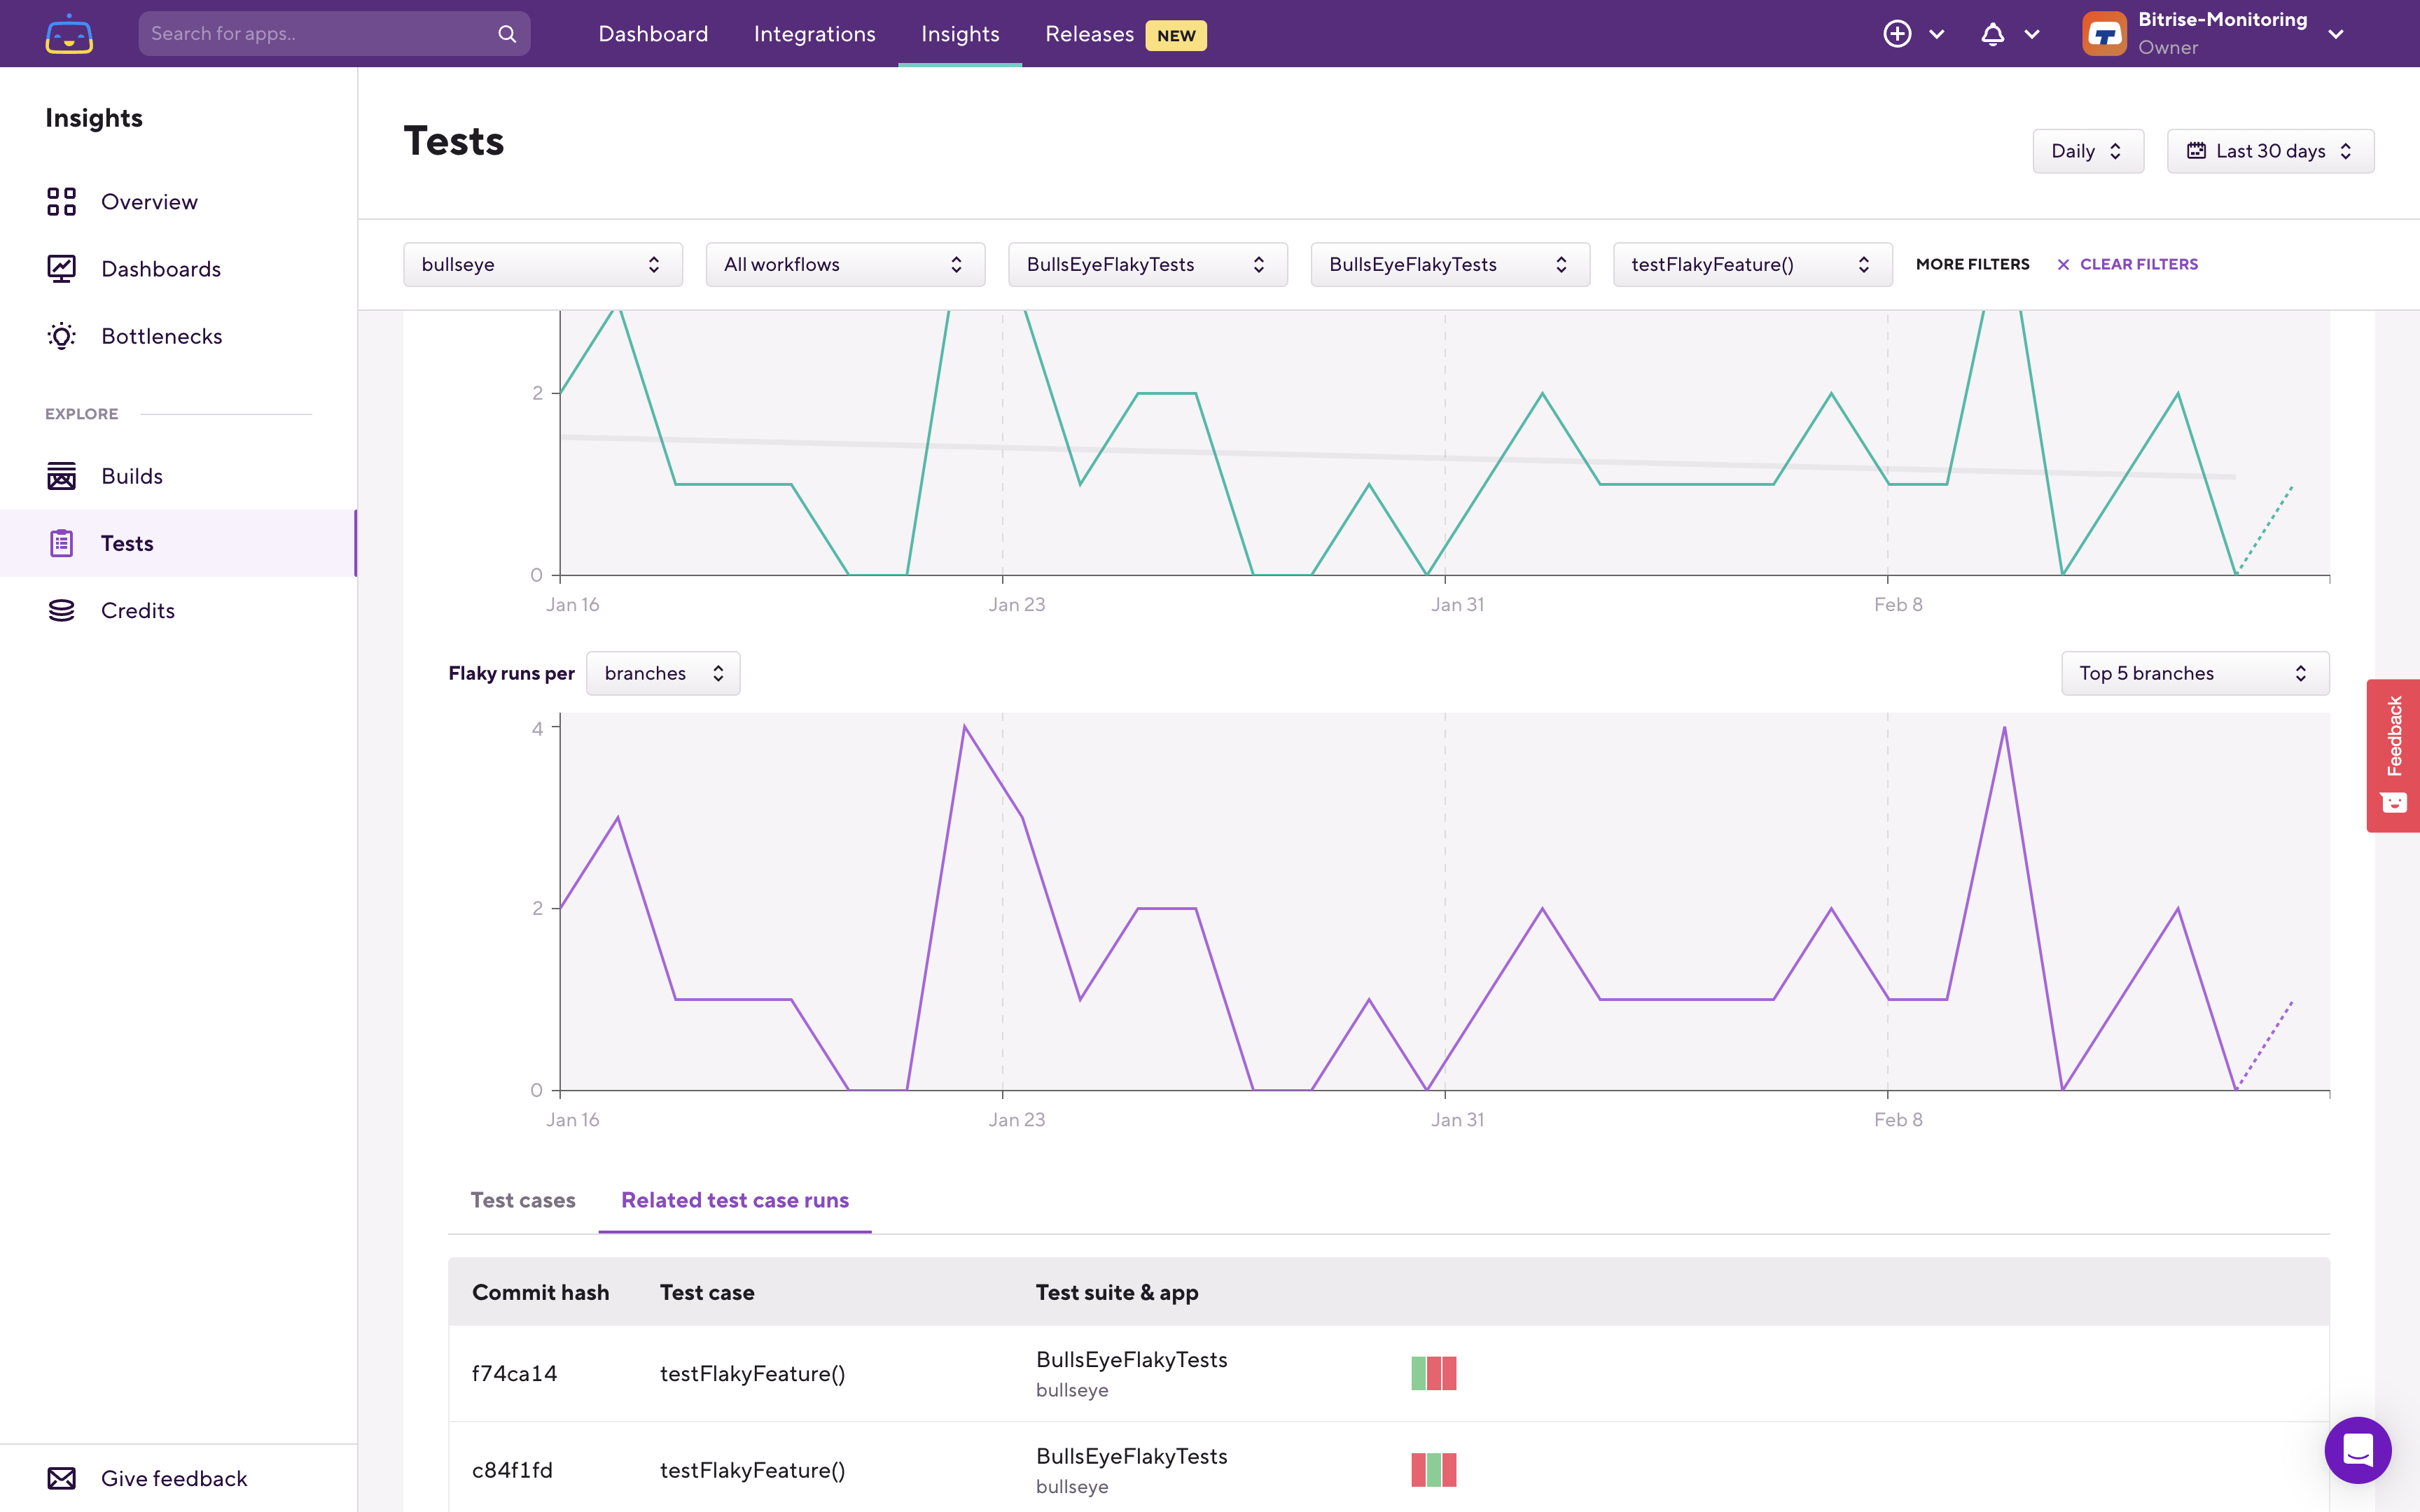
The Related test case runs table lists the specific executions of the test case which had inconsistent results, either in a given build, or across builds with the same commit hash. As you can see in this example, the testFlakyFeature() test case had both successful and failed results for the same commit (for commit f74ca14 and also for c84f1fd).
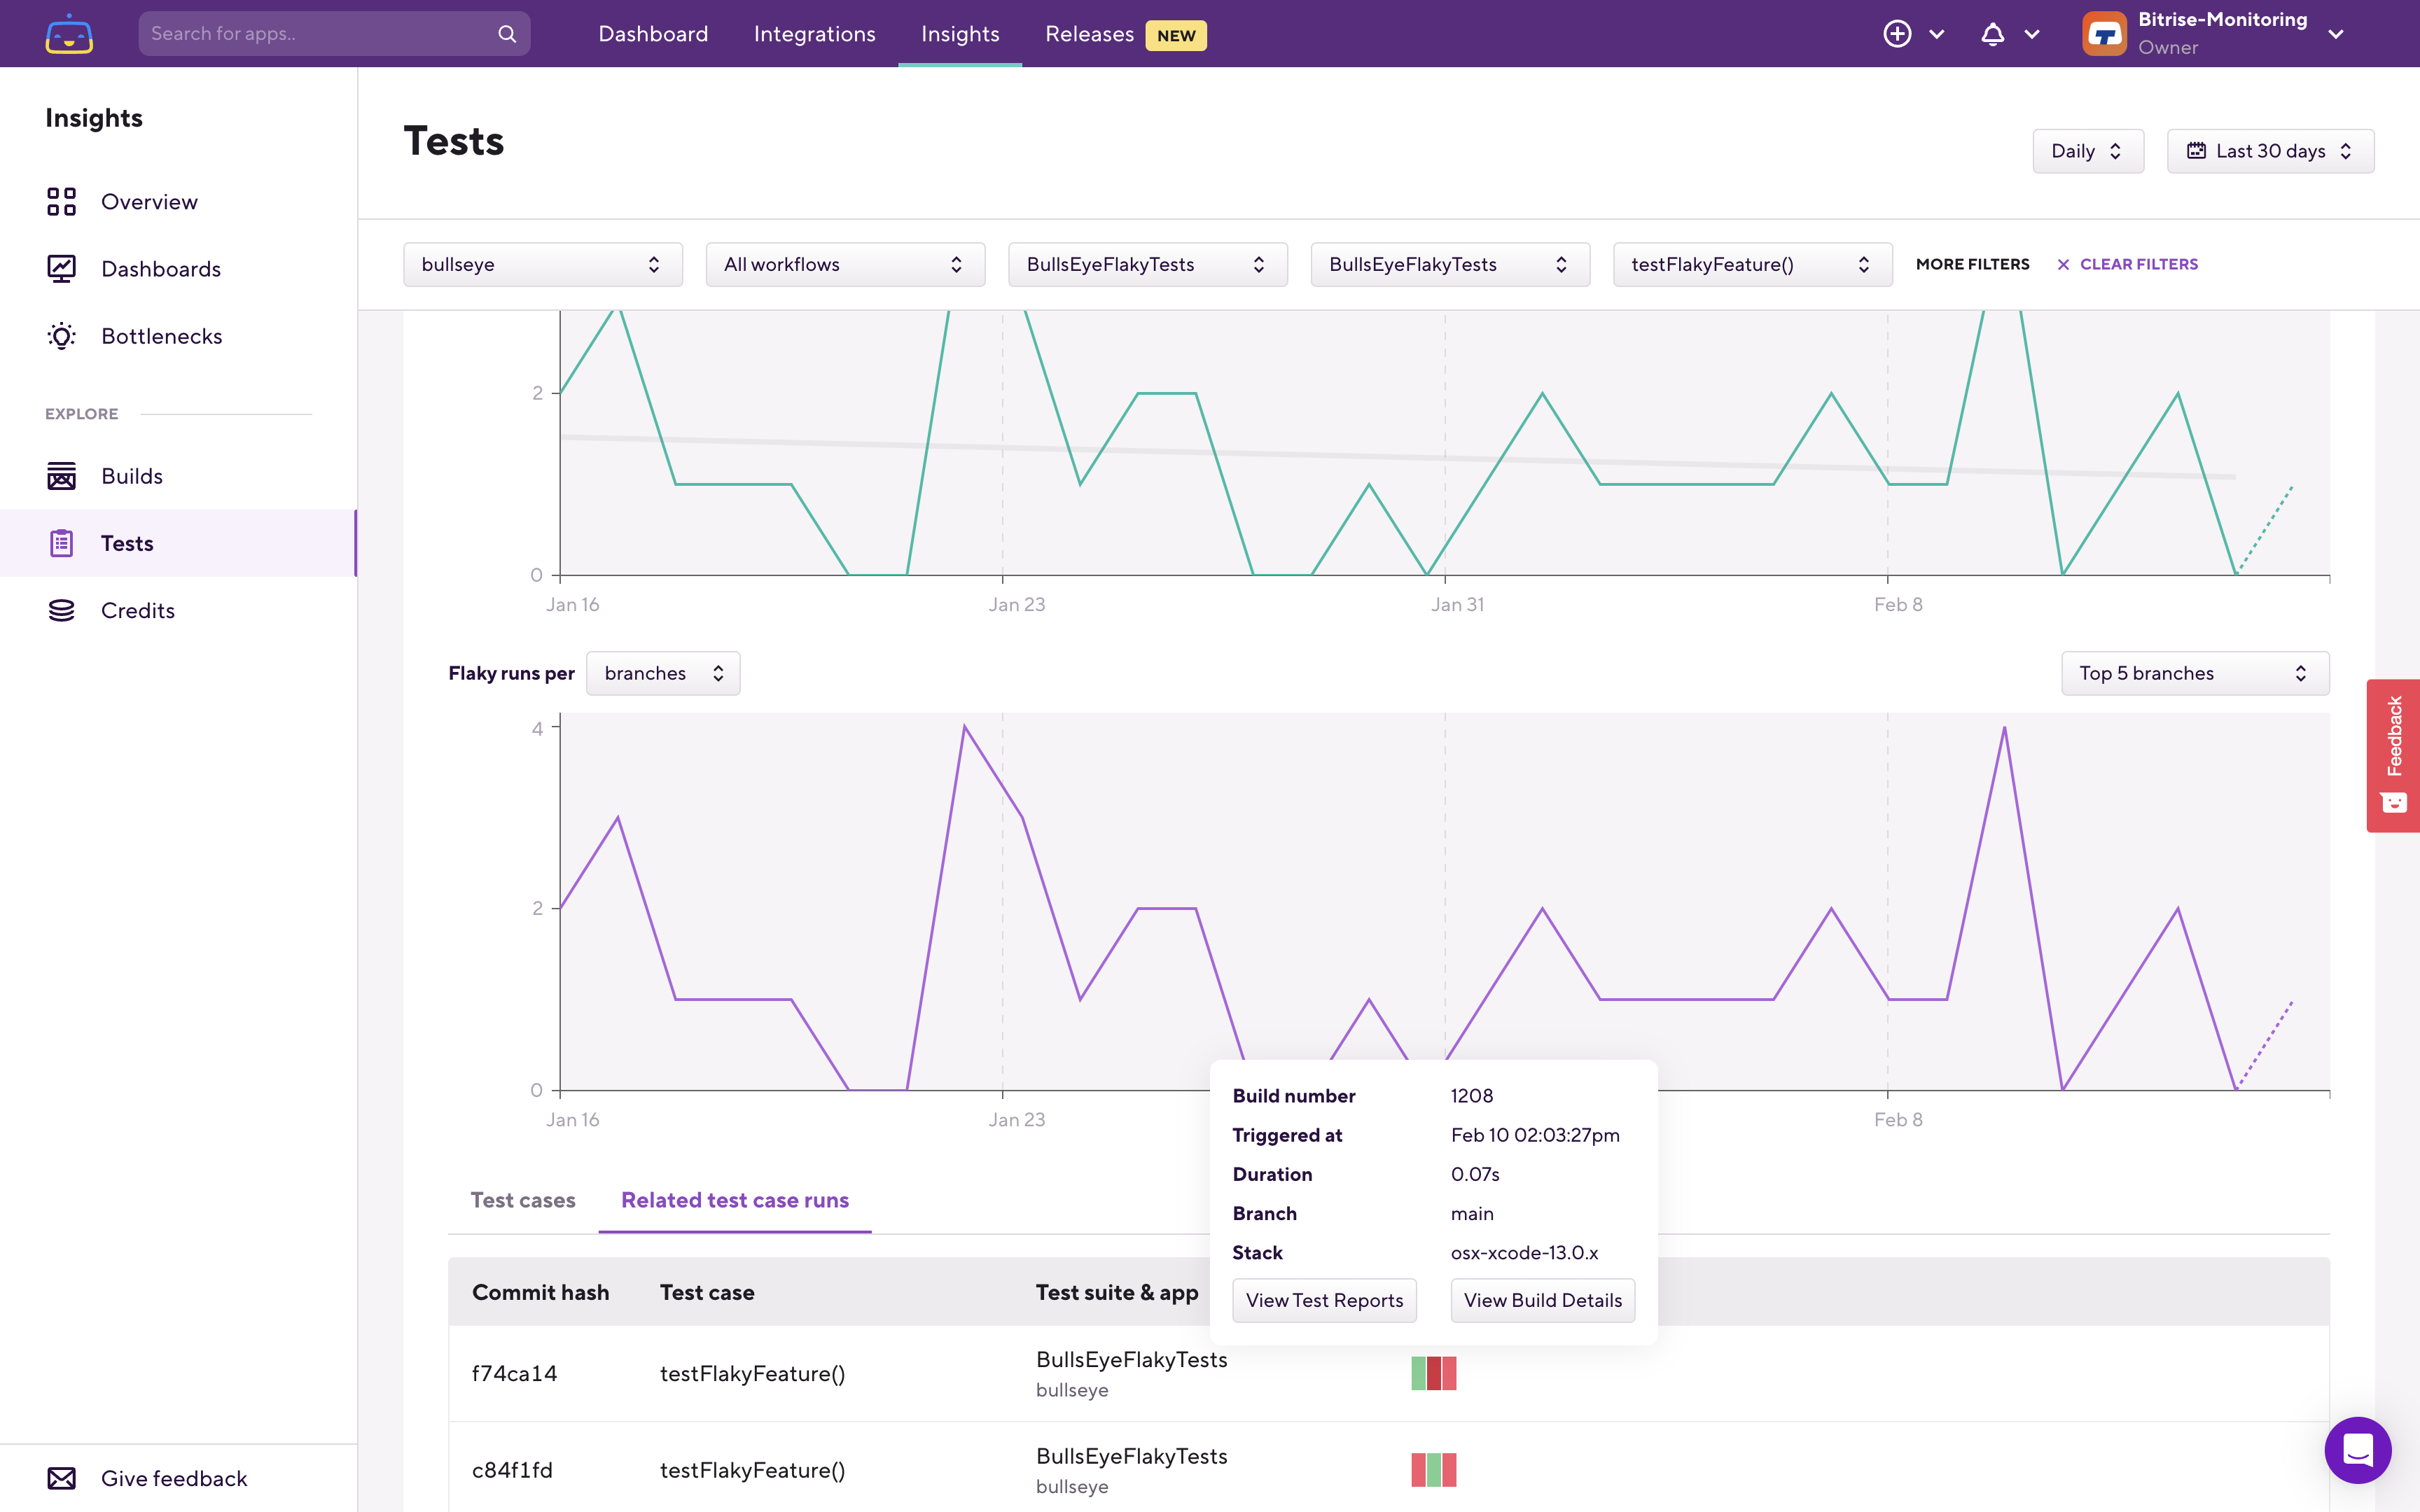
Using the Related test case runs table you can see all the previous flaky runs of this specific test case, how long that run was, and whether it was successful or not. Using the buttons in the test run popup you can quickly jump to the relevant build’s page and to the relevant test report’s page and then continue your investigation there:
Keeping an eye on and fixing flaky tests helps you to reduce time waste during the app development process and to increase the overall test confidence of the team.
If you'd have any questions or feedback please let us know using the Give feedback button in the bottom left corner on any of the Bitrise Insights pages: