Over 4000 engineering teams are building mobile apps and related projects using Bitrise. One trend we've observed is the increasing use of monorepos by some organizations. In this blog, I'll show you an example setup that demonstrates the current best practice for using Bitrise CI with monorepos.
You can use this as a reference for your own monorepo to achieve a CI setup that prioritizes efficiency, autonomy of project teams, and effective governance.
What is a monorepo and why use one?
A monorepo, short for monolithic repository, is a single source code repository that houses several projects, and it's an alternative to each project having its own repository. The debate online over monorepo vs multi-repo is a lively one, and it won't be covered in this article.
At Bitrise, we are seeing interest in monorepos from larger organizations, often with several mobile projects and several mobile teams. There comes a point in time where engineers and their leaders can no longer ignore inefficiencies caused by substantial drift between teams/projects in terms of tools, capabilities, and practices.
One tactic for ensuring everyone on the ship is rowing in the same direction is using a monorepo. Placing all projects in the same repository encourages re-use, simplifies dependency management, and promotes common tooling.
It should also be noted that the Bazel community has improved support for mobile targets, particularly iOS, and this maturation has resulted in certain teams, particularly those with 100+ app developers, employing the Bazel build system in a monorepo. Bitrise offers a Bazel build cache and remote execution, but this blog post will not cover these topics.
Using Bitrise CI with a monorepo
Introducing our Example Project
Our example repo is just about the simplest monorepo one can make. The directory structure shows one subdirectory for each individual project as well as a common directory for shared functionality.
The repo in its completed state can be found on Github. By the end of this guide, each project will have its own CI pipelines defined in Bitrise.
Creating your Bitrise project
Adding a new project
You're going to create a separate Bitrise project for each subdirectory project in your repo. Changes to iOS/ only trigger pipelines in the iOS project, and the same for the other projects.
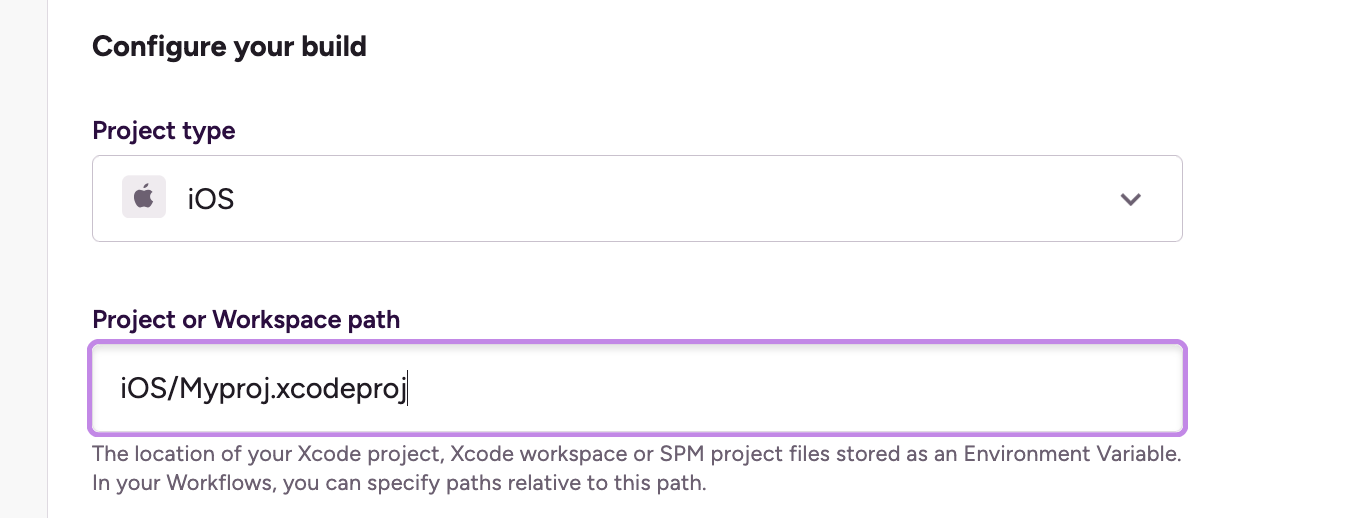
You'll add the new projects with the project scanner, the same way you would any other Bitrise project. Because the projects are located in subdirectories (rather than the root directory), be sure to set the correct path for necessary files. For example, the iOS project file is usually at ., but in a monorepo, it will be in a subdirectory named something like iOS/.
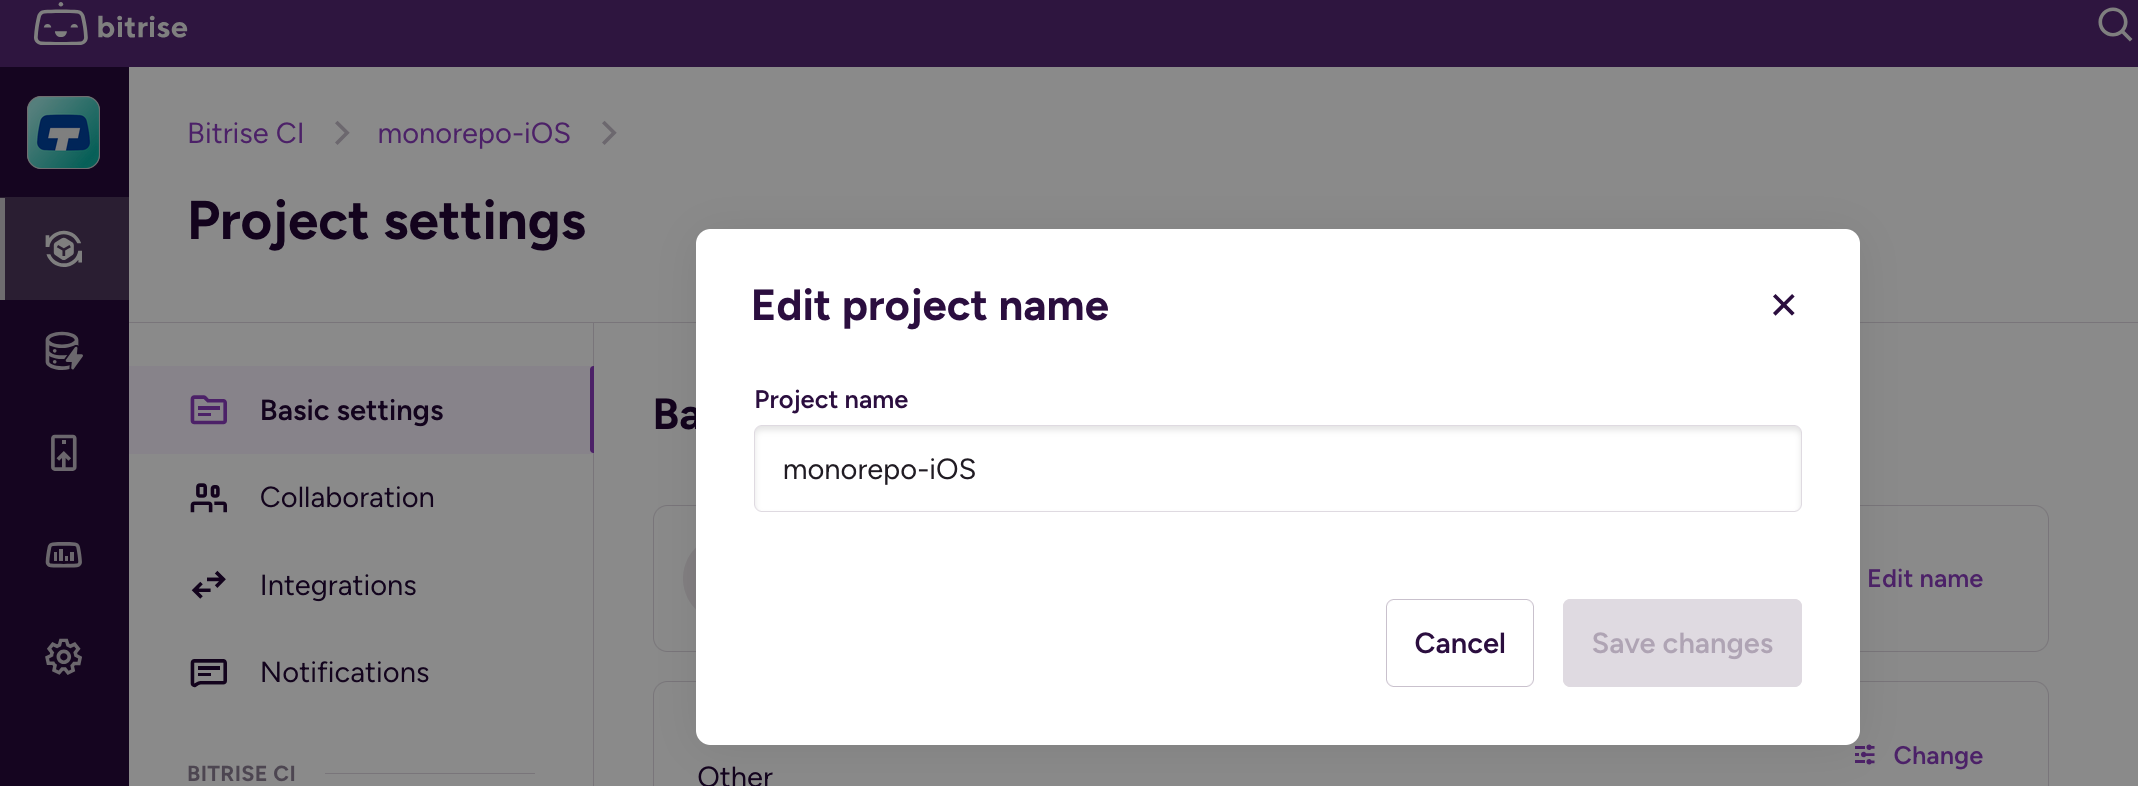
The project name will default to the name of your repo. Because you're creating multiple projects with the repo, you'll want to rename the project to be more specific. You'll do this in "Project settings." For this example, my naming convention is monorepo-iOS and monorepo-android.
Permissions
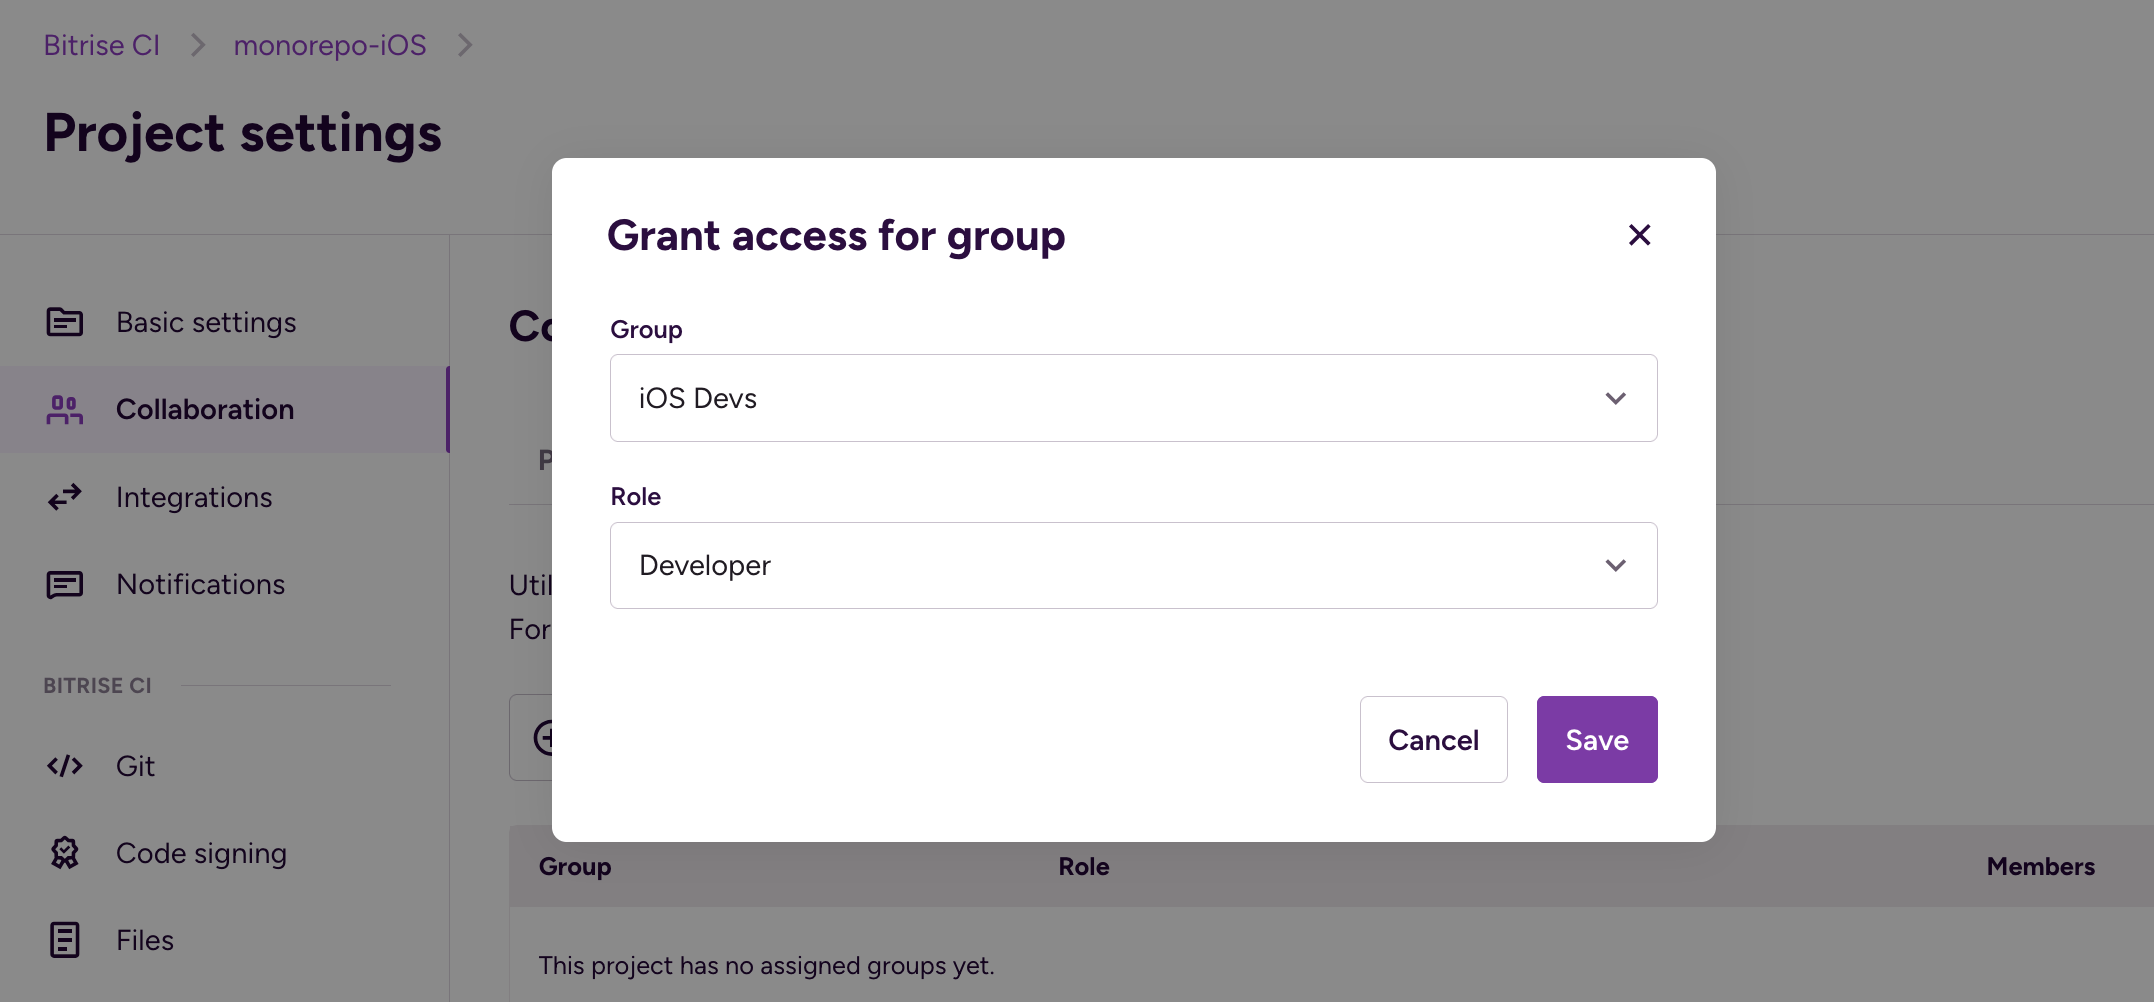
Your Bitrise administrator can define workspace groups. By default, groups do not have access to all projects within a workspace. Create a group for iOS Devs, one for Android devs, etc. You can then add the appropriate group in Project settings. This ensures that access to the Bitrise pipelines is provided to those who need it, and not to those who don't.
Adding the workflow trigger
When you create your new Bitrise project, the project scanner will make a default workflow or two for you. The workflow name will depend on the project type (iOS, Android, etc). In the case of the example project, the default workflow is primary. To set up a trigger, navigate to the Workflow Editor and select the "Triggers" tab of your workflow. Add a pull request trigger.
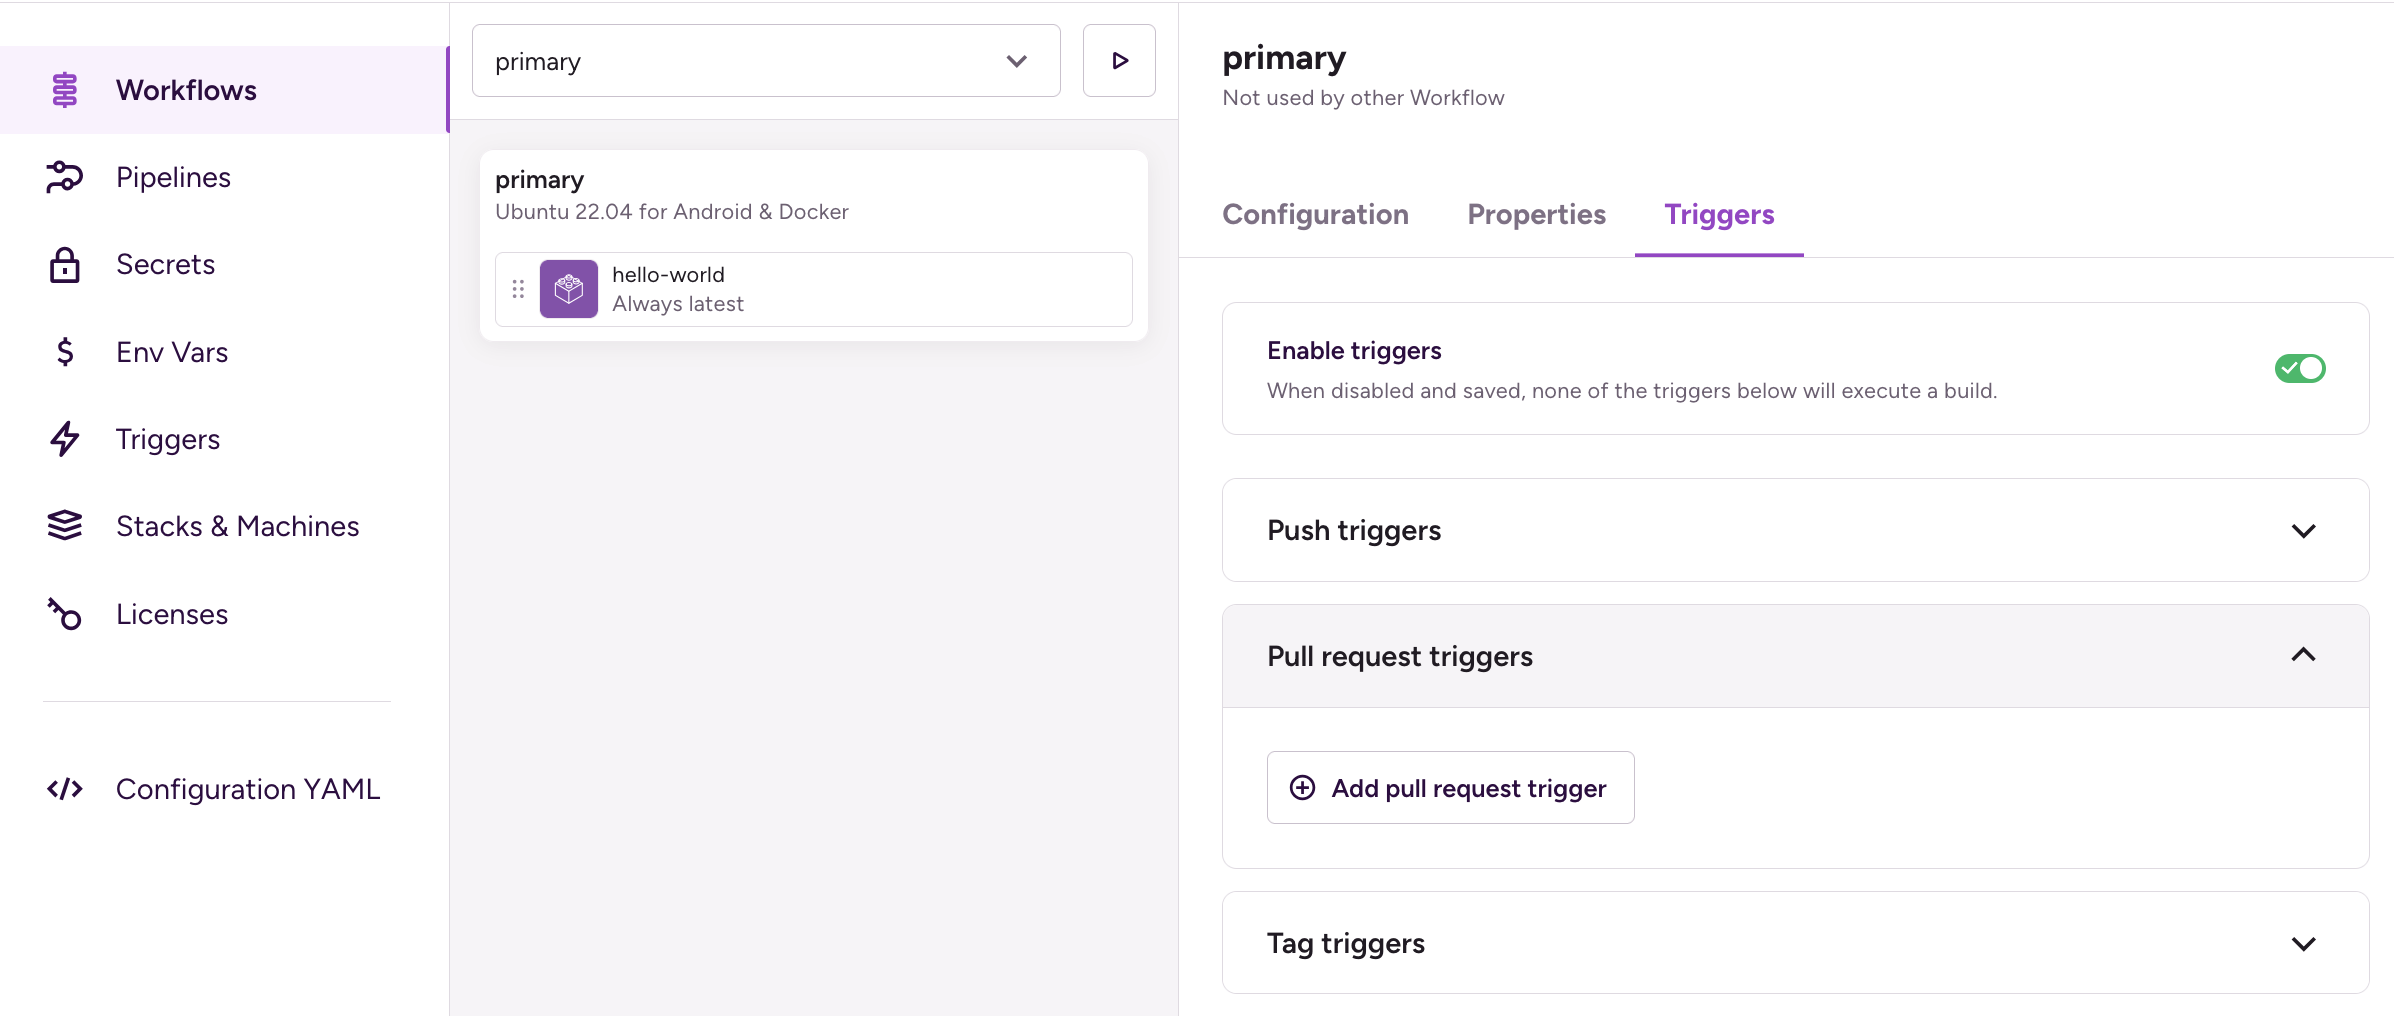
Click the "Add pull request trigger" button and define a "File change" condition. Set the path to the subdirectory for the particular project you have open. In this example, that's iOS.
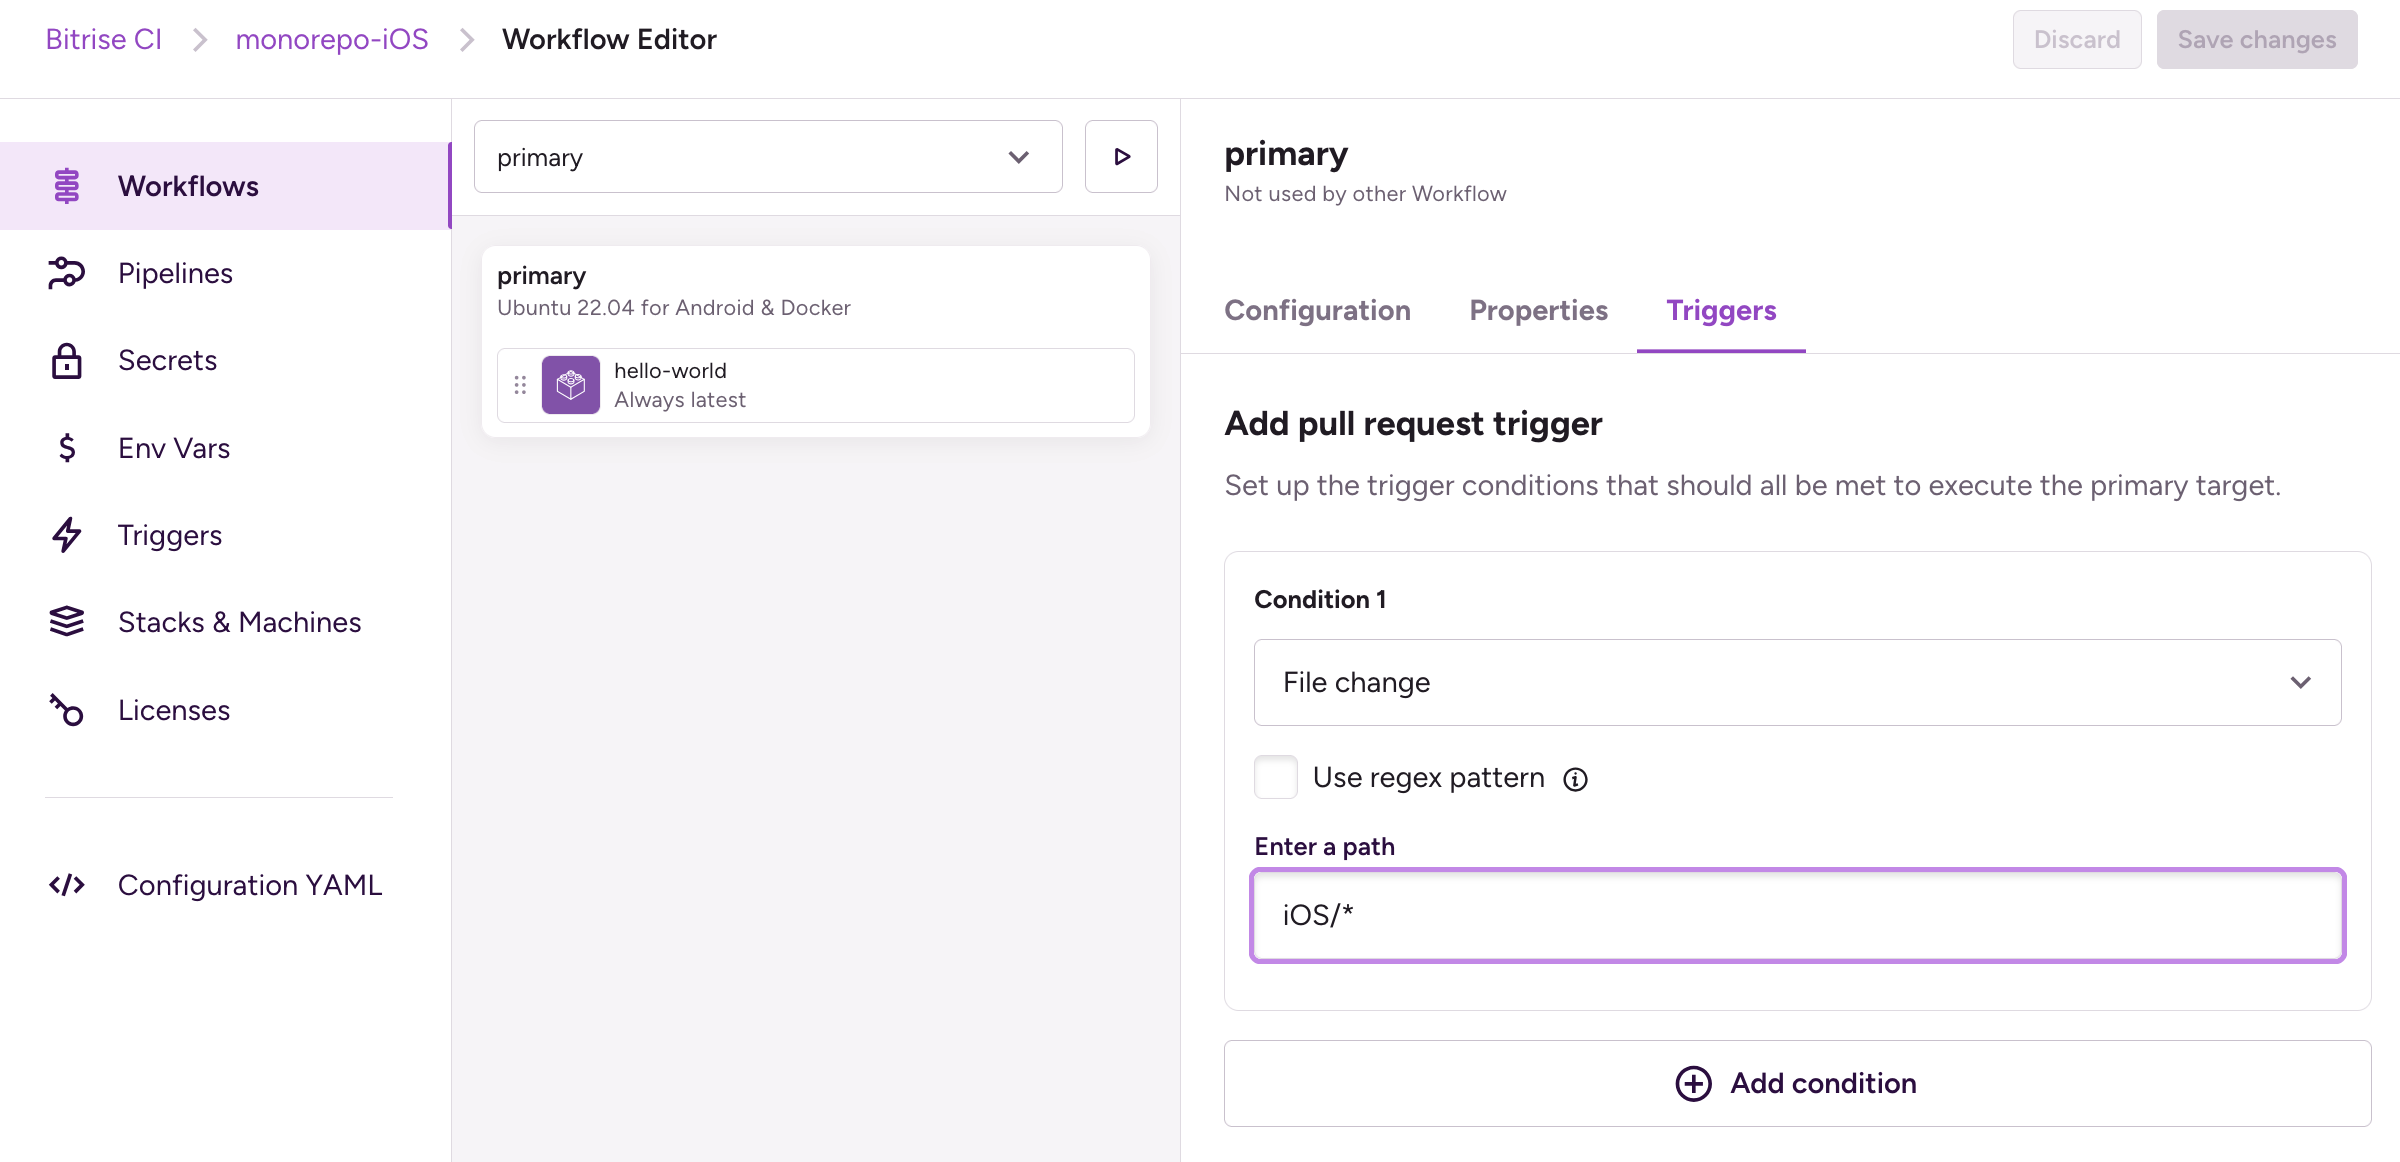
By adding the trigger with this condition, only pull requests with changes to files in the iOS/ subdirectory will trigger the workflow. In a later section, we'll add an additional workflow with its own trigger, resulting in two distinct workflows that will run when a change is made to the iOS/* subdirectory.
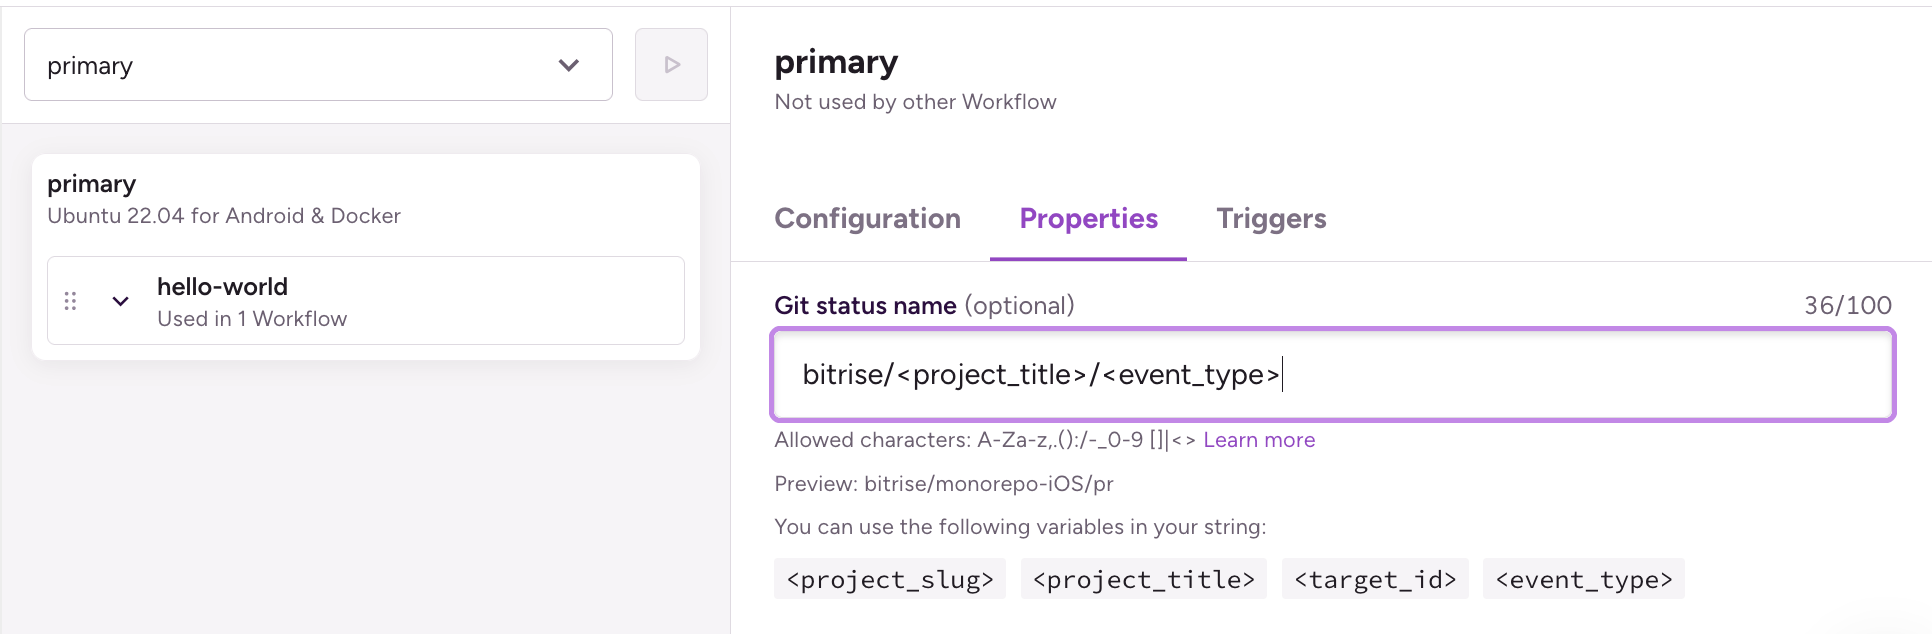
Optionally, update the Git status name (under the Properties tab) so that the result of the Bitrise workflow is recognizable in the Github pull request page.
Below is a snippet of yml with the triggers so far.
Store the pipeline definition in repo subdirectories
Storing pipeline as code--tracking it in the source code repository-- is a recommended practice. Benefits include governance benefits such as generating an audit log by git history as well as requiring pull request approval before changes can be made to pipelines.
In a monorepo where each subdirectory has its own Bitrise project, each subdirectory will also have its own bitrise.yml. Add a bitrise.yml to each subdirectory and commit and push that change.
The repo's file structure will be:
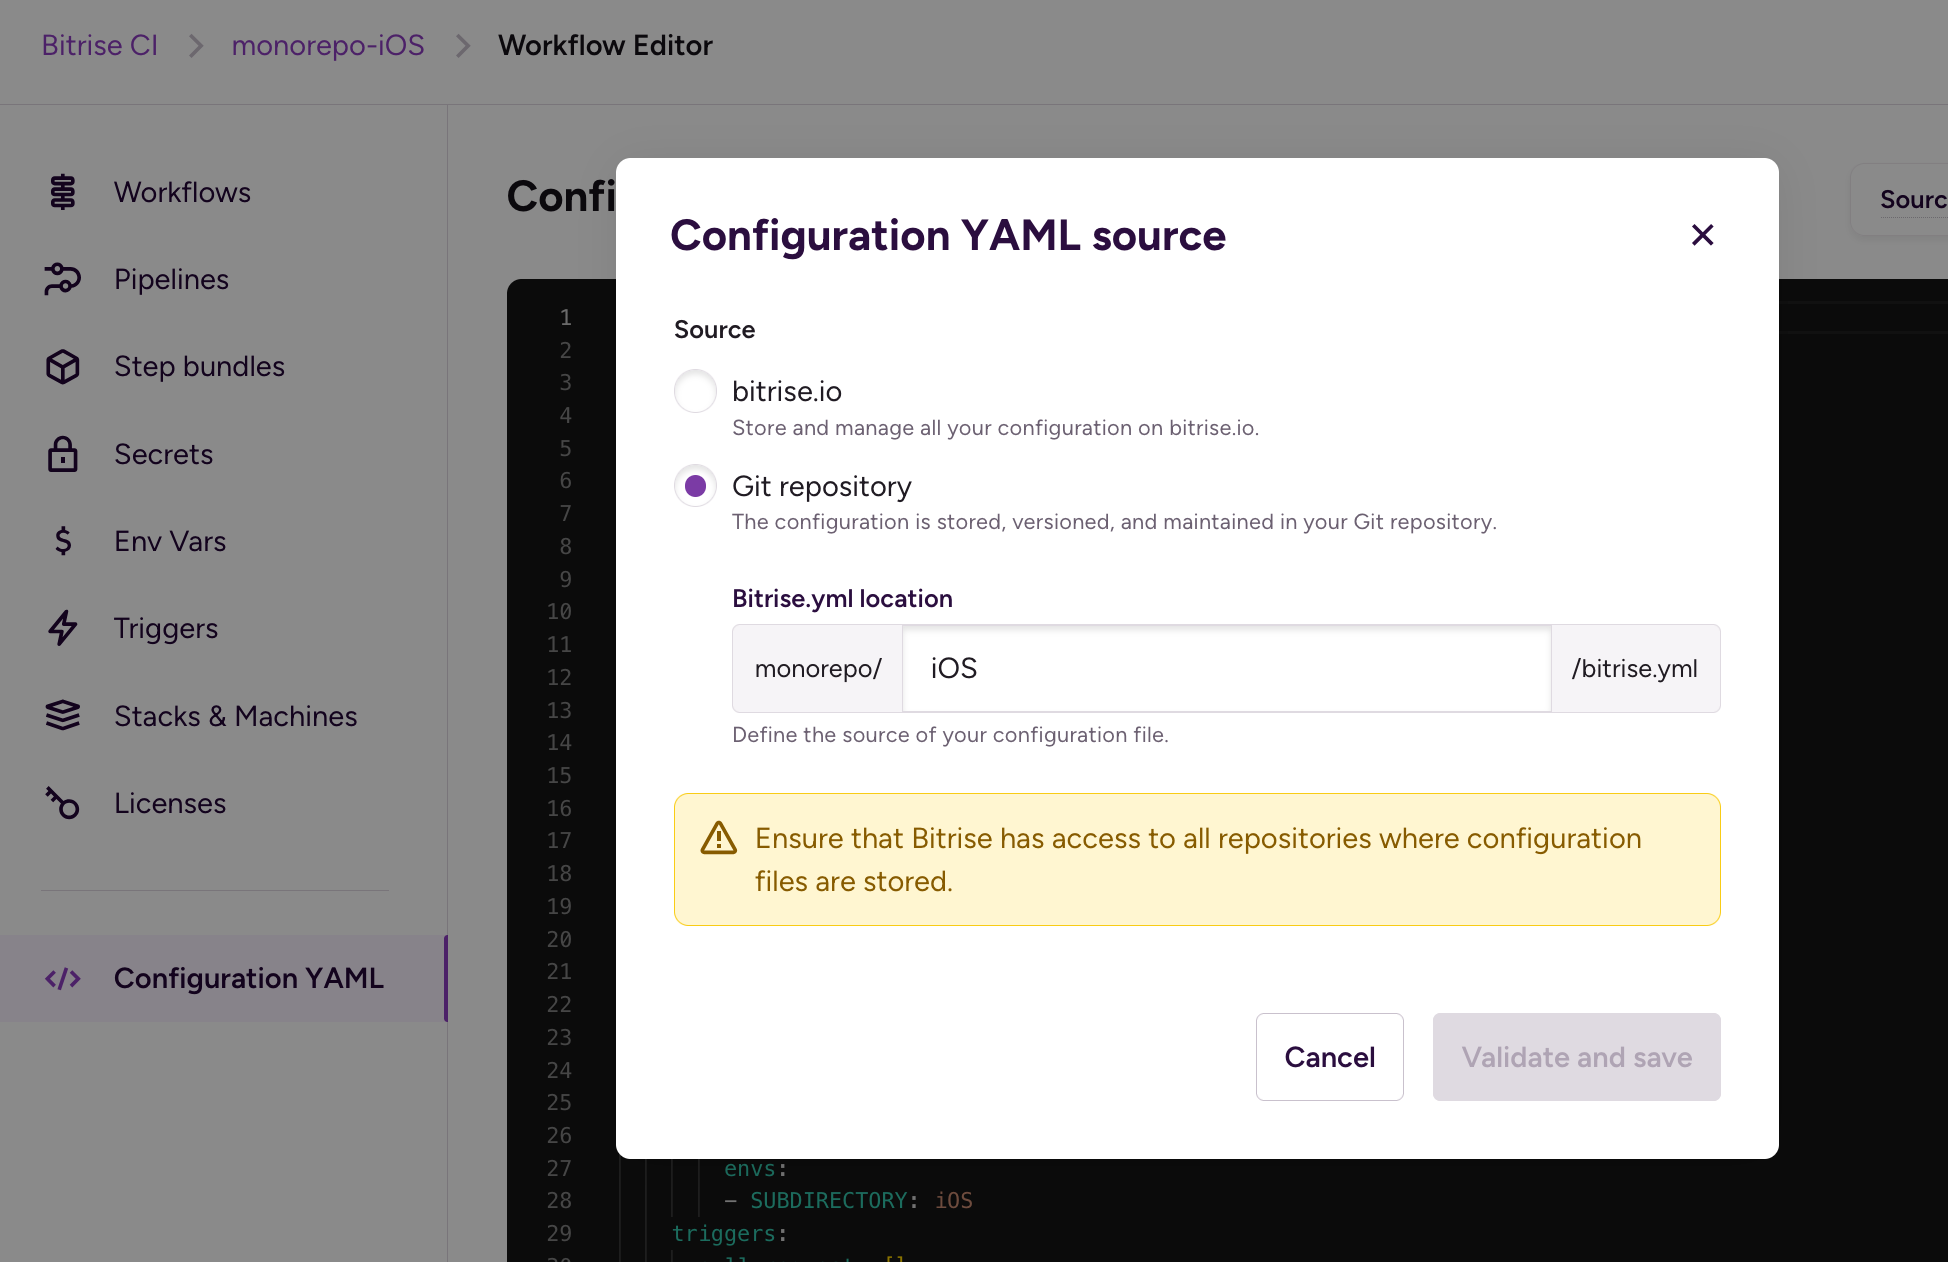
Once each project has its own bitrise.yml, in the "Configuration YAML" tab of the workflow editor, set the source to "Git repository" and set the applicable path for the project. Below is an example for the iOS project.
Re-use pipelines with modular YAML
At this point, each monorepo project has its own Bitrise project--each with its own workflows. One of the goals of a monorepo is common tooling and practices. To that end, we will use two Bitrise features that enable your team to write re-usable YAML once, and re-use that in multiple projects.
- Modular yaml uses the
importkeyword to fetch yaml snippets from one file and inject into abitrise.yml. Shared functionality that will be used across multiple projects will be saved incommon/bitrise.yml. - Step bundles provide a mechanism for aliasing commonly used sequences of steps. For example, many workflows begin with cloning the repo and downloading cached dependencies. This can be wrapped in a
setupstep bundle. Instead of re-writing the same steps in each worfklow, thesetupbundle can be referenced.
Below is an example of how step bundles and modular yaml are employed to maximize re-use and simplify future updates:
iOS/bitrise.yml
common/bitrise.yml
Note: If you're using the bitrise cli to validate your pipeline definition locally, run commands from the repository's root directory to ensure import paths are correct. For example, running bitrise validate from the iOS/ subdirectory will fail. Running bitrise validate -c iOS/bitrise.yml from the repository root directory will work.
Validating changes to common
If a project in a subdirectory (iOS/, for example) relies on a different subdirectory (common/, for example), then changes to the dependency should trigger a check of the referencing subdirectory. To accomplish this, A check-yml workflow will be added to common/bitrise.yml. To make it re-usable, a PROJECT_PATH environment variable will be added to each referencing bitrise.yml.
iOS/bitrise.yml
common/bitrise.yml
And there you have it; how Bitrise makes it possible for monorepo teams to establish a successful CI program:
- Re-use is encouraged with modular yaml and step bundles.
- Governance is built-in with pipeline as code.
- Teams retain autonomy by each having their own Bitrise project with its own pipeline definition and access controls.
For additional help setting up your monorepo on Bitrise, reach out to our support engineering team at [email protected].
Get started for free
Get a 30-day free trial and join the 400,000+ mobile developers who already love Bitrise.
Start free trial