.png)
Testing is an important part of the software development lifecycle. There are different types of testing, such as Unit testing, Integration, UI testing, and more. Once we implement different tests suites for our application, we should make sure to also have documentation to keep track of how these tests behave.
What's are test reports in software testing?
A test report is a document or page that contains a summary of all test activities and the final test results of a testing suite. It is an assessment that shows how well the testing is performed.
Based on a test report, stakeholders like engineering managers, product managers, or release managers can evaluate the quality of the tested product and make a decision on the software release. For example, if the test report shows that there are many defects or blockers remaining in the product, stakeholders can delay the release until all the defects are fixed.
Test reports are one of the communication channels between the testing team and the development team or the stakeholders, because they should be readable, accurate, and include all the needed information to know the status of the project.
What does a good test report contain?
A test report is an important document in software testing and should always contain the following information:
- Test Summary, including the total number of tests cases with the different statuses such as (passed, failed, skipped/ignored)
- Test description, including the test name, class or package
- Test duration, including the the execution time for the test case
- Test artifacts, including screenshots, videos, and any other logs.
A test report can be generated on our local machines when we are running the Unit or Integration tests, but the challenging part is always the Test Report on the CI server and integrating it with our tests to display the results with every code change or pull request.
Now that we learned about test reports and why it’s important to implement them in our tests, it’s time to find out how to integrate them with the Bitrise Test Reports add-on.
The Bitrise Test Reports add-on
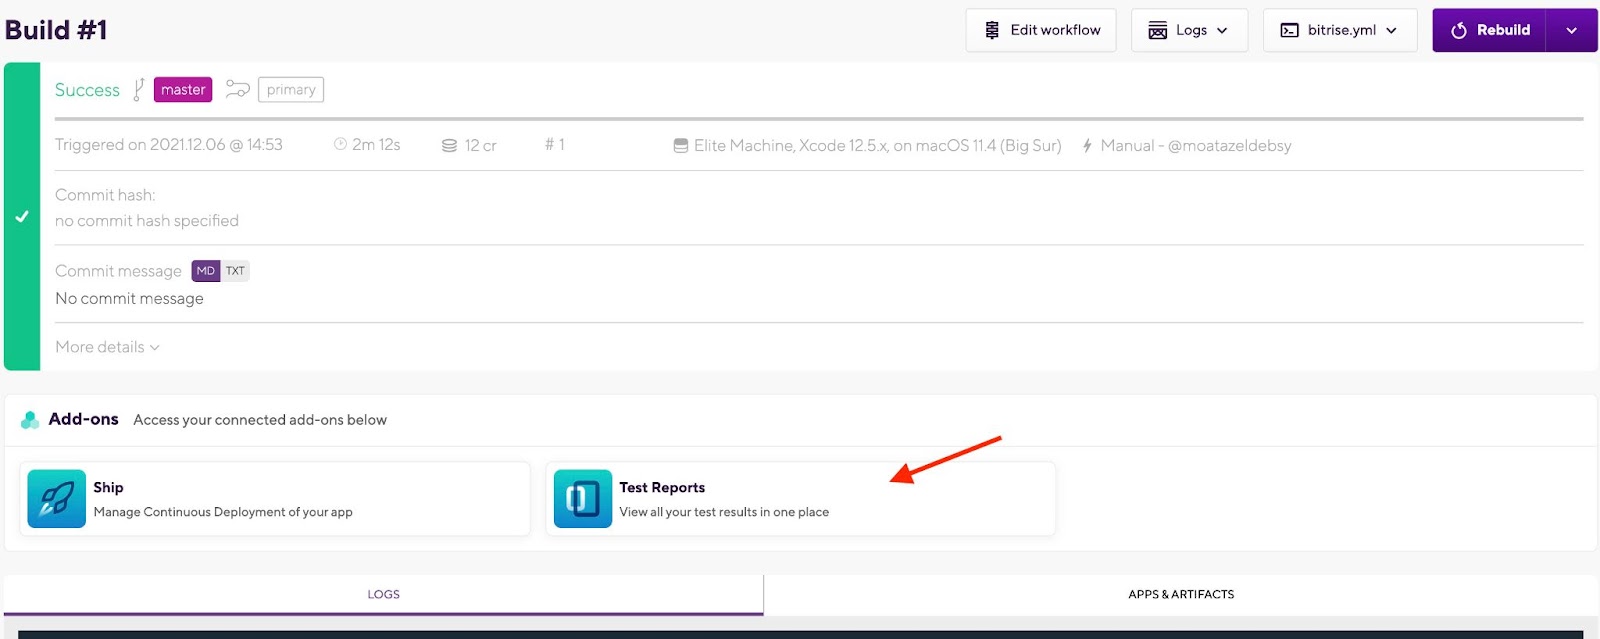
Test Results are just a click away from your Build’s page. Once your build has run, you can click the Test Reports button and view all your unit, UI, and device test results collected in a single dashboard. Once you’ve analyzed your build’s test results, you can easily navigate back to your app through the top menu bar.
How does it work?
In a nutshell, our testing Steps deploy your test results to one directory from where the Deploy to Bitrise.io Step picks up those test results and delivers them to the Test Reports page which is like a one-stop mobile test results dashboard. This means you only need the following:
- Your tests in a repository
- A supported testing Step
- A Deploy to Bitrise.io Step in your Workflow.
Steps supporting the Test Report add-on
On Bitrise we have +330 Steps including a lot of test Steps between community and partner Steps. By default, there are five steps that support the Test Reports add-on:
Let’s look into some examples for the Test Report add-on with Bitrise Steps.
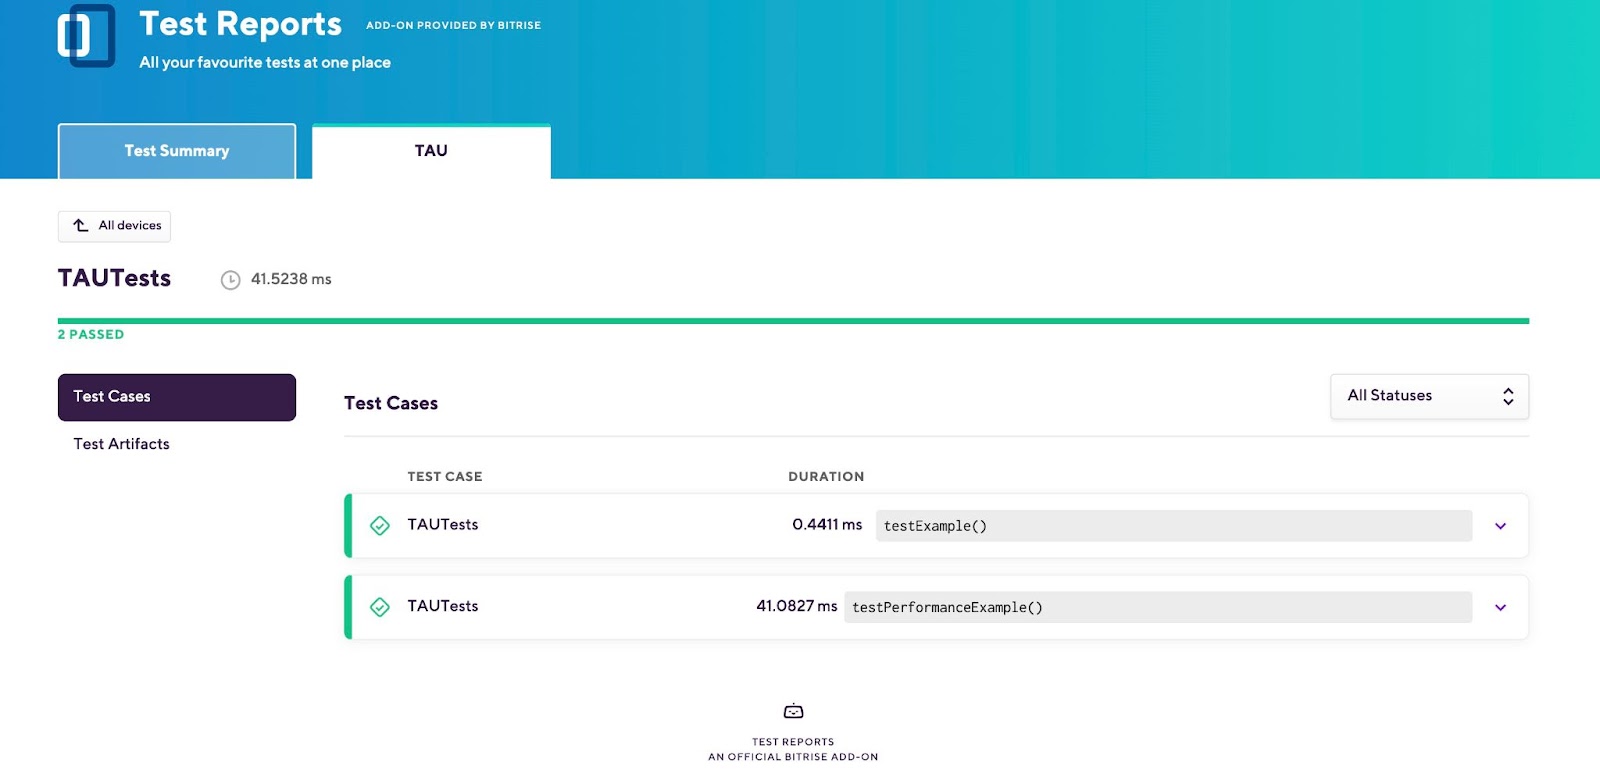
Xcode Test for iOS
Let’s assume that the following iOS workflow on Bitrise includes the Xcode Test for iOS Step for running all the Xcode tests that are included in your project.
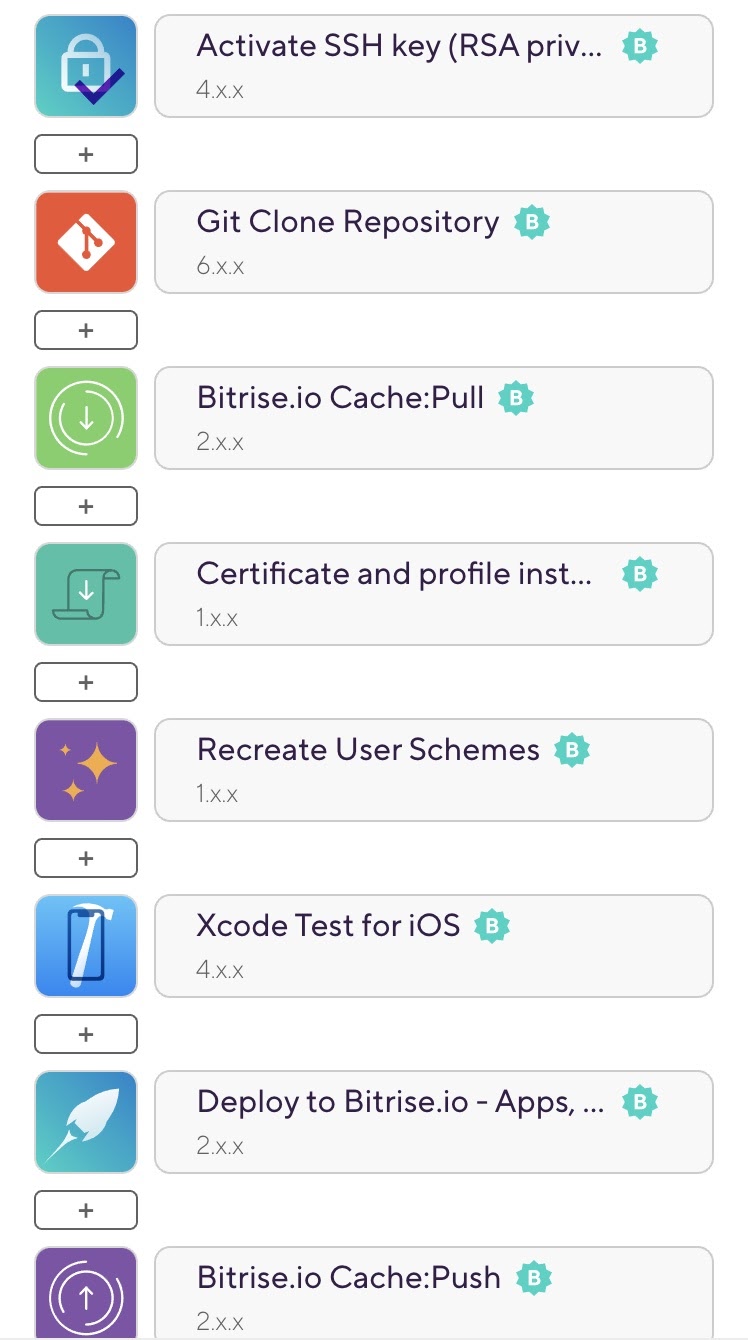
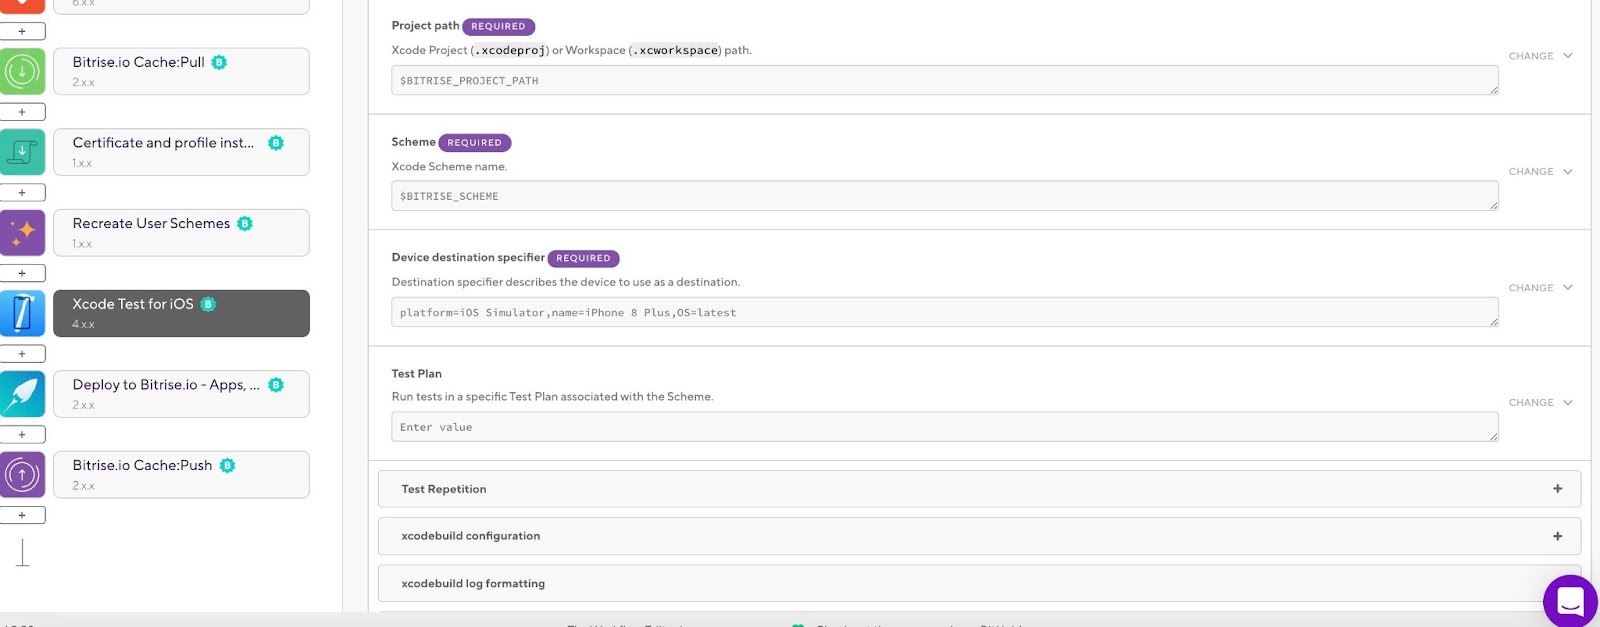
You only need to configure the Step with the Scheme name, the Device destination, and other configurations. Then, as you can see, we have a Deploy to Bitrise.io Step after this Step to upload the test results to the Test Report add-on.
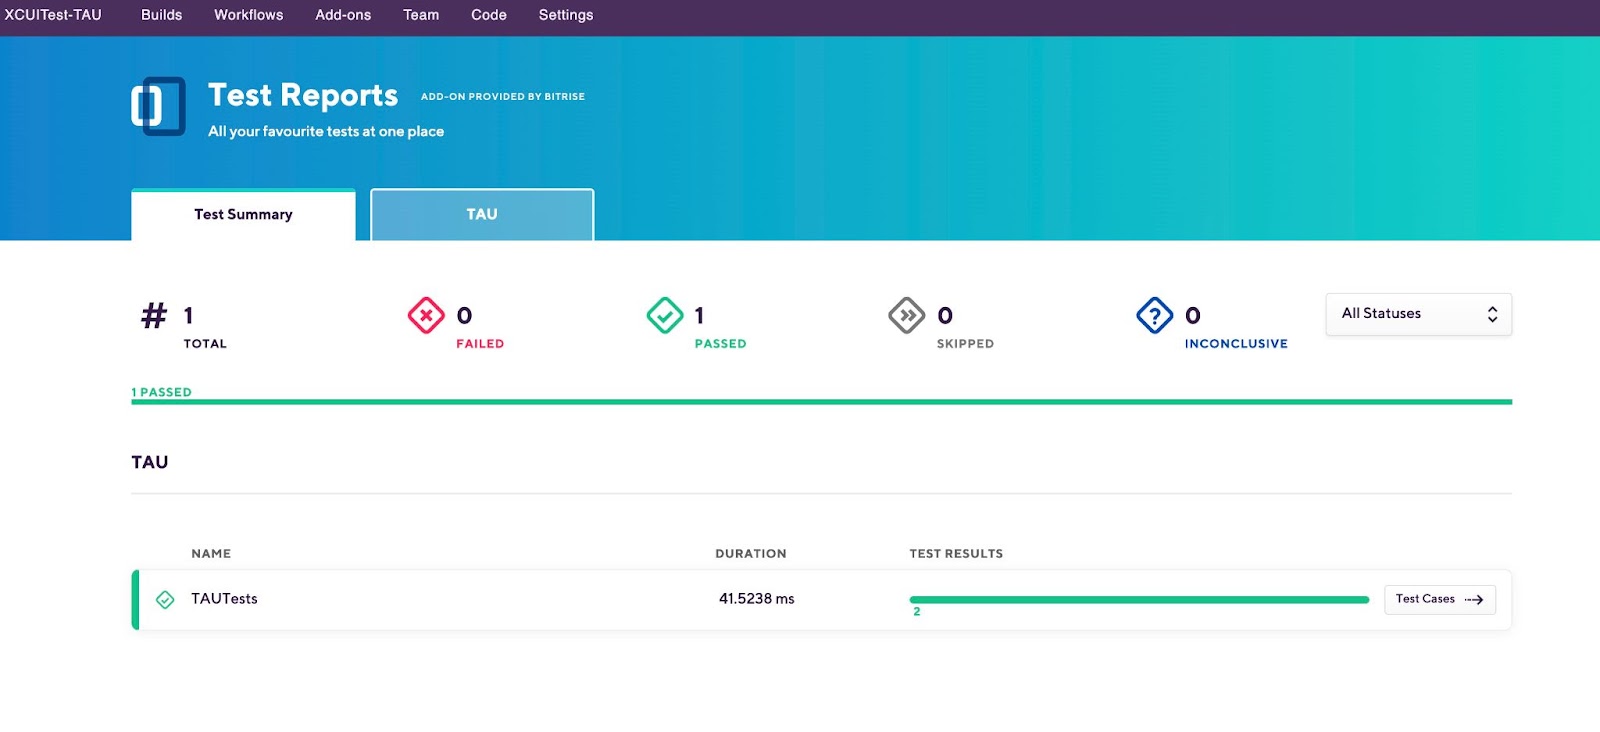
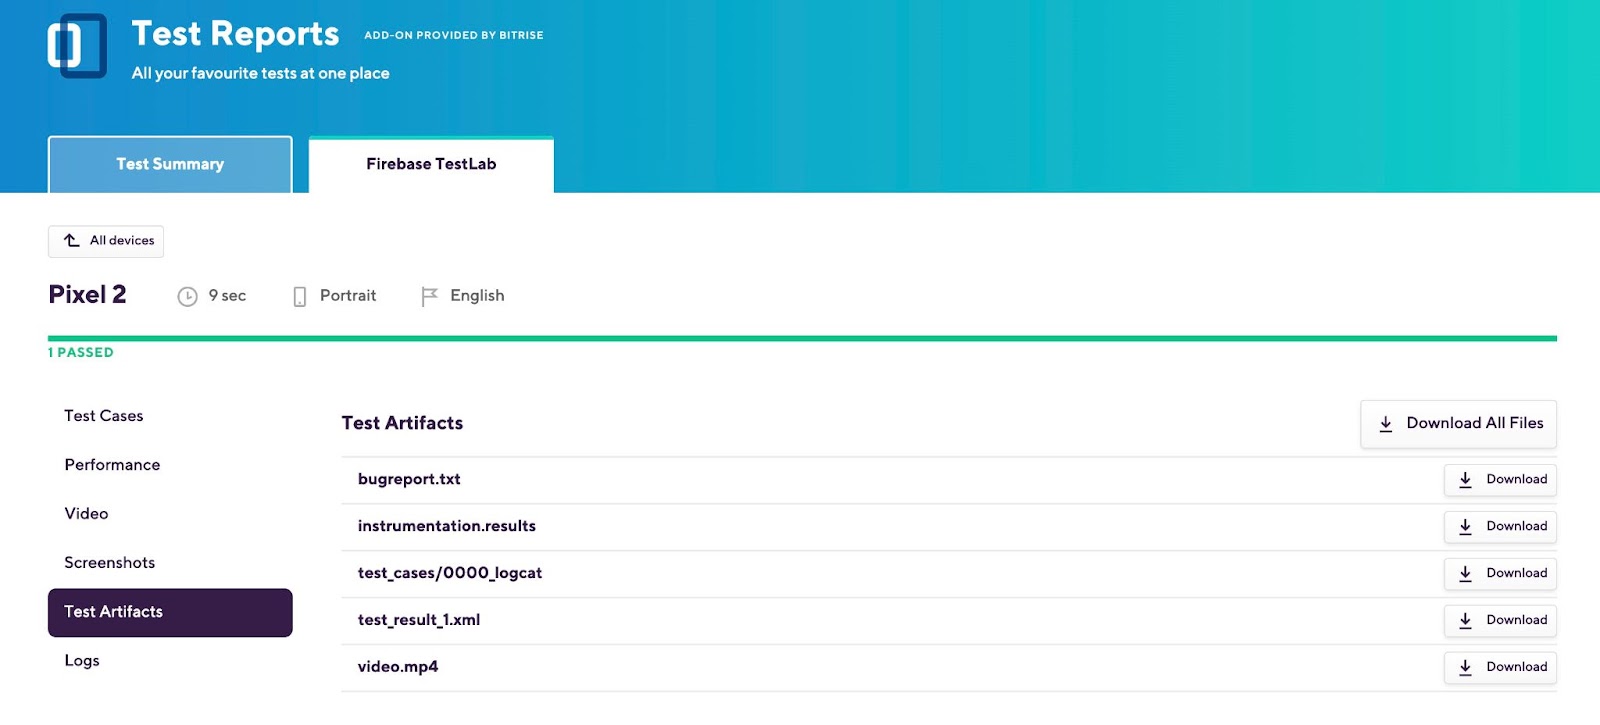
Once the build is finished, you can click on the Test Report button to view the test results like this:
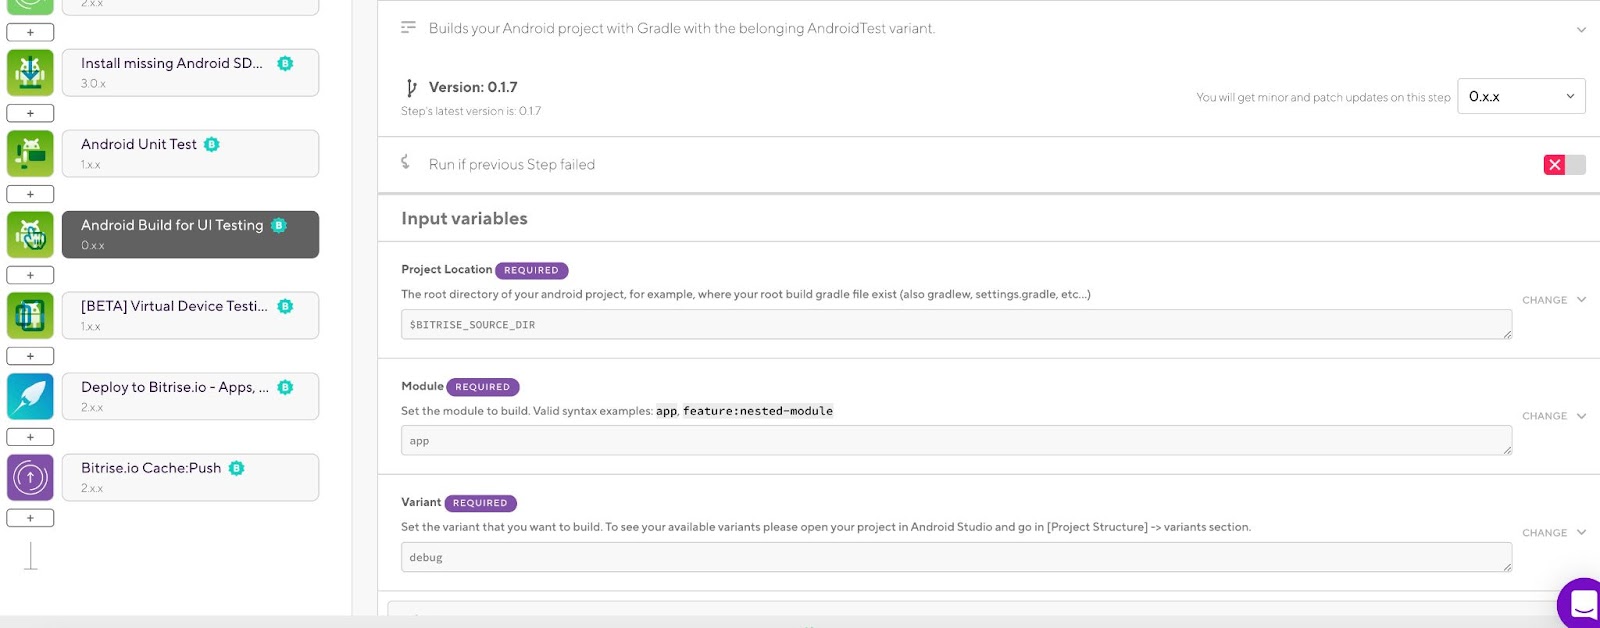
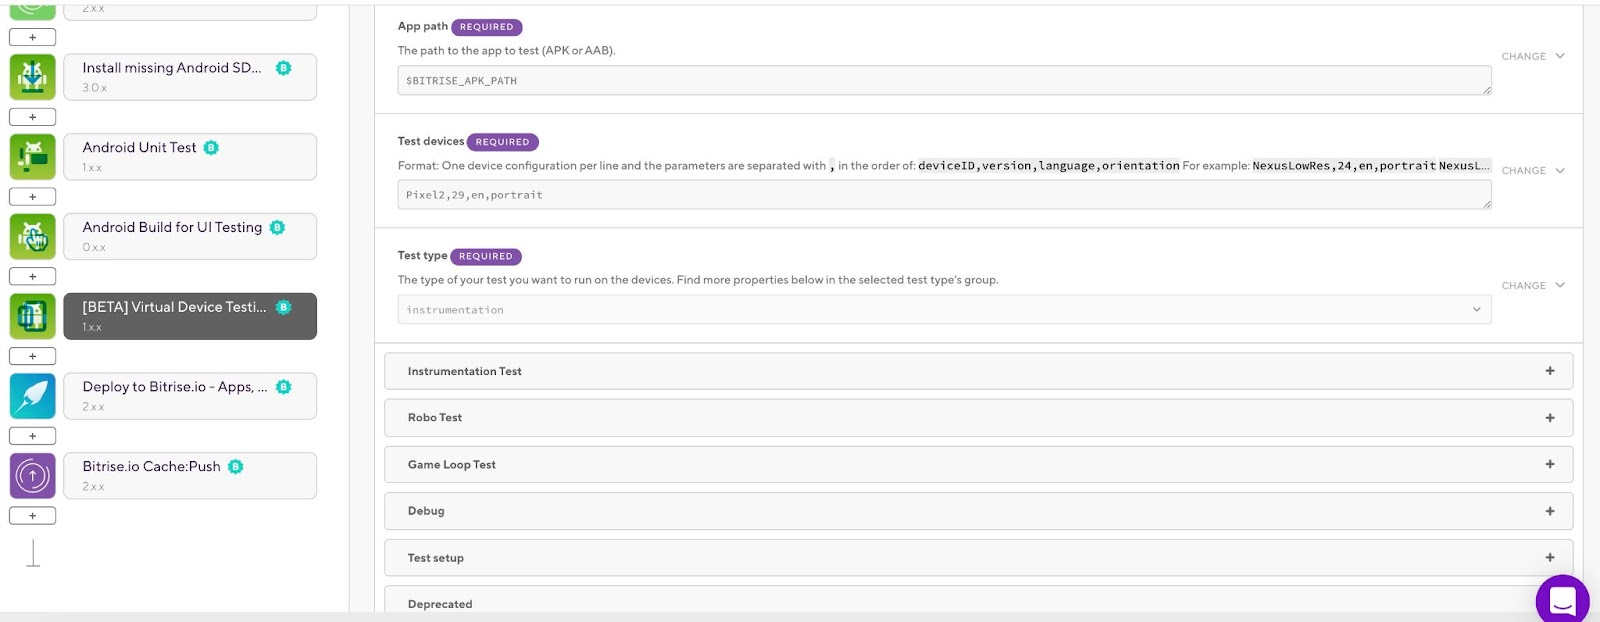
Virtual Device Testing for Android
This Step is used to run Android UI tests on virtual devices. It doesn't build anything, it collects the built APK from $BITRISE_APK_PATH (and in the case of instrumentation tests, the test APK from $BITRISE_TEST_APK_PATH).
Available test types are instrumentation, robo, gameloop (Because this step is running the UI tests on Firebase Test Lab devices). The minimal setup of this Step would be to select a test type. If you selected instrumentation, don't forget to set the Test APK path under the Instrumentation Test group as well. To create the two required APKs, you can run the Build for UI testing Step (before this Step) like this:


Flutter Test
The Step runs the flutter test command with the specified flags. To check the available flags, open a command-line interface on your own machine and run a flutter test --help.
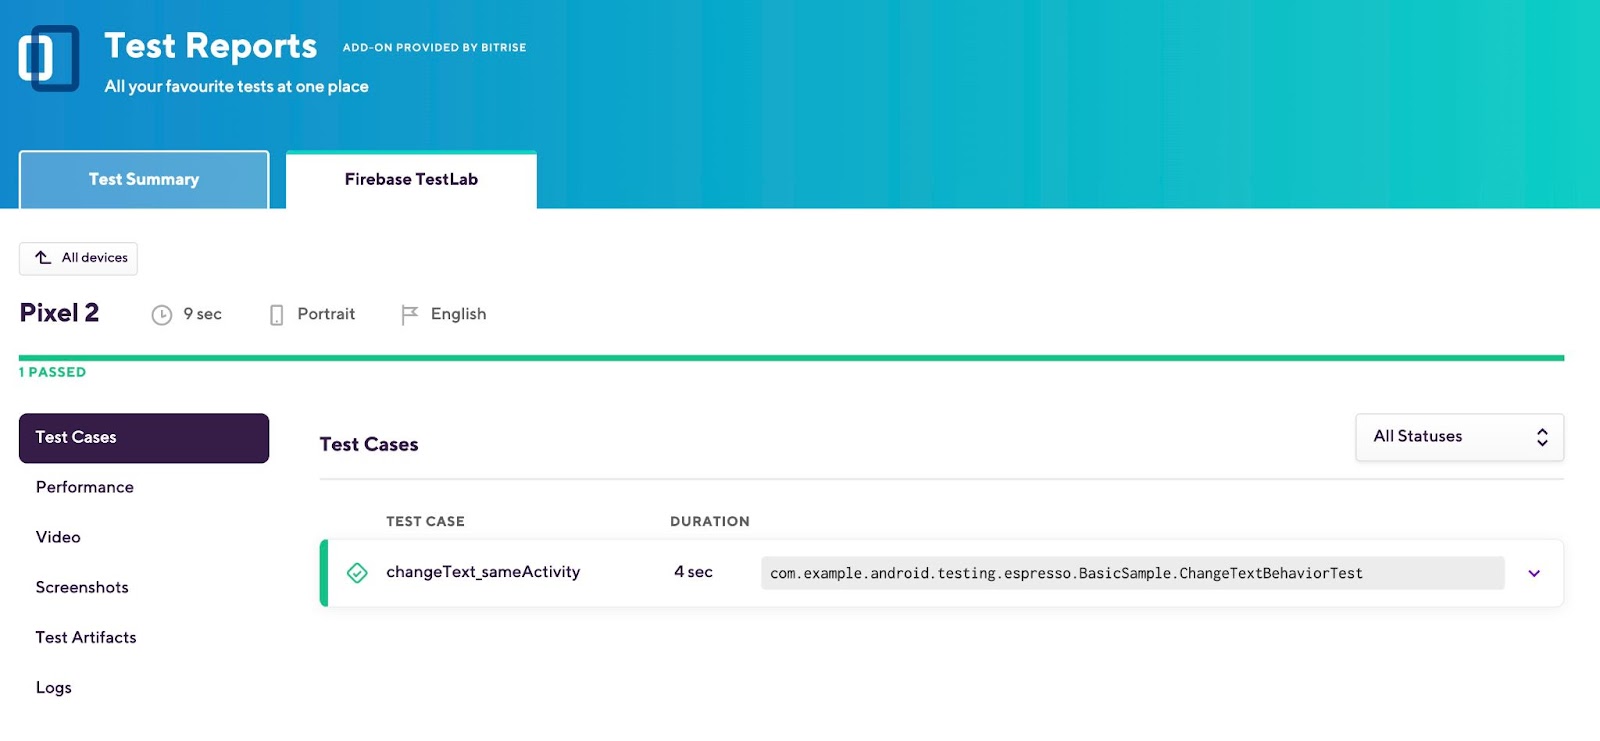
Let’s assume that we have the following Flutter Workflow to build and test our Flutter application, including the Flutter Test Step to run the tests and publish the results to the Test Report add-on.

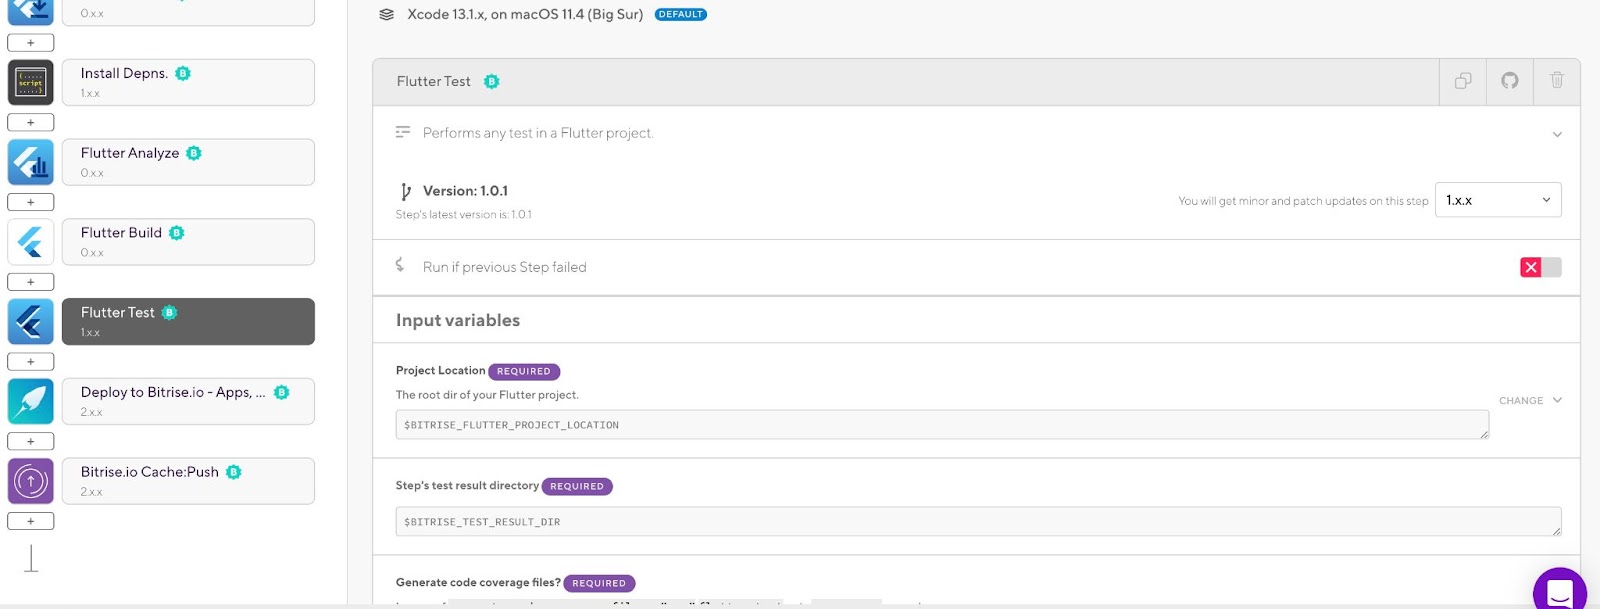
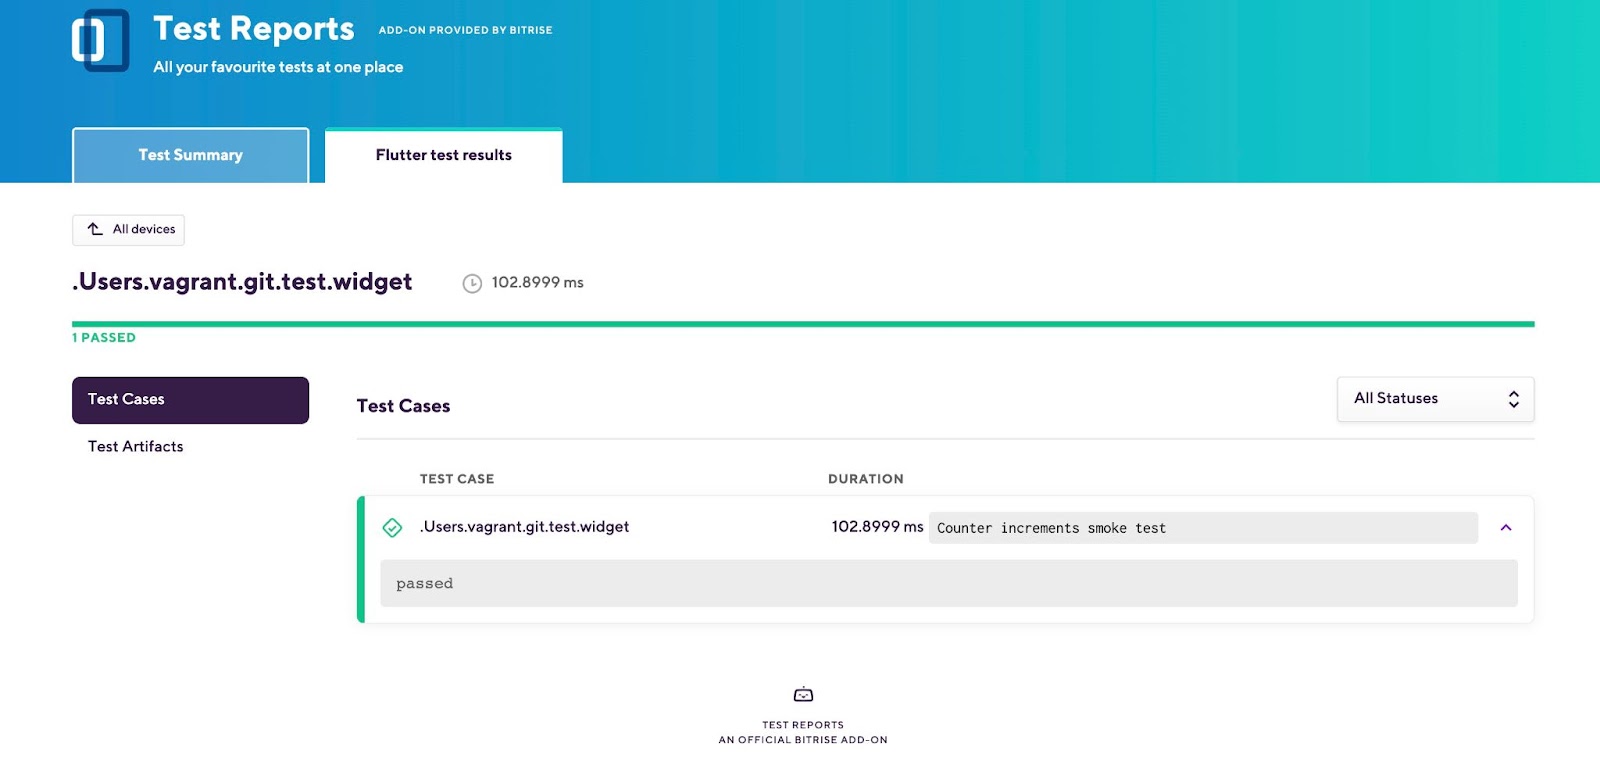
After running the build, we can click on the Test Report button as usual to see the test results like this:

Exporting to Test Reports from any Step
Test Reports add-on can also read and display test results that are in either of these two formats:
- plist
- JUnit XML
For example, let’s assume that we are running Appium Android UI tests on Bitrise, and we need to show the test results in the Test Report add-on. How can we do it?
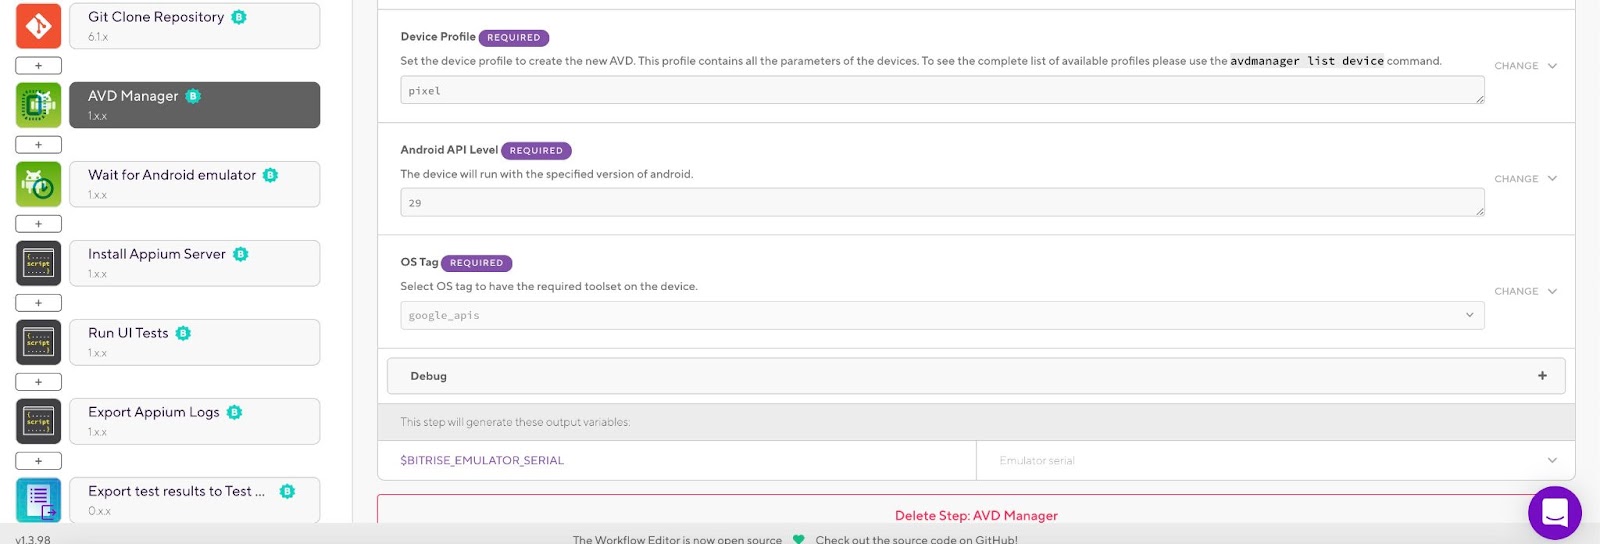
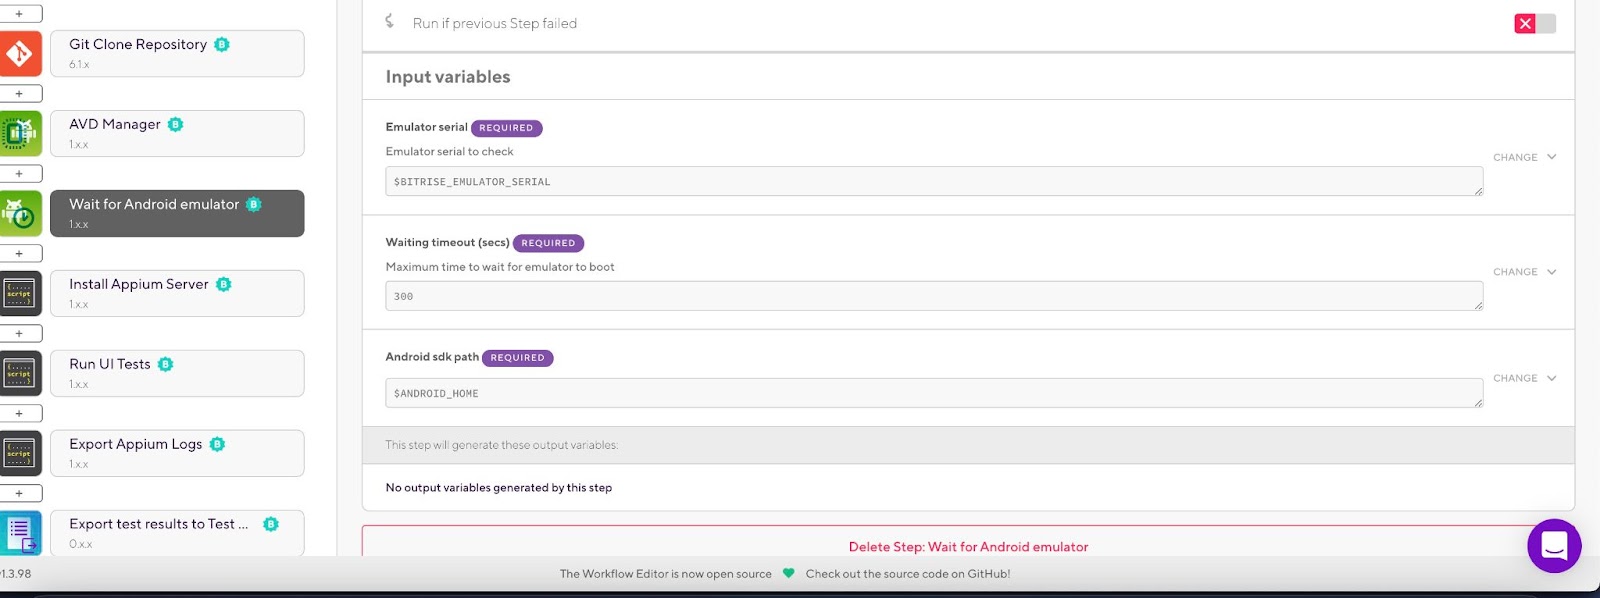
We can simply run Appium tests for the Android app on Bitrise in the following Workflow:
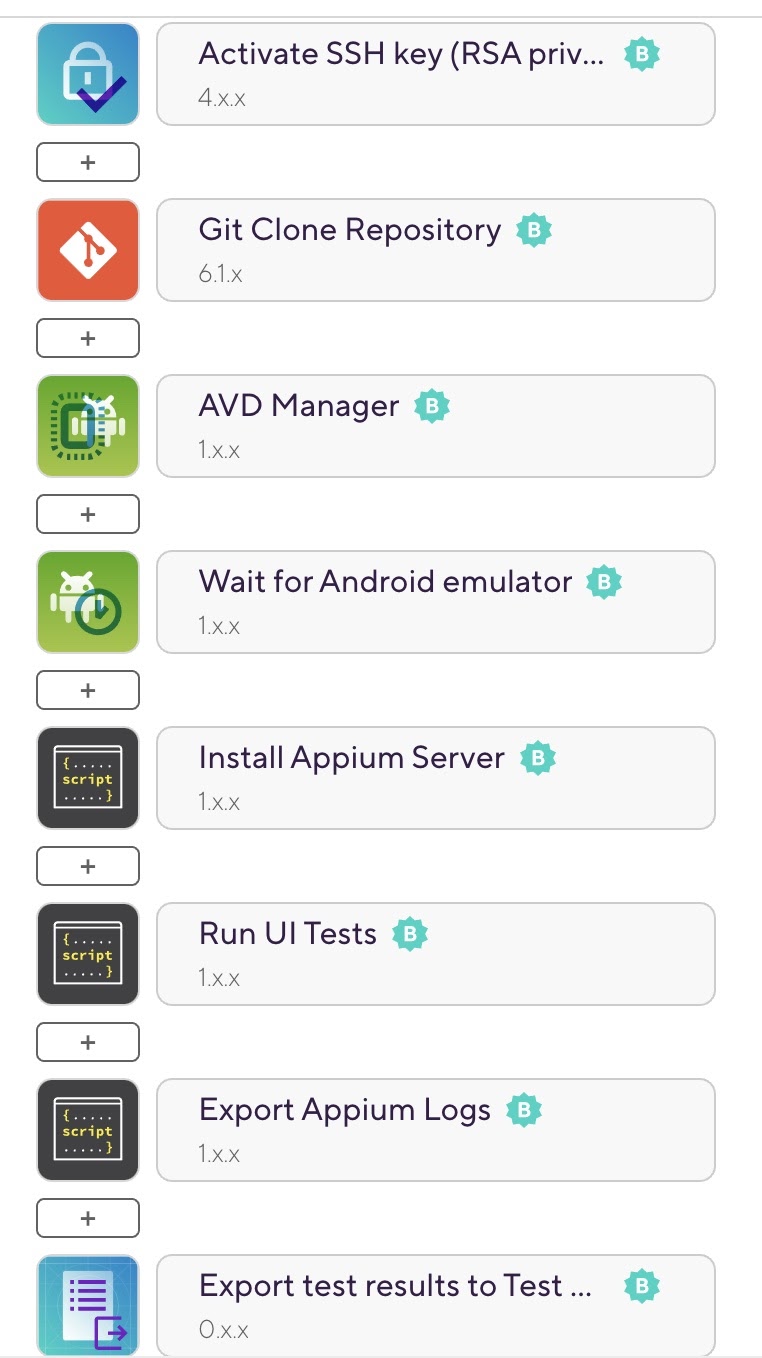
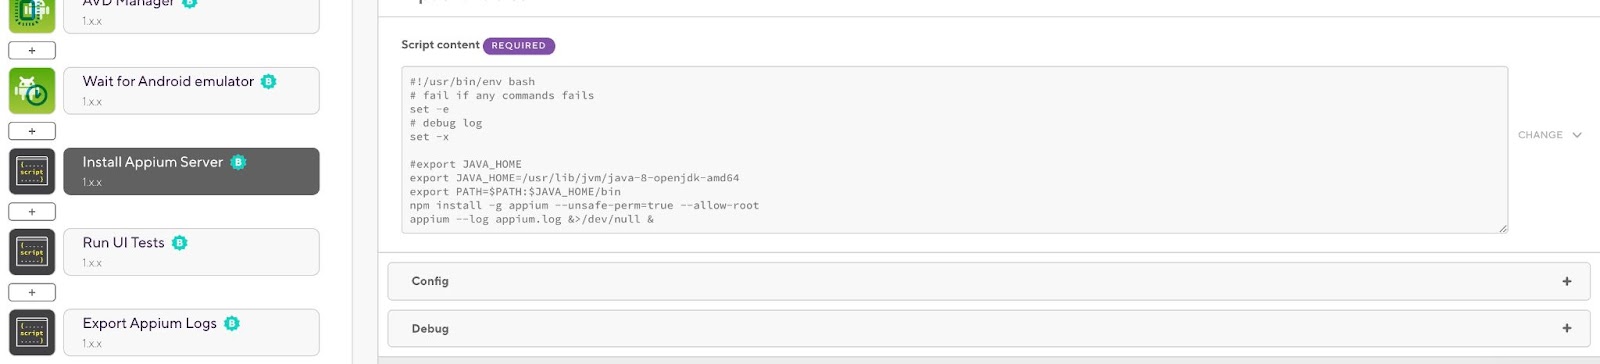
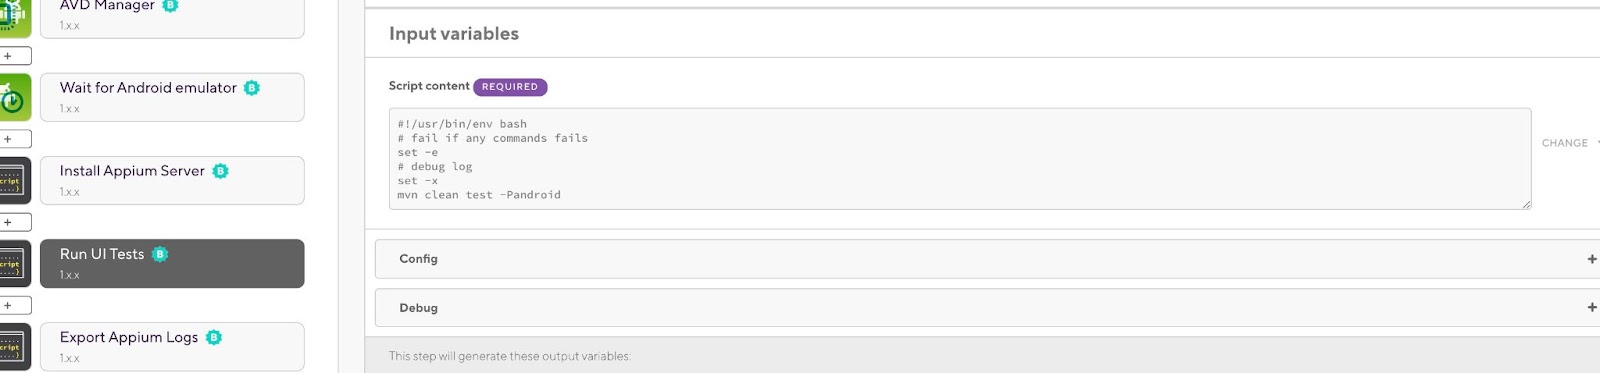
First, we clone the repository, then we use AVD Manager for creating Android Emulator, then install and run Appium Server, run the UI tests using maven command line, then export Appium log and test results to the Deploy Step.
To be able to send the XML test results file to the Test Report add-on, you should add the Export test results to the Test Reports add-on Step and specify the report path inside your project:
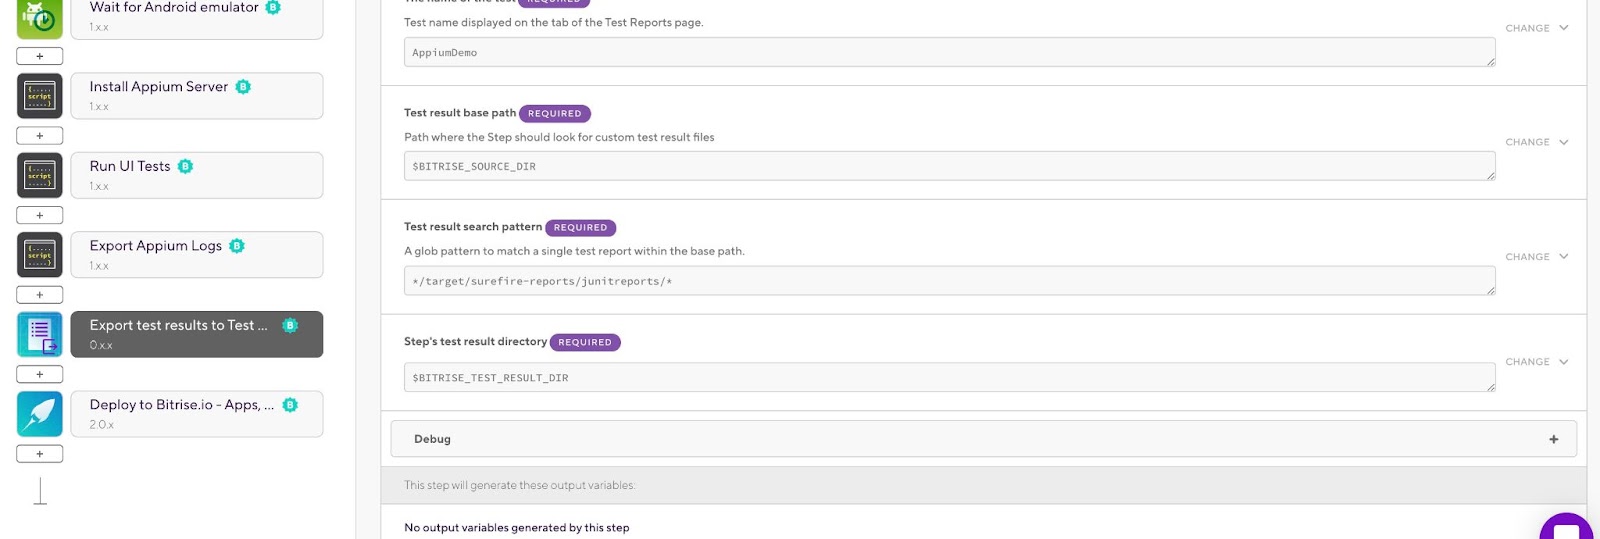
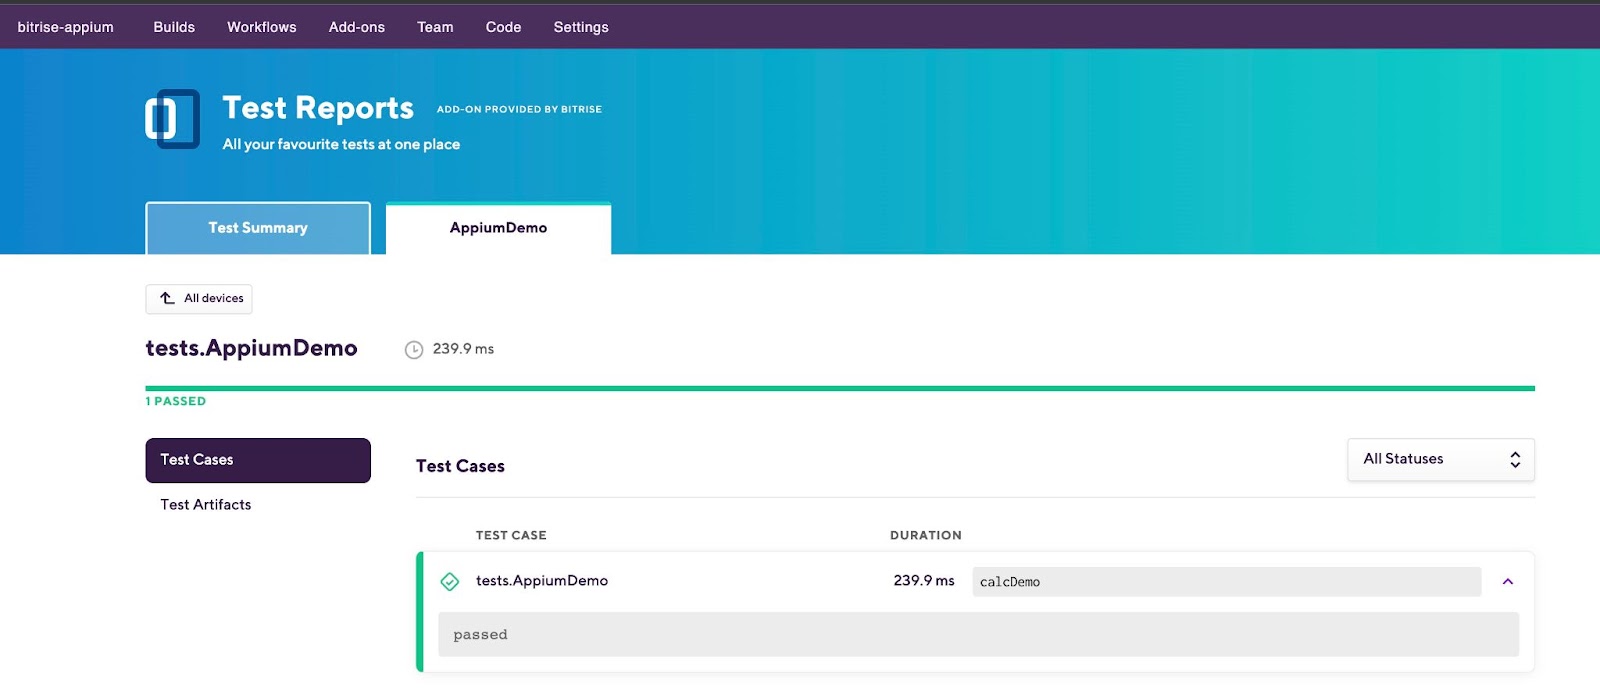
Run the build to verify the test results then you can click on the Test Report add-on to check if the report displayed successfully like this:
Note
Sometimes you need to implement the logic for taking screenshots on failure for your UI tests in your test framework to be able to display it with the Test Report add-on.


.jpg)
