
Code signing is one of the most painful tasks that every iOS dev has to do. In this article, I'm going to explain the whole procedure.
How does code signing work?
As I mentioned in my previous article iOS devices can only run apps that are signed by trusted developers. The provisioning process is just the beginning of a much bigger story. Profiles are used during the code signing phase, but what exactly is a code signature, and most importantly, how can I sign an iOS app successfully?
Code signing is the process of digitally signing an app, to ensure that it comes from a certain developer. It's similar to when you sign your real-world contracts, but it's much safer because a cryptographic hash is way more unique than a splash of ink. Code signing also ensures the integrity of the code, this is a guarantee that the app has not been changed or corrupted since the developer made it. In other words, you can't get any malware or virus if you only download code signed apps. 😊
The initial technology for signing executable apps appeared around the time when the first iPhone was released as the code signing process was crucial for a mass-market product. Apple introduced a way to protect both their customers and the App Store. iOS simply won't run unsigned code, however, you could disable this security gate by jailbreaking your phone. That's a very dangerous process, you shouldn't do it at all.
Now that you know the reasons, it's time to learn how code signing works under the hood. Let's see what kind of tools and files are involved during the signing process.
Certificates, keys and a little bit of cryptography
Let's have a quick overview of certificates, private and public keys.
Certificate Signing Request
The Certificate Signing Request (CSR) is a file that you have to send to a certificate authority (in this case Apple, through the developer portal) to apply for a digital identity certificate. The process of creating a CSR is part of the Public Key Infrastructure (PKI). The applicant has to generate a public and a private key on the local machine, then a CSR file can be generated from the public key file with some additional personal info, like name, email etc. Applicant keeps the private key secret, this means that you should NEVER give out your private key to the public! 🤫
Certificate
A certificate is a public key combined with lots of additional information signed by a Certificate Authority (CA), in this case, Apple. You can generate a certificate by uploading a CSR file to the developer portal or nowadays Xcode can automatically manage them for you. The certificate expires at some point in time, if that happens you have to renew it. Apple can also revoke your certificate if you break the rules, if that happens, you won't be able to code sign your apps anymore. Please note that you'll also need the corresponding private key during the code signing process.
Public-key cryptography, or asymmetric cryptography, is a cryptographic system that uses pairs of keys.
Public key
The public key can be shared with everyone, it's usually available under a publicly accessible directory. A person who has the public key can encrypt some data for a specific receiver. The receiver with the private key can only decode the message. The digital signature process also relies on this fundamental concept of asymmetric cryptography. Guess what? This is also part of the Public Key Infrastructure. 🔑
Private key
The private key is a secret key that is used to decrypt some specific data or message. You have to use the private key to code sign your app, without it, you cannot use the certificate and public key to sign anything. You should never share your secret key, but the only exception is maybe if you have multiple members in your developer team and more than one person is responsible for the signing process. The private key is maybe the most important component of the entire signing process. You can't download a private key from the developer portal, so always keep it secret. If you lose it, you can still apply for a brand new cert, but that can be pretty time-consuming.
As you can see, I'm not going too much into the details of cryptosystems like (RSA), you don't really need to understand them in order to be able to sign an app. Obviously, it's useful to have some advanced knowledge of cryptography, but that alone could be a topic of a much longer article. Let's just focus on how to create your signing keys and the process of obtaining your certificate from Apple this time. 🍎
Manually signing your apps
This method requires more work, but if you follow the instructions you will learn a lot about how automatic code signing works behind the scenes. It's always good to know the fundamental building blocks. If you are facing some code signing issues, the debugging process will be so much harder if you don't understand the basics. 🐛
Creating a CSR
The easy way: through the Keychain Access application
Start the Keychain Access application, from the Keychain Access menu item, select the Certificate Assistant option and click the Request a Certificate From a Certificate Authority... option. If you are seeing the Keys category, and there is a key selected in the right panel, that specific key will be used for your new CSR file. If there is no key selected, a new one will be made for you.
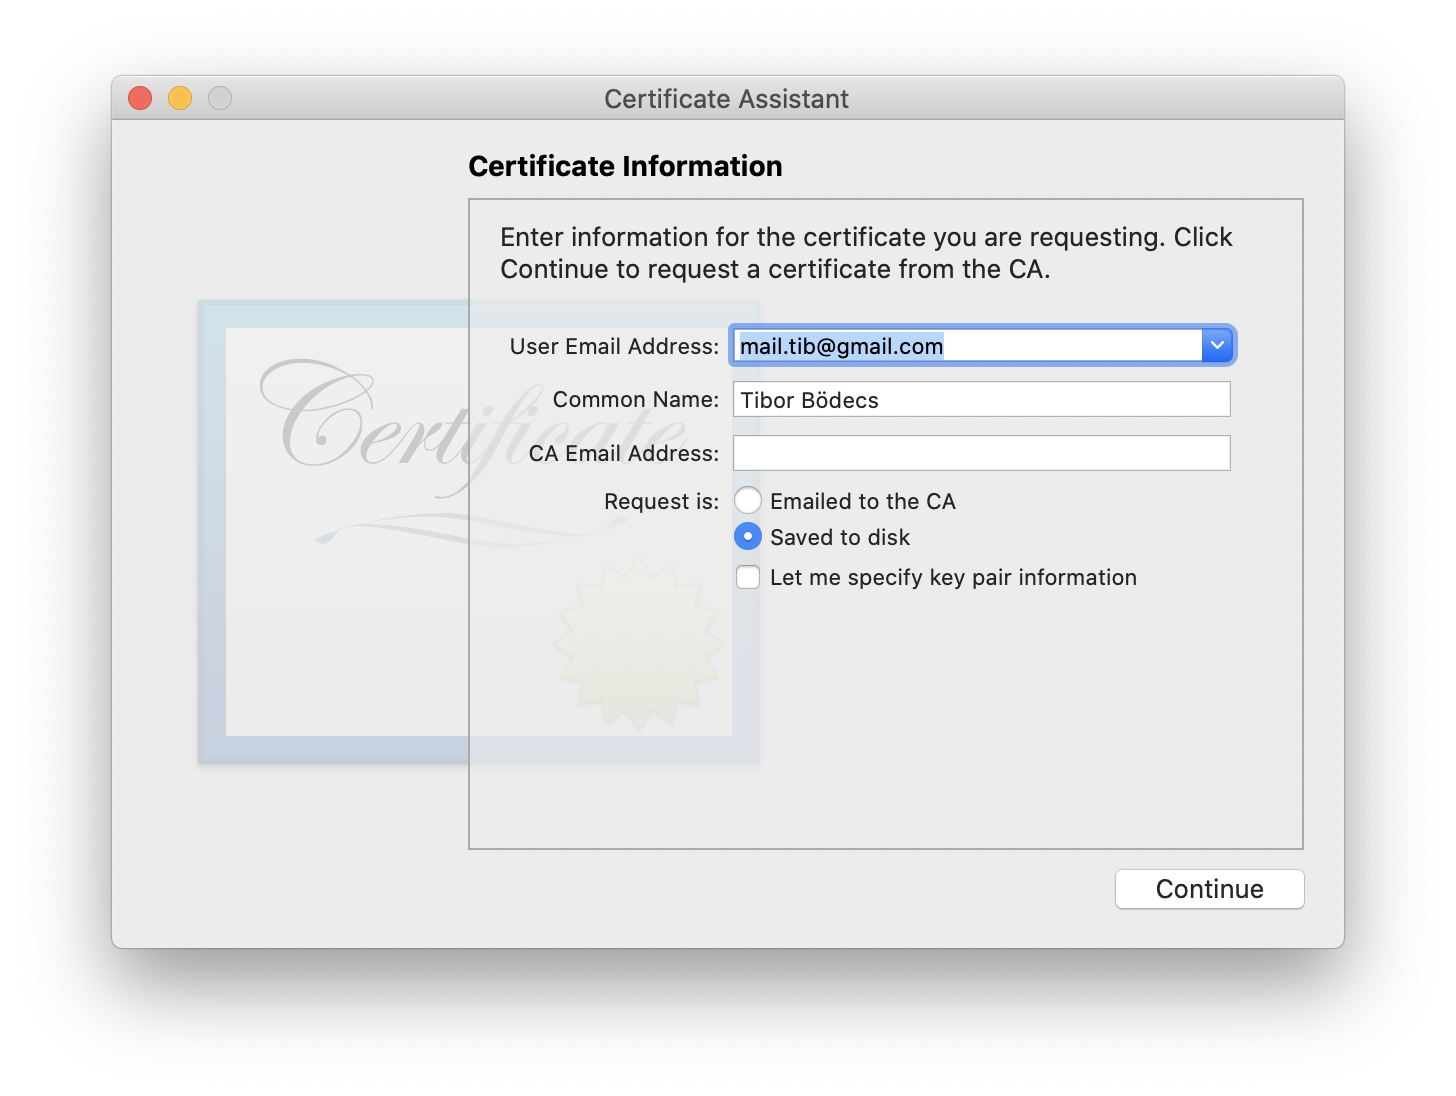
Enter both your email address and your name and select the Saved to disk option. Press the Continue button, and save the CSR file somewhere on the disk. A new public and private keys will be automatically added to the login keychain for the CSR.
Generating a CSR file using the command line
If you go with the command line, you can manually generate the CSR and the key-pair in a .pem file format. You also have to import the keys to the keychain manually.
#generates the private key file
openssl genrsa -out private-key.pem 2048

#generates the CSR file using the private key
openssl req -new -key private-key.pem \
    -out CertificateSigningRequest.certSigningRequest \
    -subj "/[email protected], CN=My Developer Name, C=US"

#extract the public key from the CSR
openssl req -in CertificateSigningRequest.certSigningRequest \
    -noout -pubkey -out public-key.pem

#import the keys to the login keychain
security import private-key.pem -k ~/Library/Keychains/login.keychain-db
security import public-key.pem -k ~/Library/Keychains/login.keychain-db
Now you're ready to get a certificate! 📋
Obtaining a certificate from Apple
Just go to the developer portal (it has a brand new look by the way), and select the certificates menu item in the left sidebar. There is a plus button next to the title, you should press that too and the following screen will appear:
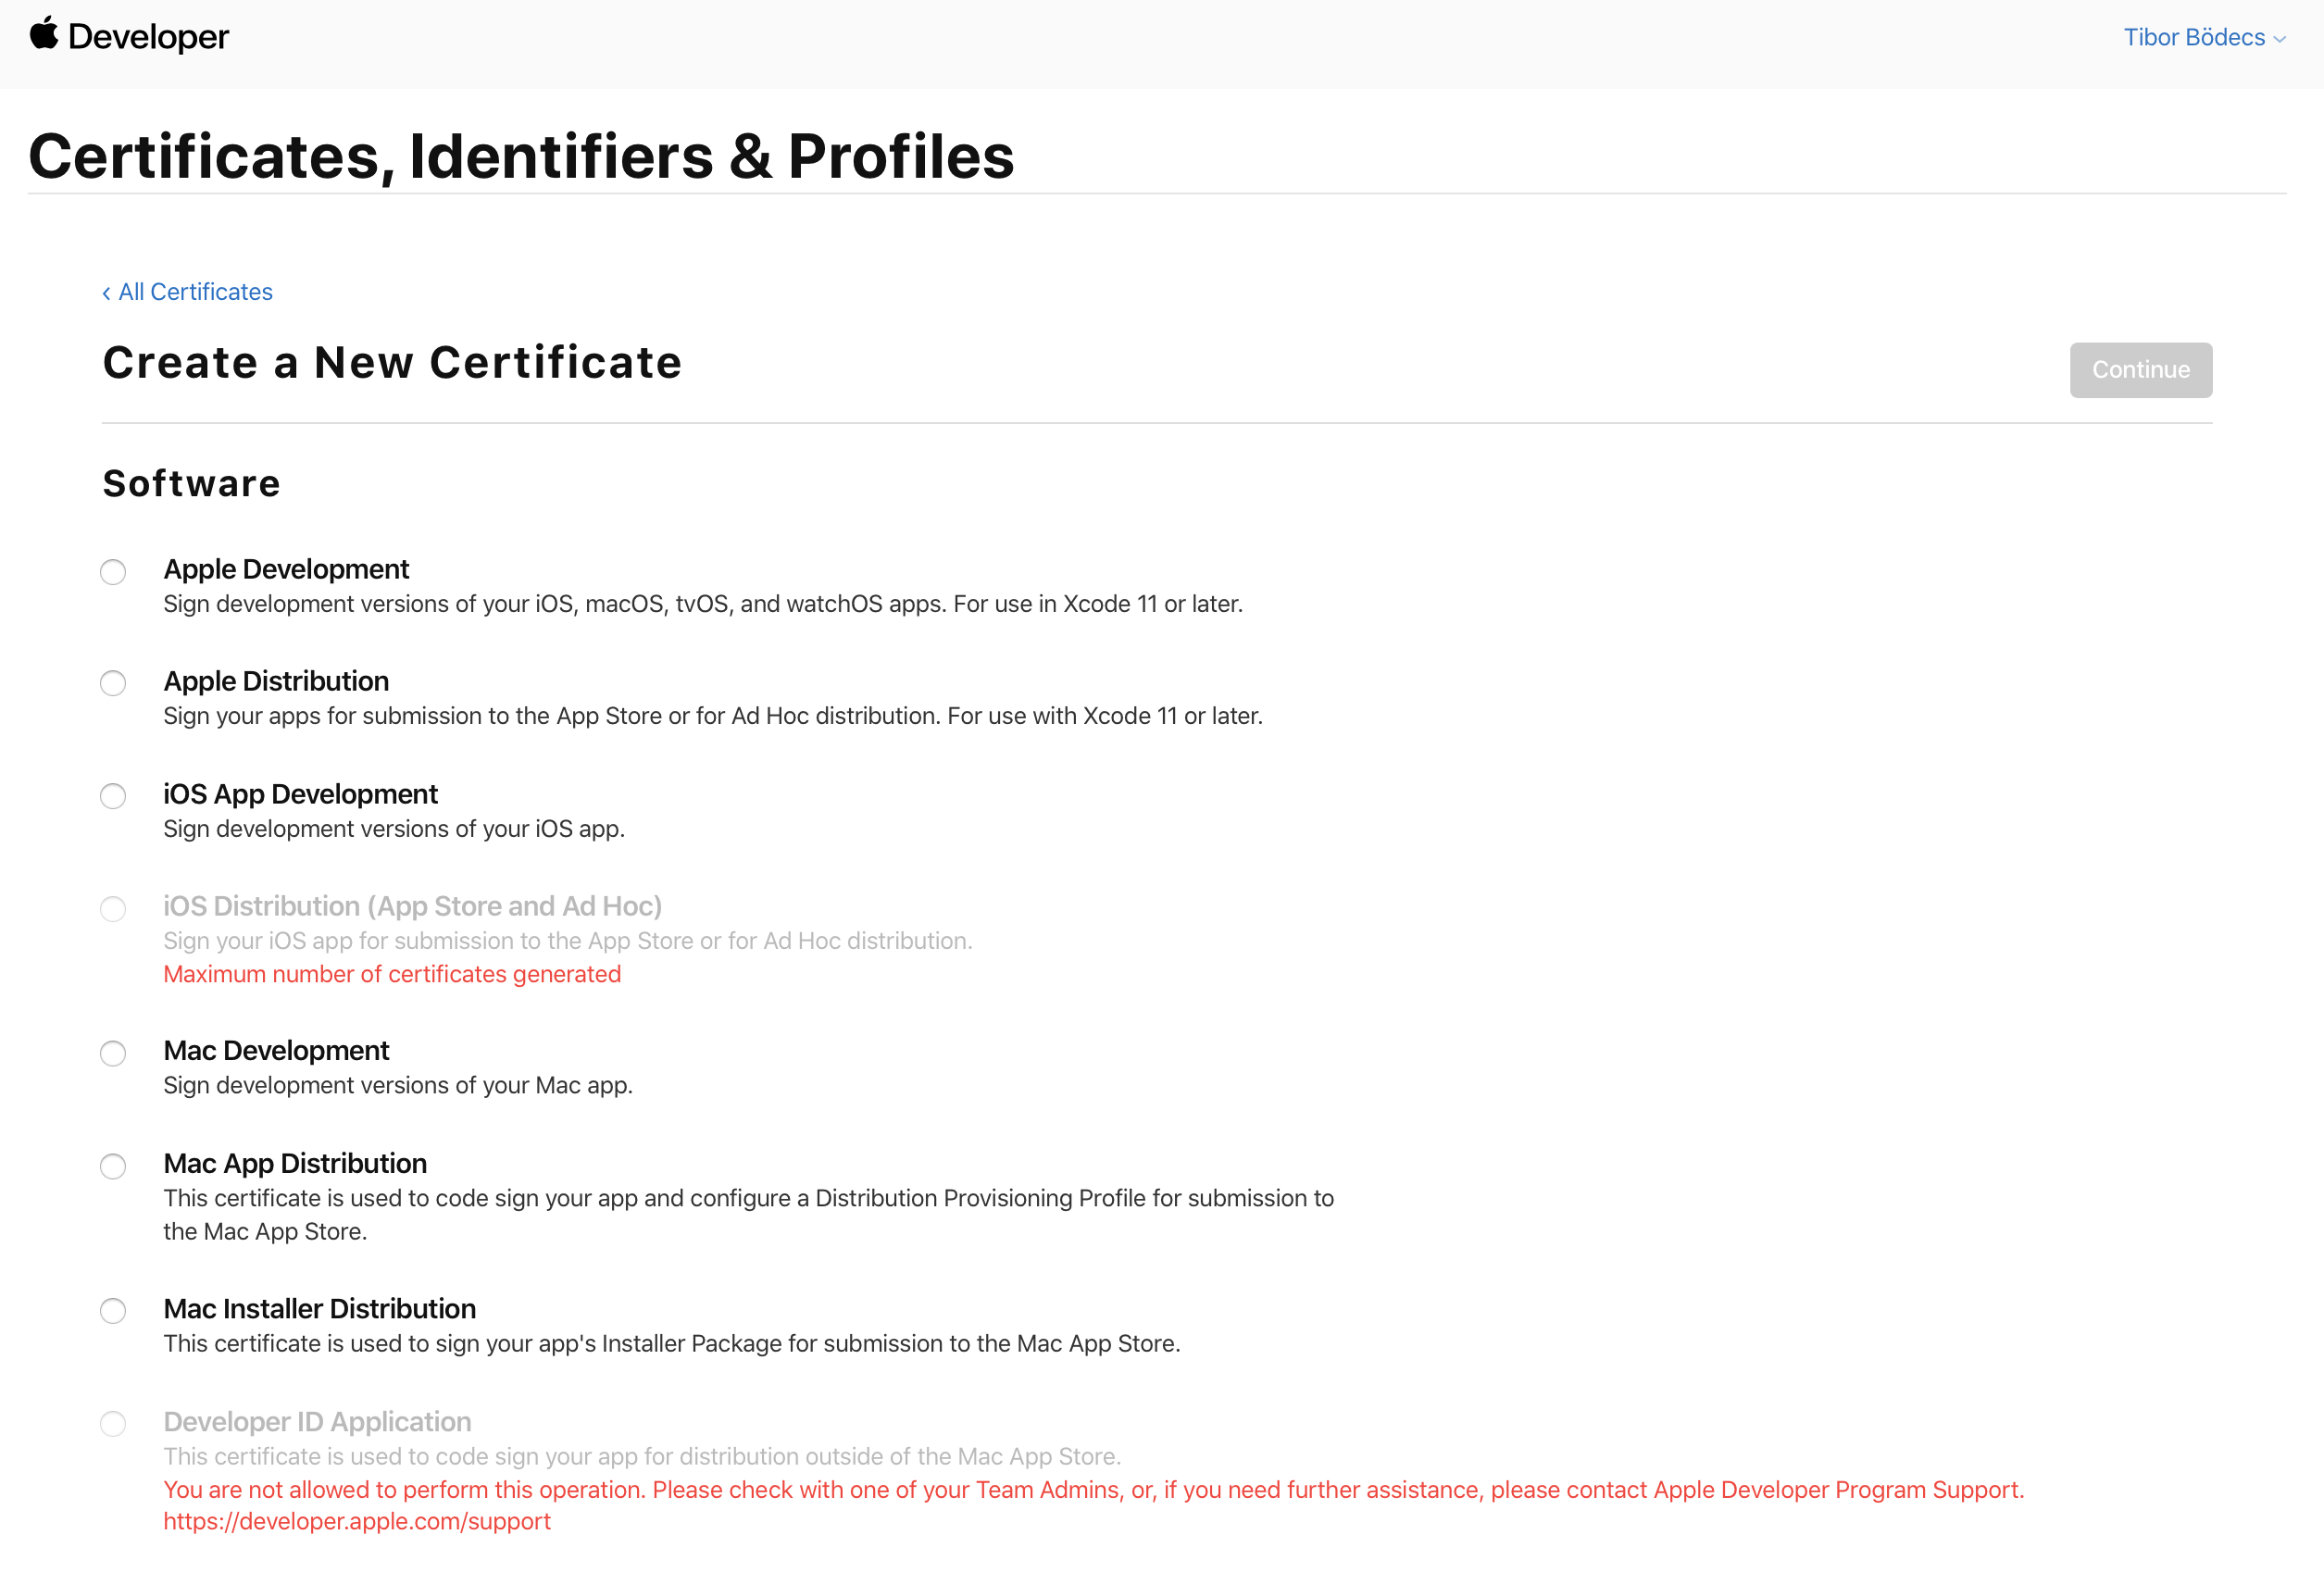
The first two options are also new ones. From Xcode 11 on, you can submit your apps for all the platforms, so a single certificate can do the job for you. For older versions of Xcode, you can go with the iOS / macOS development certificates. You should note that iOS certificates were used both for iOS, tvOS, and watchOS.
You can choose between development and distribution certificates. The last one is for publishing your apps to the App Store, the first one is for code signing development versions. Also, there can be a maximum of two valid distribution certificates at a time per person. Next, you have to upload the CSR file, in order to get a certificate.
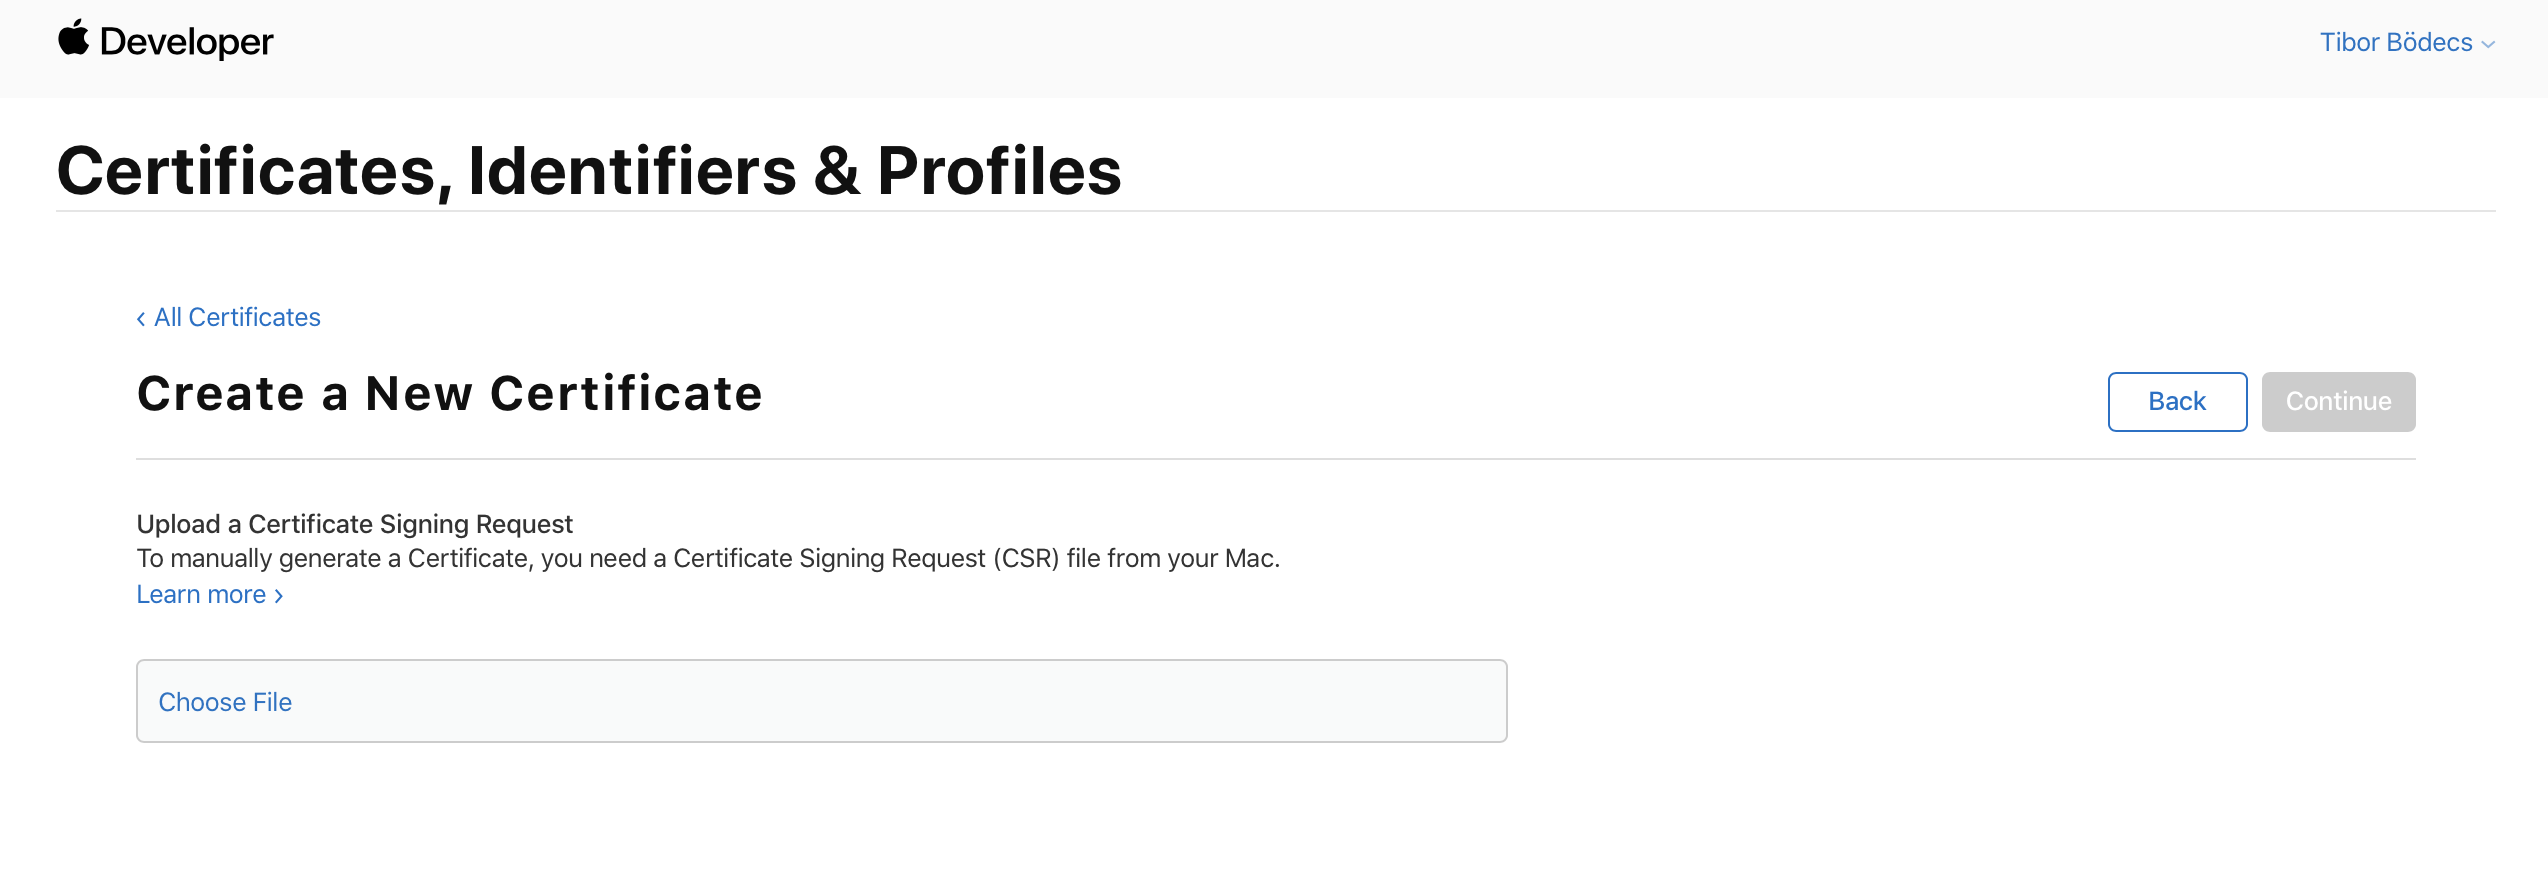
After you press the Continue button, you can download the generated certificate. You should double click the file and add it to your login keychain. If there is a little arrow right next to it on the left side that means there is an associated private key file, and you're ready to use the certificate to sign your applications... or not? 🤔
Creating a provisioning profile
Well, it's not that simple, you still need to get a valid provisioning profile from Apple. As I mentioned in my previous article, provisioning plays a key role in the code signing process. Fortunately, everything can be done through the dev portal.
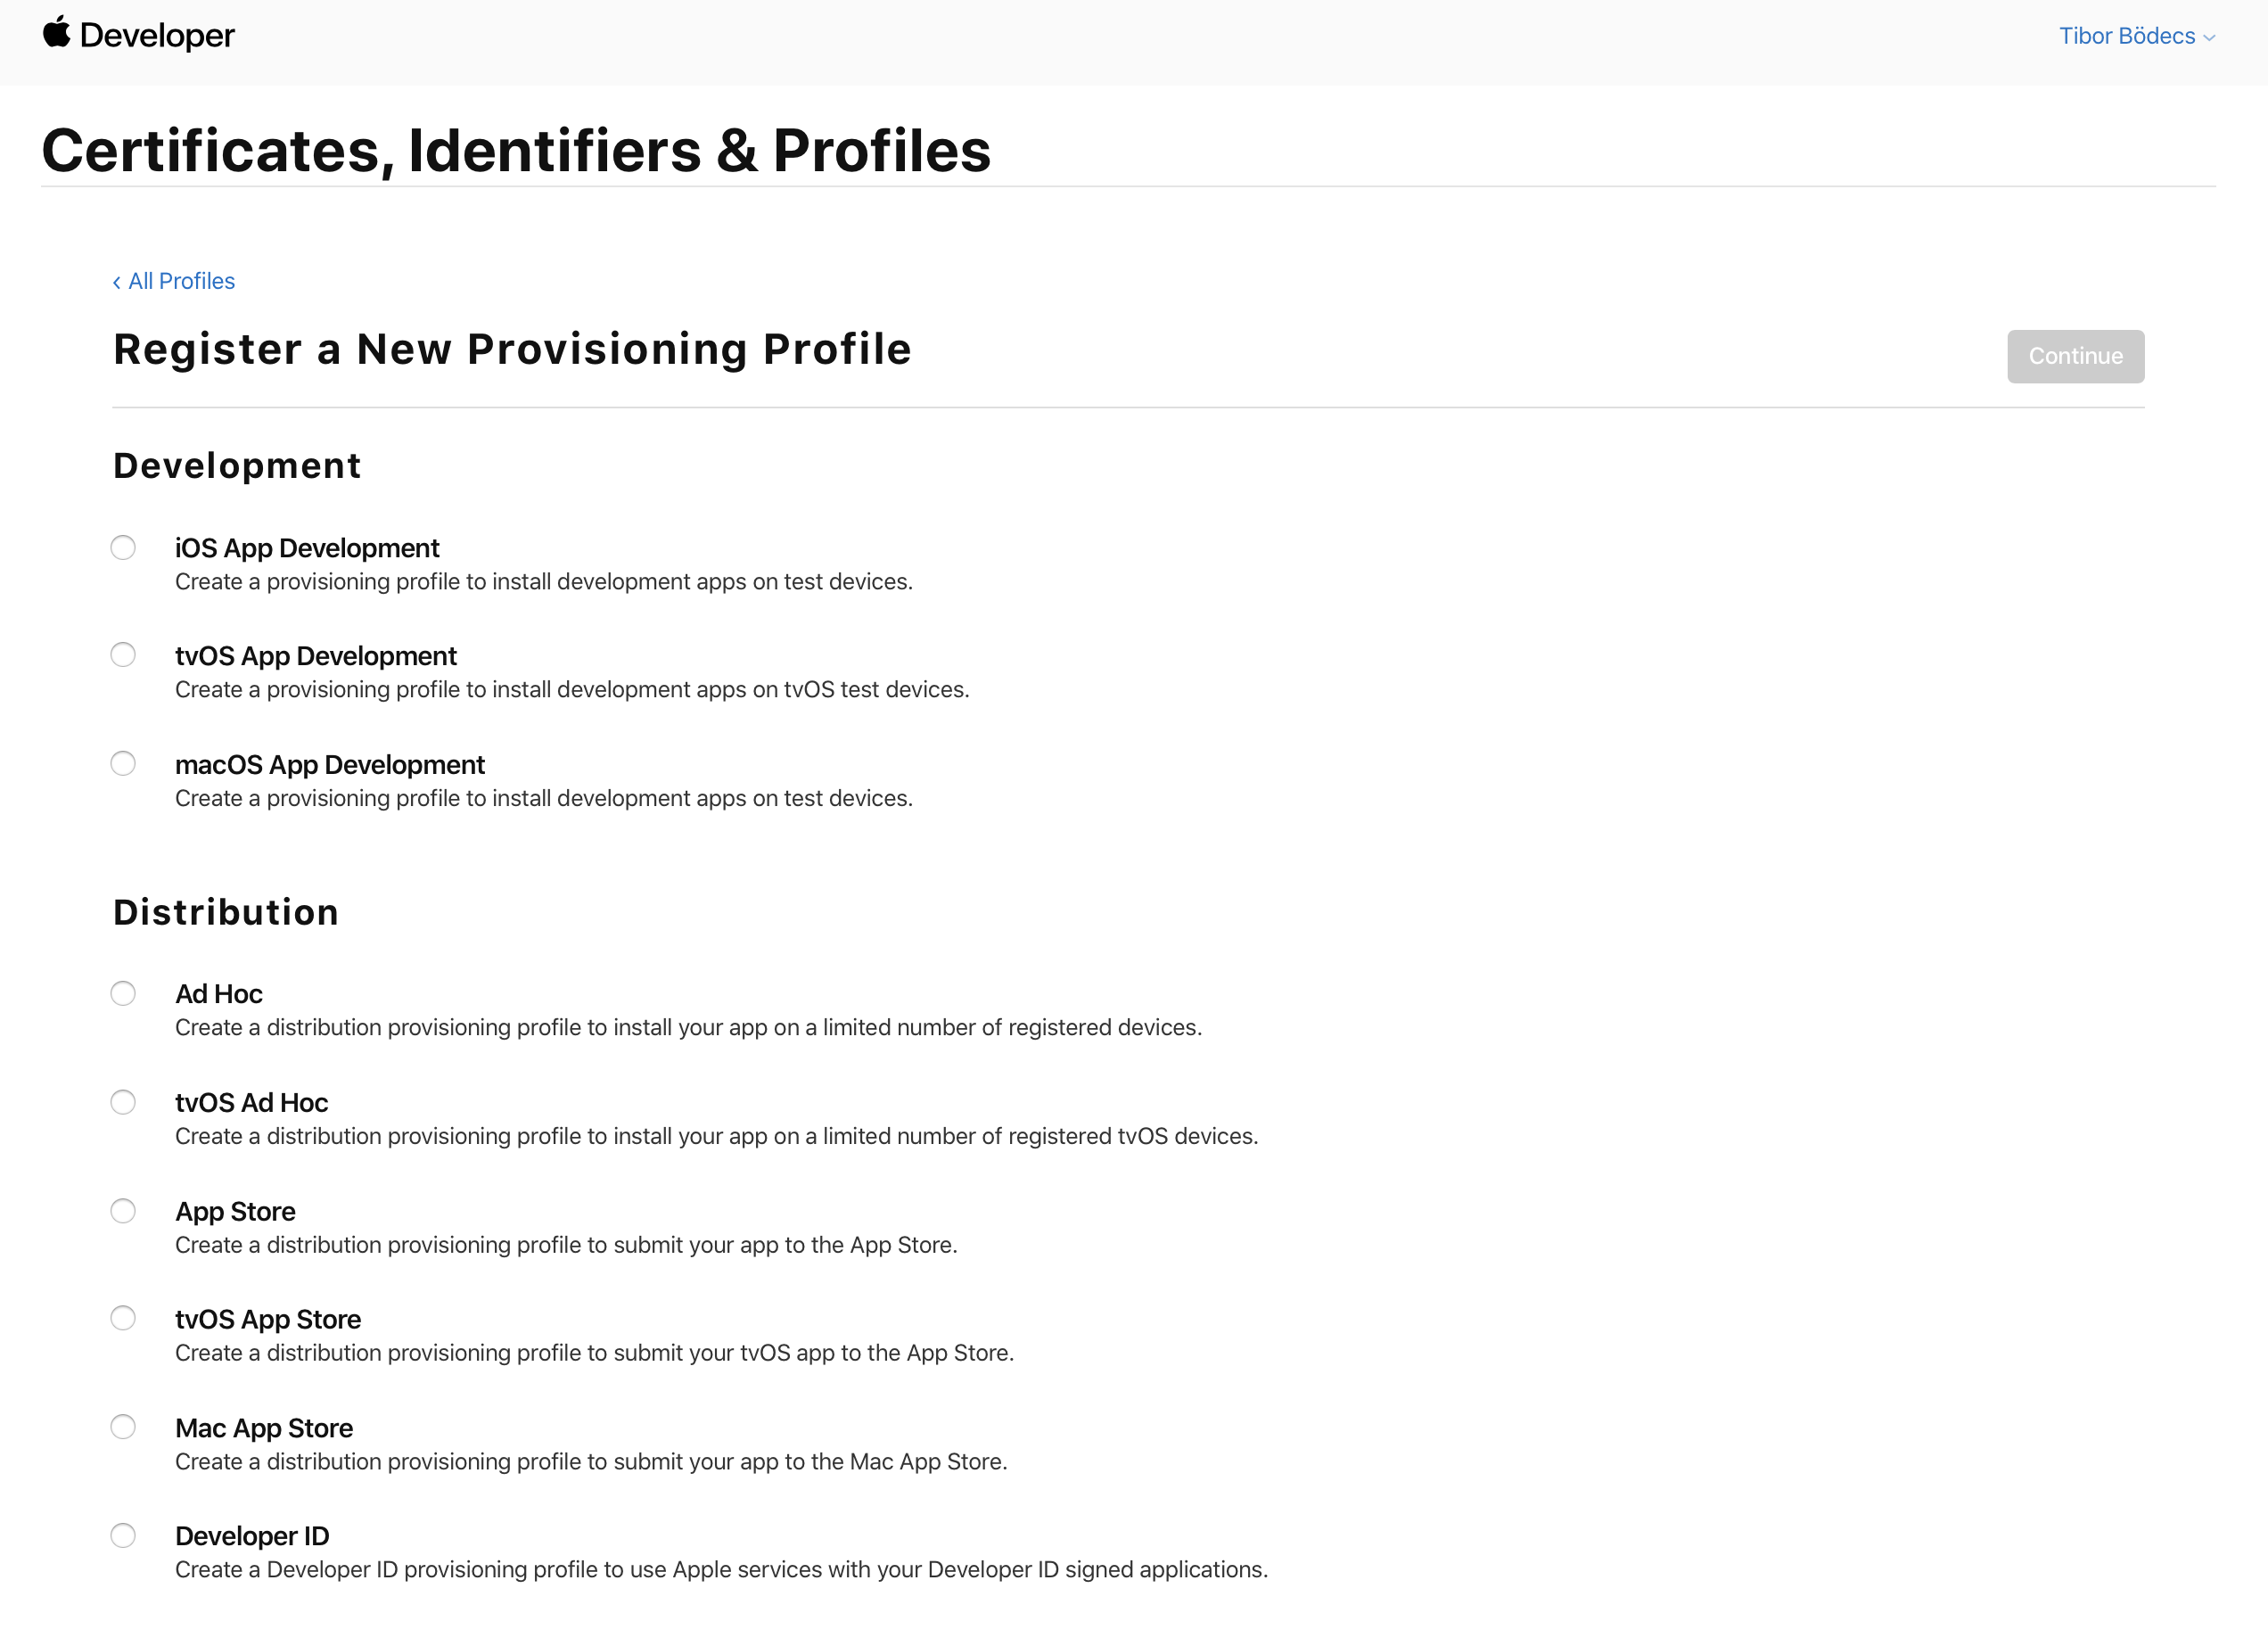
First, you have to select the type of your provisioning profile. I already explained these types, please read my article about provisioning if you want to know more about it.
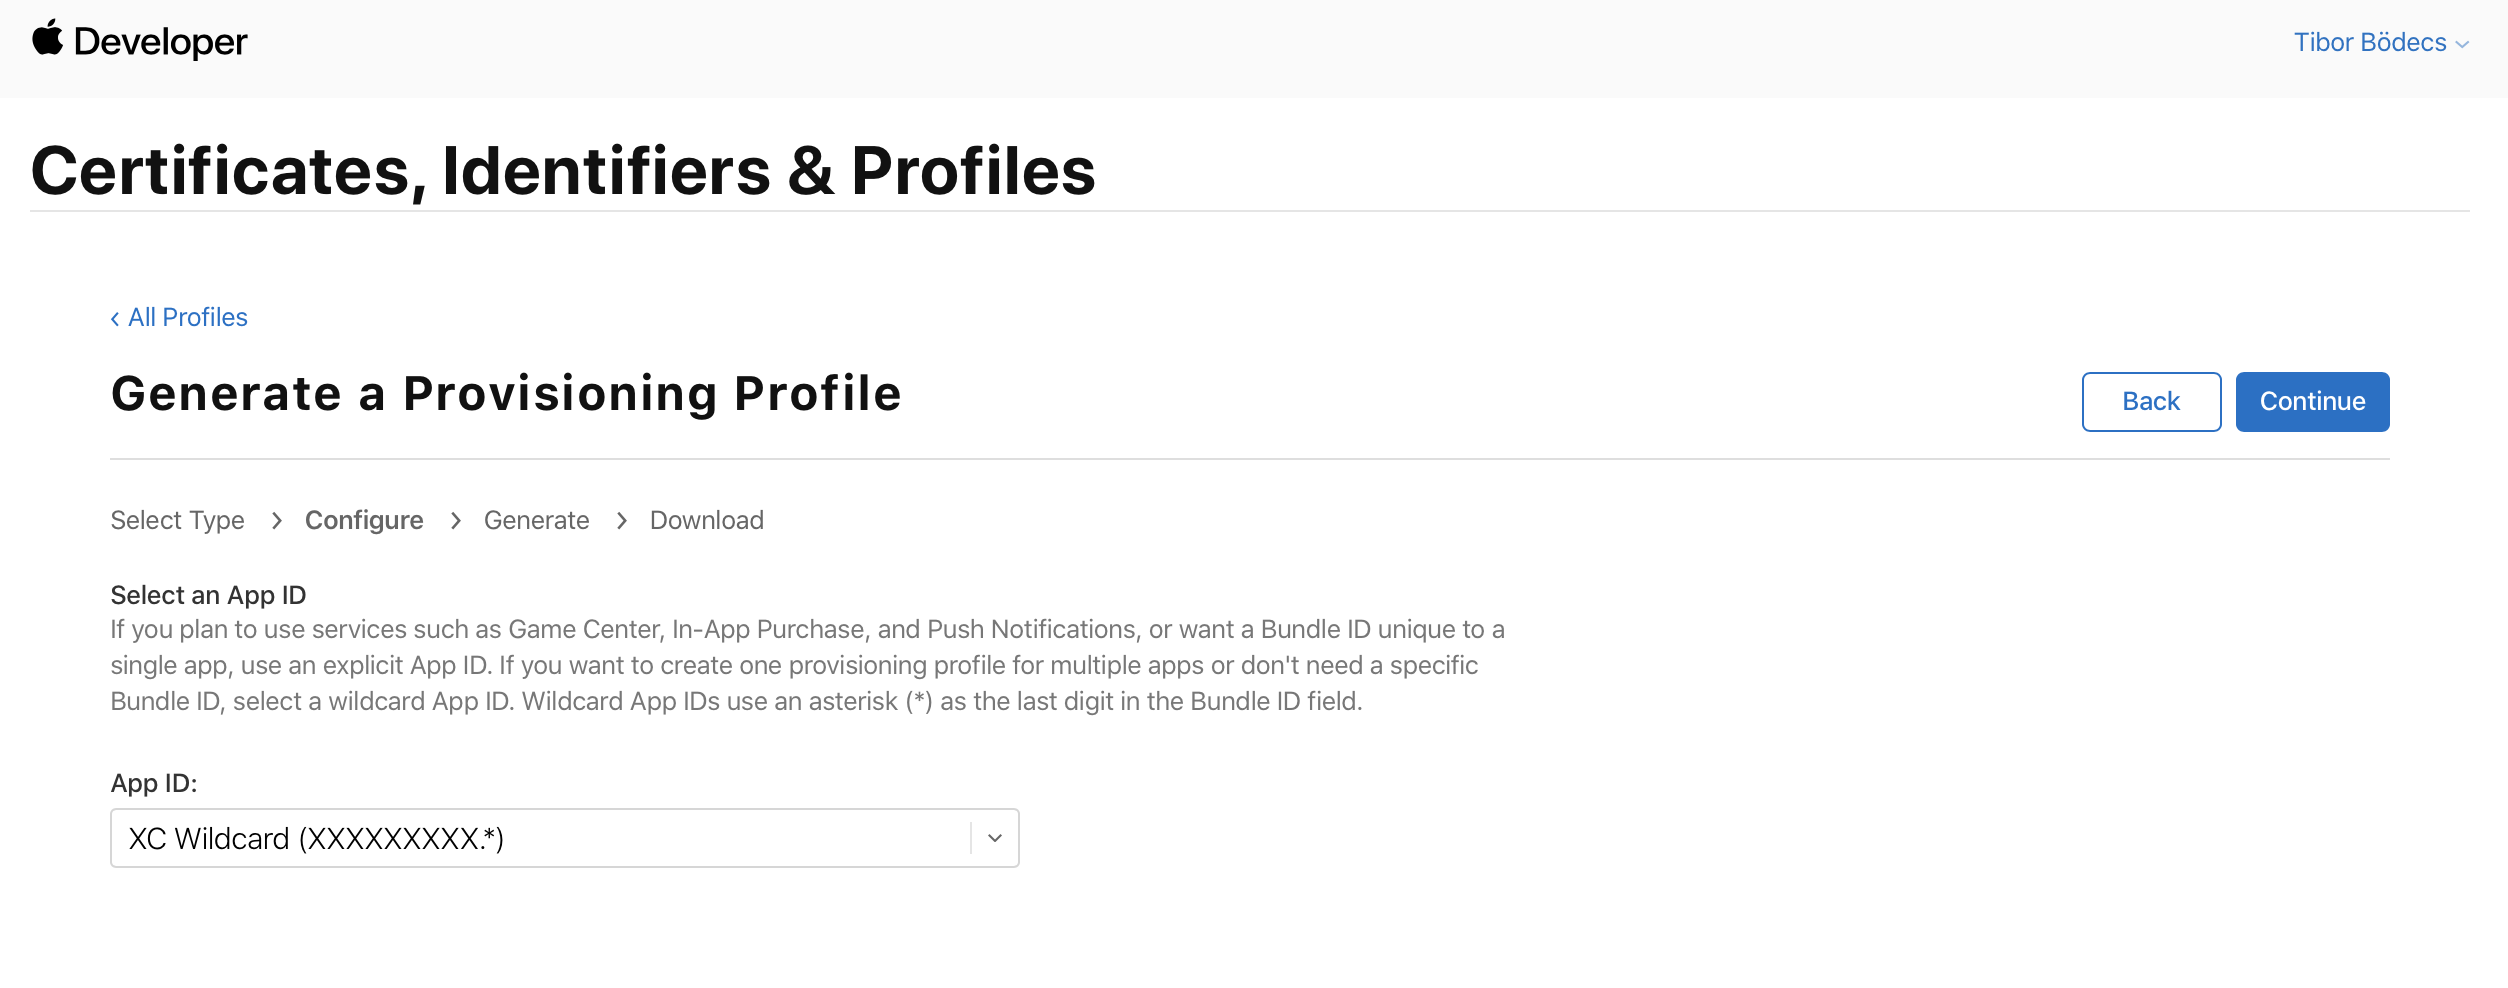
As a second step, you have to select the application that you're going to make a provisioning profile for. If you don't have an application identifier, you can register one by using the Identifiers menu item. It's really straightforward.
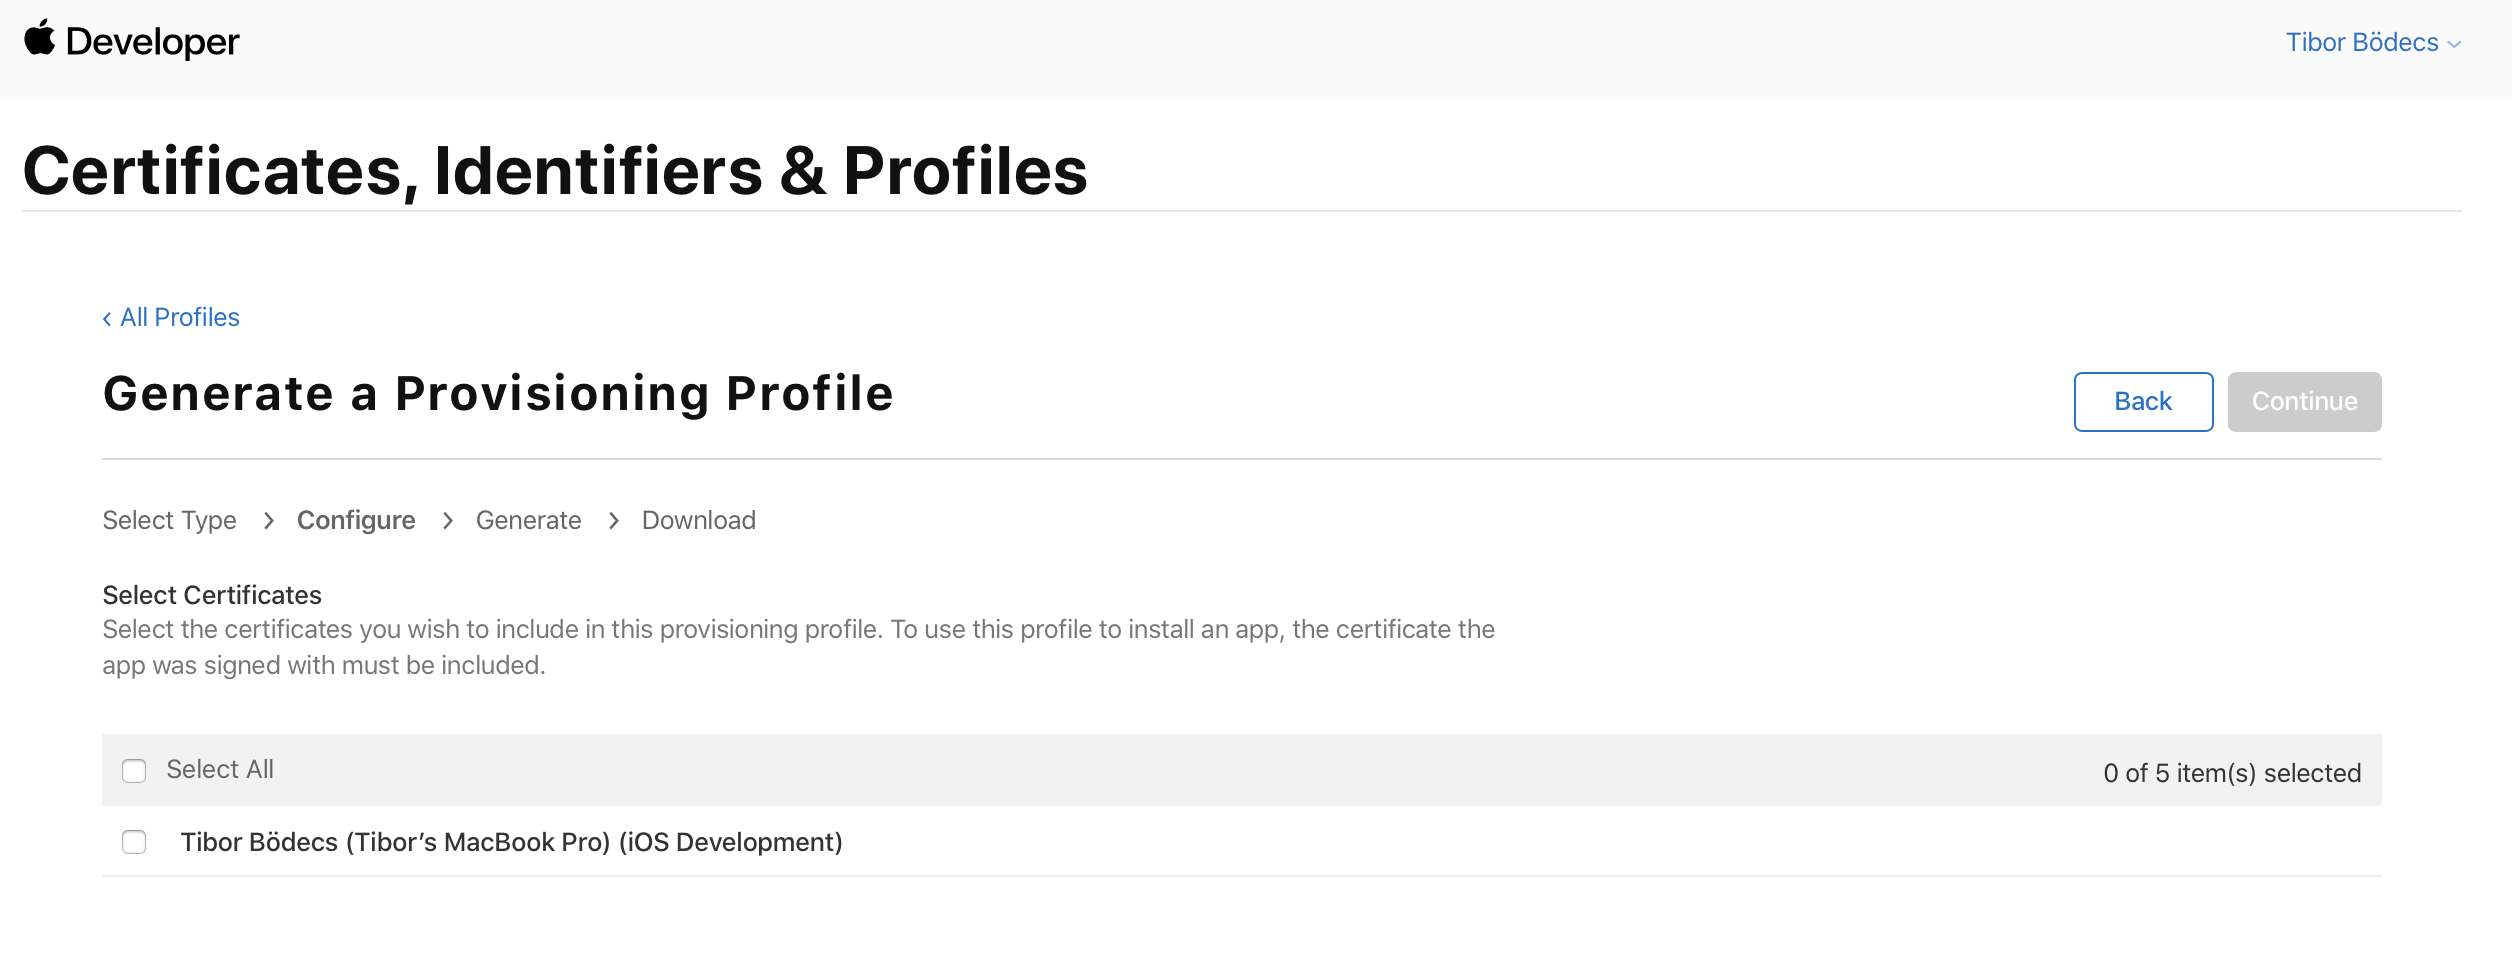
On the next screen, you have to select the certificate that you'd like to use during the code signing process with the provisioning profile.
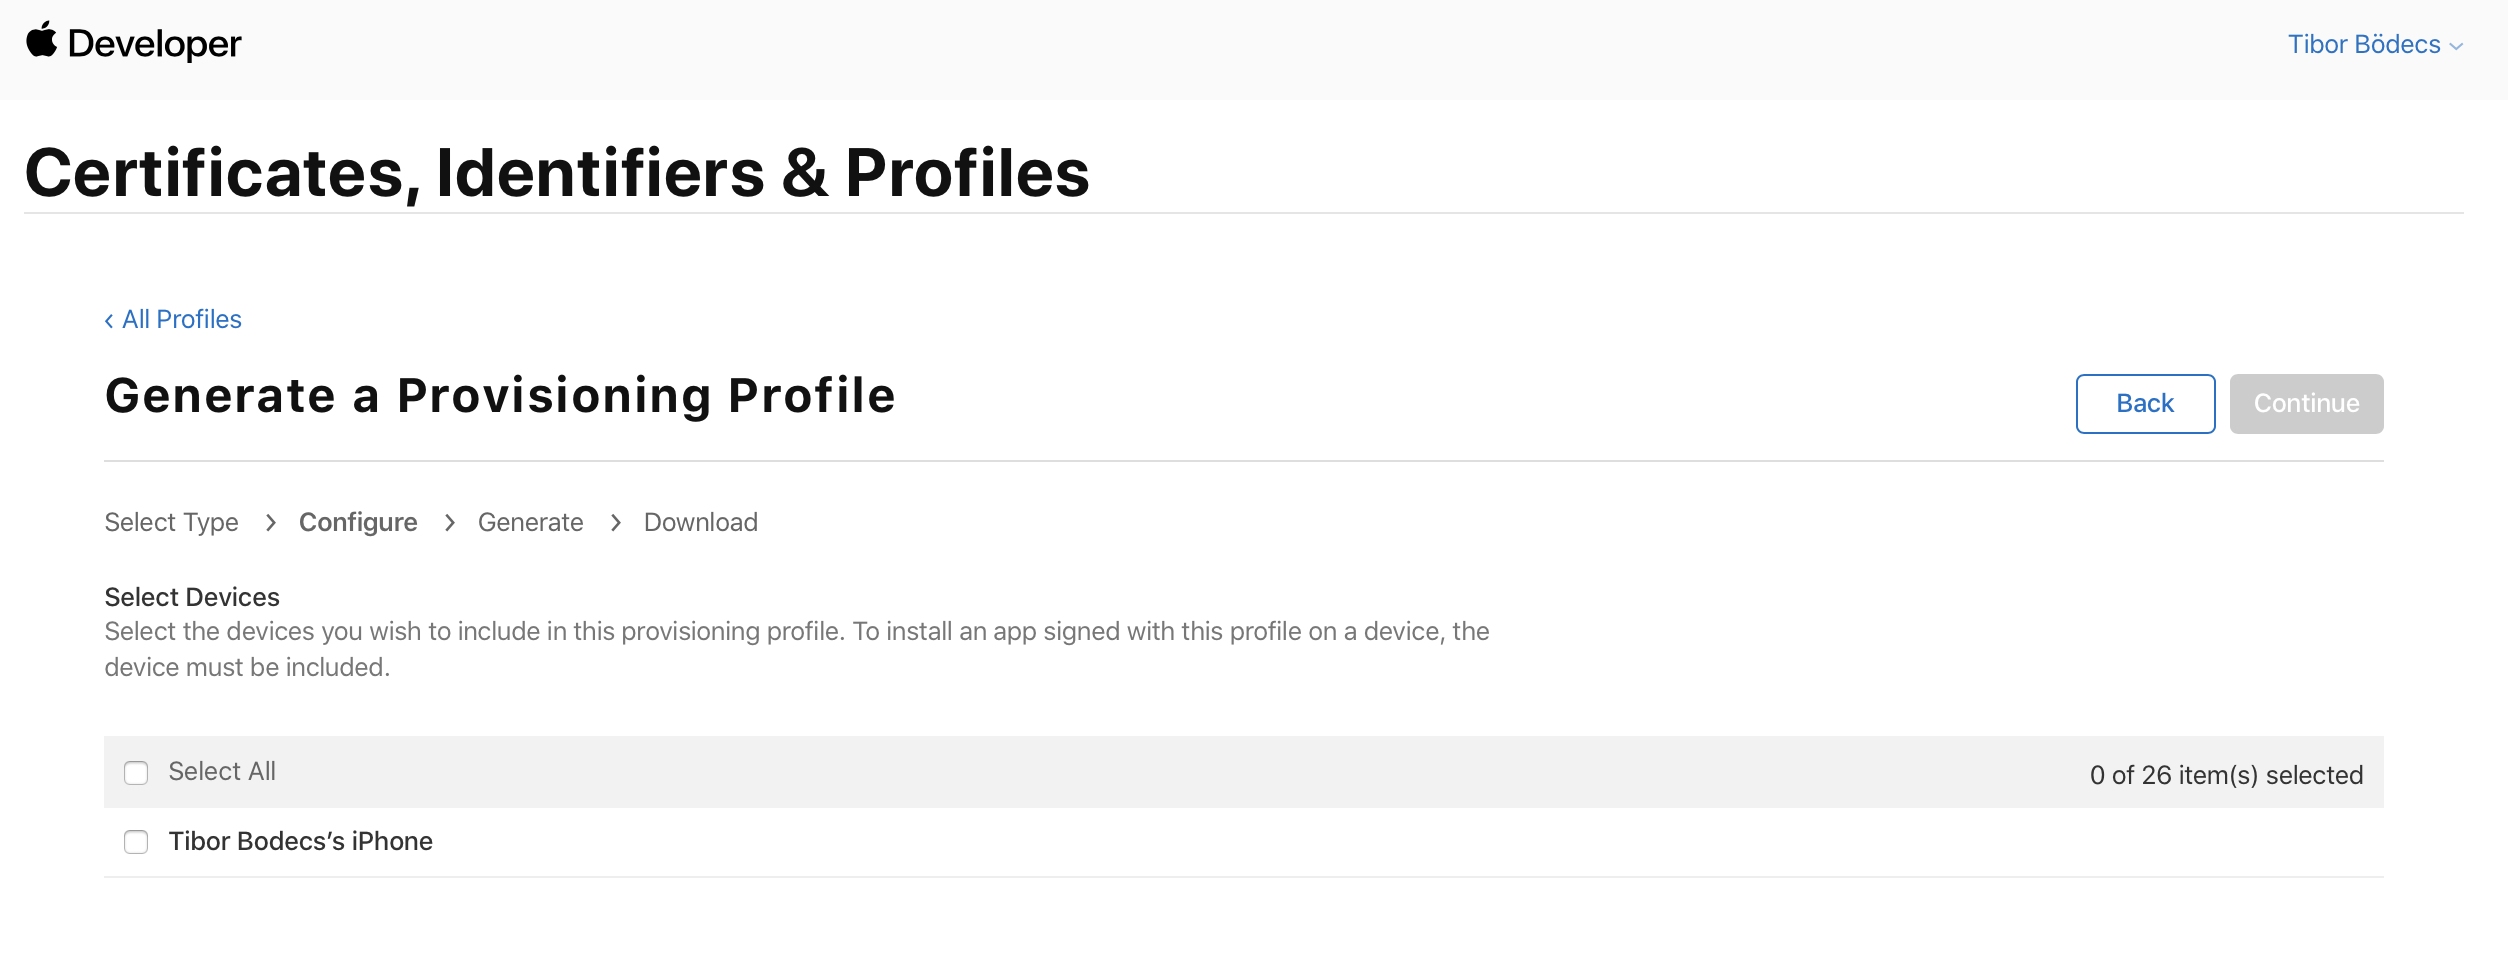
As you might already know, developer profiles have associated device identifiers, so if you have registered test devices in the developer portal, here you can associate them with the given profile. You can't install the app on the physical device if the UUID is not included in the profile, so it's worth to double check them. This can be quite problematic sometimes.

Finally, you'll see an overview of your profile. You have to name your profile, and if you press the Generate button, you can download it through your browser. That's it.
After you have downloaded both your signing certificate and provisioning profile, you should double click both. The certificate needs to be imported to the login keychain, and the provisioning profile has to be stored under a given location, so Xcode can use it during the code signing process.
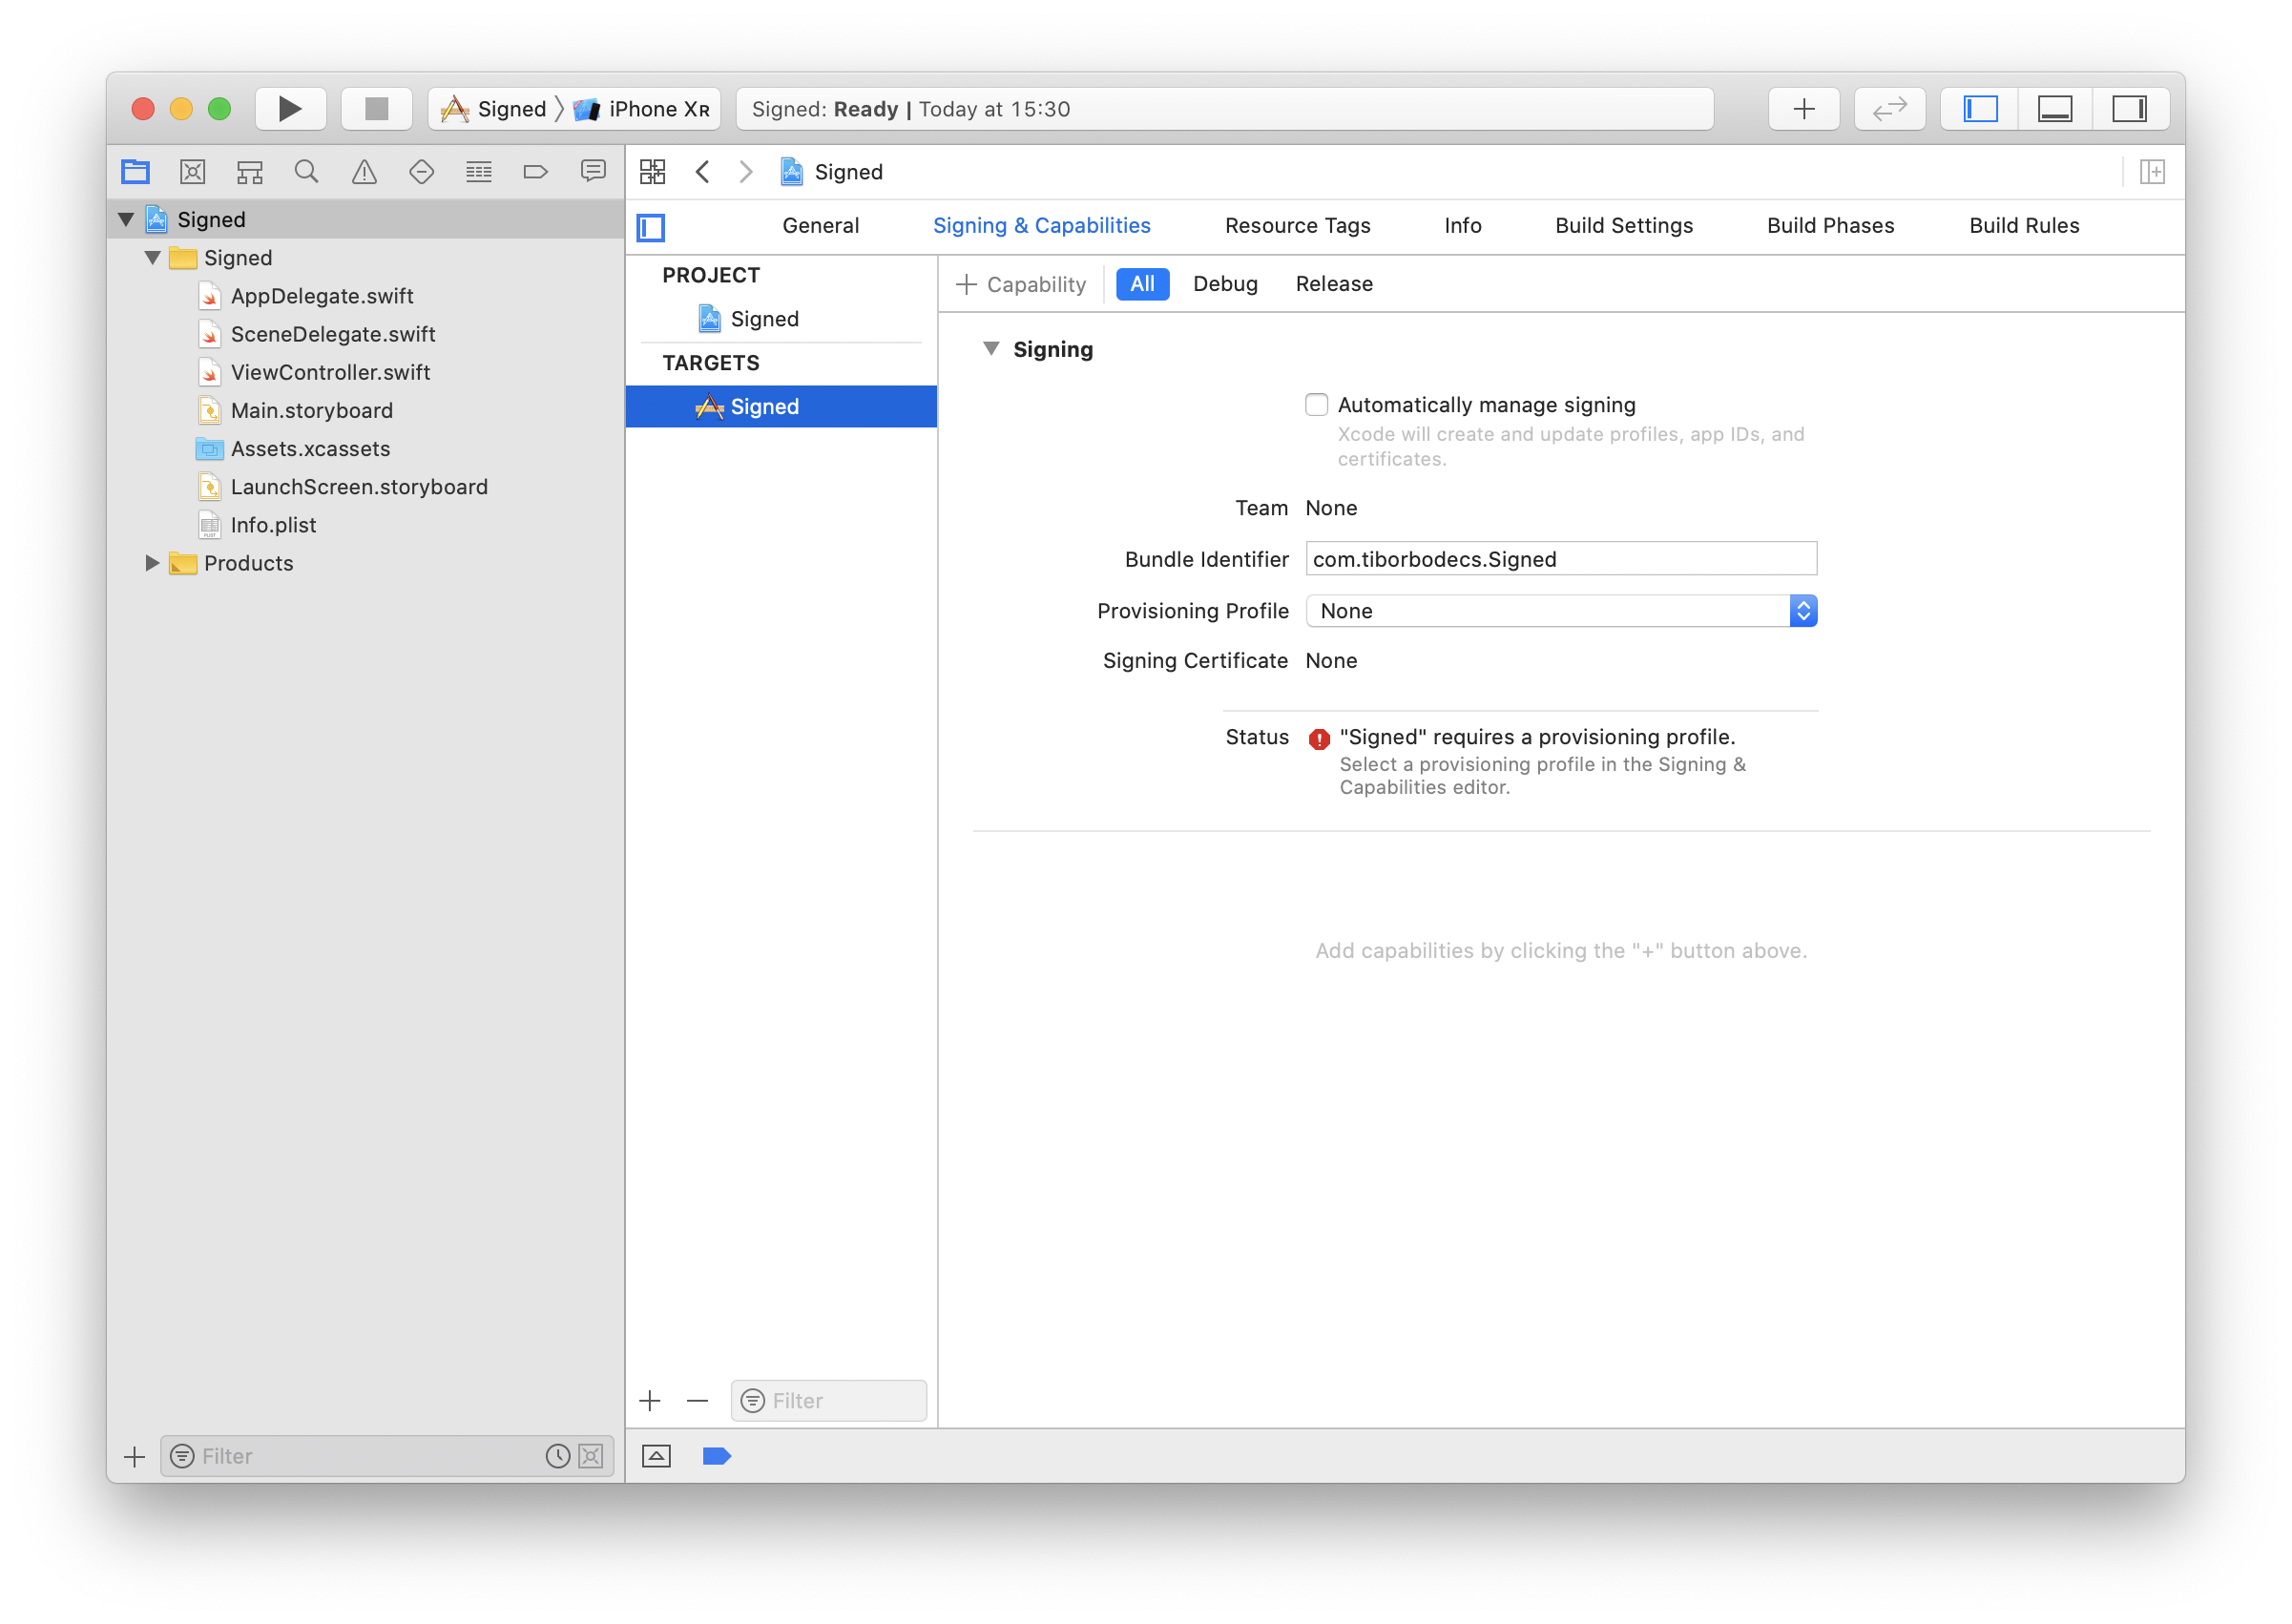
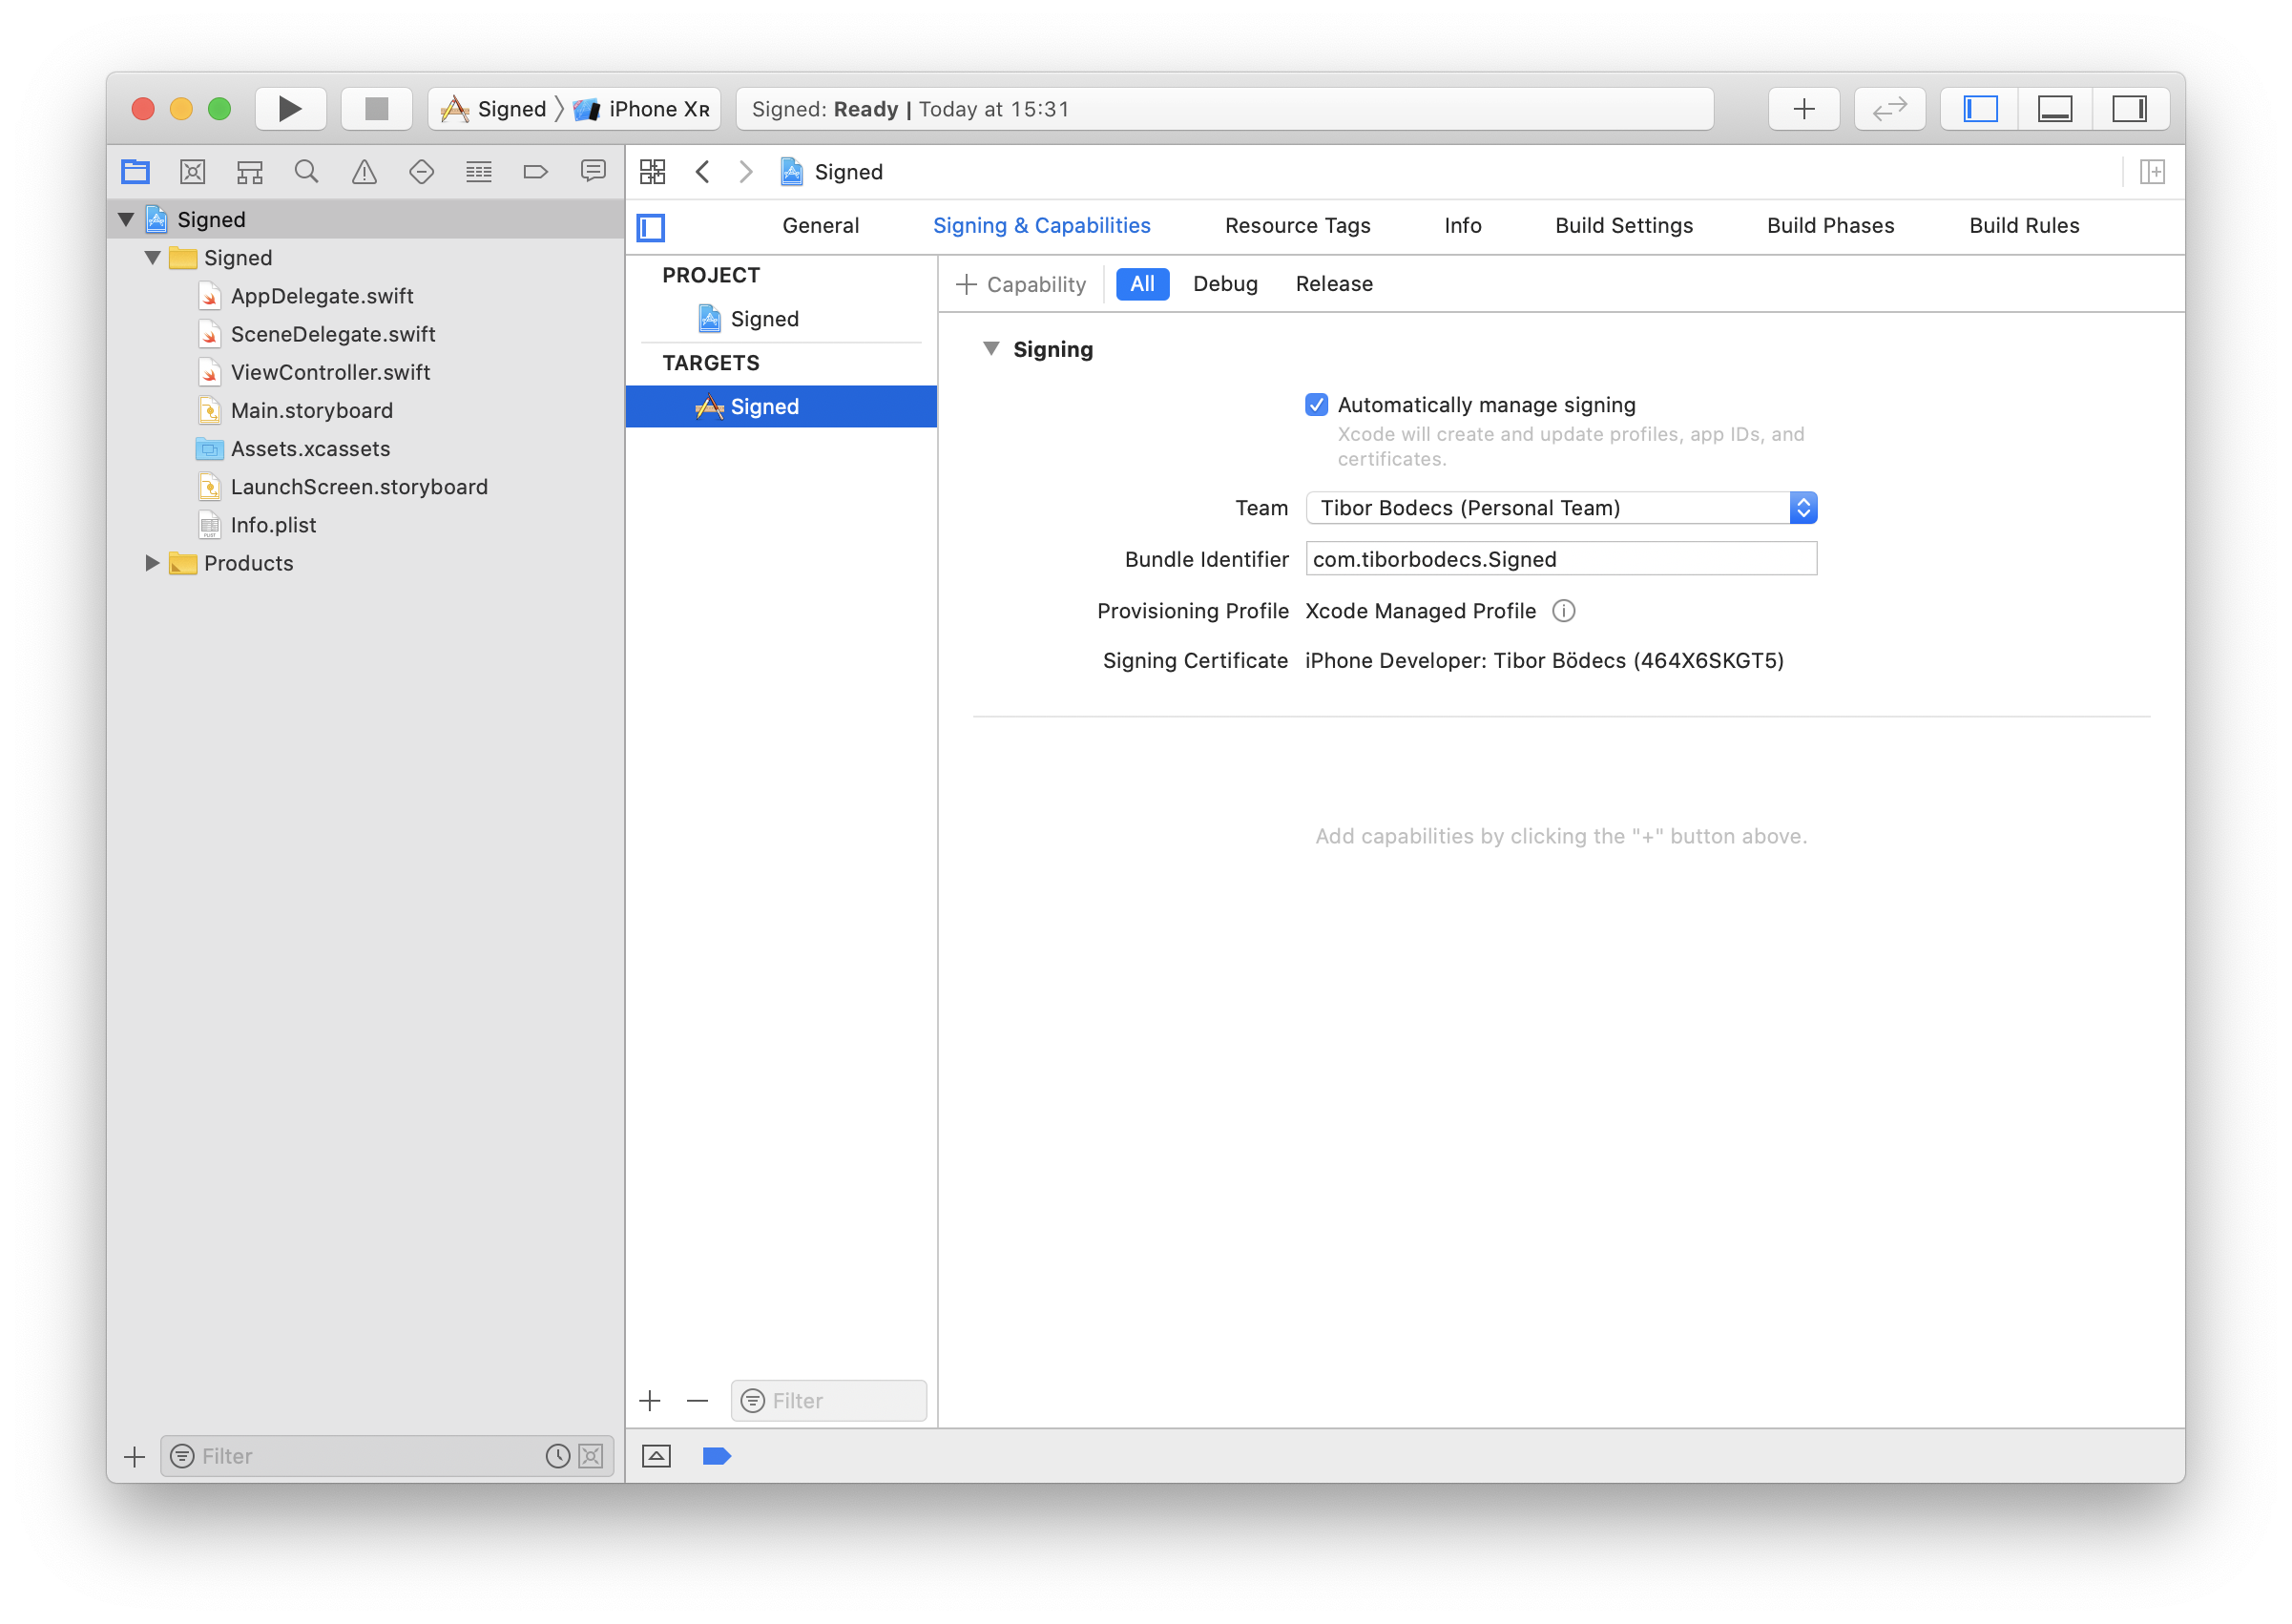
Now if you open Xcode and go to the Signing & Capabilities tab (it's under the General before Xcode 11), you can check or uncheck the Automatically manage signing checkbox. You have to select a valid provisioning profile from the drop-down menu item. If you did everything right, Xcode should be able to see both the profile and the associated certificate. This means that all the red error indicators should be gone and you should be able to build and sign your app on your physical test device. 🙏
Automation: Xcode, Bitrise and codesigndoc
Automatic code signing is a piece of cake. Let me show you what needs to be done in order to enable this powerful feature in Xcode first.
Automatic code signing using Xcode
The whole manual signing thing I just showed you is the past. Nowadays you can simply use Xcode to manage all the certificates and profiles for you. You just have to connect your developer account under the settings menu.

After entering your valid developer credentials, Xcode can create and download everything for you that's required to properly sign an app. However, sometimes there can be some issues, and there are some actions that you still have to do manually like creating a Push notification certificate, but it's really helpful to forget about the rest, if you just want to try out your app on a real device.
Oh and don't forget that you should check the Automatically manage signing checkbox & you have to select the developer team that you'd like to use for the signing process.
That's it, no more manual CSR, certificate or provisioning creation. 💫
Bitrise & codesigndoc
There are two ways (steps) to sign your app by using Bitrise:
- Certificate and profile installer step (manual)
- iOS Auto Provision (automatic)
If you go with the first one, you have to upload your certificate with the key-pair and the provisioning profile to Bitrise. Under the workflow editor there is a dedicated tab for this specific reason, it's called: Code Signing. 😅
Using codesigndoc to upload code signing files to Bitrise
Fortunately, Bitrise made an amazing open source tool called codesigndoc, that can help you with the whole upload procedure. You just have to run one line of code in your terminal window & codesigndoc will take care of the rest. If you set up your Bitrise credentials, you don't even have to upload the exported code signing files manually, codesigndoc can make that happen for you too.
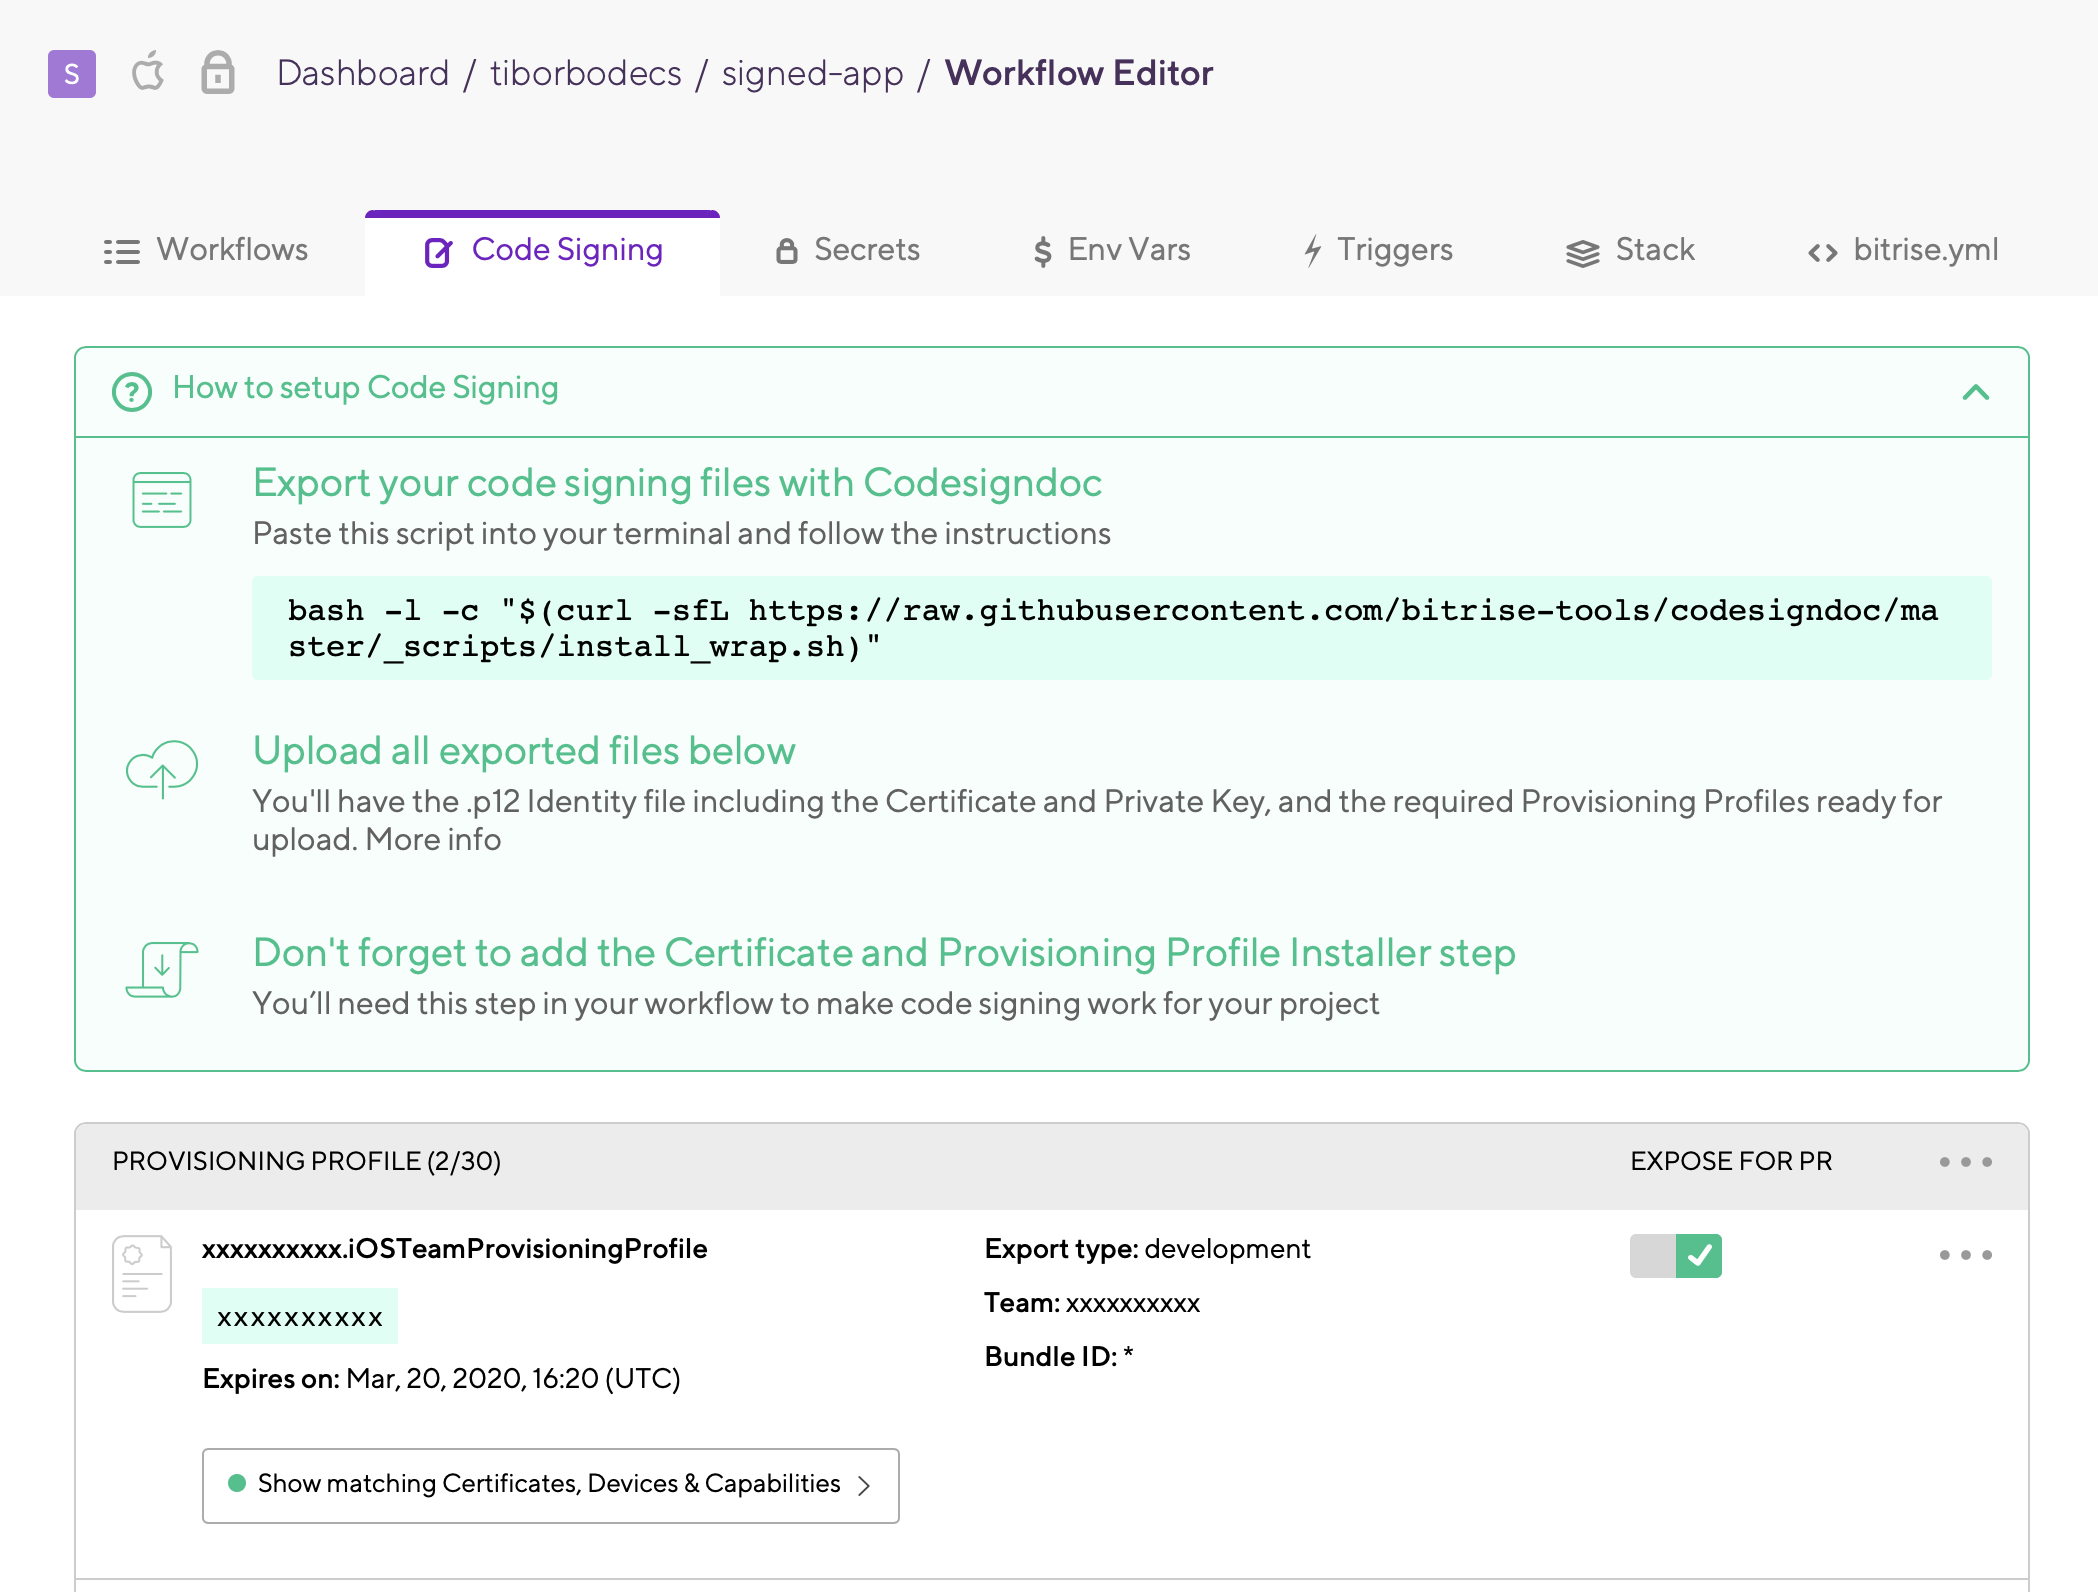
This is what the code signing tab looks like, there is a dedicated section for provisioning profiles, one for the certificates. There is even a safe generic file storage that can be used during the code signing process if you have some really specific needs. Honestly speaking, I've never used that before. 🤷♂️
Automatic vs manual provisioning on Bitrise
My recommendation is that you should simply go with the iOS Auto Provision step.
Don't waste your time on the export and the unnecessary file upload. Auto provisioning is easy, because you just have to enter a few configuration properties and connect a developer account. I usually set the Distribution type to development, enter The Developer Portal team id and lastly set the Should the step try to generate Provisioning Profiles even if Xcode managed signing is enabled in the Xcode project? option to yes.
In most cases, this method works.
Just codesign or should I re-sign?
One more thing: there is a standalone codesign command line tool.
With the help of the codesign command you can check the status of an application, or even better, you can sign or re-sign the executable. The codesign command can also give you information about the signing status, which can be extremely helpful if things go wrong. You can always check the manual of the codesign tool, and if you'd like to get some info about your apps code signature you can simply enter this command:
# check signing information
codesign -vv -d Example.app
# verify the app signature, no output is good output
codesign --verify Example.app

# signing
codesign -s 'Certificate name' Example.app
# re-signing
codesign -f -s 'Certificate name' Example.app
I would not recommend using this tool for signing apps, because there is another great tool called XReSign with a proper user interface that can be used to re-sign your apps. If you really need to go this way, it's better to use XReSign, because it can auto-update the underlying entitlements file based on the given provisioning. It also has a command line interface, so all in all, it's more convenient to use. 😉
Conclusion
Code signing is definitely difficult to understand & work with, but there are lots of great tools that can make your life easier. The process nowadays is way easier than it was a couple of years ago, thanks to Xcode and the automatic code signing option.
If you use Bitrise to automate your builds, you should always use codesigndoc or the iOS Auto Provision step if you want to avoid the struggle. They can save you a lot of time, especially if your certs and provisioning profiles change a lot. 👍
Apple just made some amazing little changes, like the new combined certificate for all the platforms, redesigning the UI for the developer account or the dedicated tab in Xcode 11 for managing code signing and capabilities.
I really hope that this article will help you understand the entire process better. 😊


.jpg)
