
Mobile UI testing is always challenging: we always have new UI components and elements that require new testing tools or solutions to be able to write valuable UI tests for these features in our mobile apps. One of the these components is Android Jetpack Compose. It’s Android’s modern toolkit for building native UI.
What is Android Jetpack?
Jetpack is a suite of libraries to help developers follow best practices, reduce boilerplate code, and write code that works consistently across Android versions and devices so that developers can focus on the code itself.
Source: Build better apps faster with Jetpack Compose.
What is Jetpack Compose?
Jetpack Compose is Android’s modern toolkit for building native UI. It simplifies and accelerates UI development on Android. It helps you quickly bring your app to life with less code, powerful tools, and intuitive Kotlin APIs.
Source: Android Jetpack.
Setup Jetpack Compose
To have the best experience when developing with Jetpack Compose, you should download Android Studio Arctic Fox. That’s because when you use Android Studio to develop your app with Jetpack Compose, you can benefit from smart editor features, such as New Project templates and the ability to immediately preview your Compose UI.
There are two options to start with Jetpack Compose with Android Studio:
1. Create a New Project with the support of Jetpack Compose: Android Studio includes new project templates to help you get started. To create a new project that includes Jetpack Compose, proceed as follows:
2. Trying Jetpack Compose sample apps hosted on GitHub: by importing a sample app project from Android Studio, proceed as follows:
Open Android Studio, click on the more options button and select Import an Android Code Sample
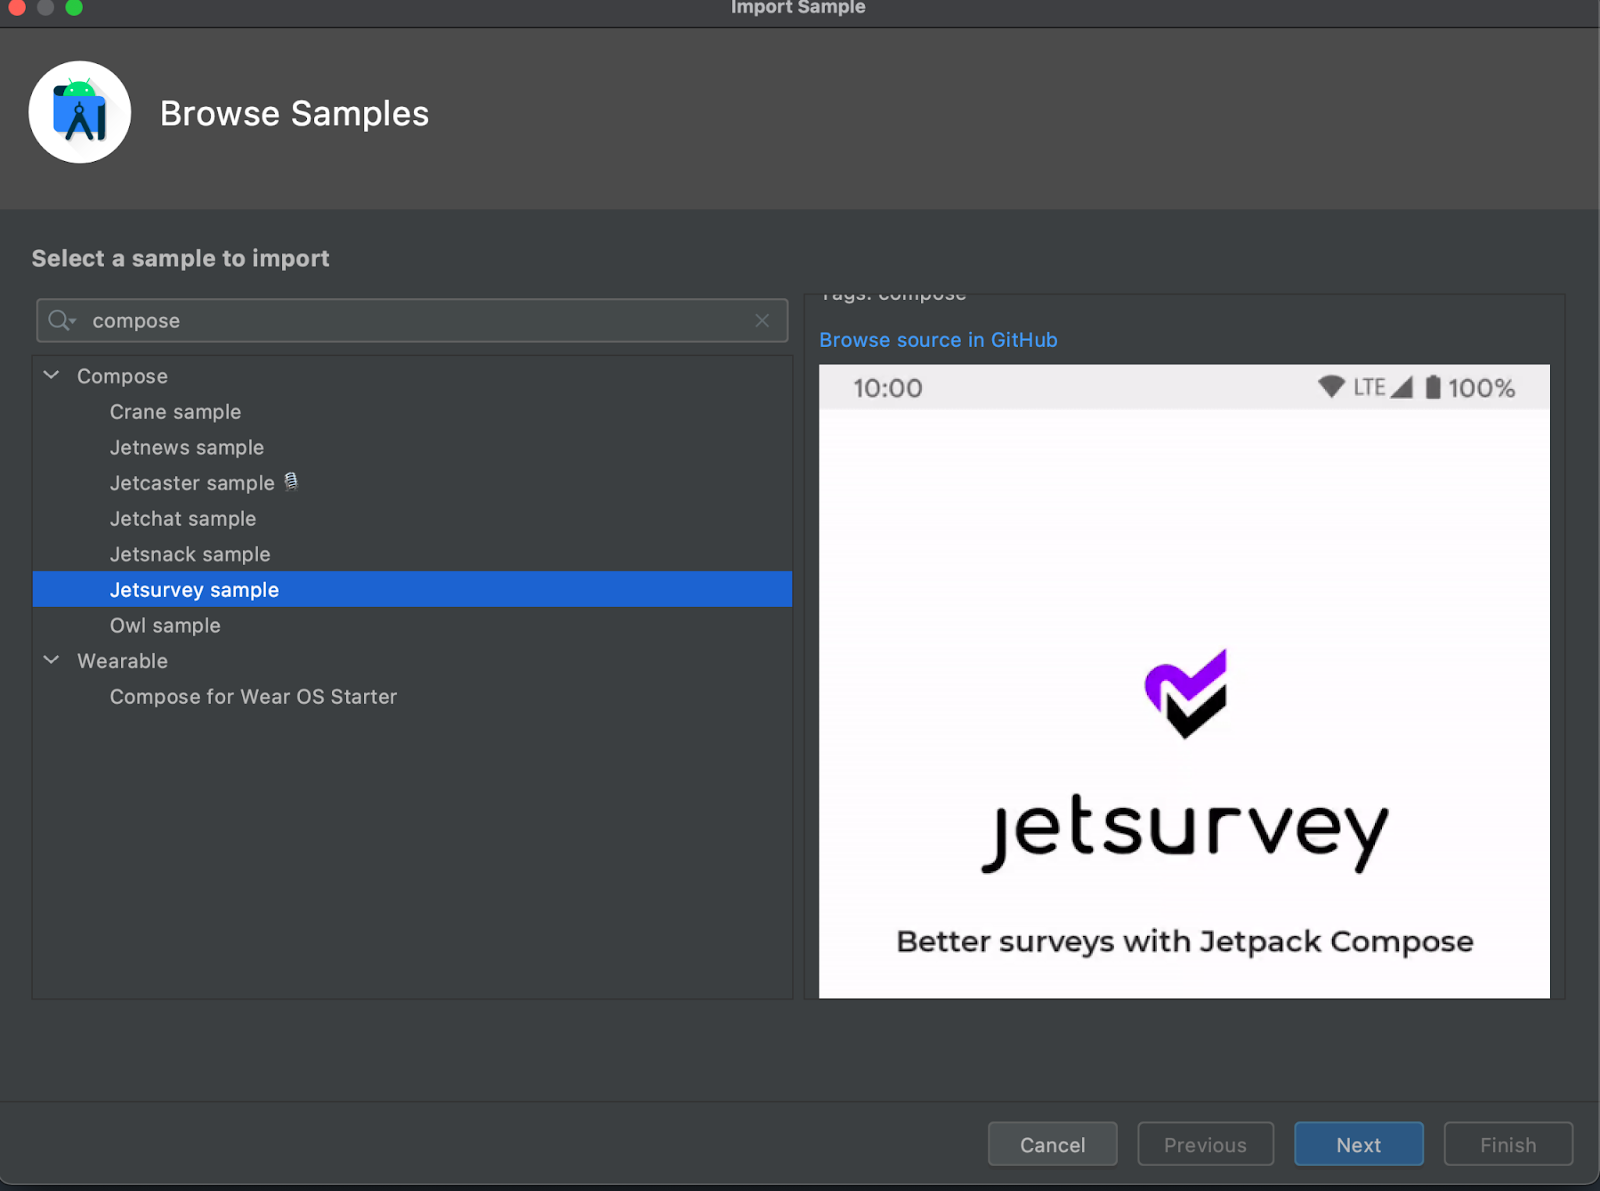
Search for “Compose” projects:
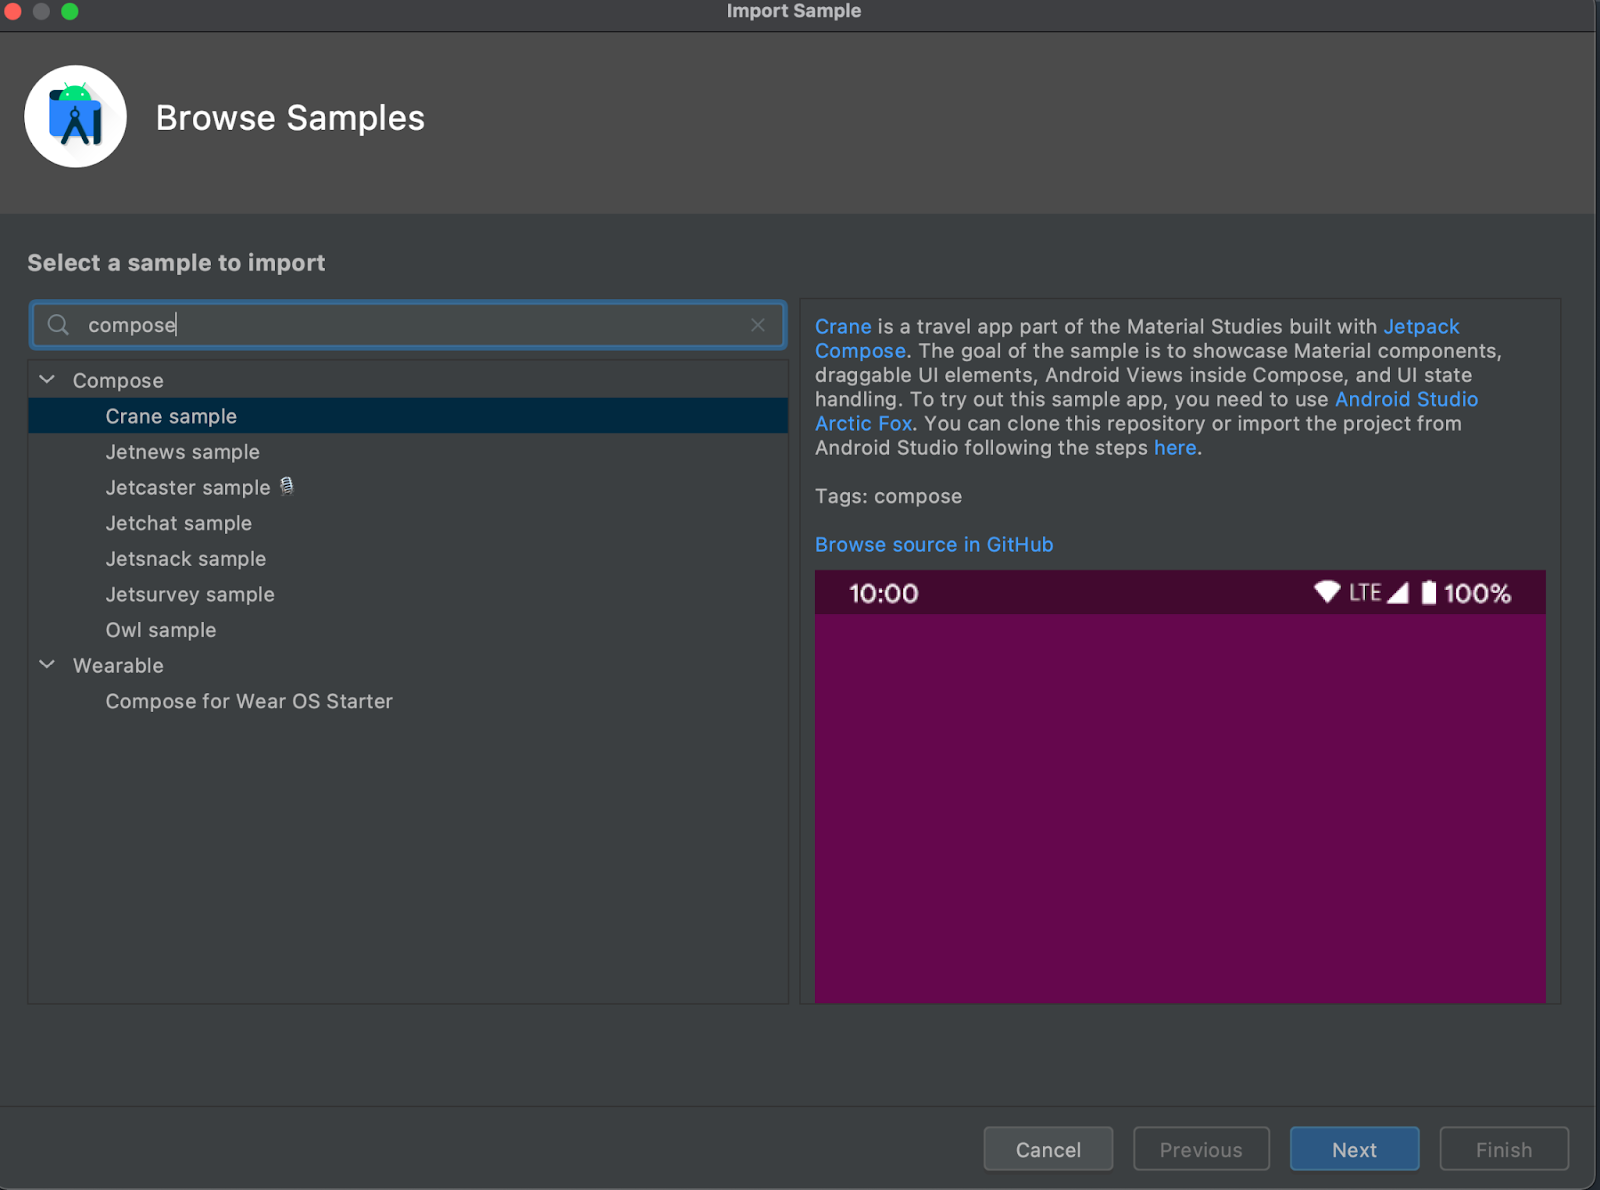
Then select your preferred project and click the Next button.
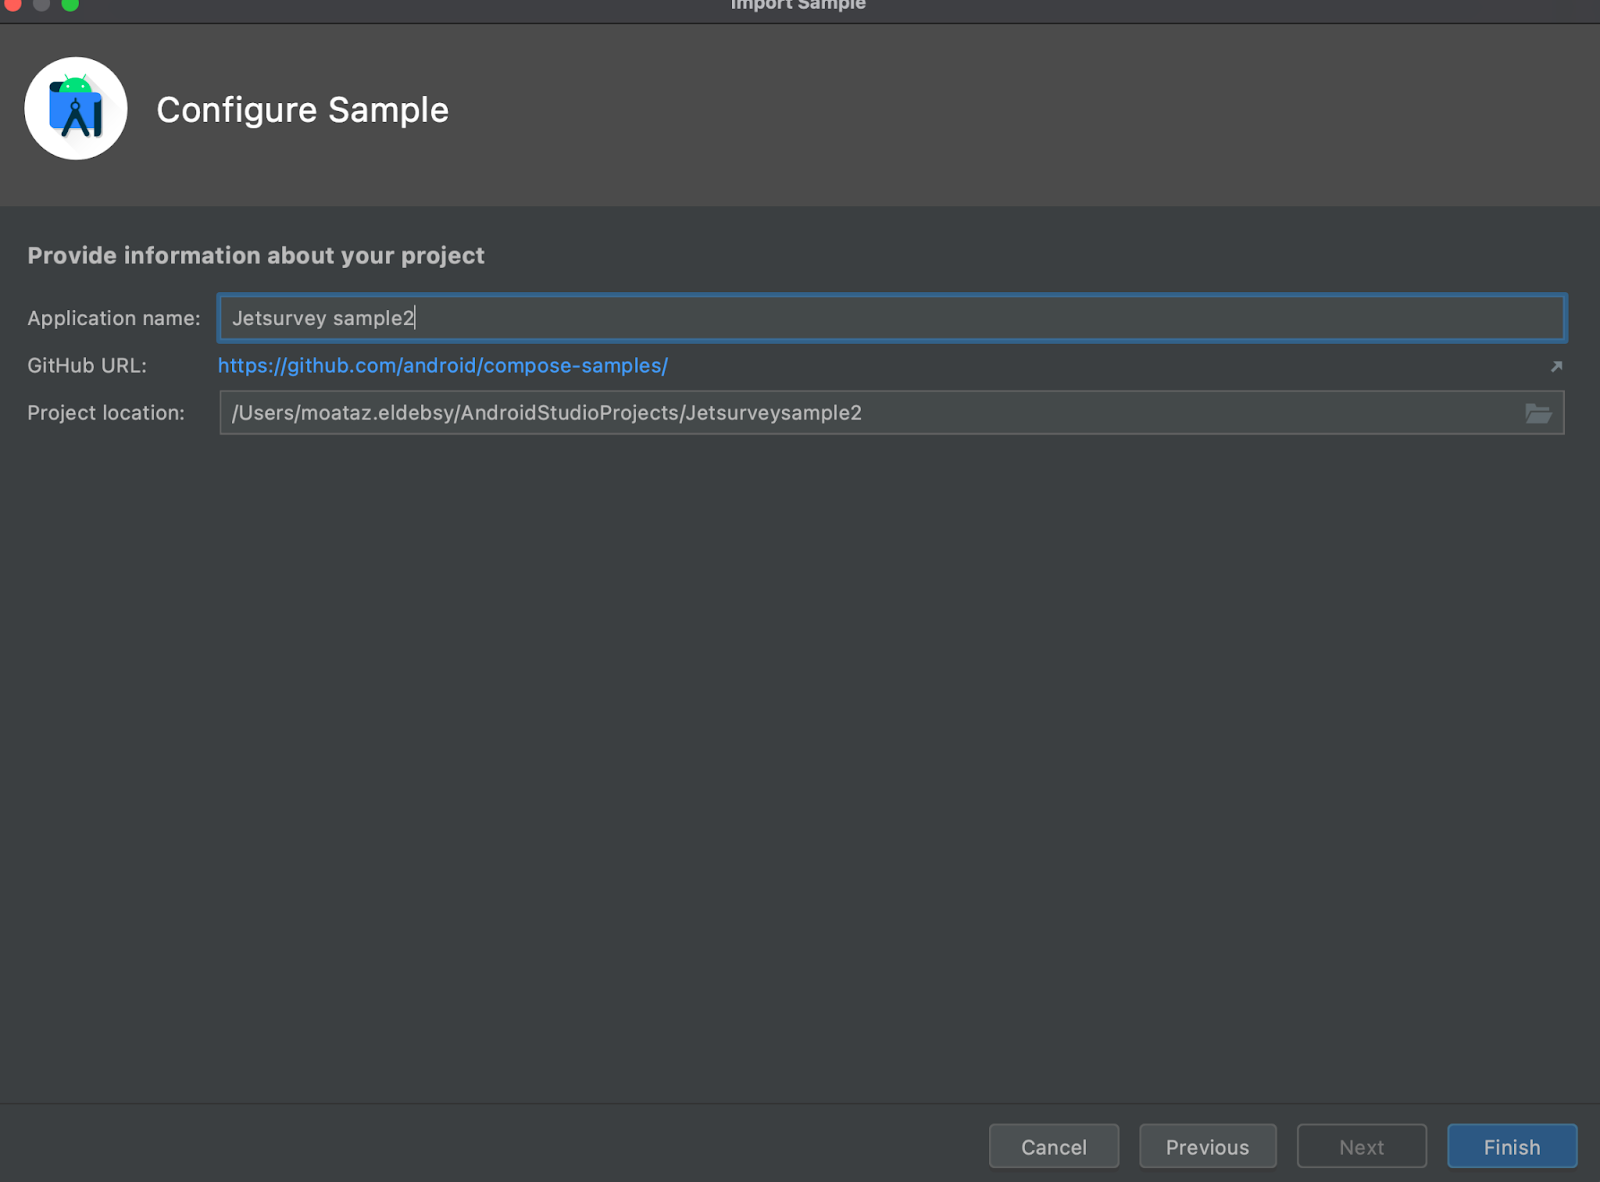
Finally, enter the project name and click the Finish button.
Testing Jetpack Compose Layout
As usual, when we are automating the UI screens or elements, we are doing 3 things:
- Finding or locating elements,
- Verifying or asserting that the element is displayed or contains a specific attribute,
- Performing an action based on the type of this element.
Because Jetpack Compose is an instrumentation test, you can use a test framework such as Espresso, but Compose already provides a set of testing APIs to work with elements by finding elements, verifying their attributes, and performing user actions. They also include advanced features such as time manipulation.
This is good because usually, when you have a specific type of UI component or element it’s better to have specific testing APIs or functions for them to handle their different cases.
Note: Testing a UI created with Compose is different from testing a View-based UI and requires a different approach to matching UI elements.
Let’s get started!
In this article I will create a simple Compose project with the following steps:
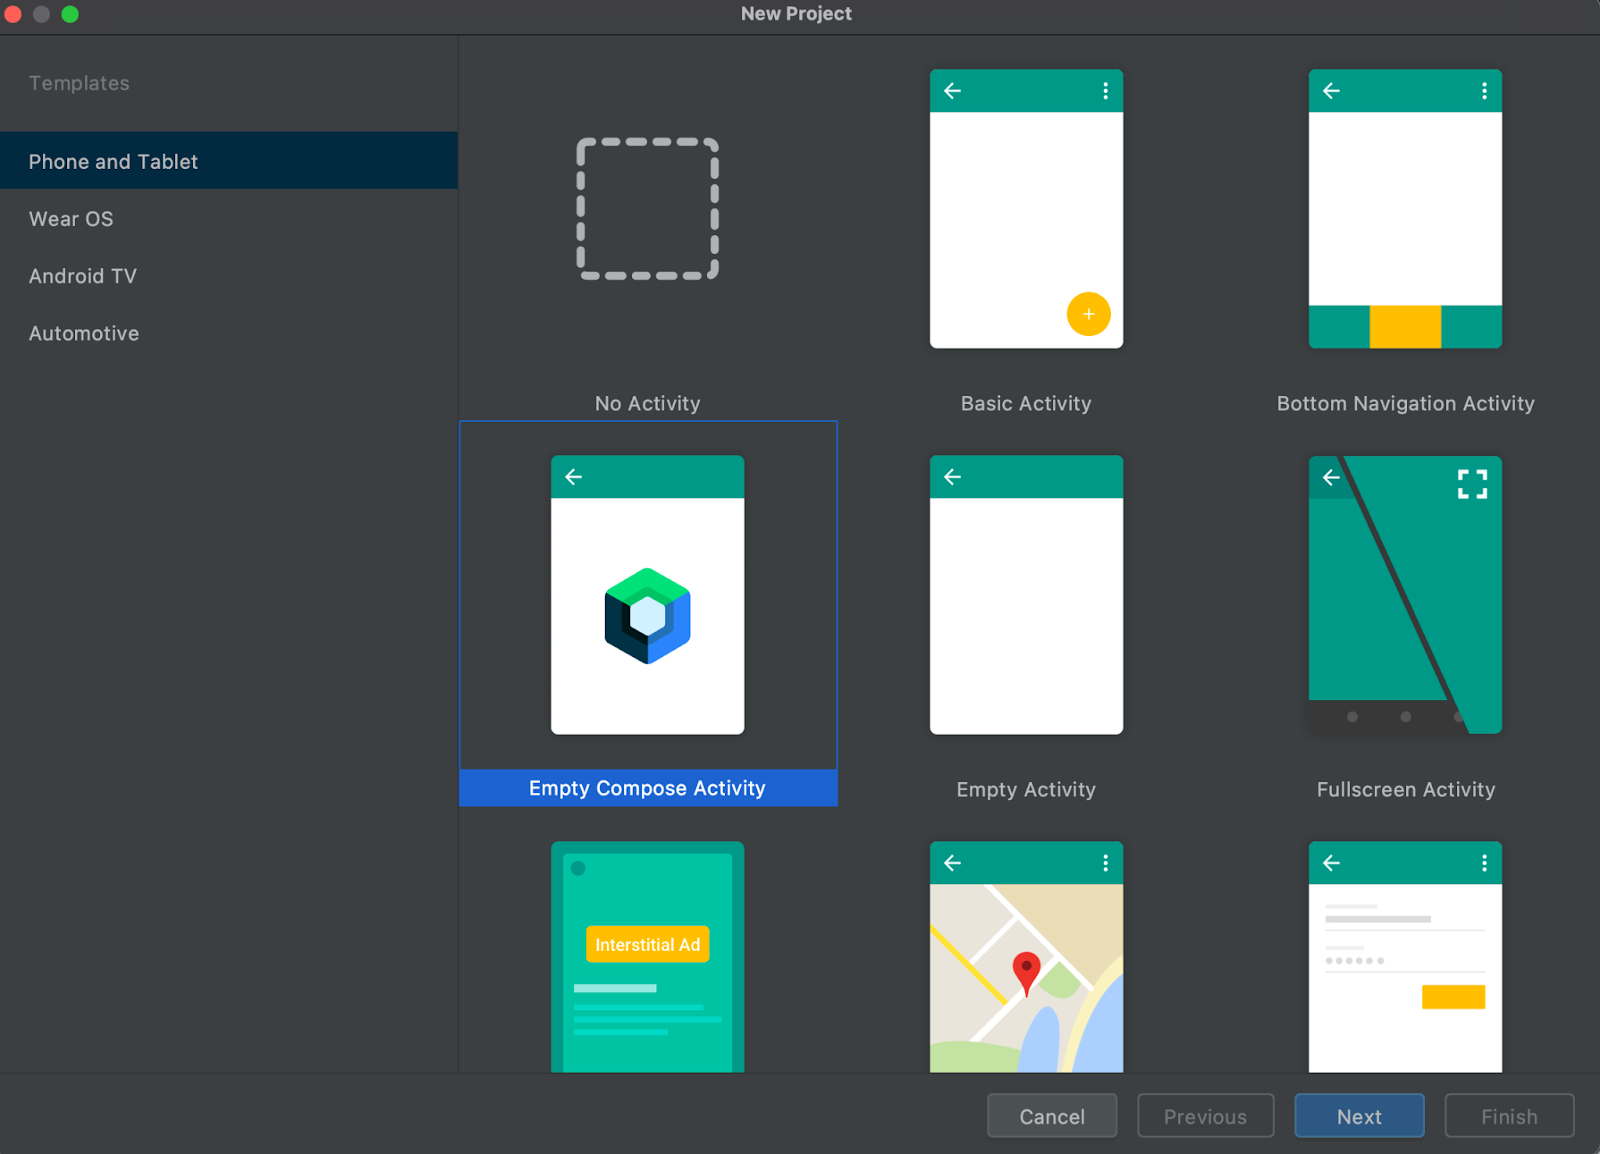
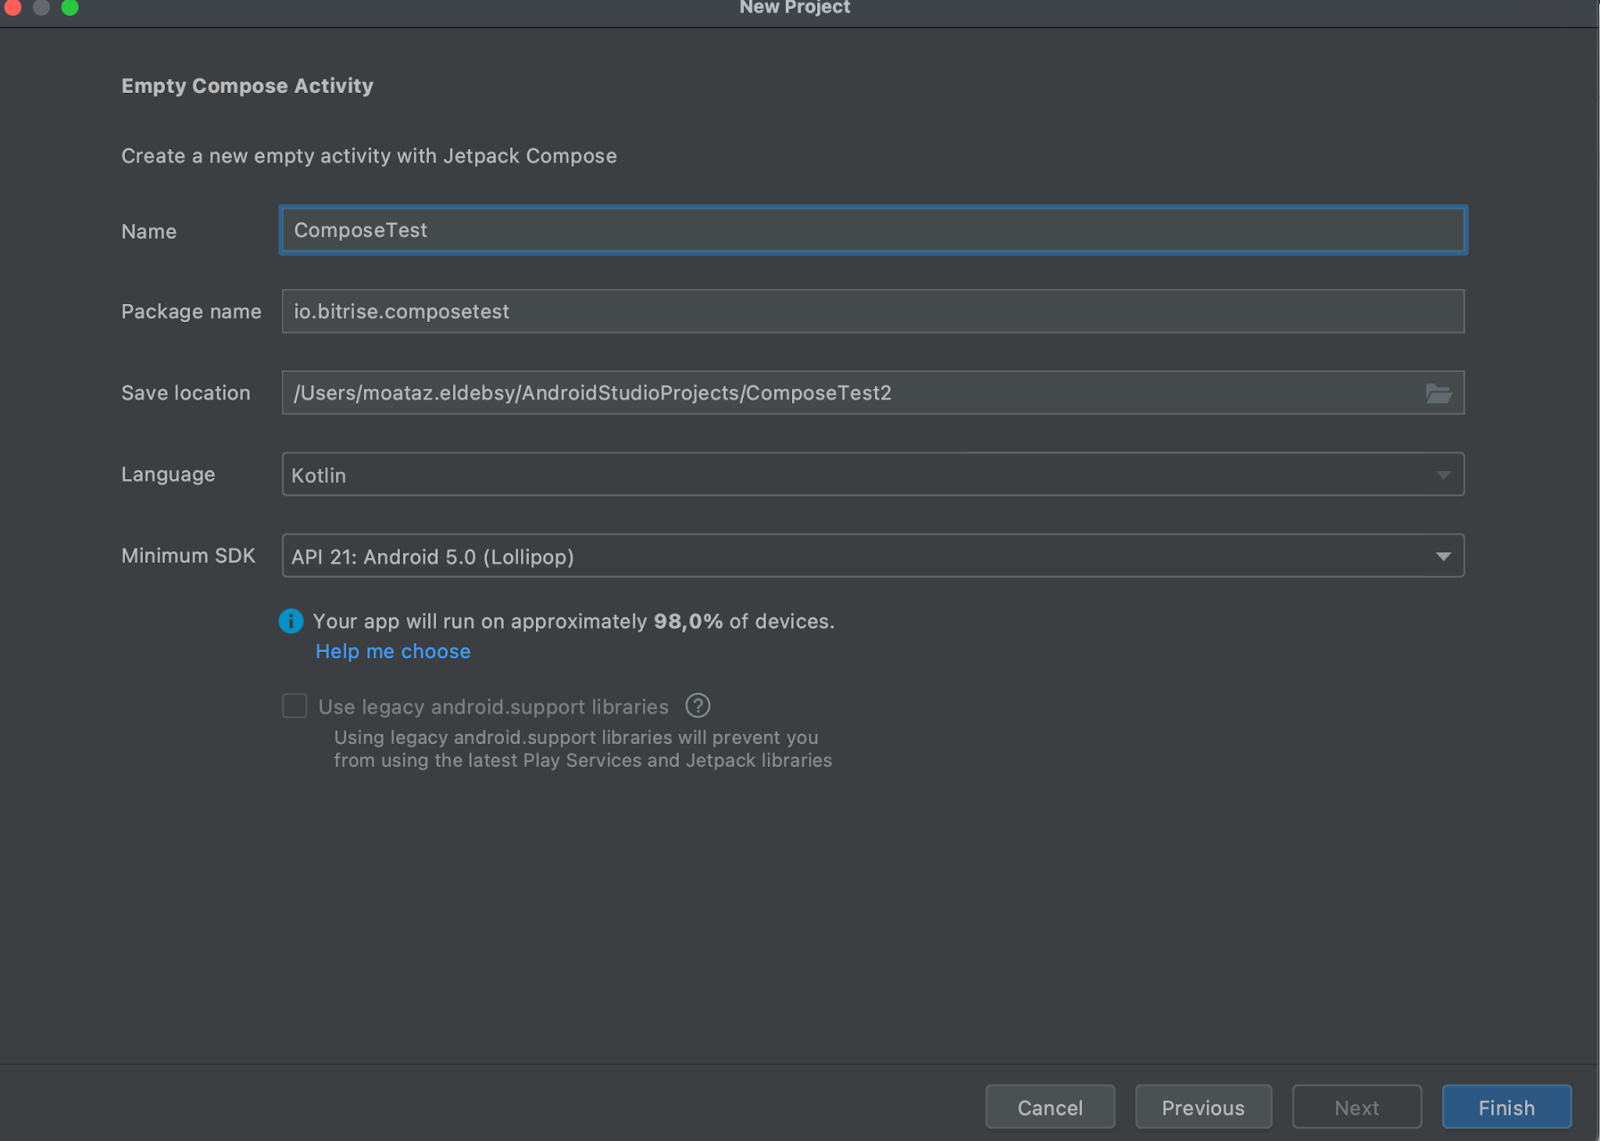
- Open Android Studio, select New Project and select Empty Compose Activity.
2. Enter the project name and the minimum SDK and click Finish.
3. Wait till Gradle finishes downloading and preparing the project.
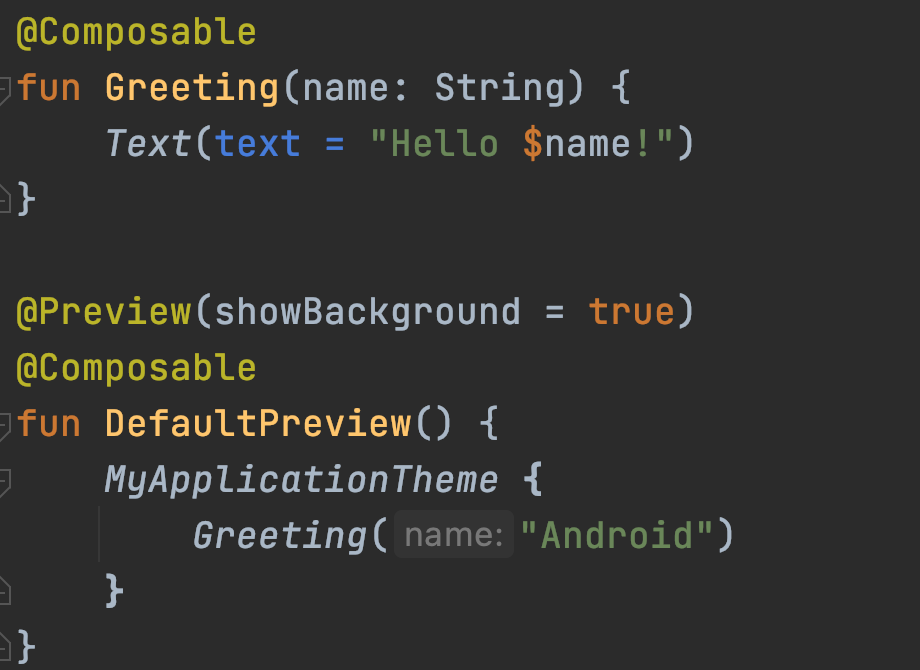
4. Open the MainActivity.kt file and you will find that it includes the onCreate function and Composable function with simple text as shown in the following images:
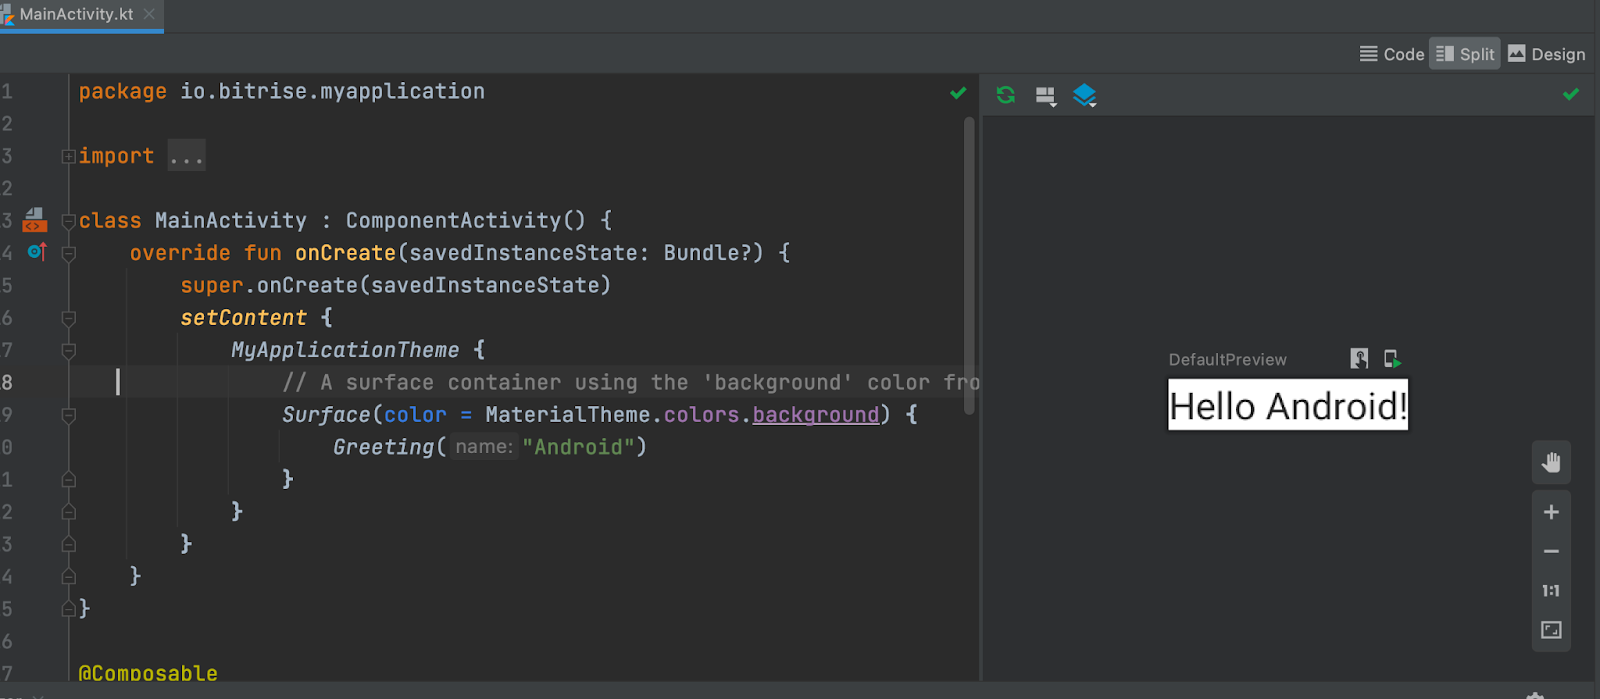
You can build and preview the app to view any changes in the screen with live interaction as well.
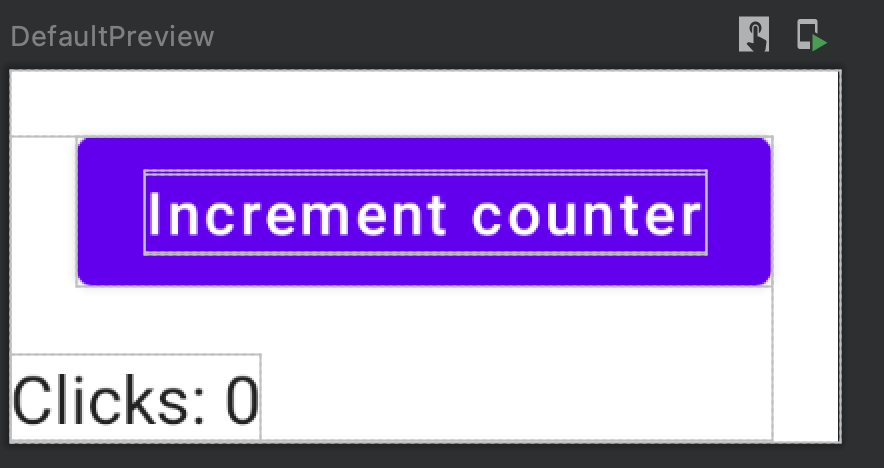
5. Now let’s change the screen by adding a button and text with a counter like the following image:
6. Select the res folder, then the values folder and open the strings.xml file.
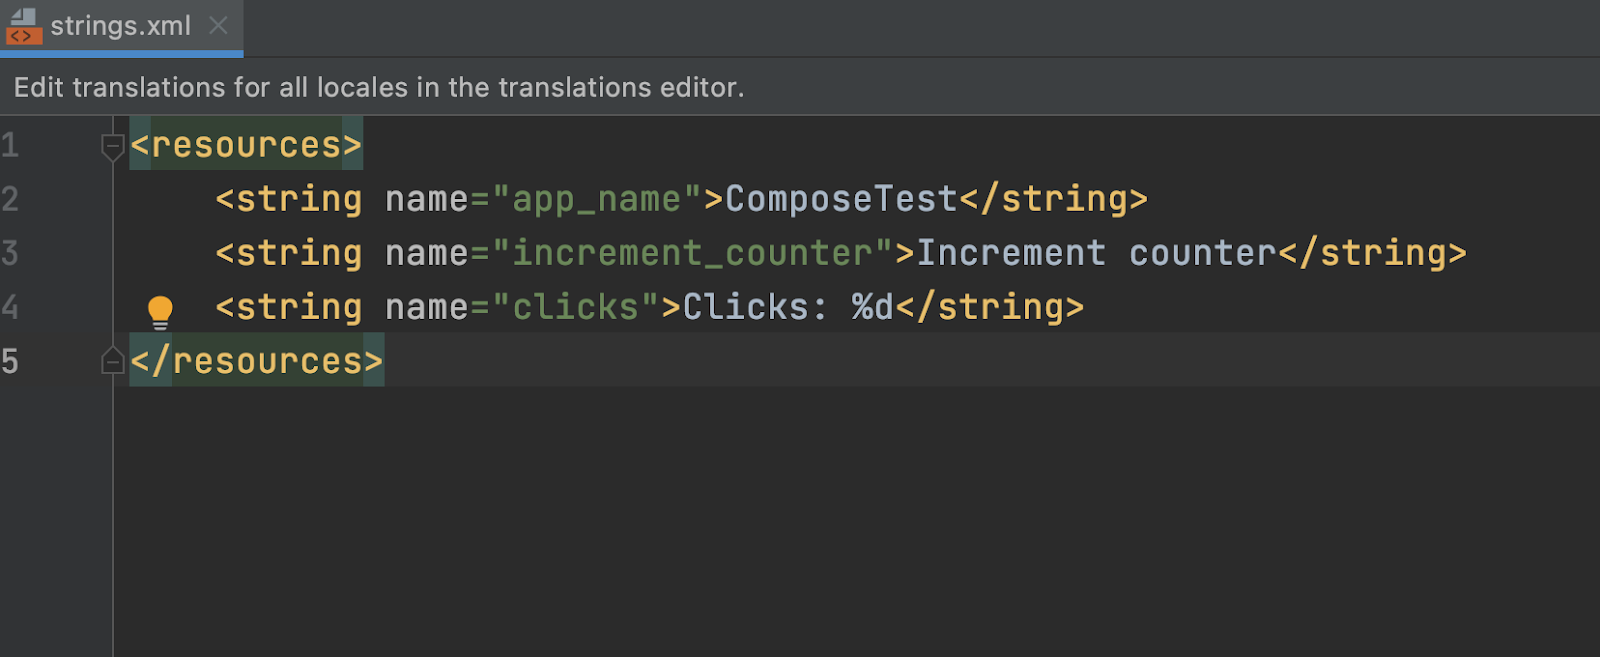
7. Add the following string values there:

We will use these two strings for the button and the counter text.
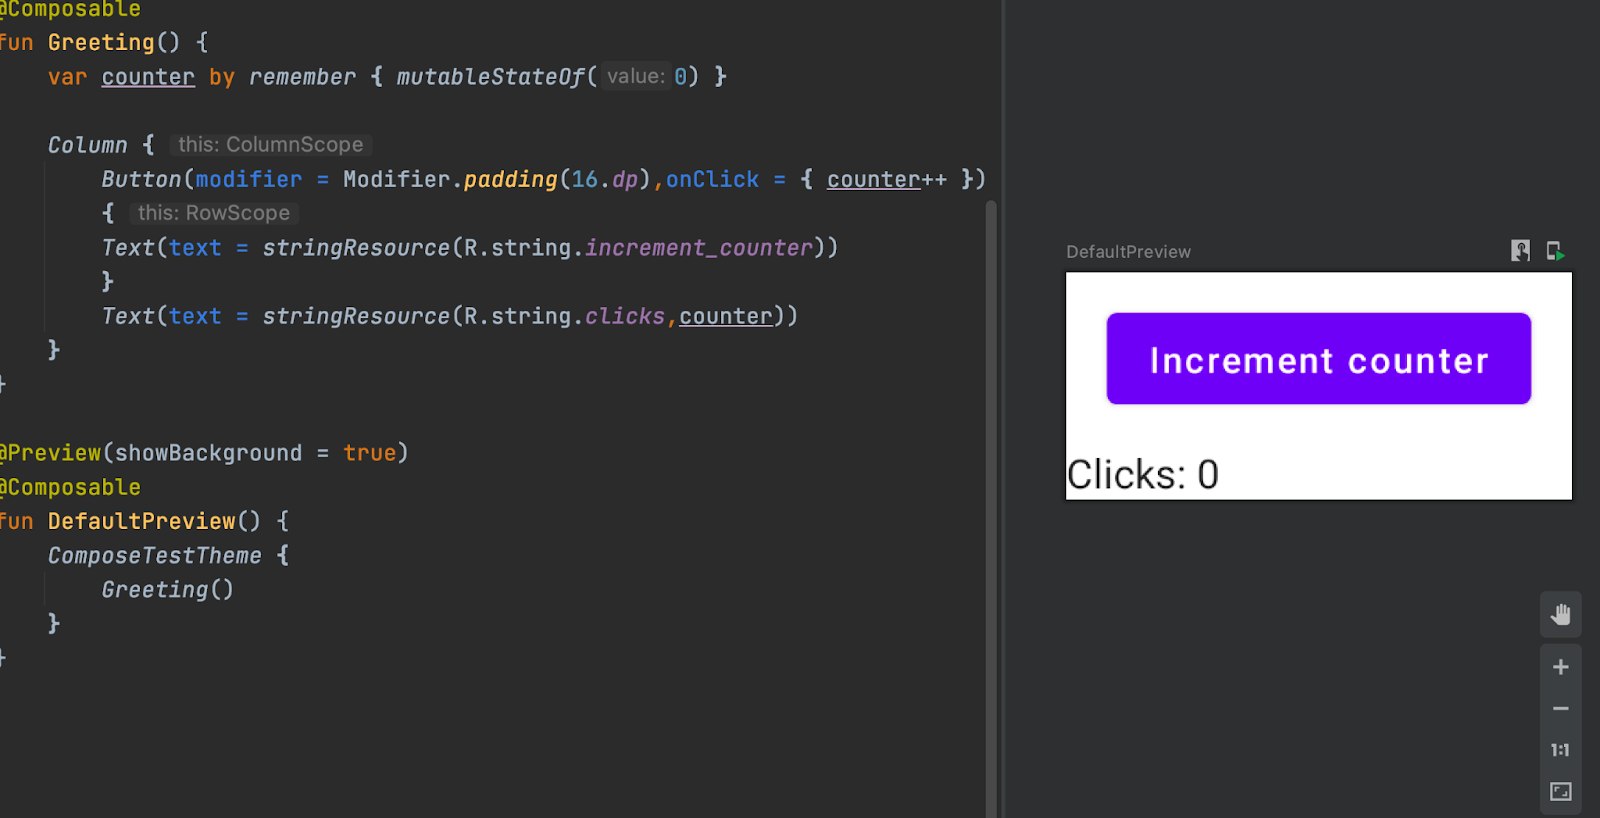
8. In the MainActivity.kt, change the Greeting() function to be like the following code:
@Composable
fun Greeting() {
    var counter by remember { mutableStateOf(0) }
    Column {
        Button(modifier = Modifier.padding(16.dp),onClick = { counter++ })
        {
        Text(text = stringResource(R.string.increment_counter))
        }
        Text(text = stringResource(R.string.clicks,counter))
    }
}
In the above code, we add a Column from the Compose Layout, then add children elements such as a button with a counter and text in a vertical view and we also remove the string parameter from the Greeting function.
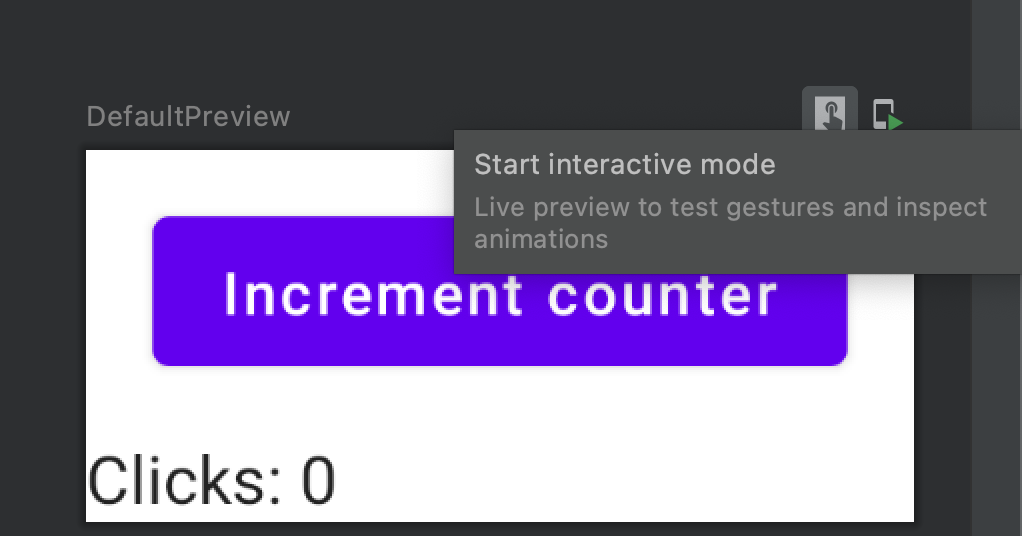
You can click on Start interactive mode to verify that the button is working properly.
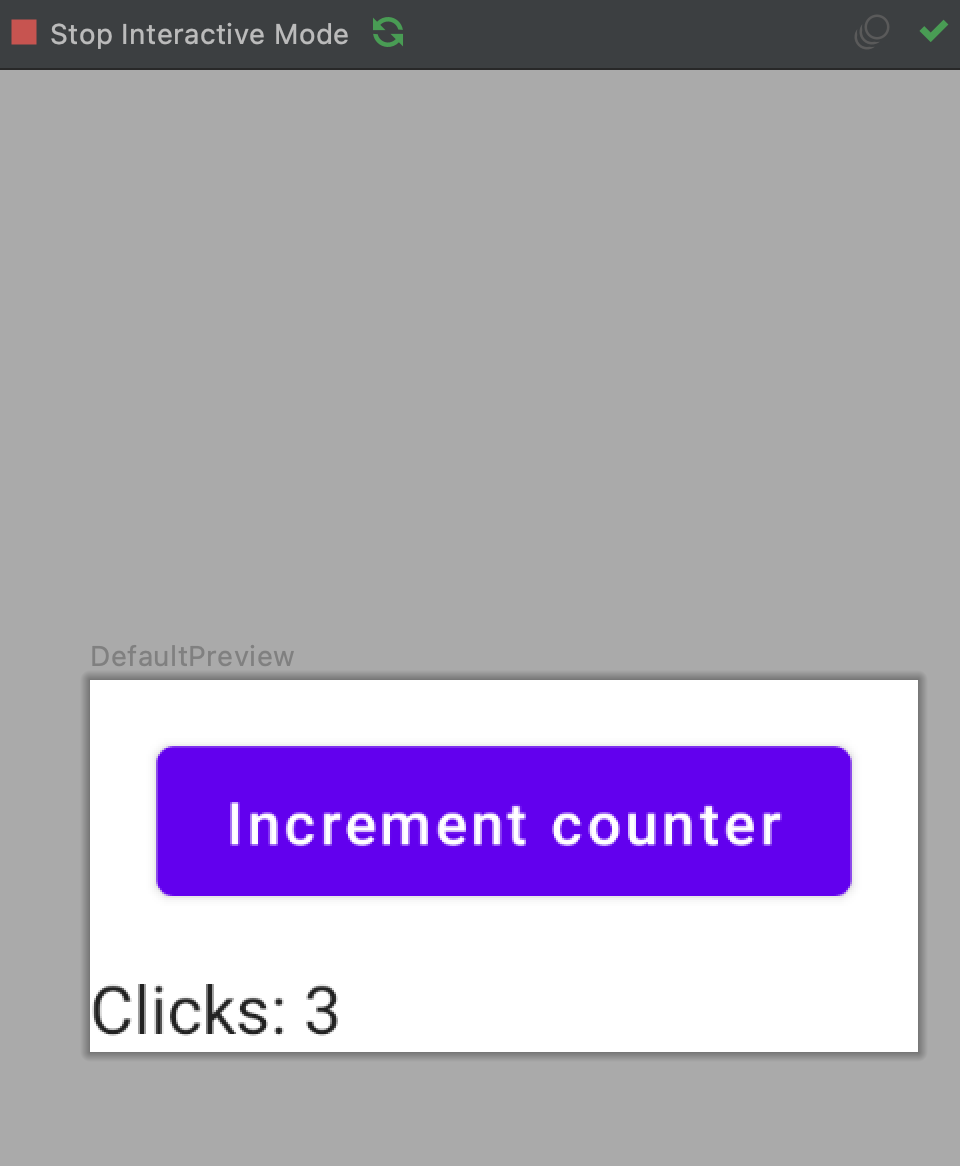
9. Then stop the Interactive mode. Now our app is ready for writing UI tests for this screen.
10. Open the androidTest folder, then java, and select the ExampleInstrumentedTest file. You will notice that this is a simple test to assert the package name is correct.
11. Rename the class to ‘CounterTest’ for example and remove all the existing code.
12. First we need to add composeTestRule with the following code:
@get:Rule
val composeTestRule = createAndroidComposeRule
This is usually used for tests where the compose content is set by the Activity.
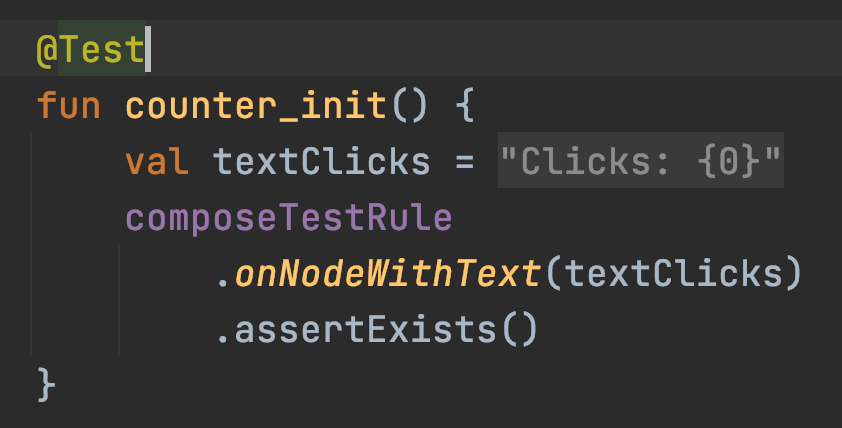
13. Then we will add the first test function to verify that the counter text displayed
@Test
fun counter_init() {
    val textClicks = composeTestRule.activity.getString(R.string.clicks, 0)

    composeTestRule
        .onNodeWithText(textClicks)
        .assertExists()
}
In the above code, we used the composeTestRule to find a node with a specific string.
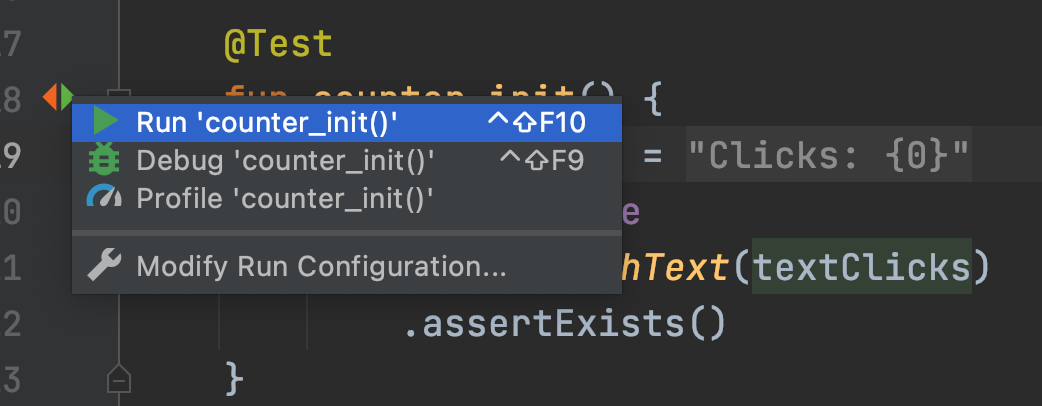
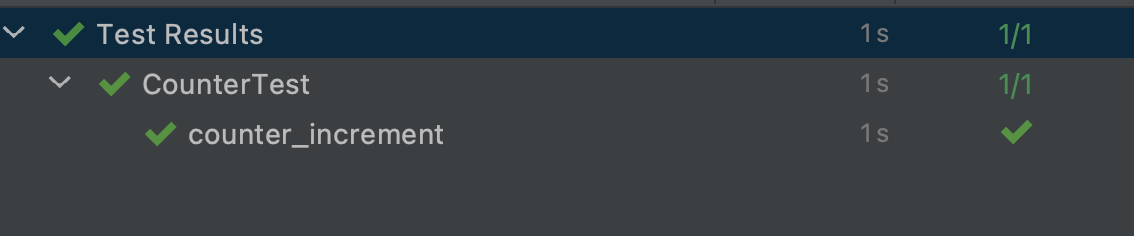
14. Now we can run the test!
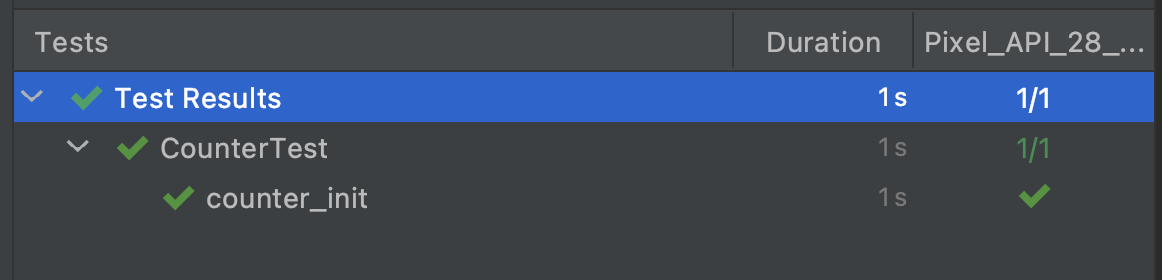
And the test should pass:
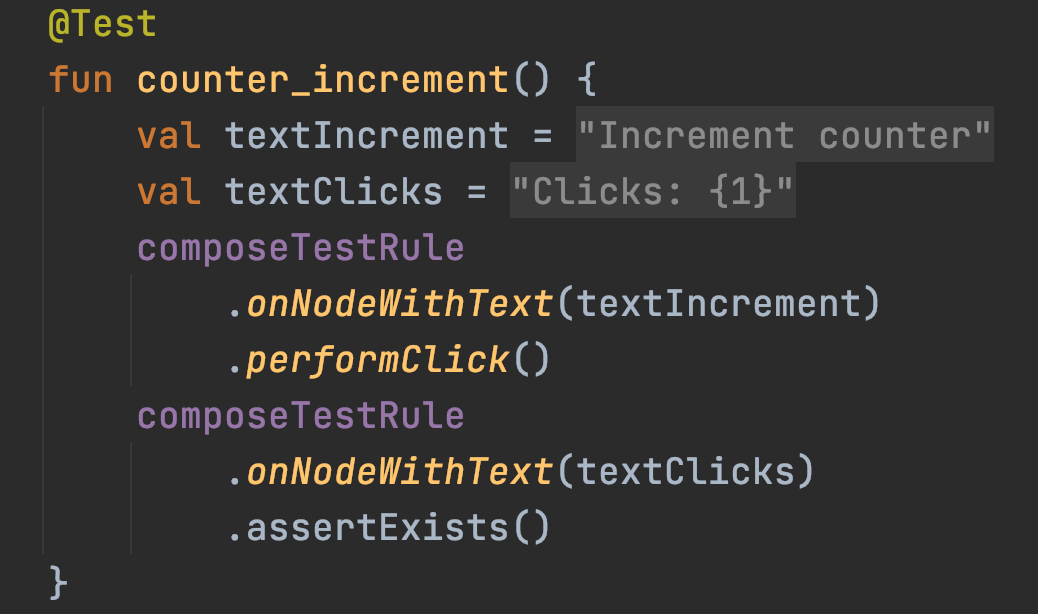
15. We can add another test to verify that the counter is working correctly. As with the previous test, we will use the composeTestRule to find the button and perform click action, then assert that the counter value is changed successfully from 0 to 1 with the following code:
@Test
fun counter_increment() {
    val textIncrement = composeTestRule.activity.getString(R.string.increment_counter)
    val textClicks = composeTestRule.activity.getString(R.string.clicks, 1)
    composeTestRule
        .onNodeWithText(textIncrement)
        .performClick()
    composeTestRule
        .onNodeWithText(textClicks)
        .assertExists()
}
And the test should be passed:
The final test class should be like the following code:
@RunWith(AndroidJUnit4::class)
class CounterTest {

    @get:Rule
    val composeTestRule = createAndroidComposeRule<MainActivity>()

    @Test
    fun counter_init() {
        val textClicks = composeTestRule.activity.getString(R.string.clicks, 0)
        composeTestRule
            .onNodeWithText(textClicks)
            .assertExists()
    }

    @Test
    fun counter_increment() {
        val textIncrement = composeTestRule.activity.getString(R.string.increment_counter)
        val textClicks = composeTestRule.activity.getString(R.string.clicks, 1)
        composeTestRule
            .onNodeWithText(textIncrement)
            .performClick()
        composeTestRule
            .onNodeWithText(textClicks)
            .assertExists()
    }
}
Congratulations 🥳, you have successfully implemented the first test for Compose Layout.
Tip: To learn more about Compose testing, there is a cheat sheet that is a quick reference of some of the most useful Compose test APIs. The cheat sheet is also downloadable in PDF format.

Run Jetpack Compose Tests on CI
After creating our application locally, it’s time to push the project to a source control management tool such as GitHub, to be able to build, test, and deploy it via a CI/CD pipeline, such as Bitrise. At Bitrise we are building a mobile CI/CD platform as a service to help mobile engineers to deliver high-quality apps faster.
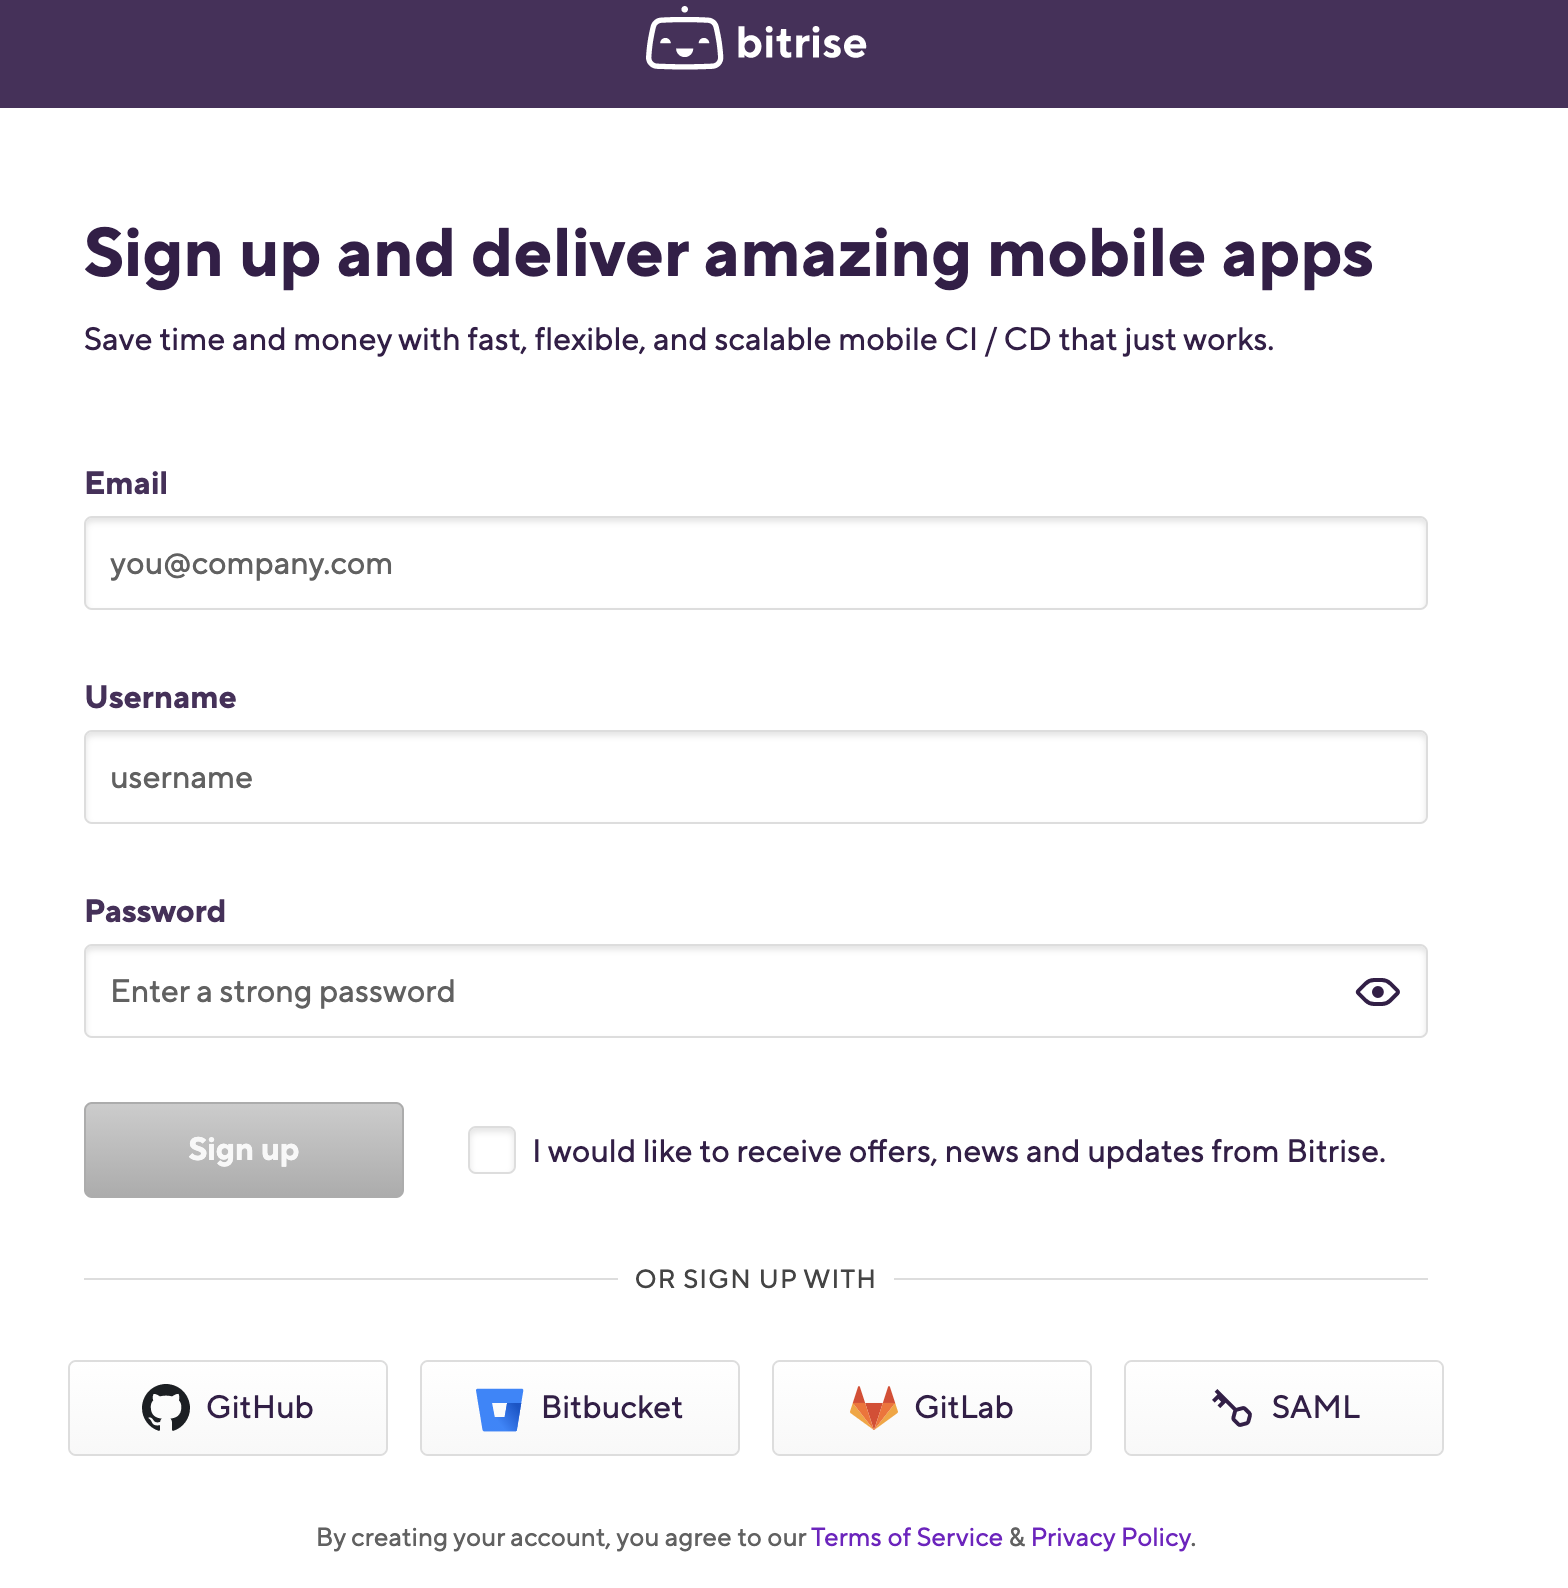
First, you need to create a new free account from the Bitrise website. You can use your email or any other account you prefer as displayed in the following image:
After successful login, you will have an empty dashboard and you can start adding your projects.
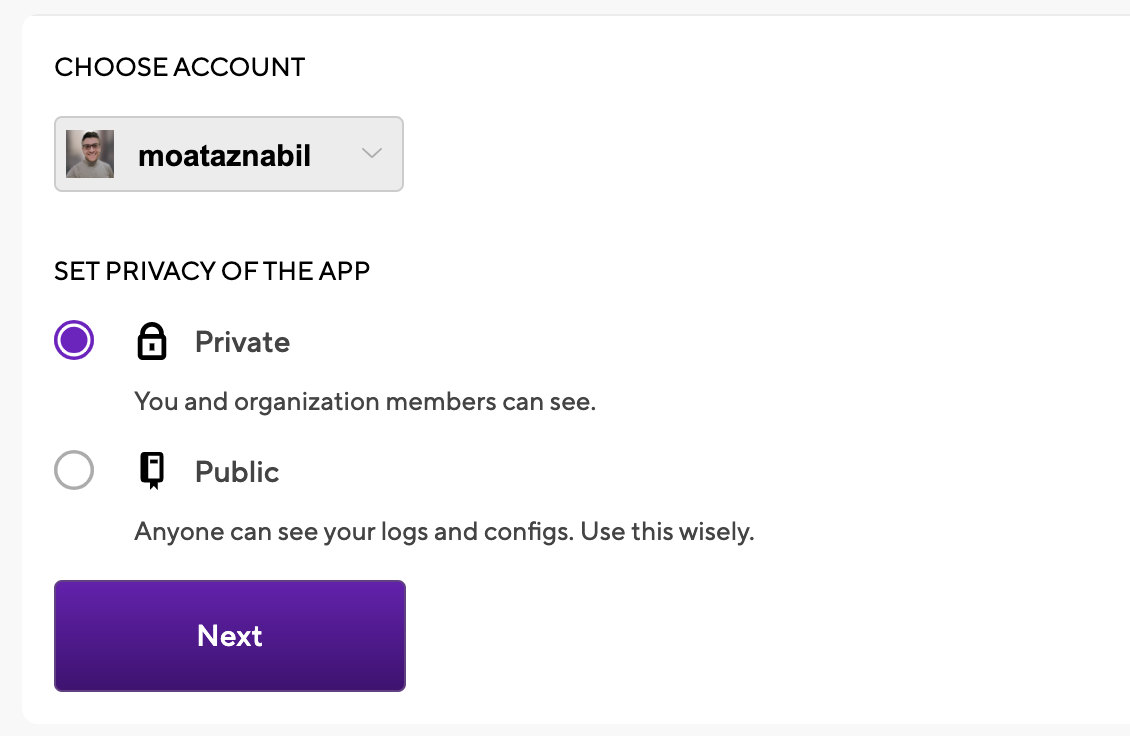
- Click on Add your first app button.
- Select your account and set the privacy for the App (Private or Public) and click Next.
Choose the repository but before that, you have to give Bitrise access rights to your source code provider. (ex: GitHub)
You need to set up the repository access, so you can click on auto-add SSH key or add your SSH key.

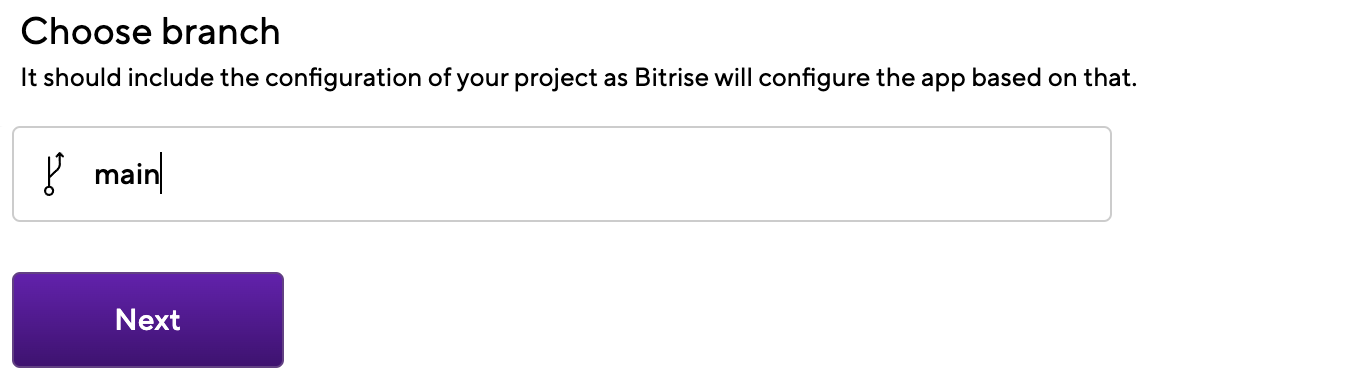
Choose Branch name (ex: main or master branch) and click Next.
Once we click next, Bitrise will run a validation with your repository and configuration

After validating the Project build configuration will display successfully, for example ‘Android App’.
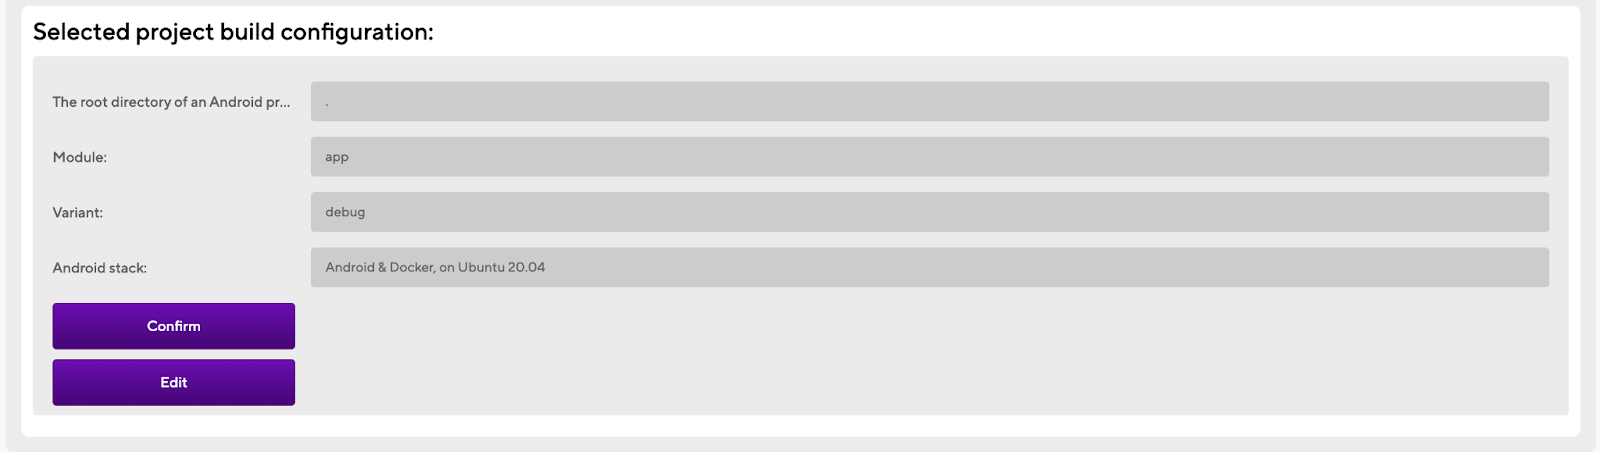
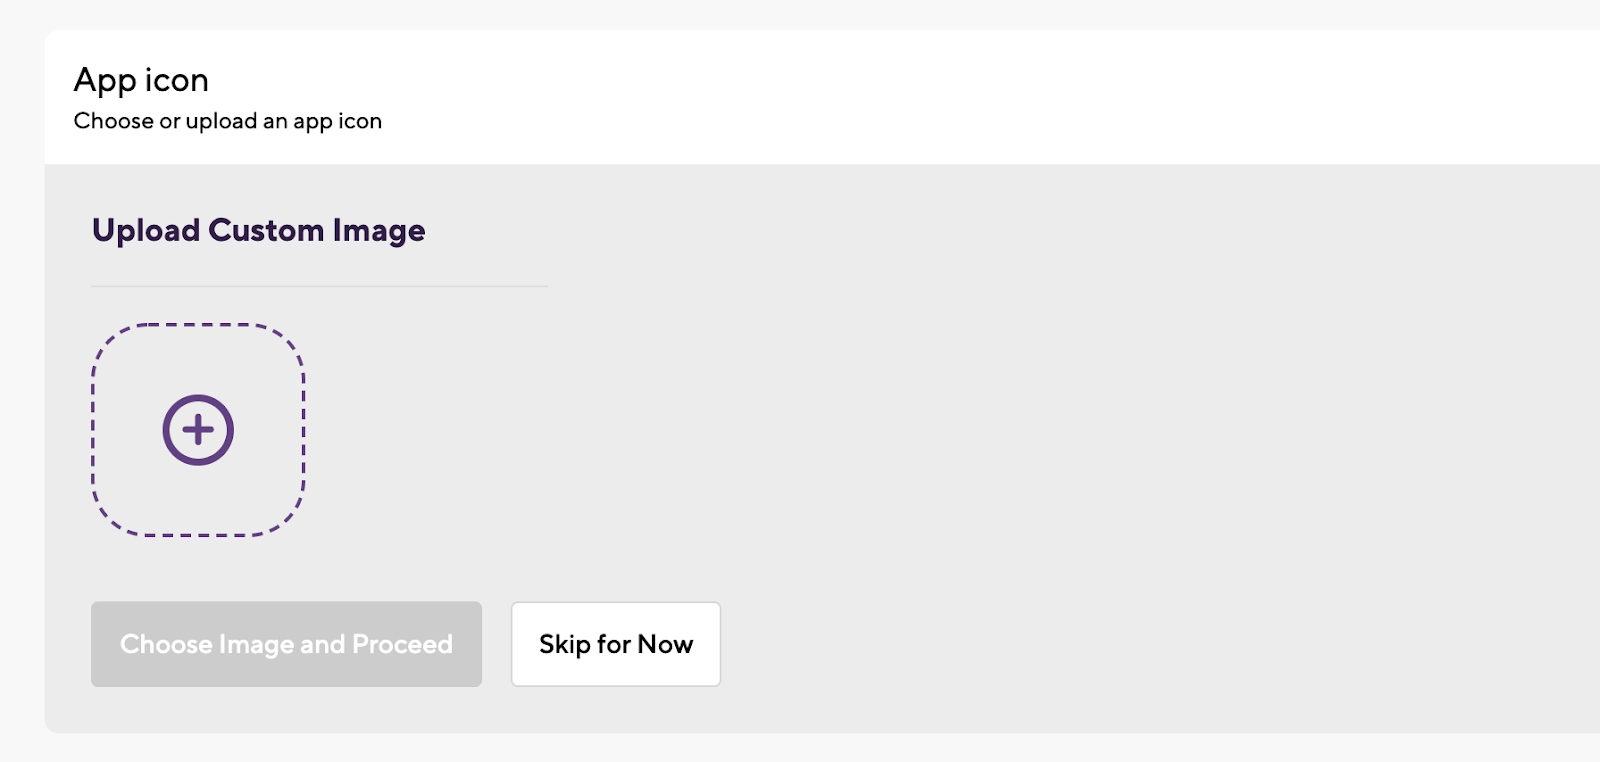
Click the confirm button after reviewing the workflow stack. You can add the app icon as well.
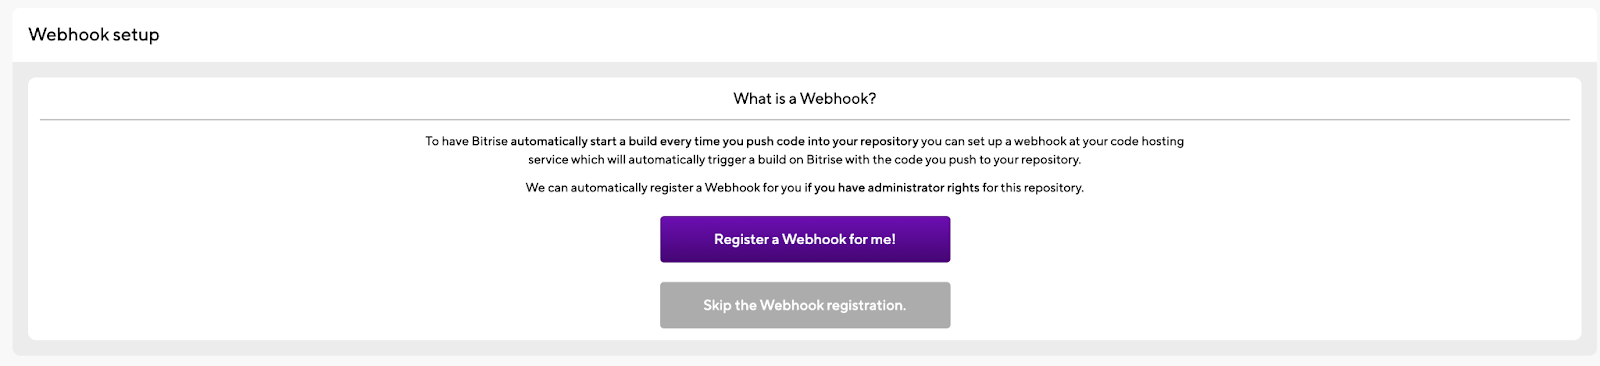
The final step is Webhook setup. You just need to click on the ‘Register a Webhook for me!’ button and you will trigger the first Android build for your project. 🚀 🎉

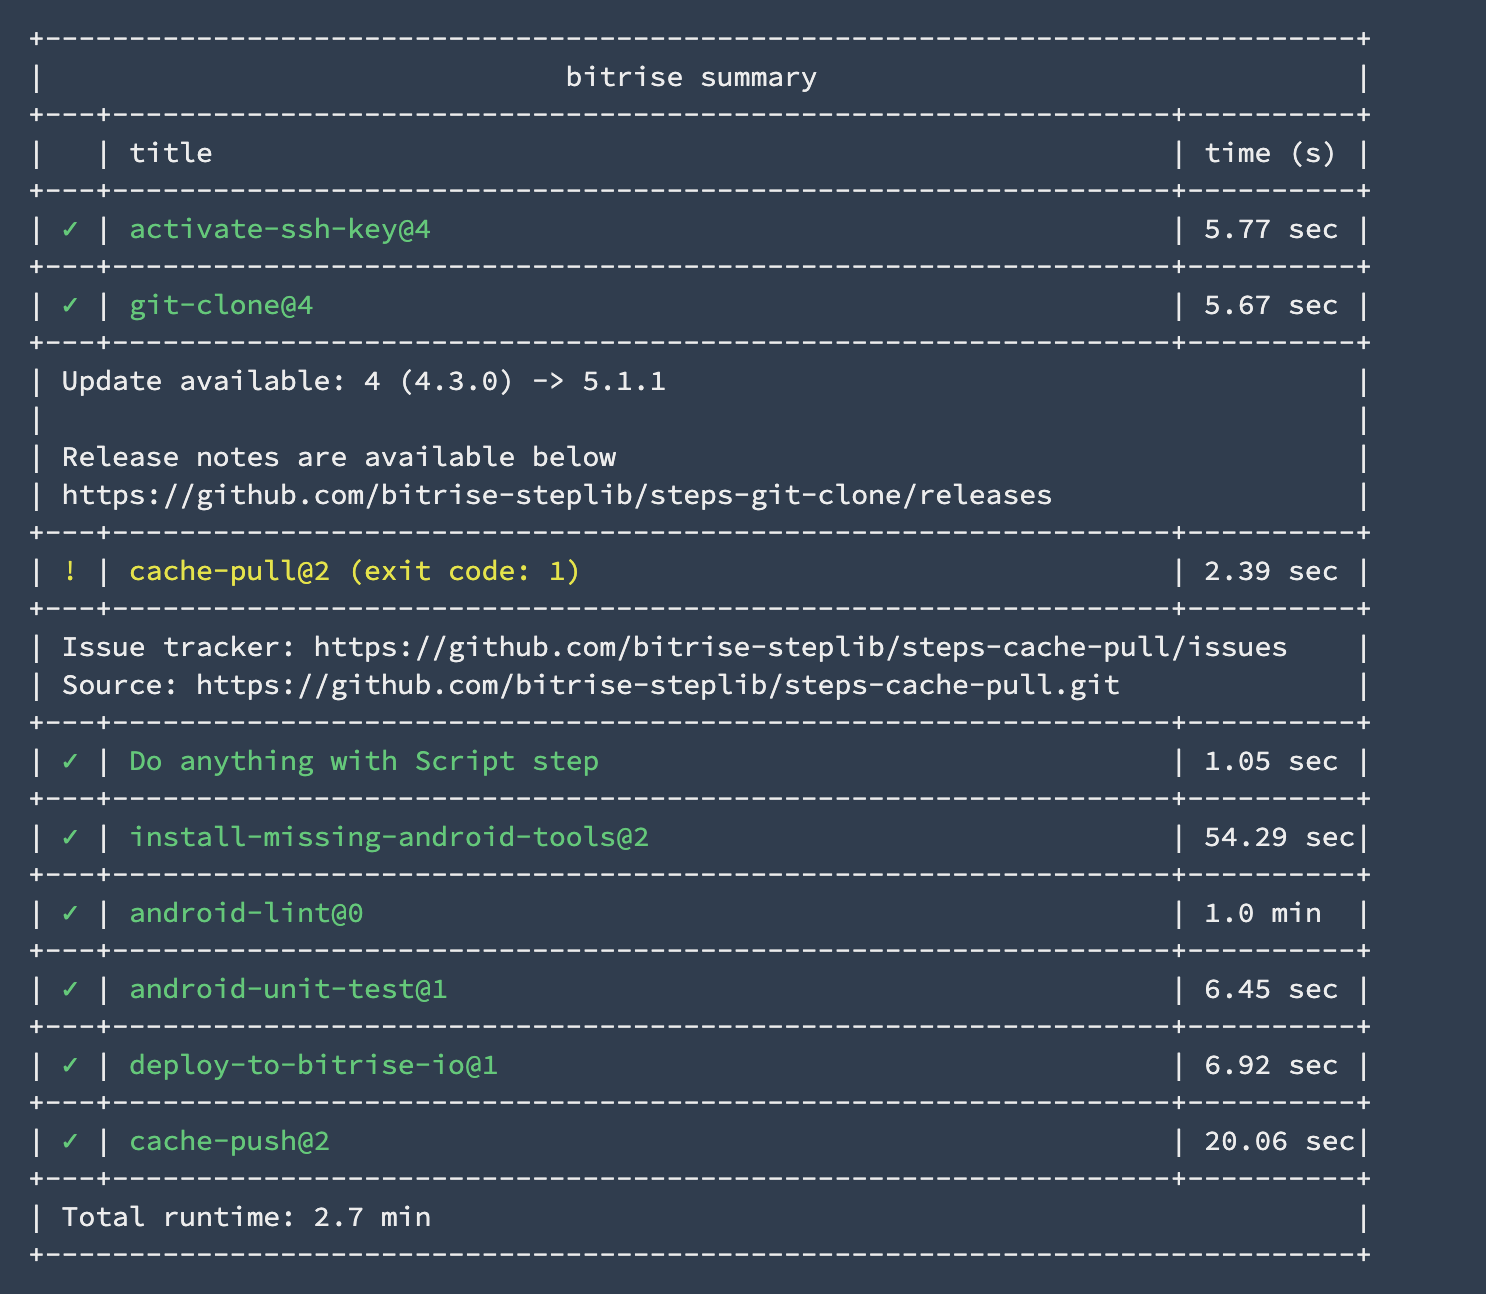
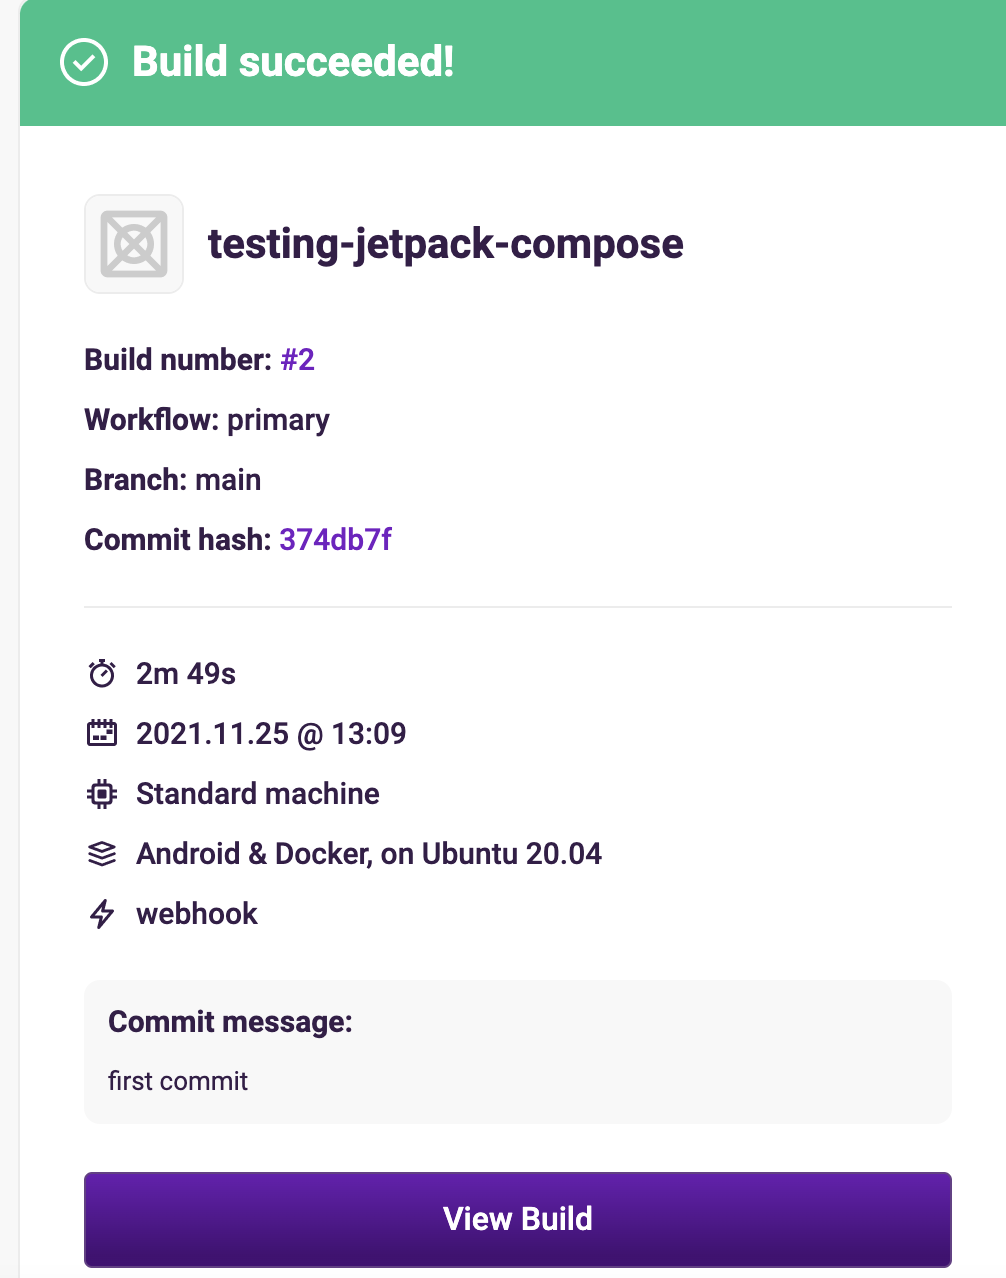
You will be redirected to the build log where you can check the steps and the build status.
In the end, you will find a summary of all the tasks that you ran during the build with Steps names and how much time they took. You can also download logs or check the Apps and artifacts.

And you will also receive an email notification about the build status.
NOTE: As you can notice, we didn’t need to configure anything related to the infrastructure or the stack because Bitrise manages all of these things instead of us. For example installing and configuring Java, Android SDK, Gradle, or Git.
Now let’s open the Workflow Editor to start adding/removing all the required steps that we need to build our app.
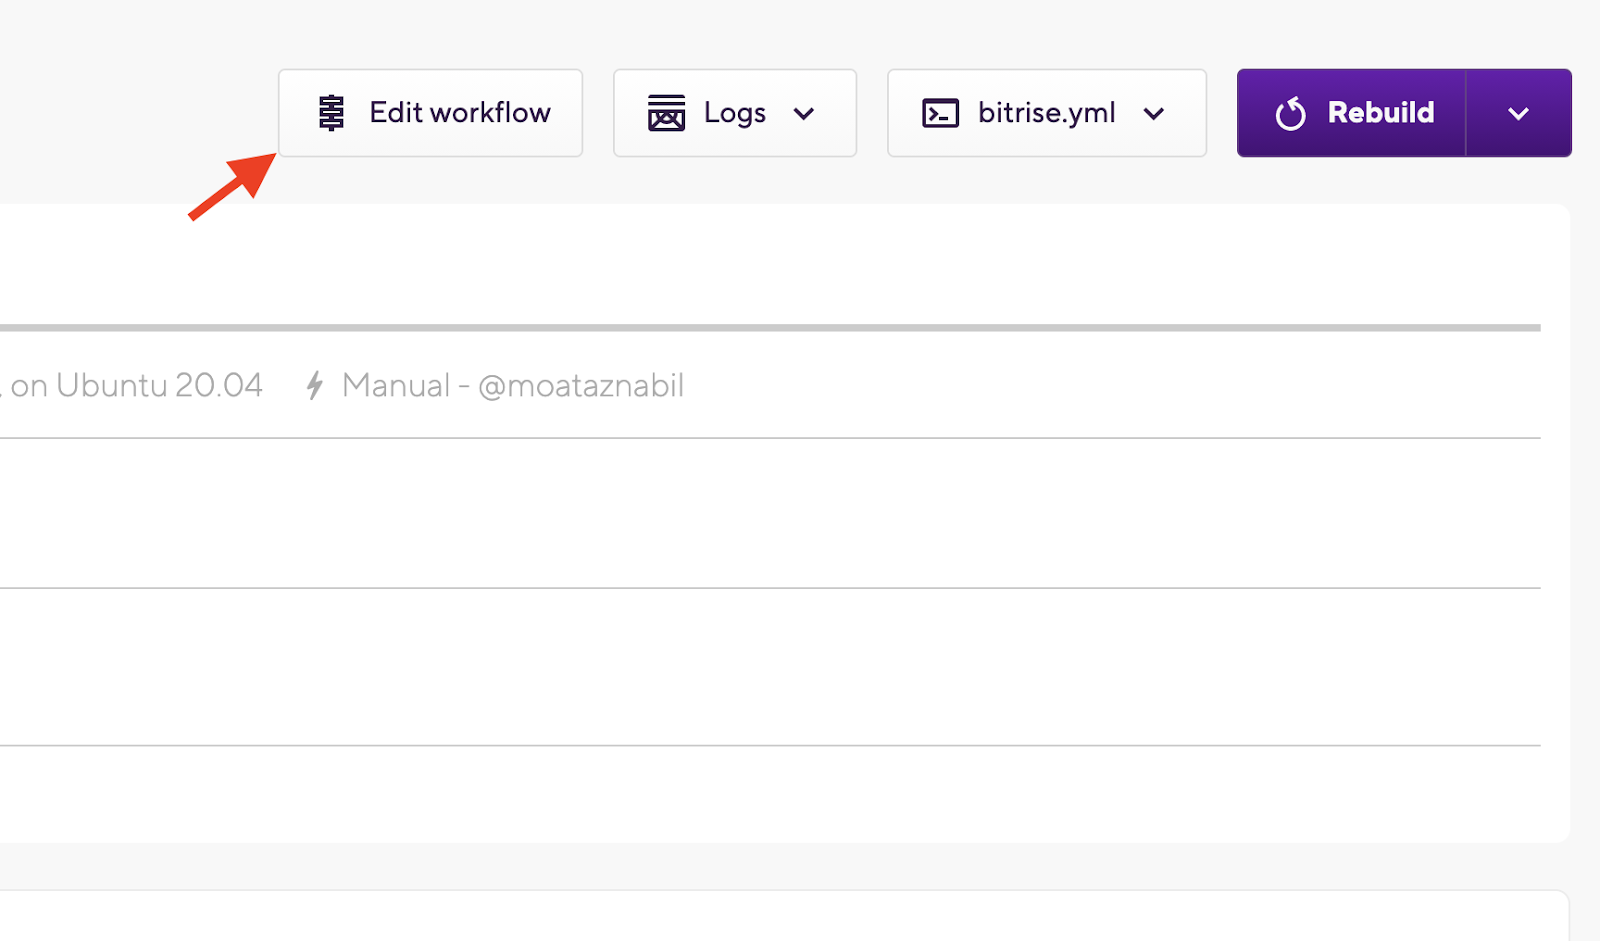
In the Workflow Editor (the Bitrise visual editor for adding Steps in our pipeline or configuring or removing the existing Steps) you will find that we have already predefined Steps that were added.
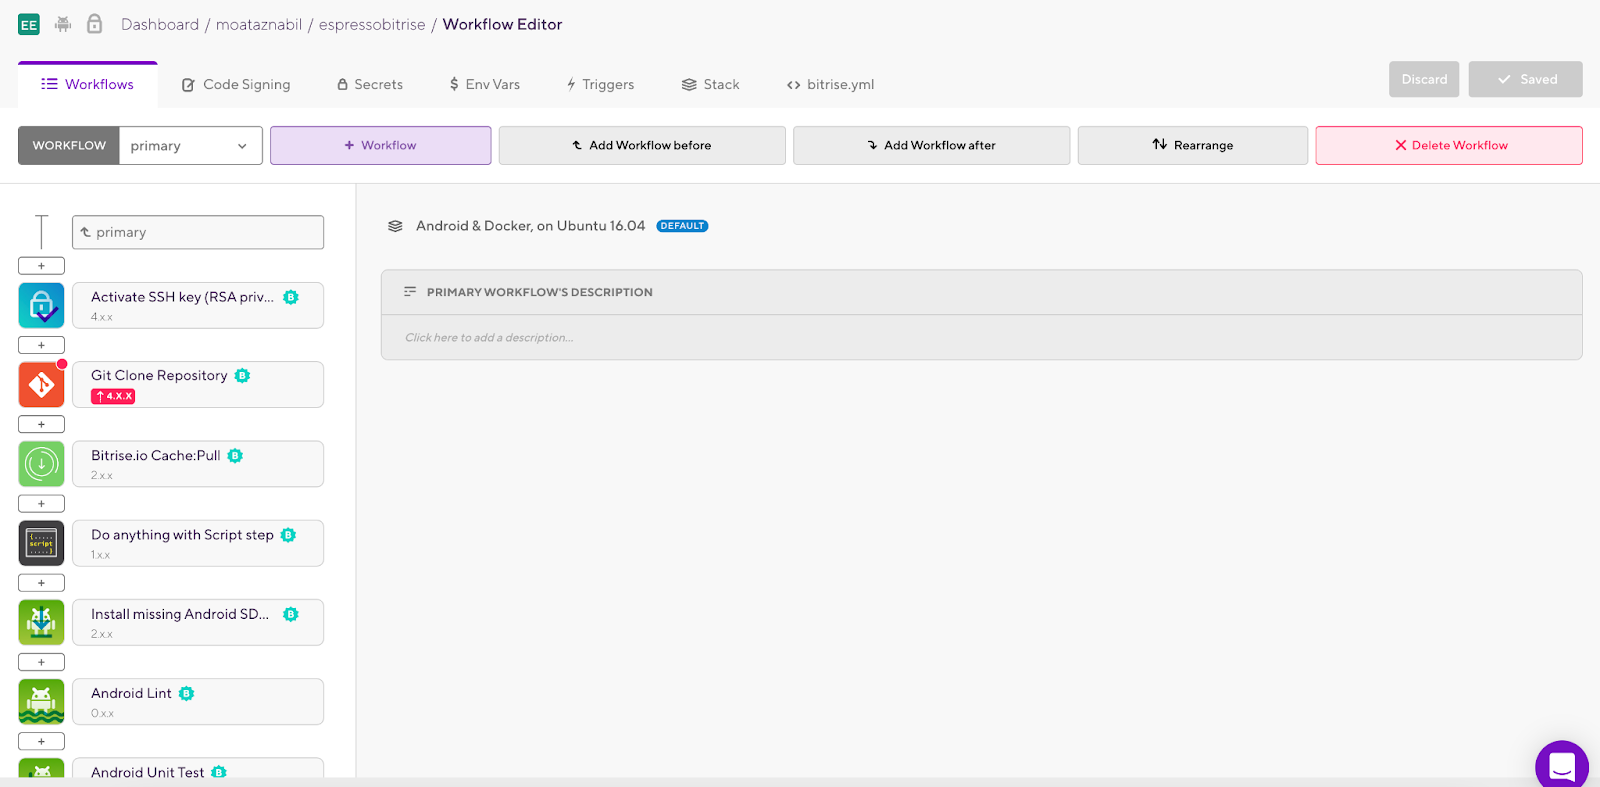
TIP: Bitrise has 330+ integration Steps in different categories for all mobile platforms.
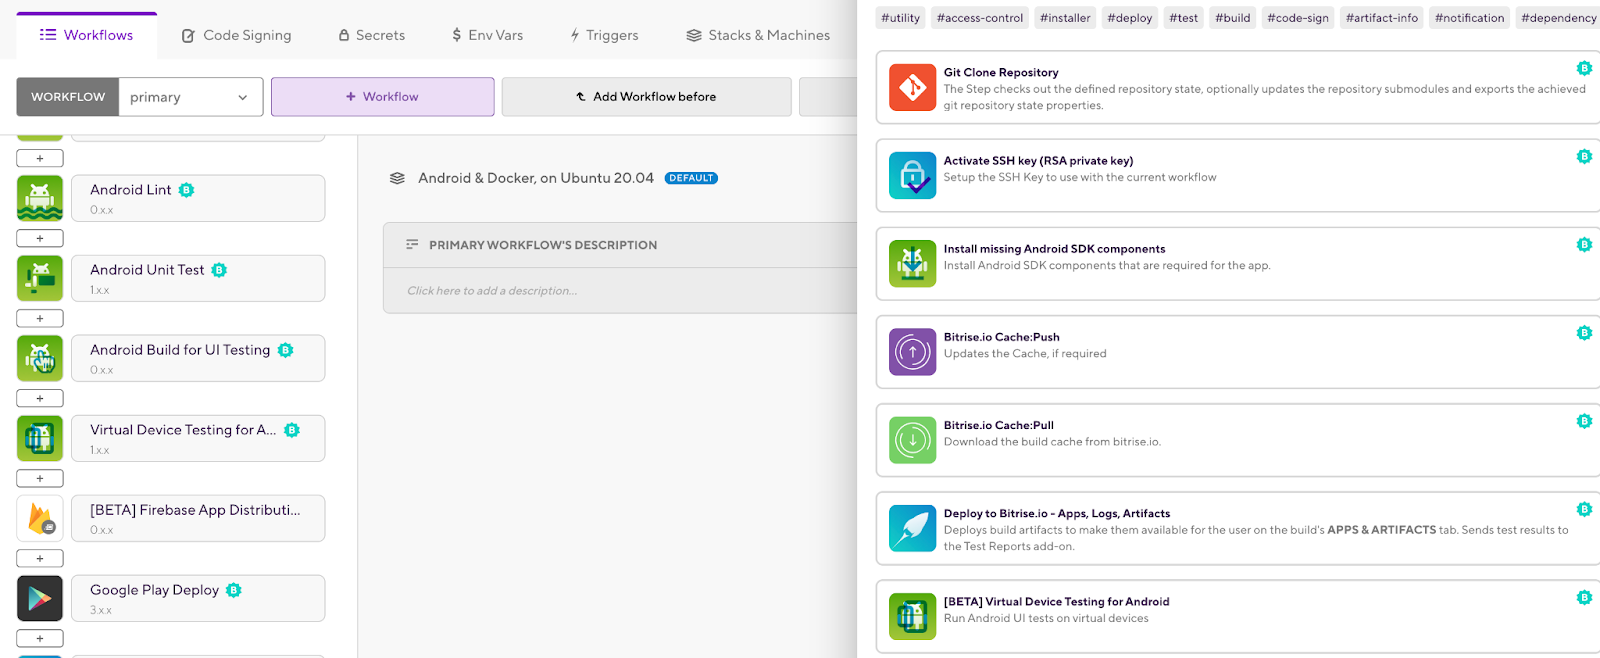
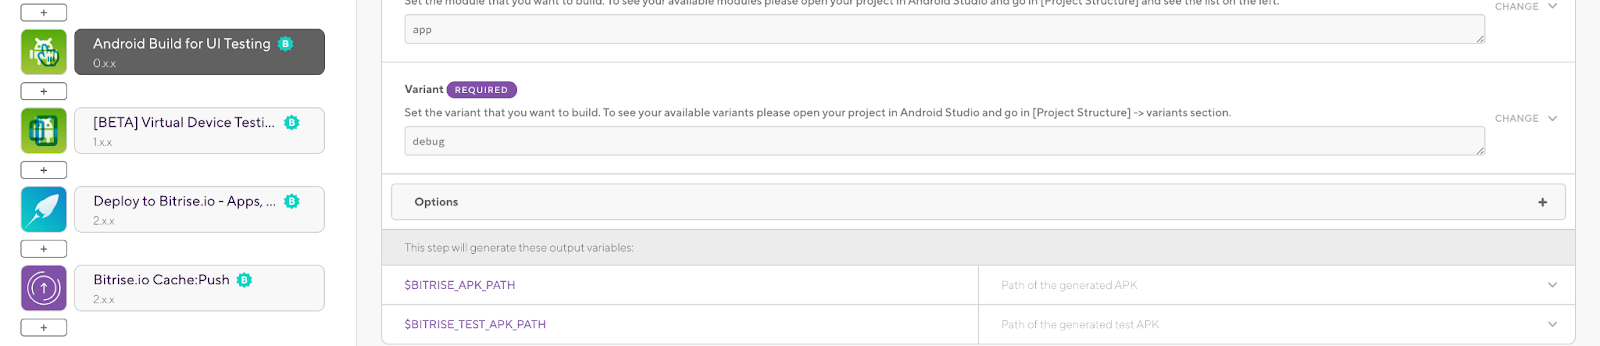
We need to add one Bitrise Step in your CI Workflow to build the app for testing and configure your module, app, and variant based on your target. This will give you the output of two apps (apk and test apk).
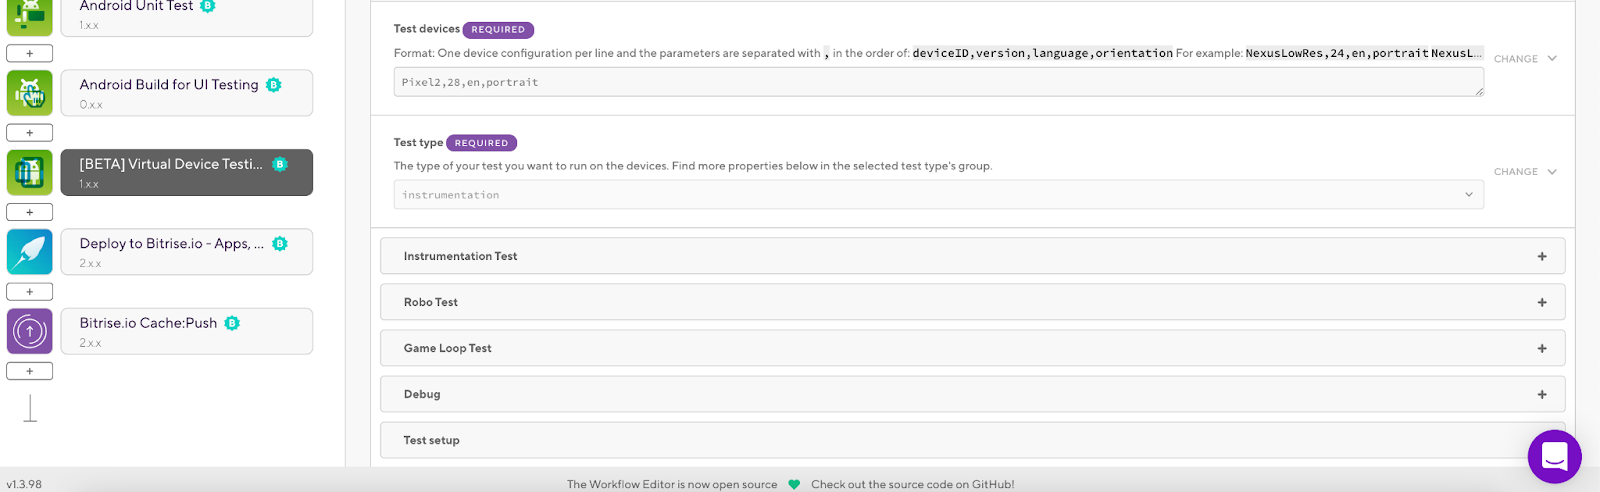
Then you can add a Step for taking the app and a test app to run them on the cloud device with Firebase Test Lab. Select the Instrumentation Test in the Test Type and the preferred device with the OS version.
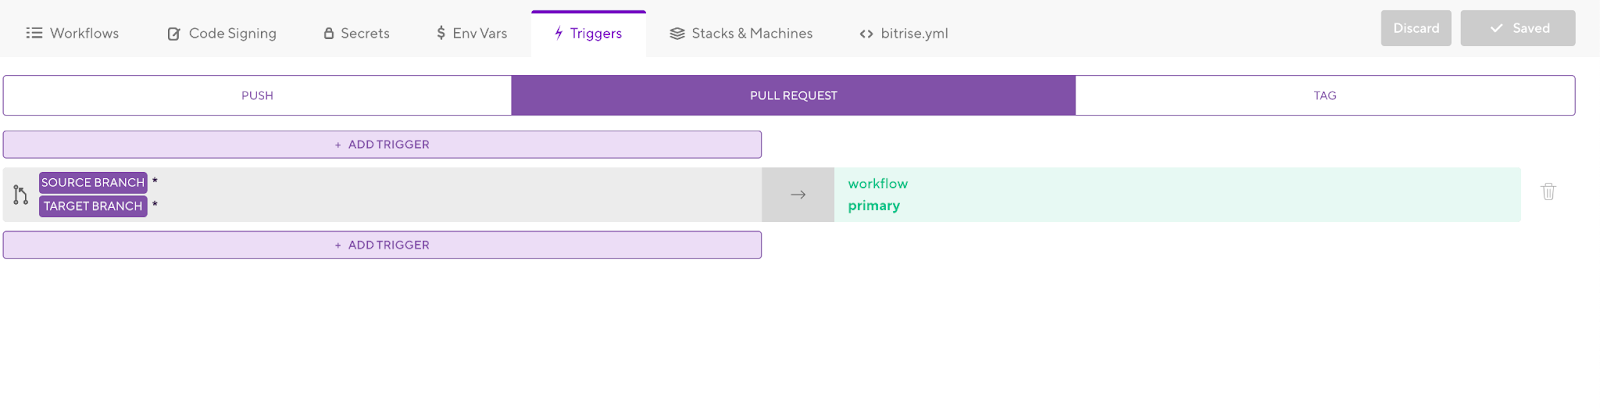
Now your Workflow is ready to run UI tests. There are different ways to run your Workflow: you can use Gitflow if you have different branches or do it manually if you want to trigger it immediately.
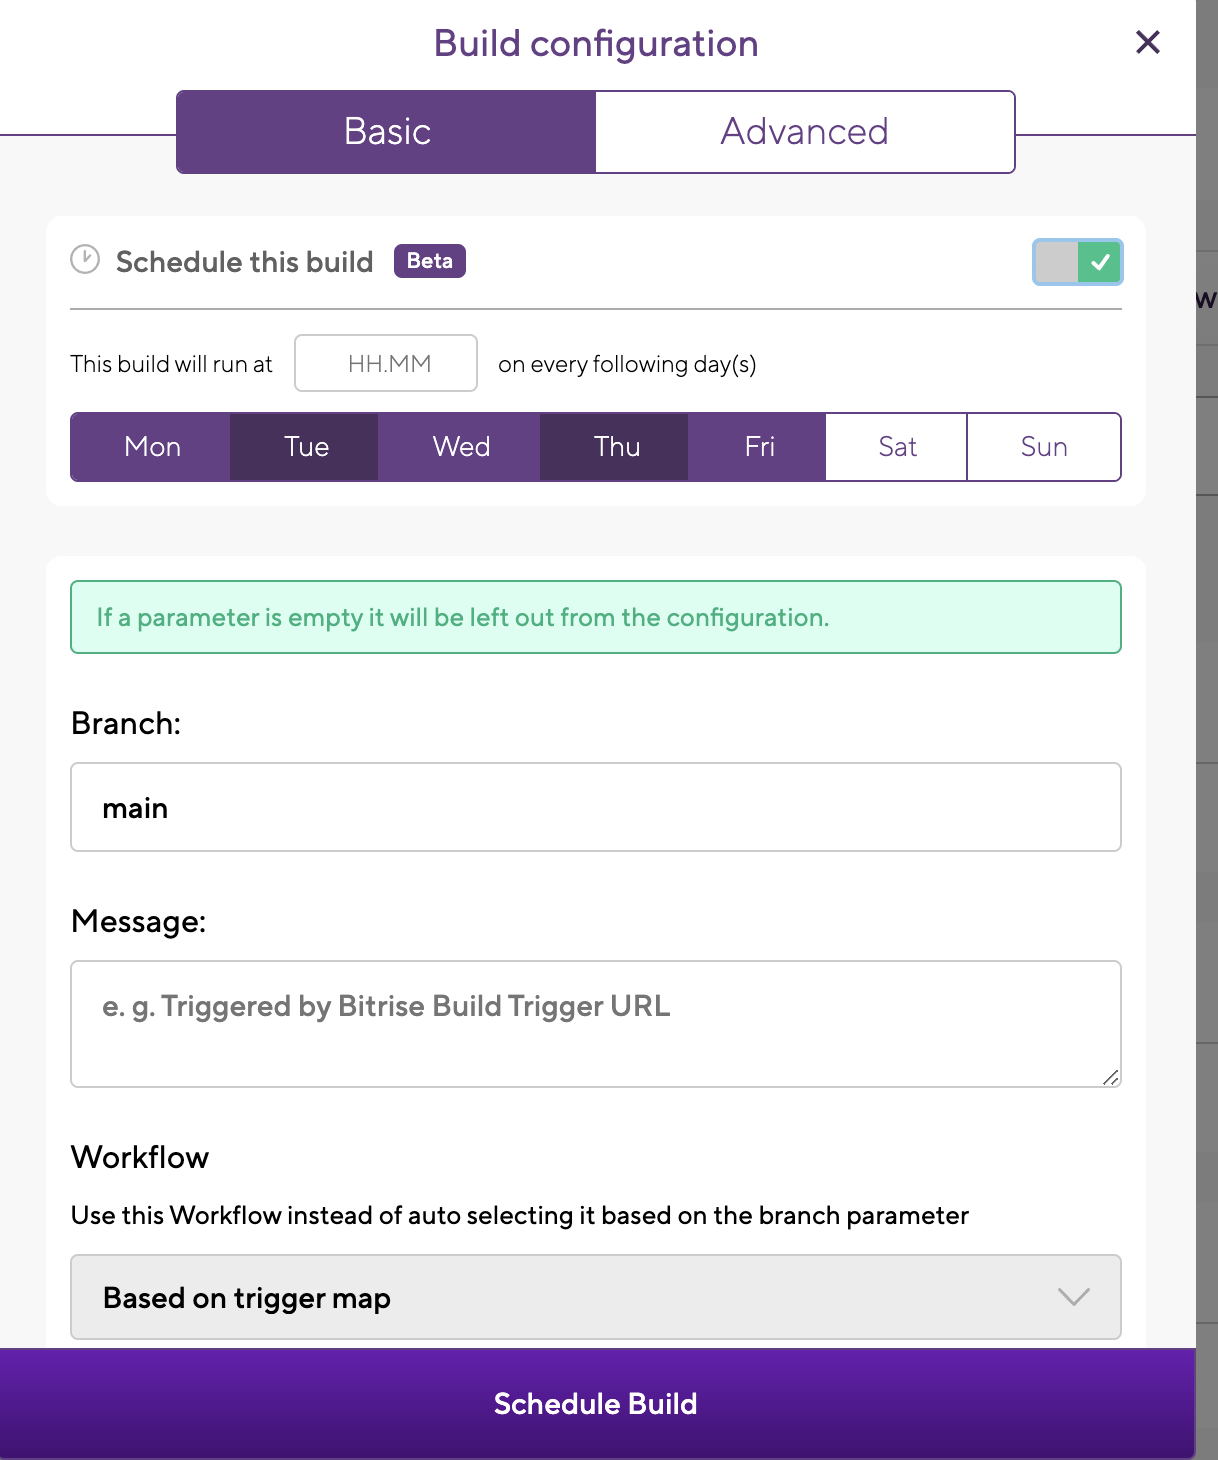
Or you can click on the builds and click on the Start/Schedule Build button.

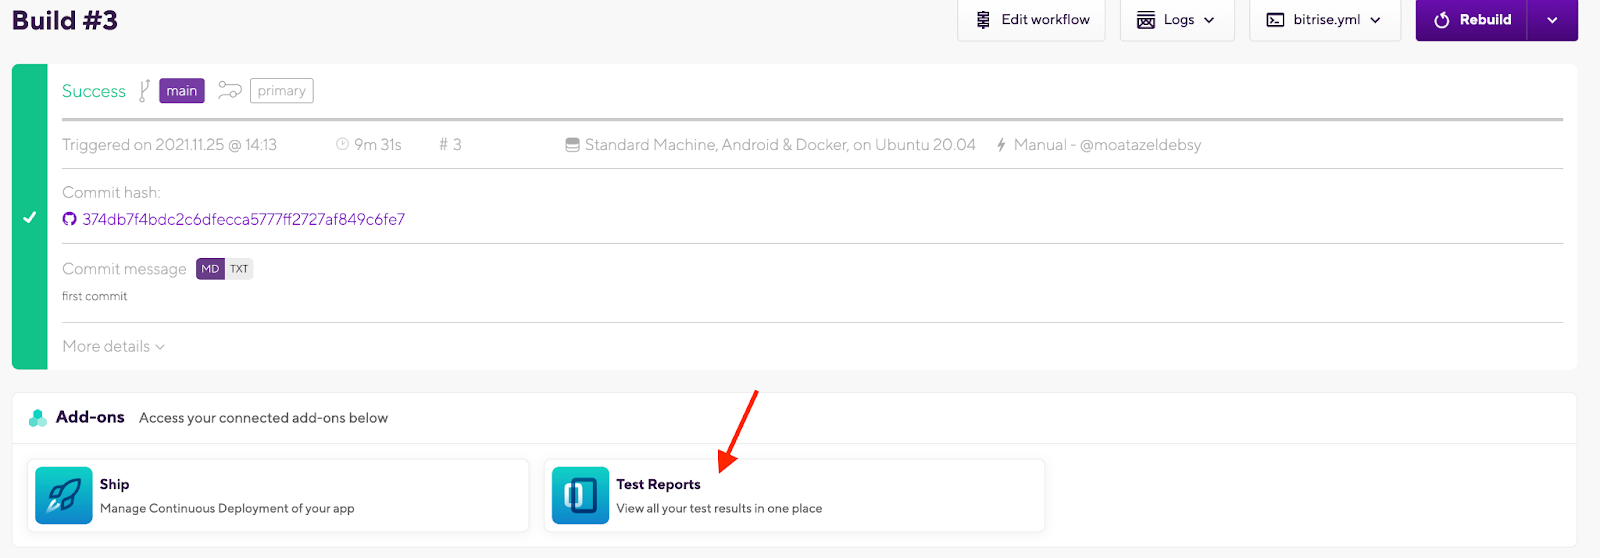
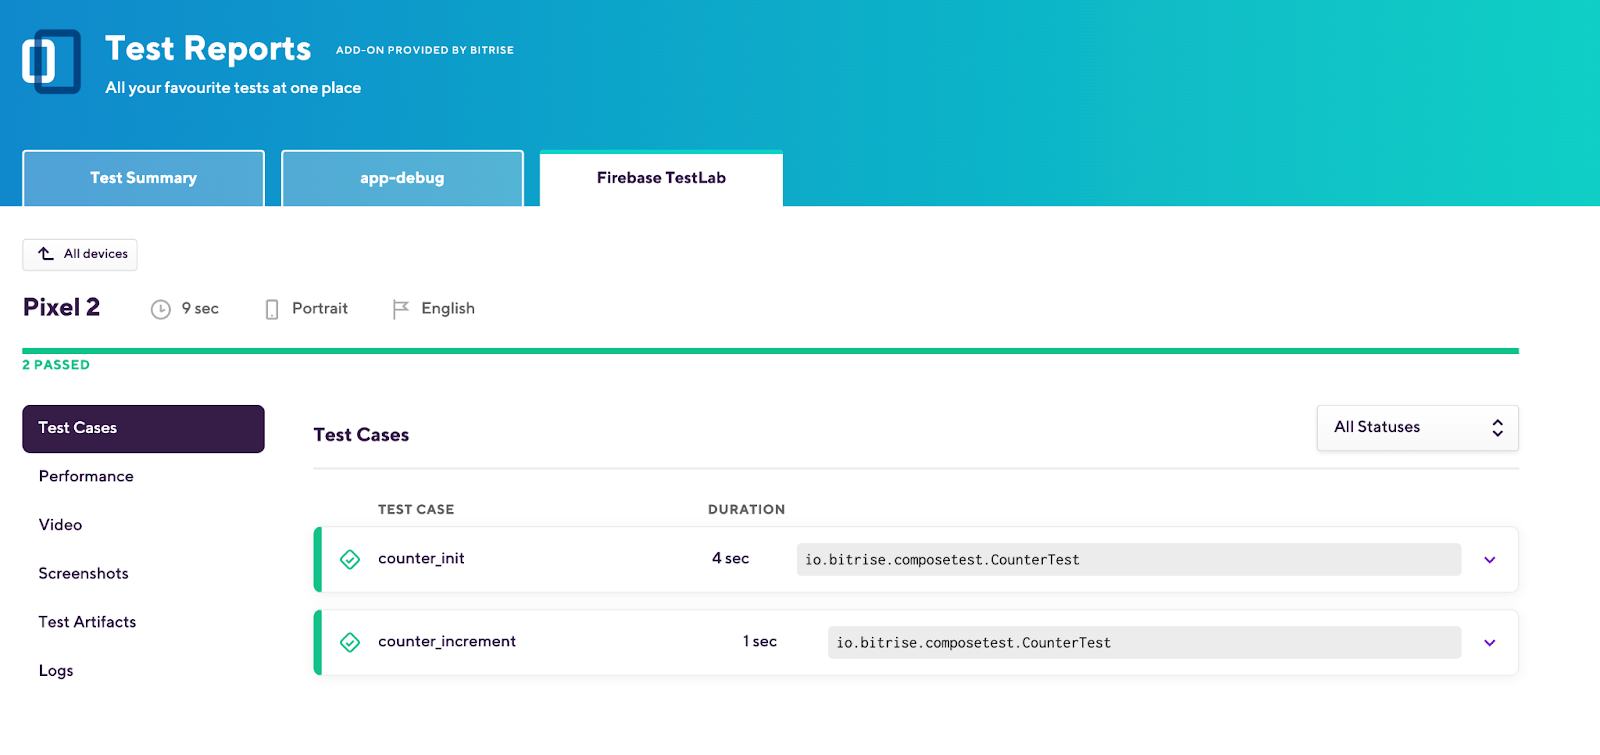
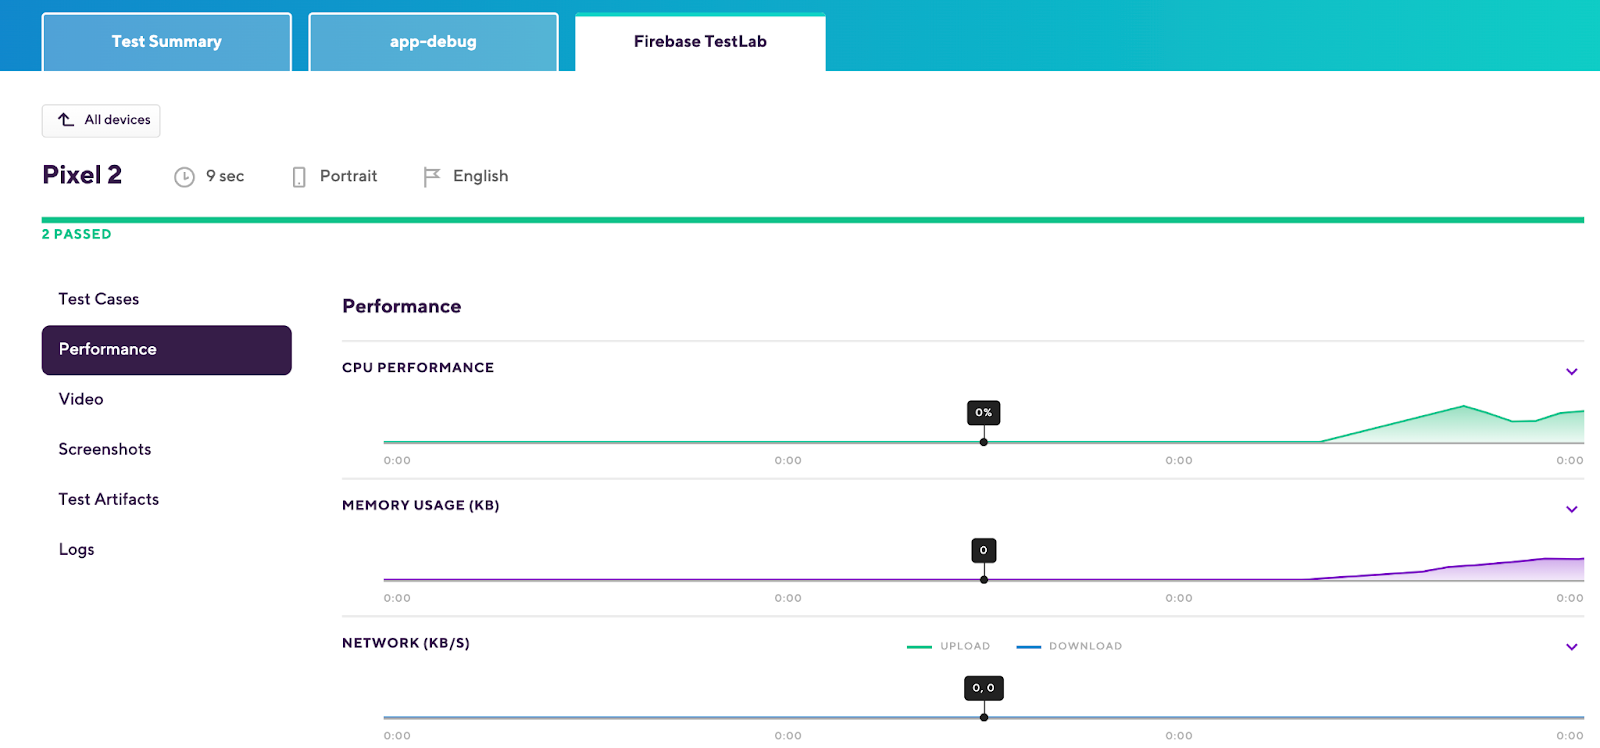
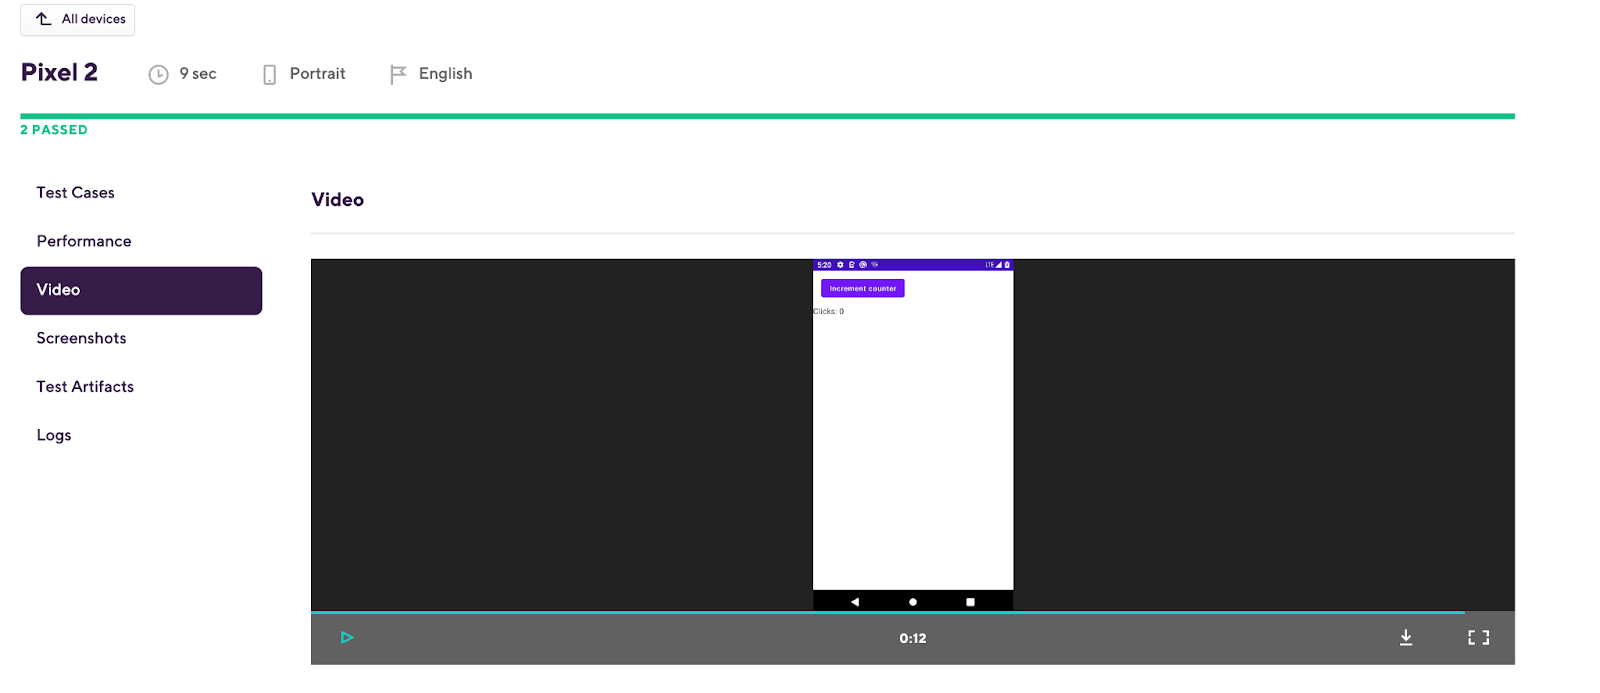
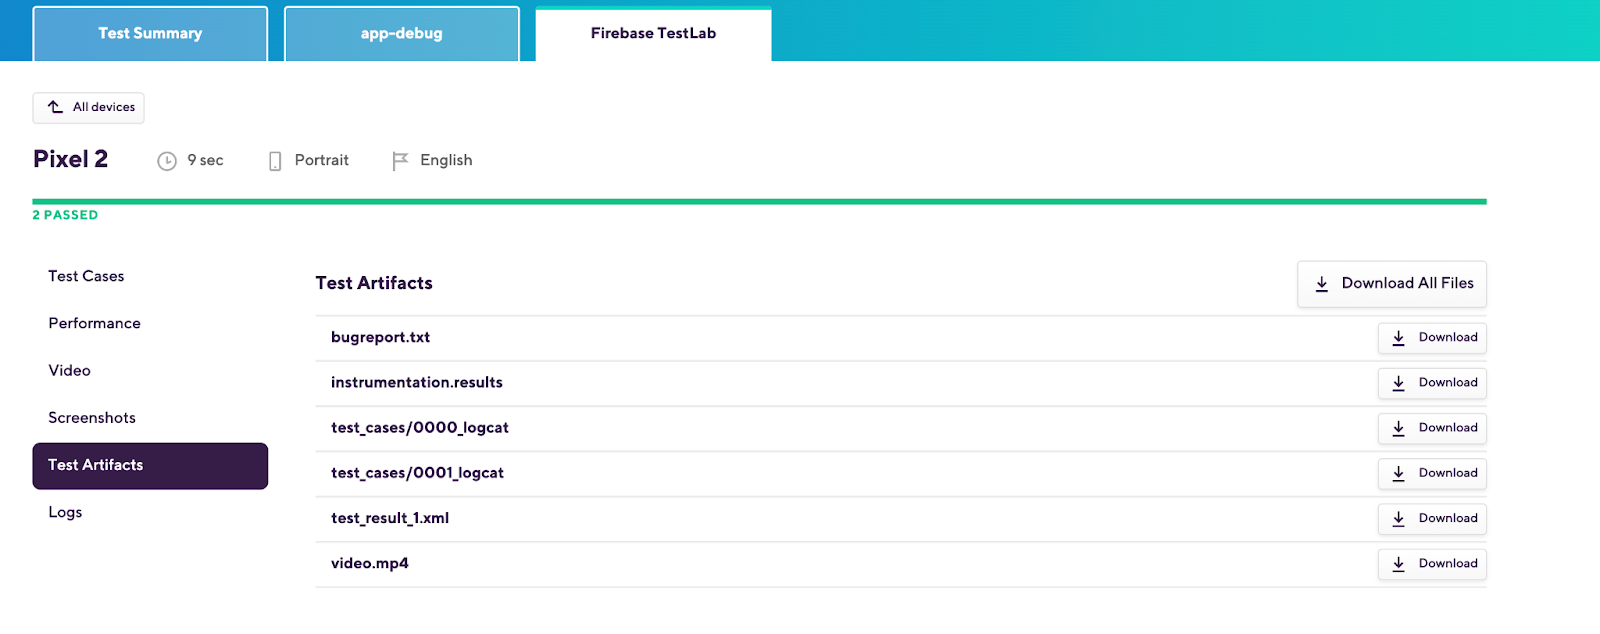
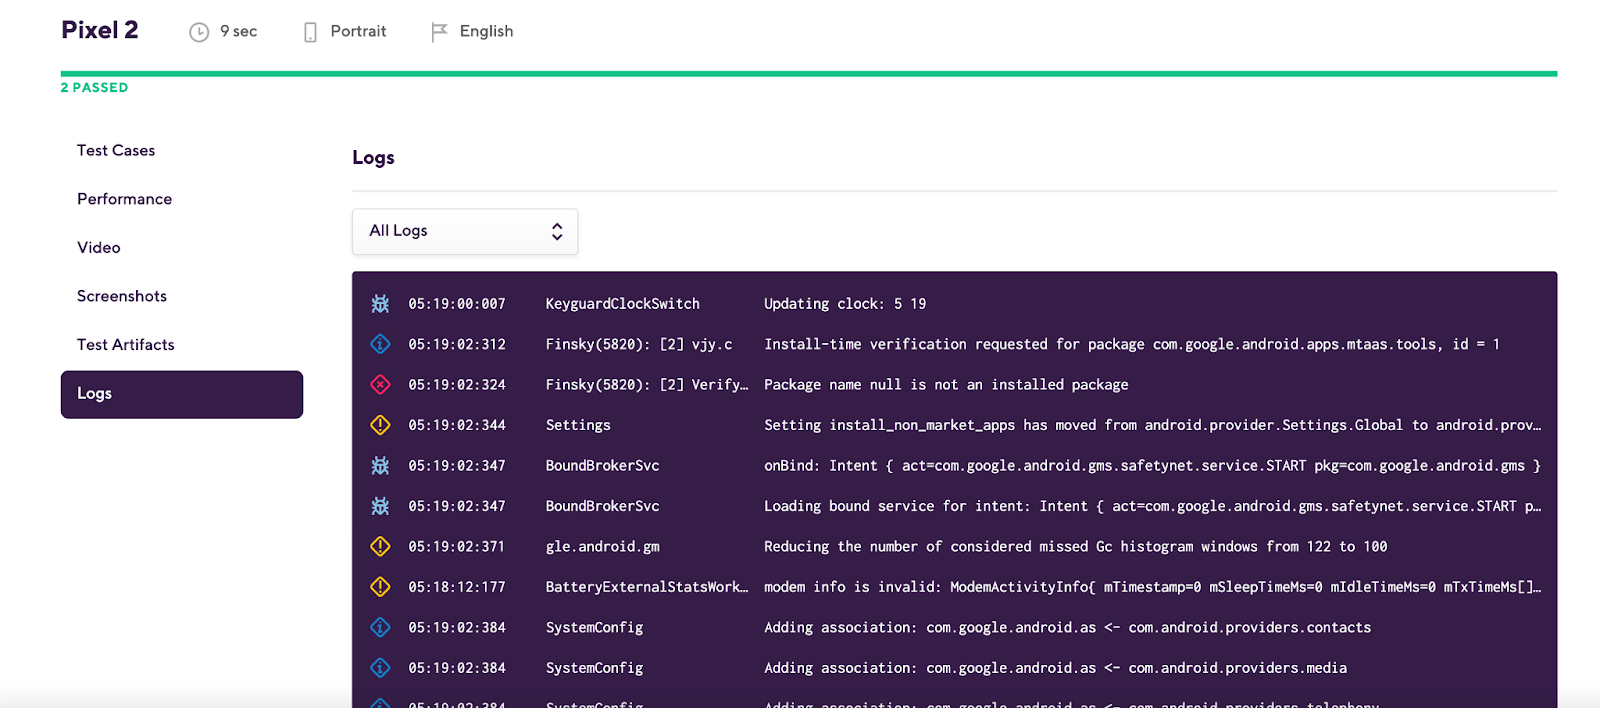
After your build is finished successfully, you can check the test report with our Test Add-on, which includes the test results and artifacts.
Congratulations! 🎉 You integrated your app with the CI server and now you can build, test, and deploy your app quickly and efficiently.
Code Repository
Resources
I hope you found this article useful! If you have any questions, you can reach out to us on Twitter or via email. If you’d like to try Bitrise, you can sign up here for free.
Are you interested in joining my team and working with us to grow the Bitrise community together? Check out our current openings. Good luck!
Stay safe and happy building!

.jpg)
.jpg)
