Software development is rapidly changing every day, especially in mobile development, because we always need to add new or revamp existing features and technologies to help our customers in their daily activities. Because of that, testing becomes a mandatory practice all mobile developers should use to make sure that the functionalities are working as expected.
There are different types and levels of testing in the software development field — we will begin with an overview before delving into unit testing in more detail.
Sounds interesting? Let’s get started!
Levels of testing
There are different types of testing with different scopes and usually we are referring to these types with the following test pyramid:
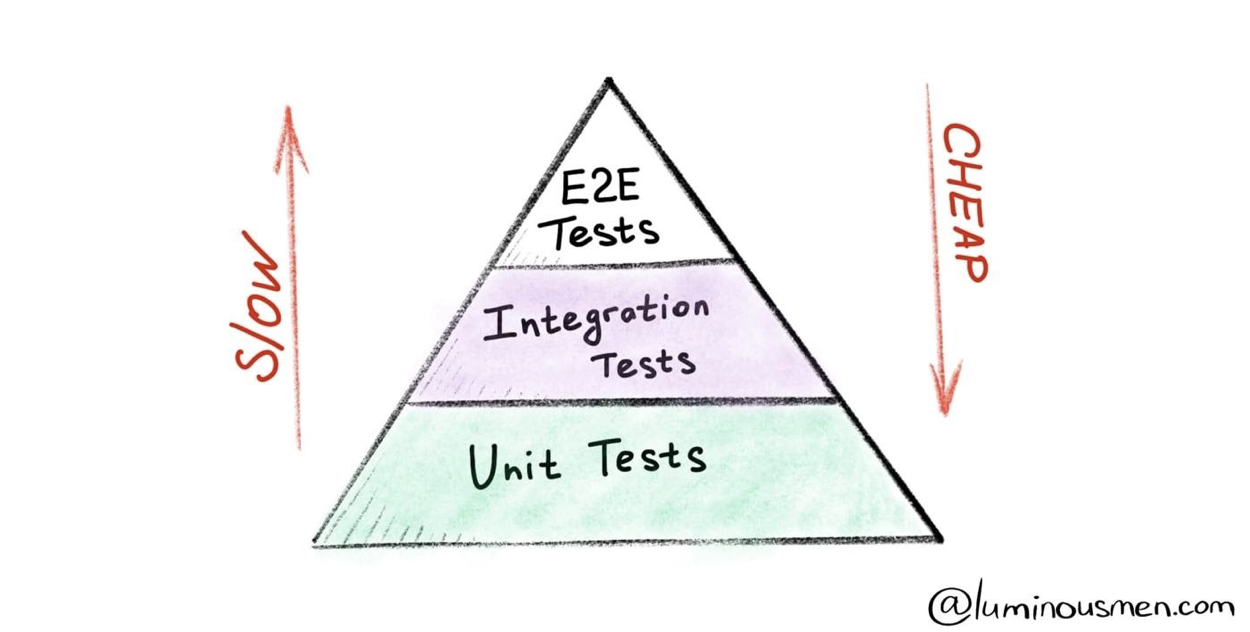
- Unit: tests on individual components that have a single responsibility
- Integration: tests on the integration of individual components
- Acceptance/E2E: tests on the requirements for an application with different scenarios
What’s unit testing?
A unit test is a piece of code that tests the behavior of a function or class, usually written by developers.
It’s the lowest level of testing, where the developer asserts a set of conditions that need to be true, as well as some that should be false and should essentially be very narrow and well-defined in scope. For instance, let’s assume that we are developing a calculator app — a developer would assert what should happen when we click on the plus button (+), and the expectations and results are narrowly-defined.
Unit testing naturally focuses on a unit of code because it can’t catch integration errors or system-level errors, which we will cover with the integration and E2E testing.
Things to unit test
We can use unit testing in different verifications such as:
- Happy paths or the expected cases.
- Edge cases.
- Boundary conditions.
- Logic.
The advantages of unit testing?
Some developers underestimate the importance of writing unit tests. The following points are the benefits of unit testing that we can consider:
- Reduces the cost of testing as defects are captured in the early phase (test early and often).
- Provides documentation.
- Reduces code complexity.
- Reduces bugs when changing the existing functionality.
- Improves design and allows better refactoring of code.
Unit testing and code coverage
Code coverage testing is determining how much code is being tested. It can be calculated using the following formula:

Code coverage techniques used in unit testing are listed below:
- Statement coverage
- Decision coverage
- Branch coverage
- Condition coverage
Unit testing in mobile development
Testing your mobile app is an important part of the app development process. By running tests against your app consistently, you can verify your app's correctness and functional behavior. Let’s take a look at three different platforms (iOS, Android, and Flutter) and learn about how we can implement unit tests for these apps.
iOS unit testing
In iOS, we can use the XCTest framework to write unit tests for your Xcode projects that integrate seamlessly with Xcode's testing workflow.
Tests assert that certain conditions are satisfied during code execution, and record test failures (with optional messages) if those conditions aren’t satisfied.
Source XCTest | Apple Developer Documentation
When we create an iOS app, we have three directories:
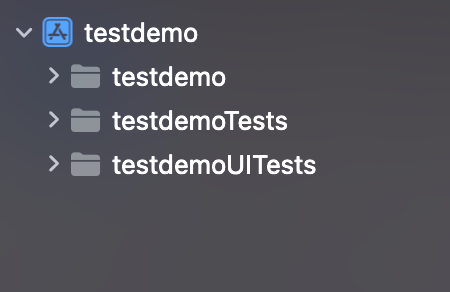
Our unit tests are going to be located inside the [ProjectName]Tests for instance: testdemoTests directory includes the following test class:
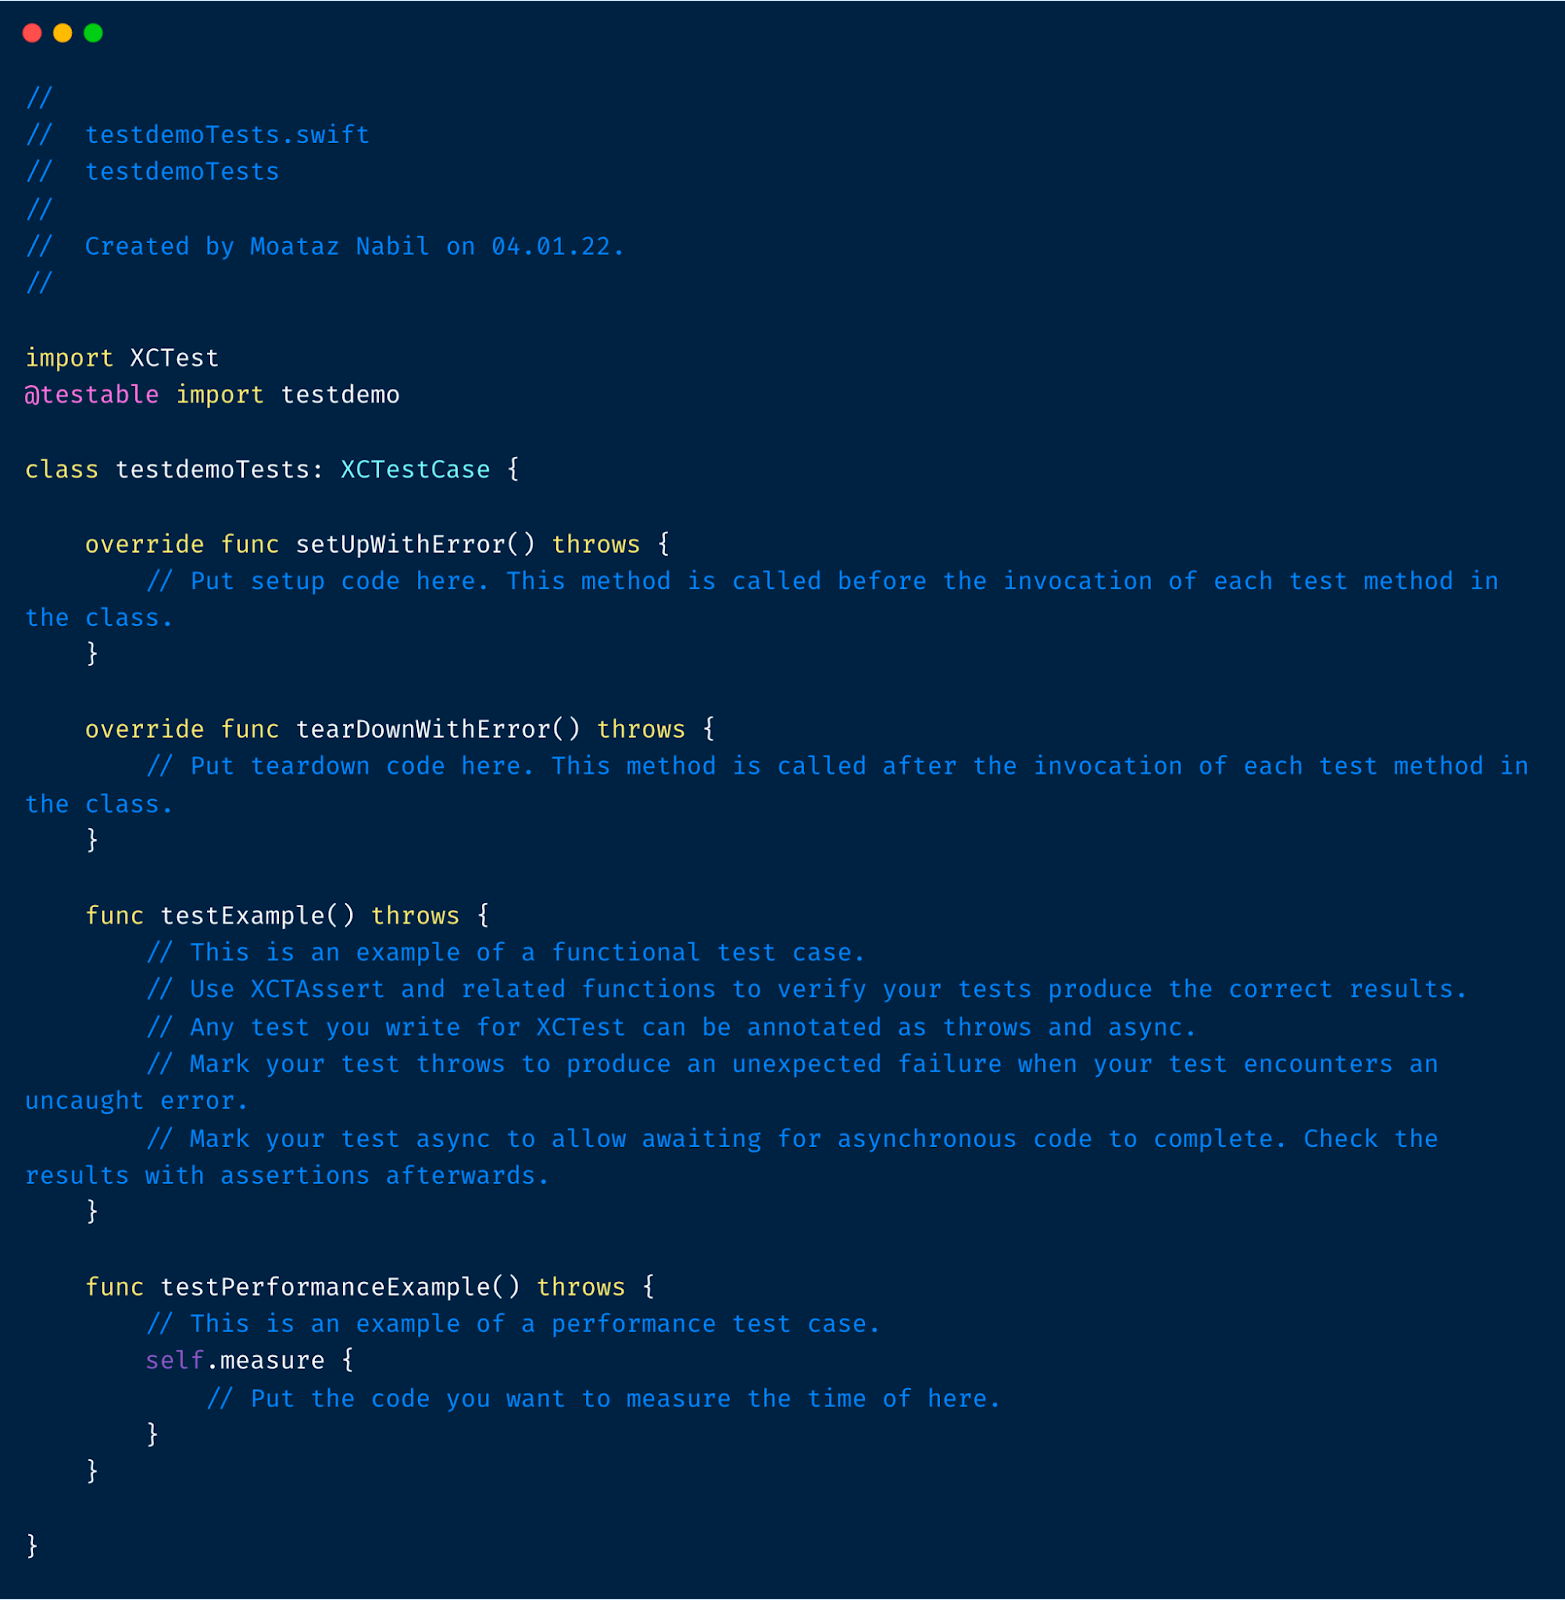
Then you can start adding your unit tests or creating different classes to test the app functions.
Let’s assume that we have a PriceCalculator class with a function to return the final price of a product:
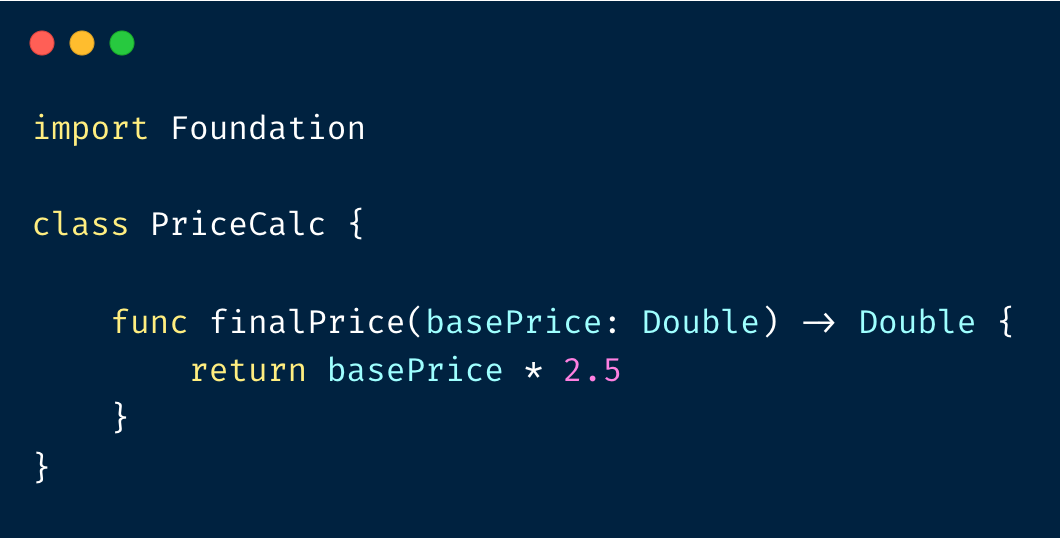
And in order to test the logic inside product price, we should create a unit test like the following:
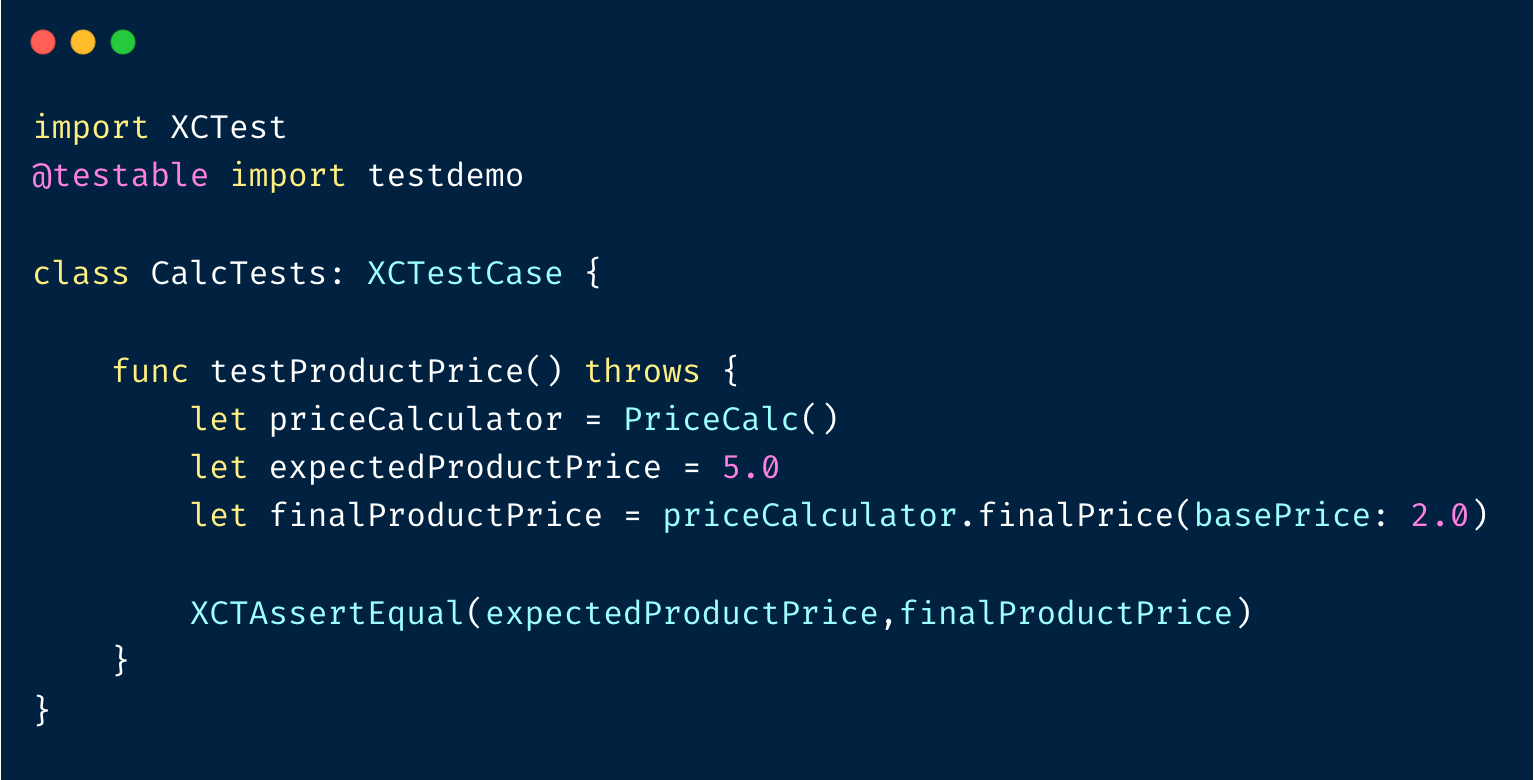
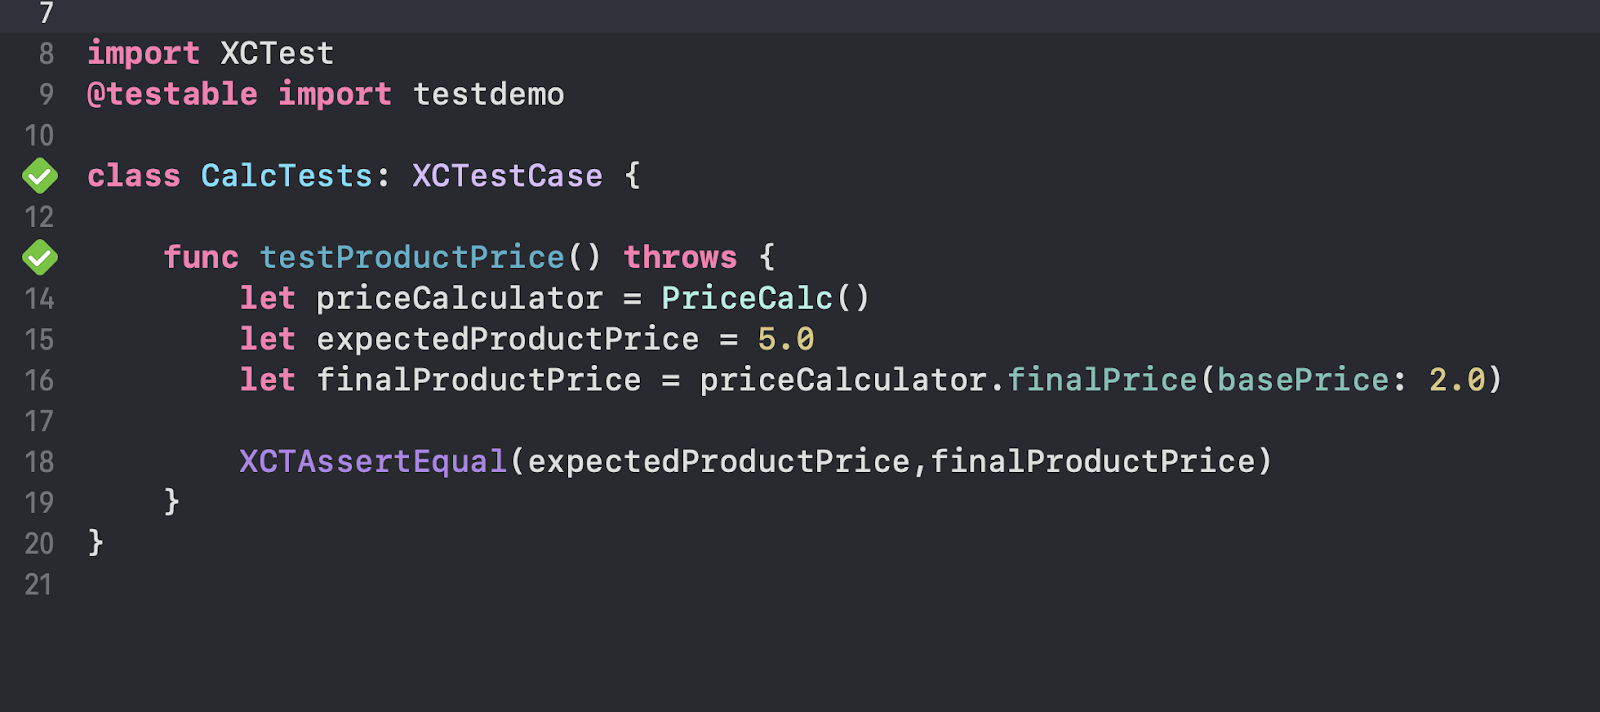
Now we can run the test and verify the result:


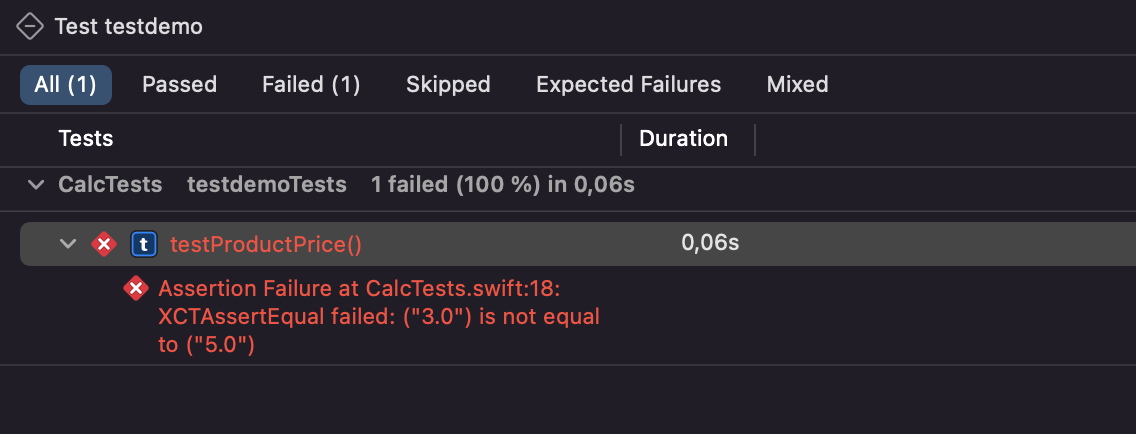
Let’s try to change the expectedProductPrice value to be 3 and run the test again:

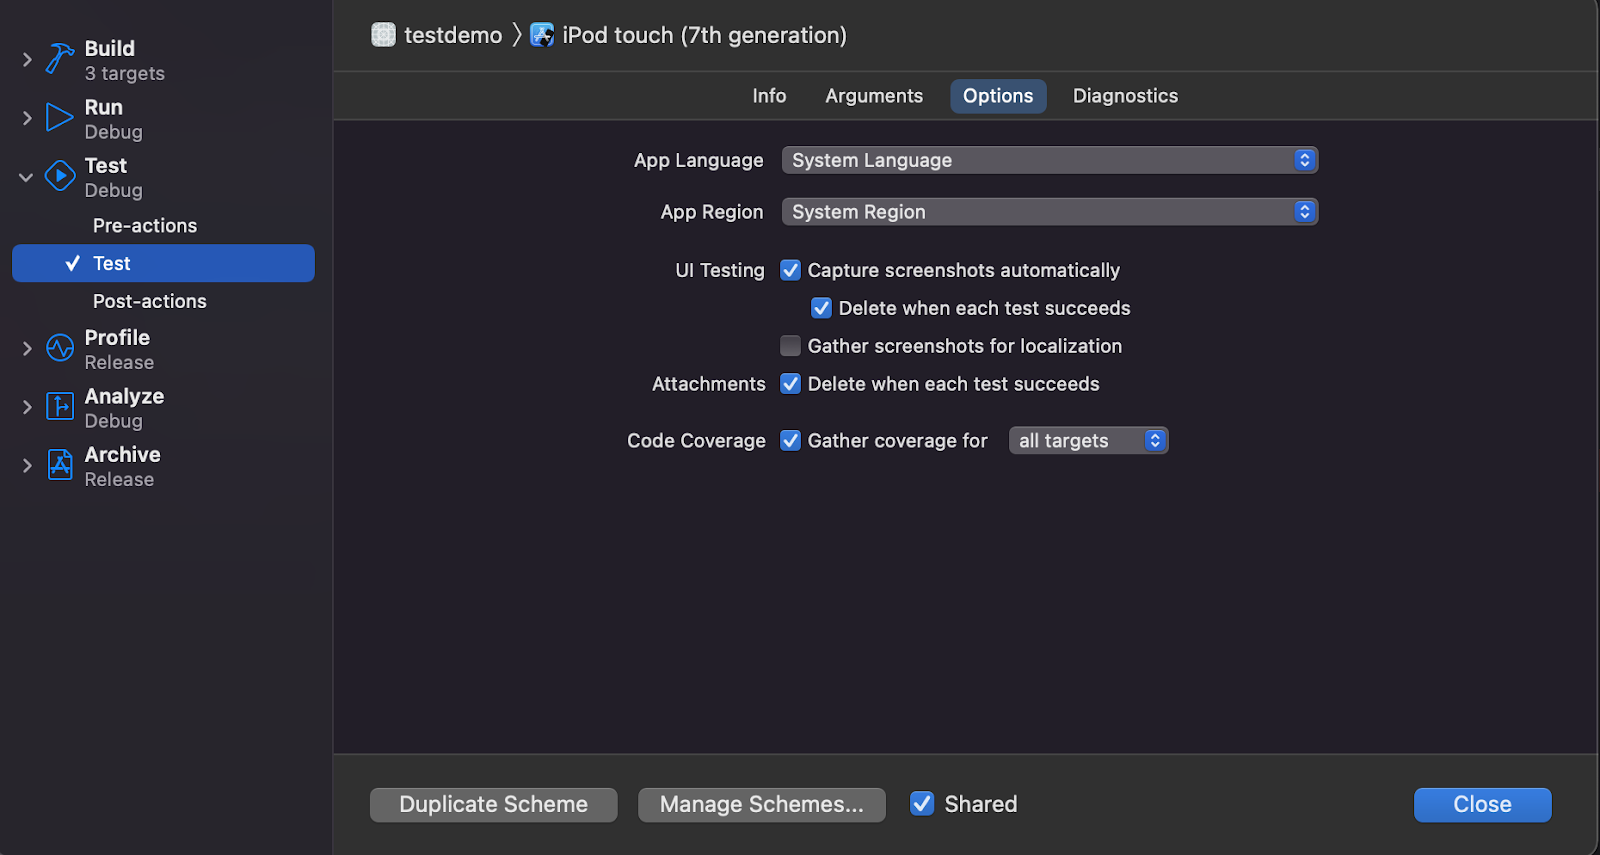
In case you need to enable code coverage for unit tests, Xcode won’t gather test coverage by default, but it’s really easy to enable it by editing the scheme and enabling it in the Test section:
Android unit testing
For Android, unit tests are compiled to run on the Java Virtual Machine (JVM) to minimize execution time. If your tests depend on objects in the Android framework, you can use Robolectric. For tests that depend on your own dependencies, use mock objects to emulate your dependencies’ behavior.
When we create an Android app, we have three directories:

androidTest: this is for instrumentation and UI tests
main: this is for the app source code
test: this is for unit tests
Our unit tests are going to be located inside the src/test directory.
Let’s assume that we have a PriceCalculator class with a function to return the final price of a product like the above iOS example:
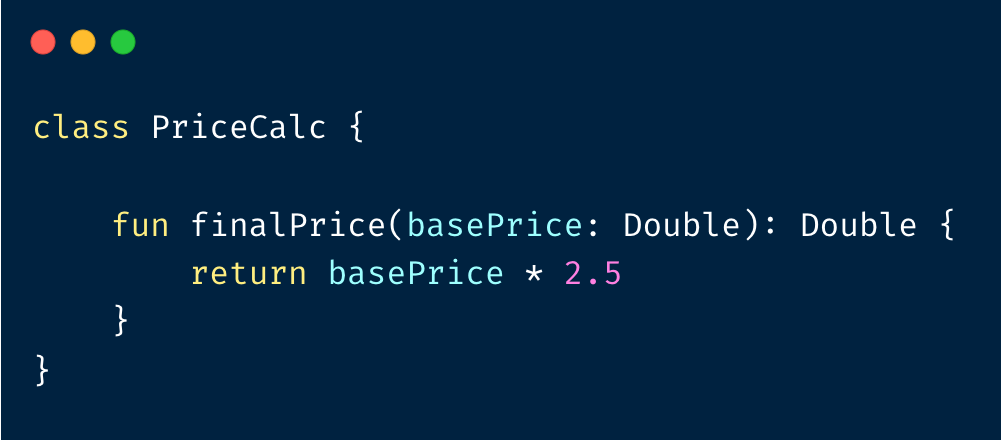
And in order to test the logic inside product price, we should create a unit test like the following:
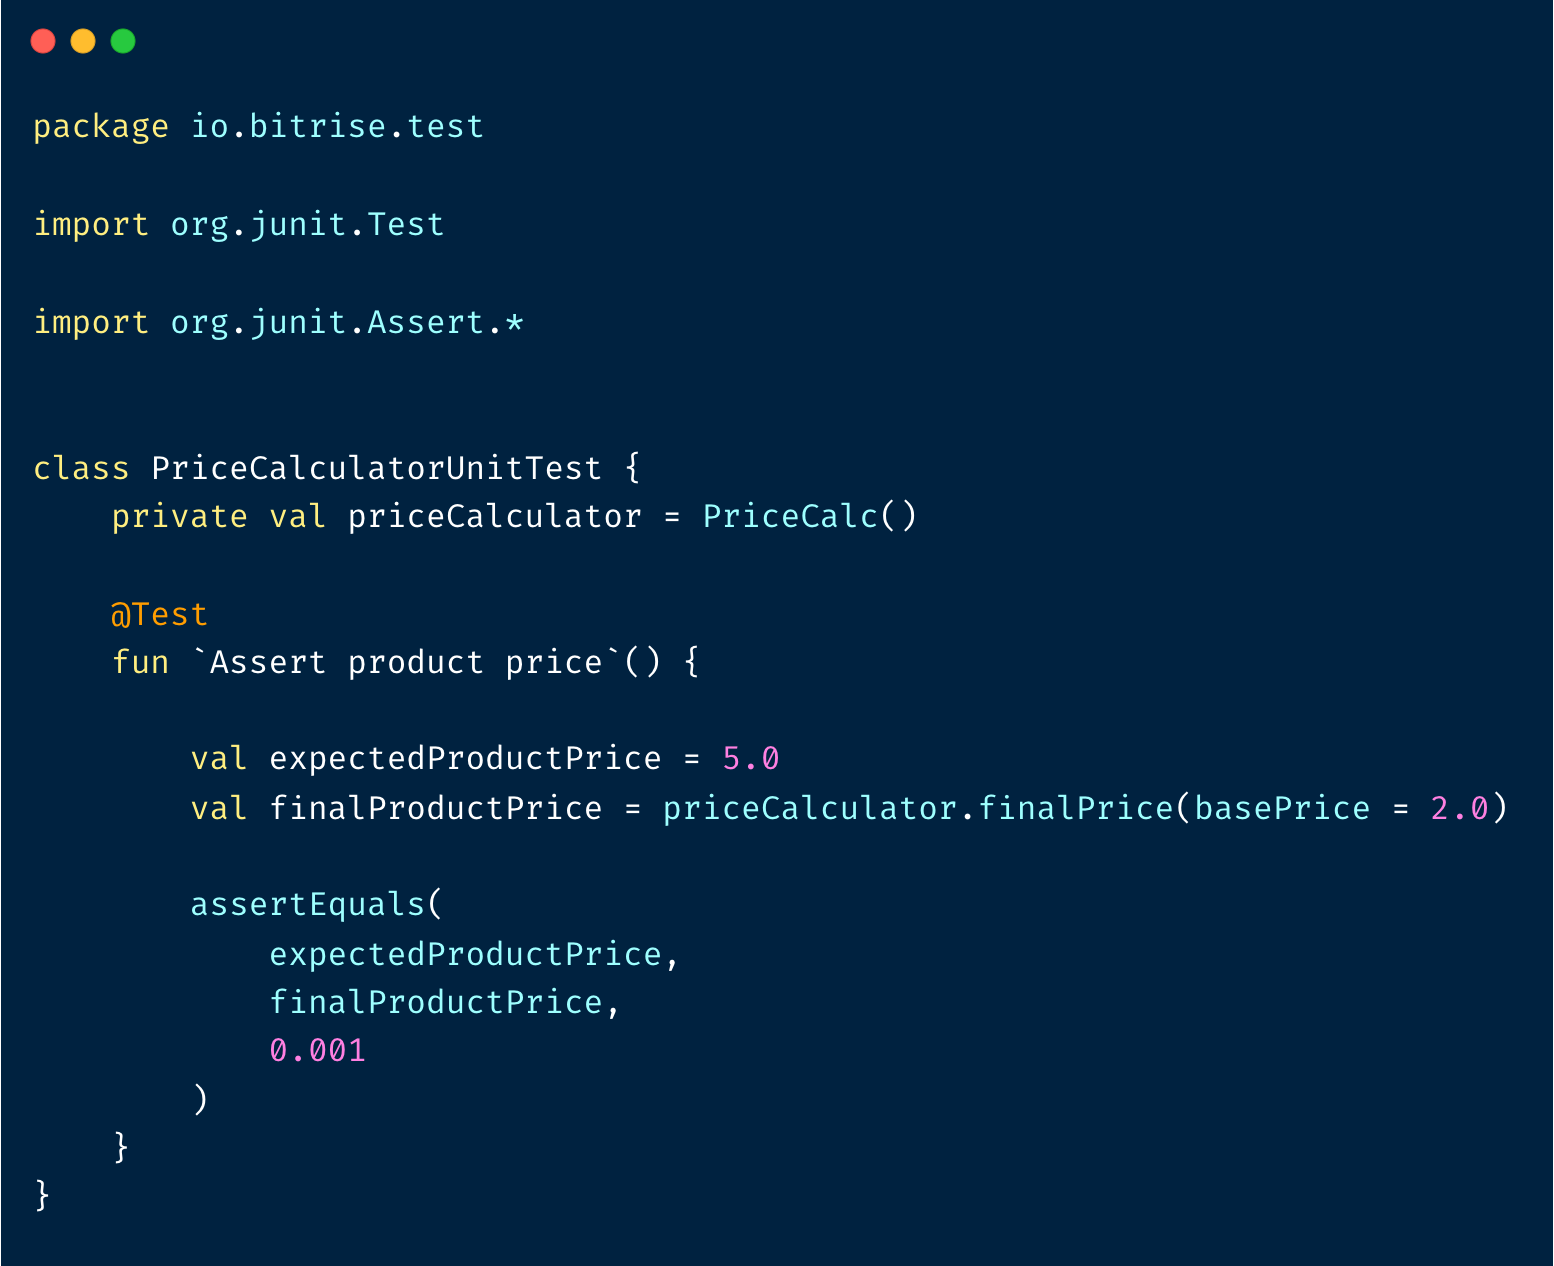
Now we can run the test and verify the result:
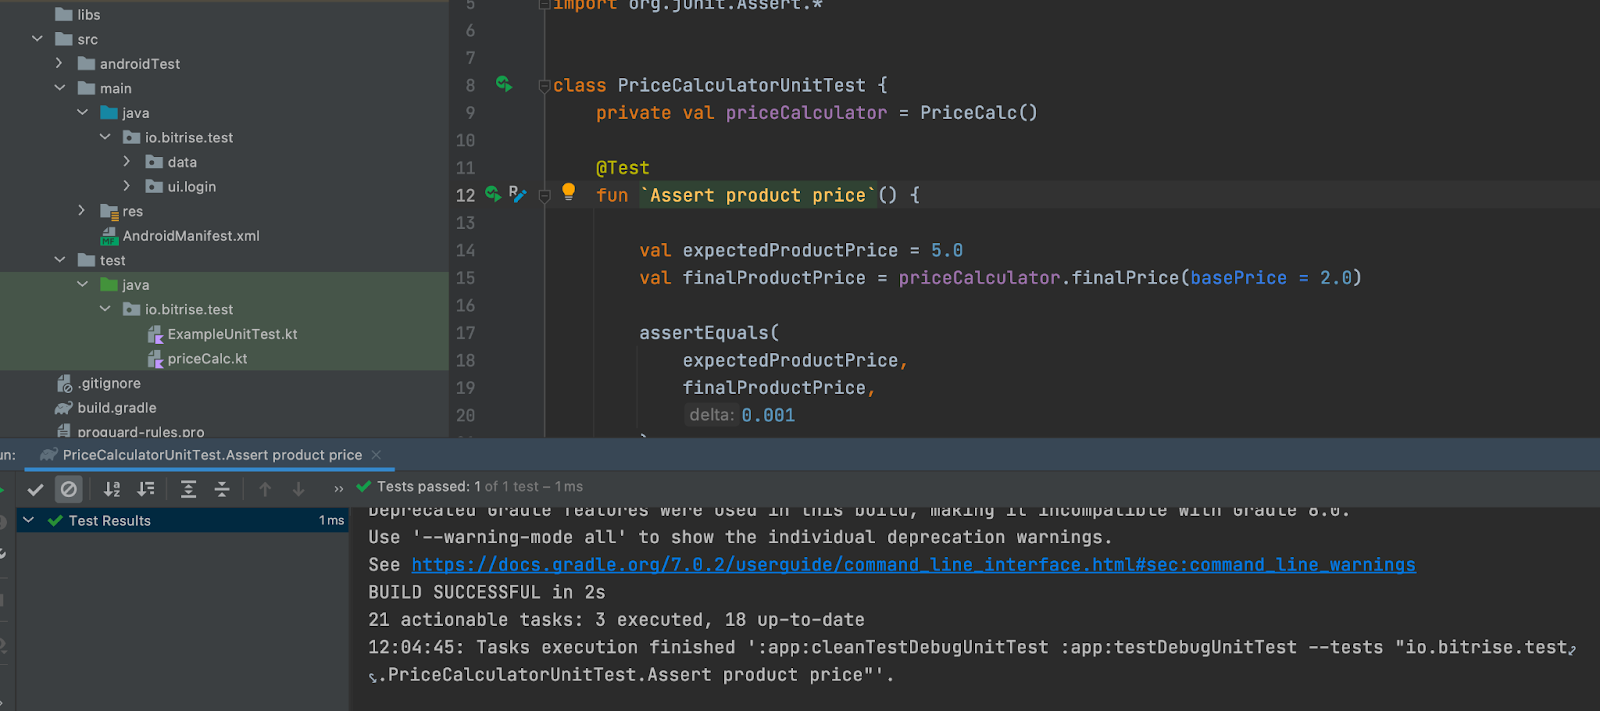
Let’s try to change the expectedProductPrice value to be 3 and run the test again:

Also, you can use a code coverage tool for instance Jacoco to generate an HTML report for your unit tests and integrate it with the CI server:

Flutter unit testing
In Flutter, the test package provides the core framework for writing unit tests, and the flutter_test package provides additional utilities for testing widgets by the following steps:
- Add the test dependency
- Create a class to test:
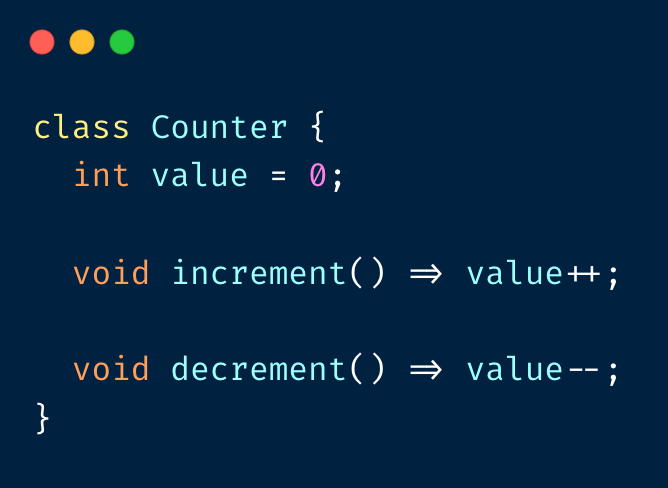
- Create a test file
- Write a test for our class:
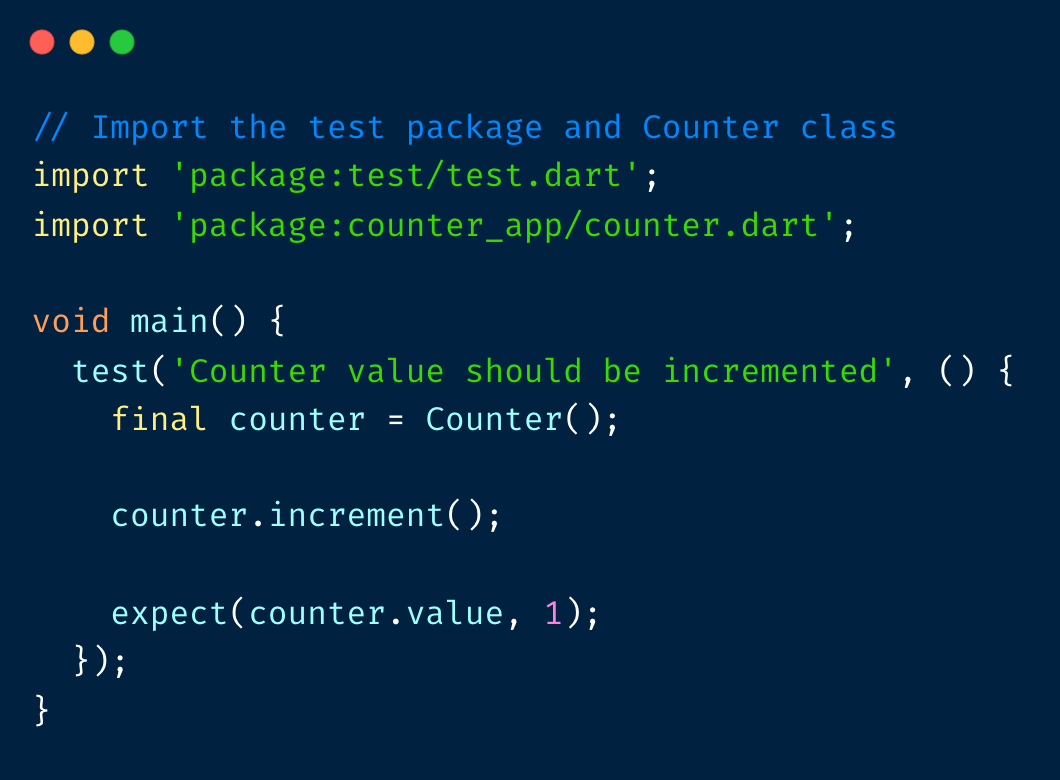
- Run the tests locally

What makes good unit tests?
There are different sets of criteria for writing efficient unit tests:
- Tests should run fast and quickly.
- Tests should be fully automated and the output should be either “pass” or “fail”.
- Tests shouldn’t share states with each other, they should be Independent and Isolated.
- We should write your tests before writing the production code they test. This is known as test-driven development.
What’s test-driven development?
TDD (test-driven development) is writing the test code first before writing the actual implementation. It’s an advanced technique of using automated unit tests to drive the design of software and force decoupling of dependencies. The result of using this practice is a comprehensive suite of unit tests that can be run at any time to provide feedback that the software is still working as expected. This technique is heavenly emphasized by those using agile development methodology.
TDD flow
TDD has three phases:
- RED: in this step, we create a test code for the implementation that will handle every possible scenario that could happen for a specific function or method. We can also code the mock objects that are required for the testing in this phase. In the beginning, the test will fail because there is no implementation code yet.
- GREEN: in this step, we create enough implementation code that will pass the test created before.
- REFACTOR: in this step, after the implementation has passed the test, we can restructure the implementation to make it cleaner, more optimized, or more maintainable but still doesn’t break the correct logic.
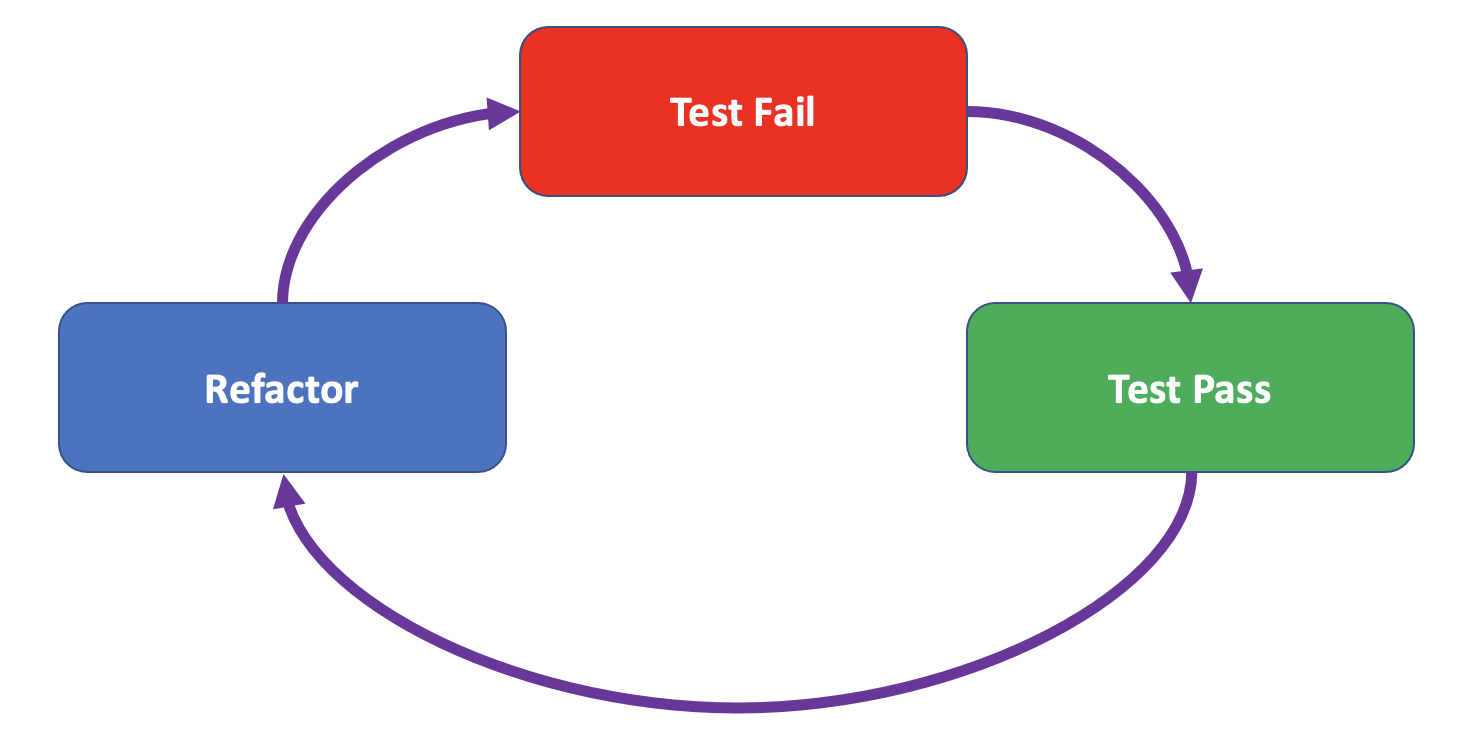
Test-driven development vs. unit testing
Unit testing is writing many small tests that each test one very simple function or object behavior. TDD is a thinking process that results in unit tests, and “thinking in tests” tends to result in more fine-grained and comprehensive testing and an easier-to-extend software design.
Running unit tests on CI
After writing the unit tests locally, it’s time to push the project to a source control management tool such as GitHub, to be able to build and test your app via a CI pipeline, such as Bitrise.
On Bitrise we have over 330 Steps and many different Steps that support unit tests:
Let’s assume that the following iOS workflow on Bitrise includes the Xcode Test for iOS Step for running all the Xcode tests that are included in your project:
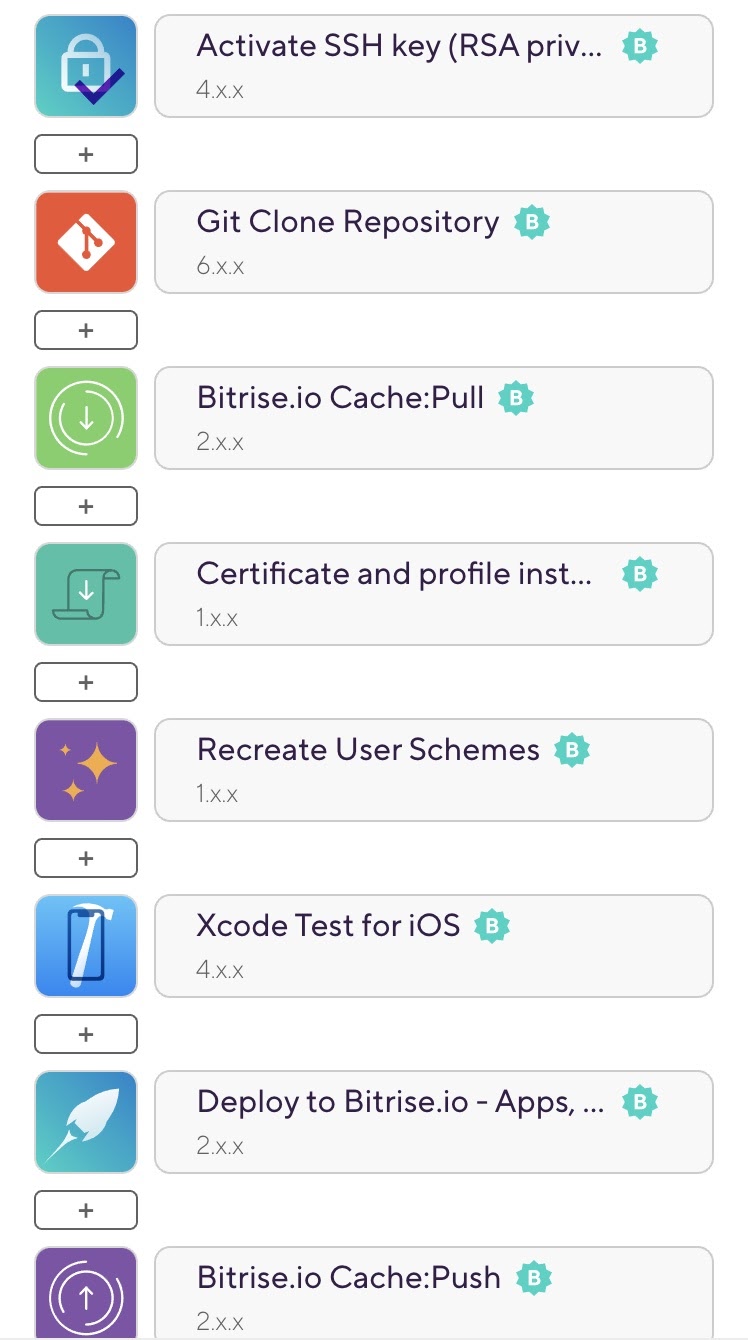
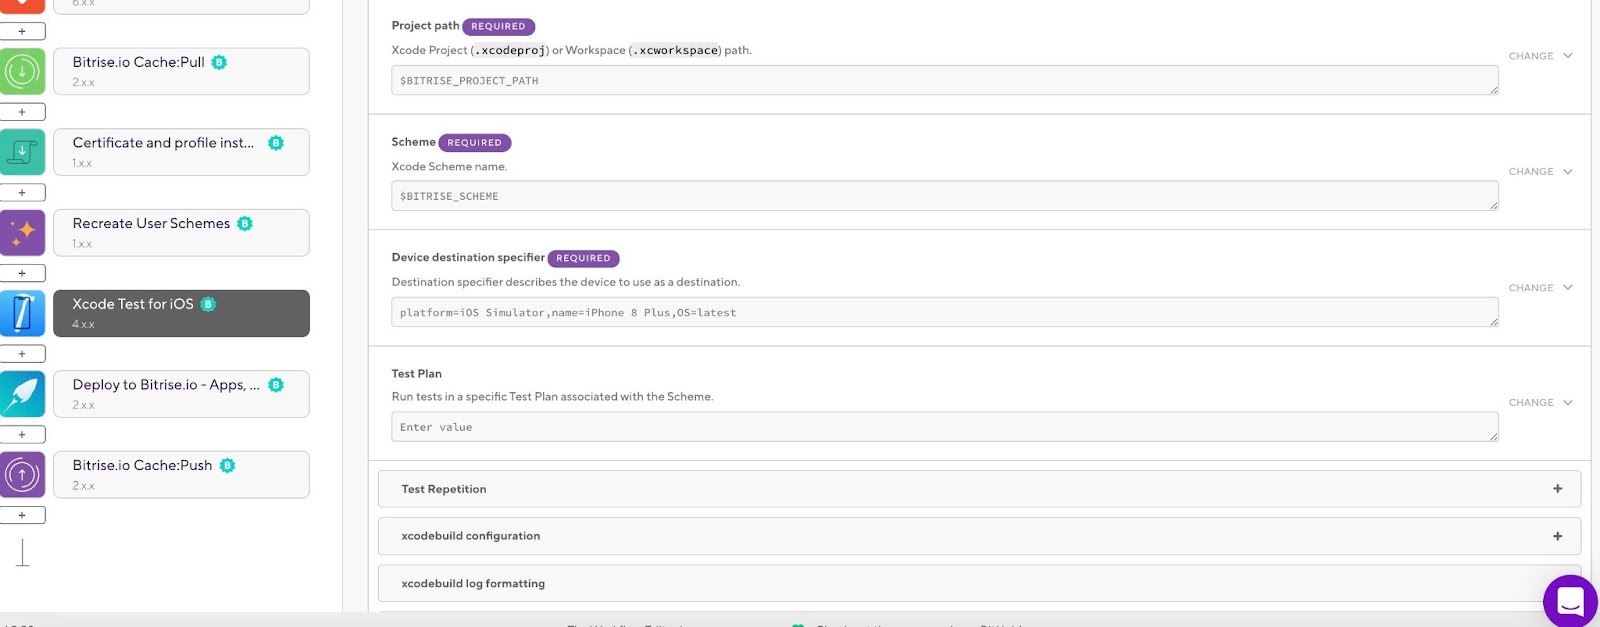
Once the build is finished you can click on the Test Report button to view the test results:
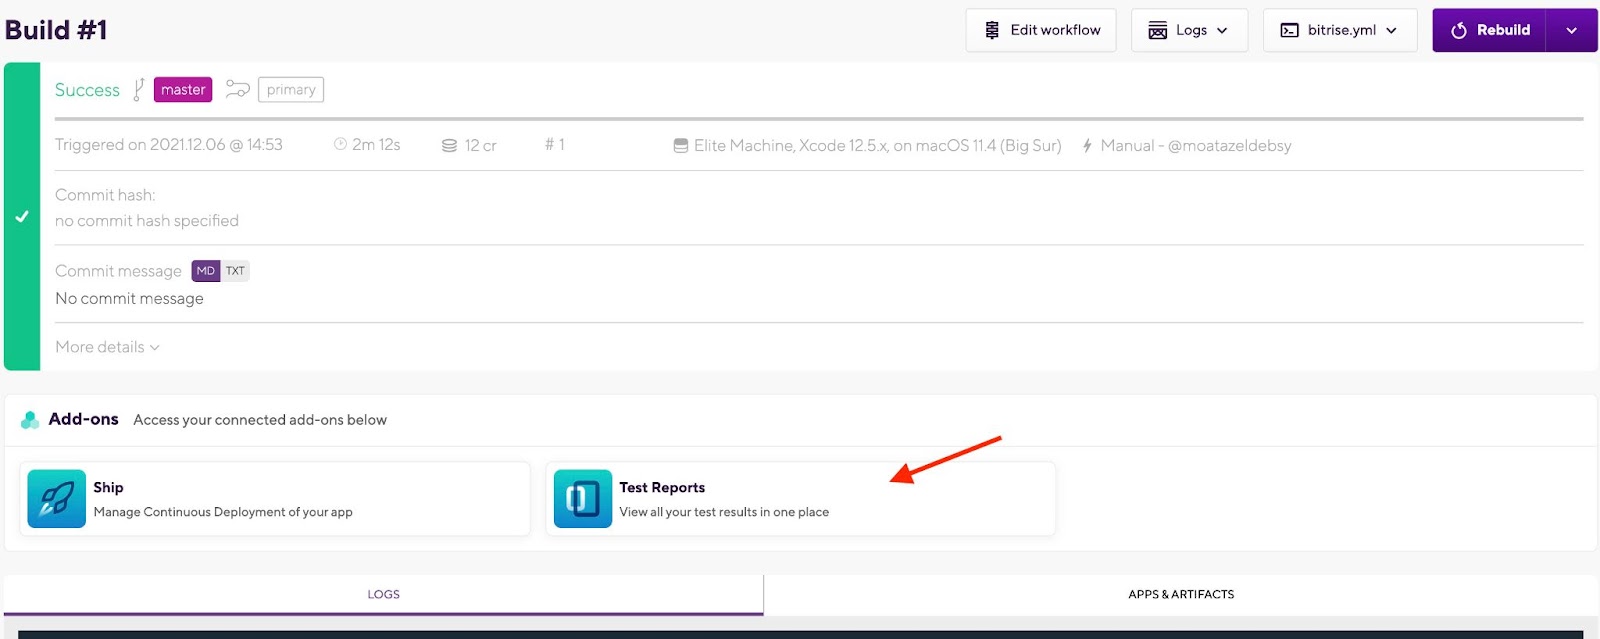
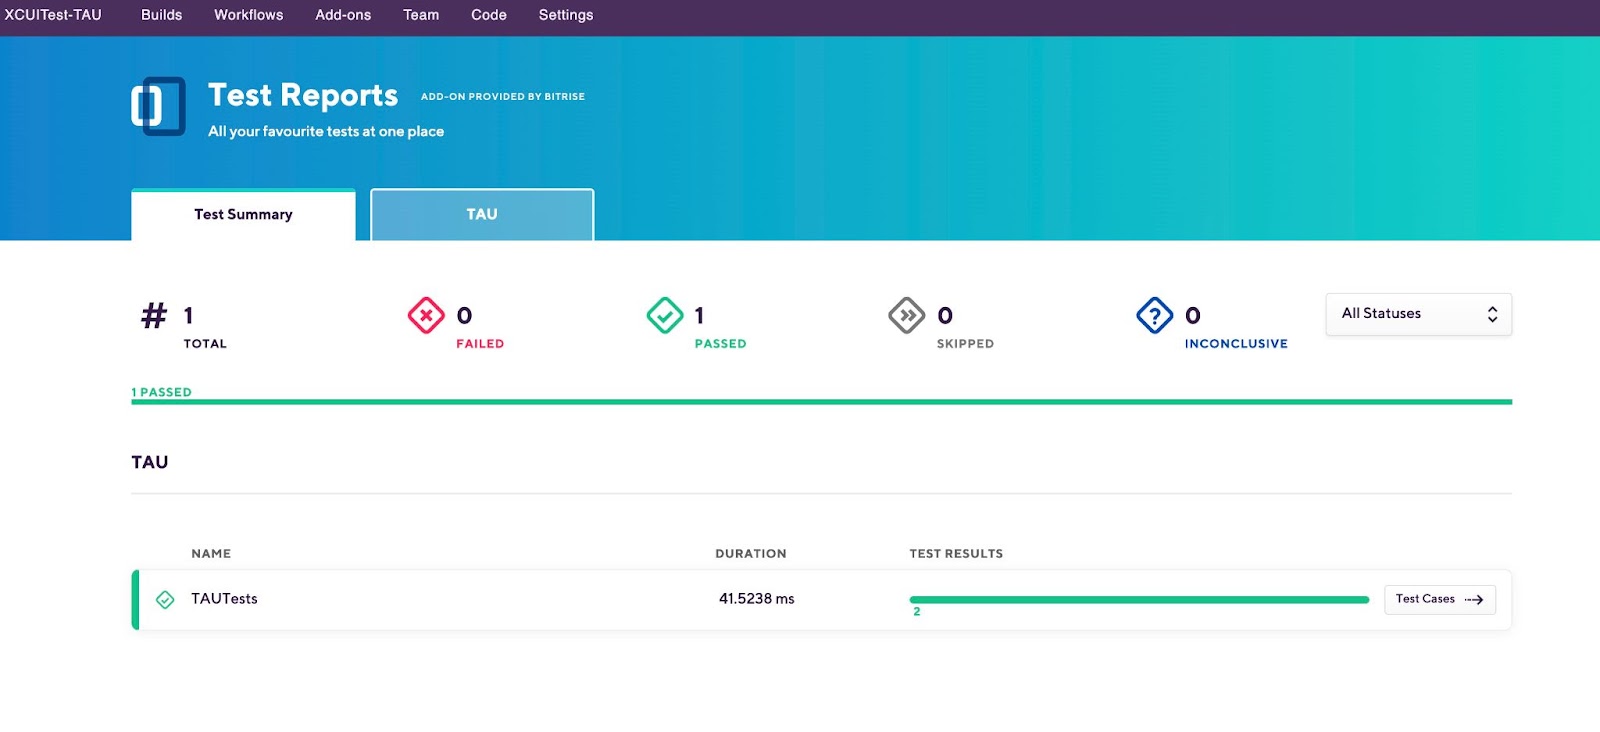
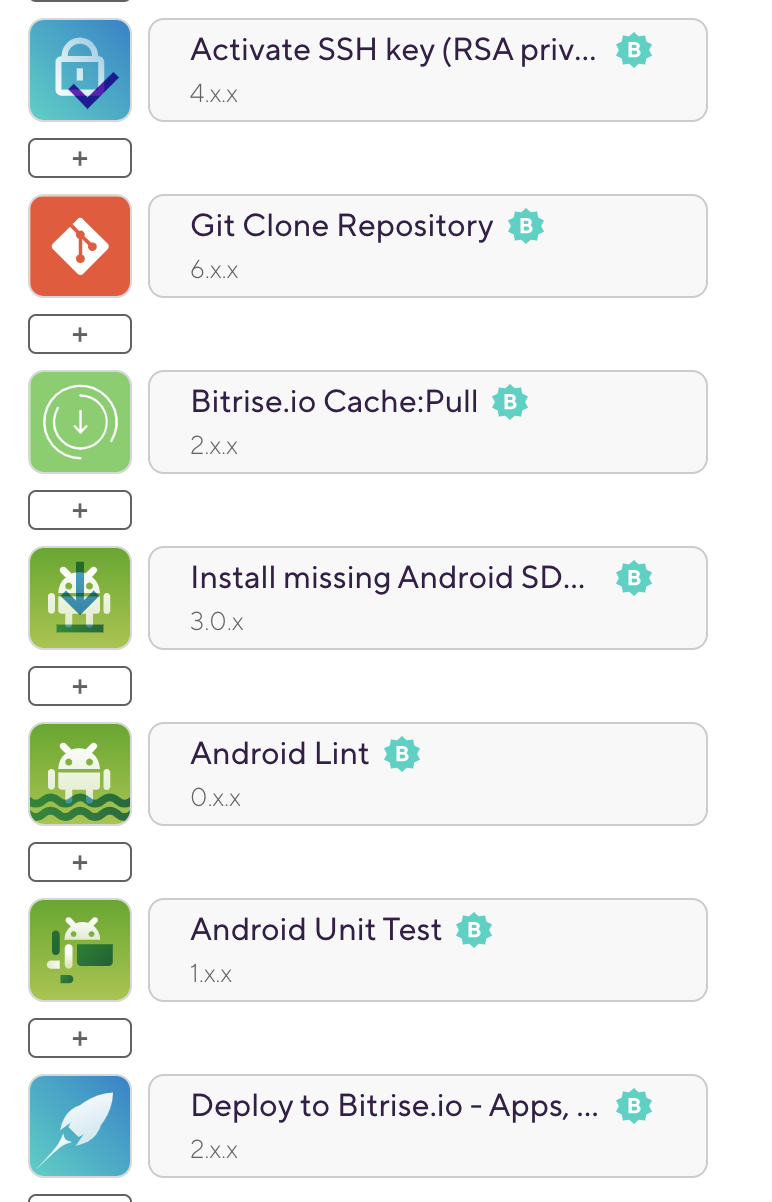
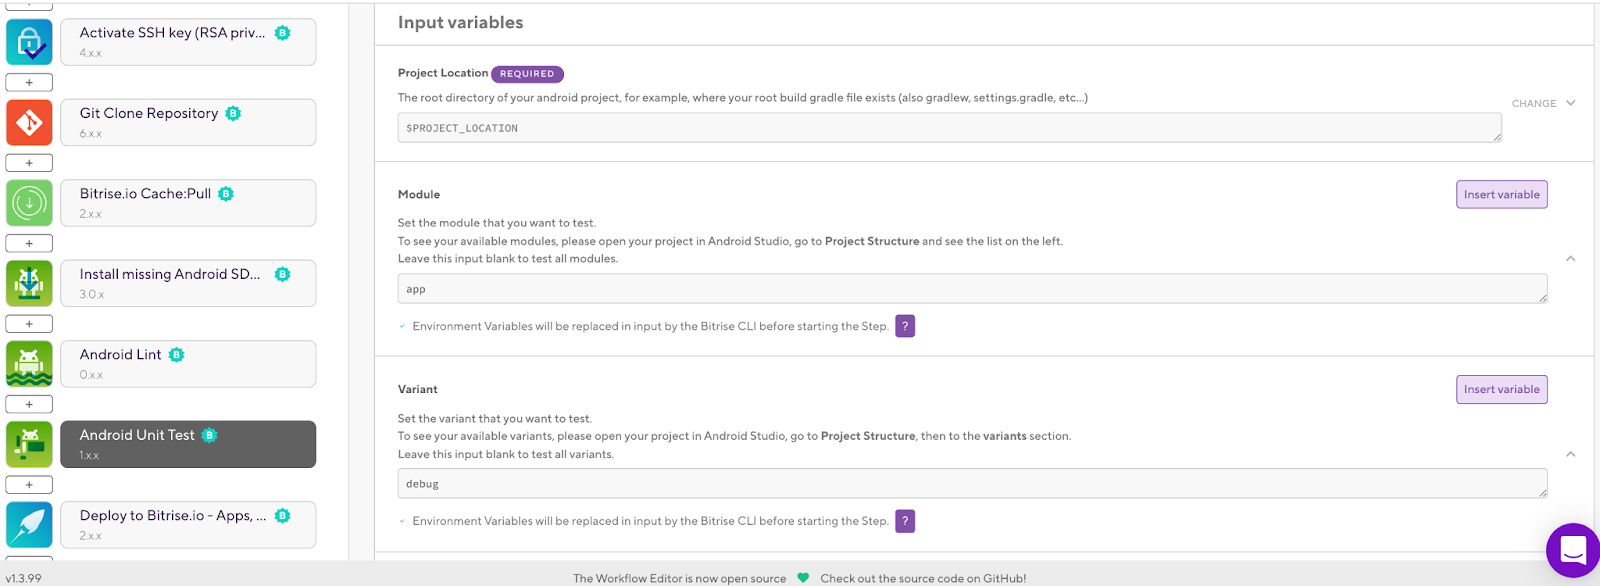
This Step runs your Android project's unit tests. Let’s assume that we have the following Android Workflow to build and test our Android application, including the Android Unit Test Step to run the tests and publish the results to the Test Report add-on:
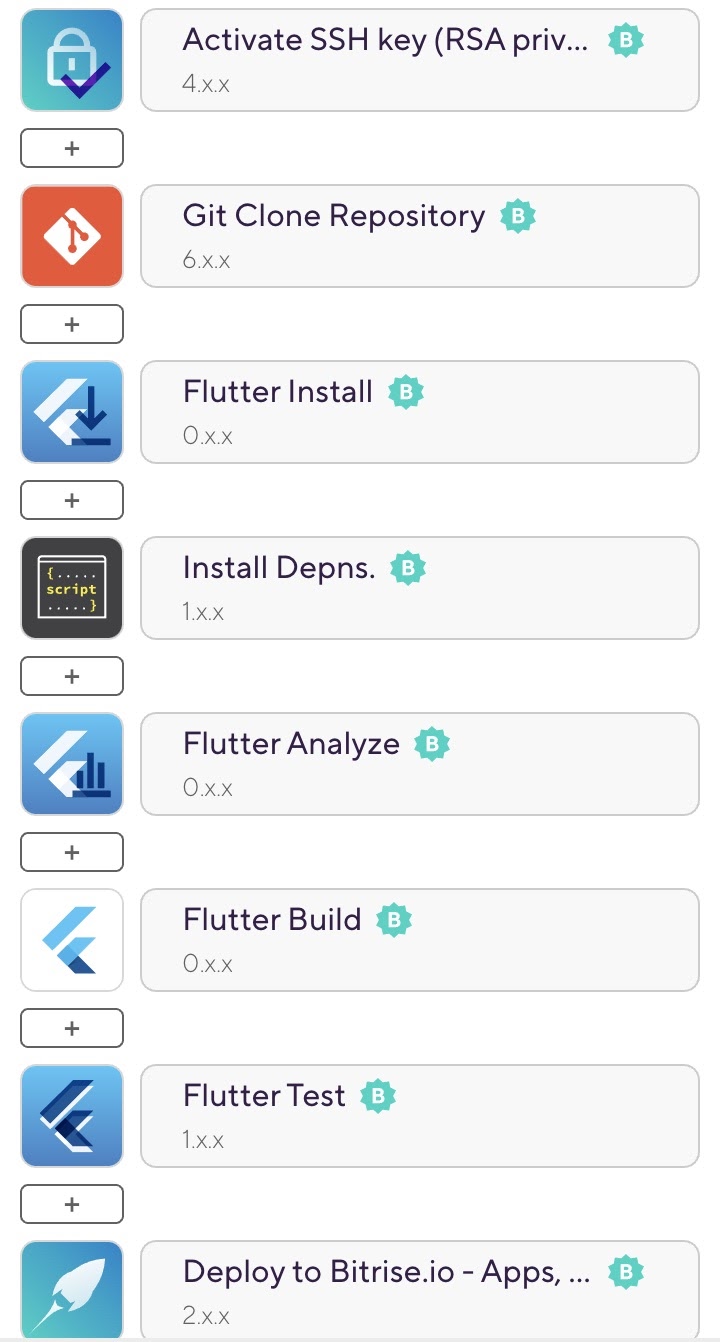
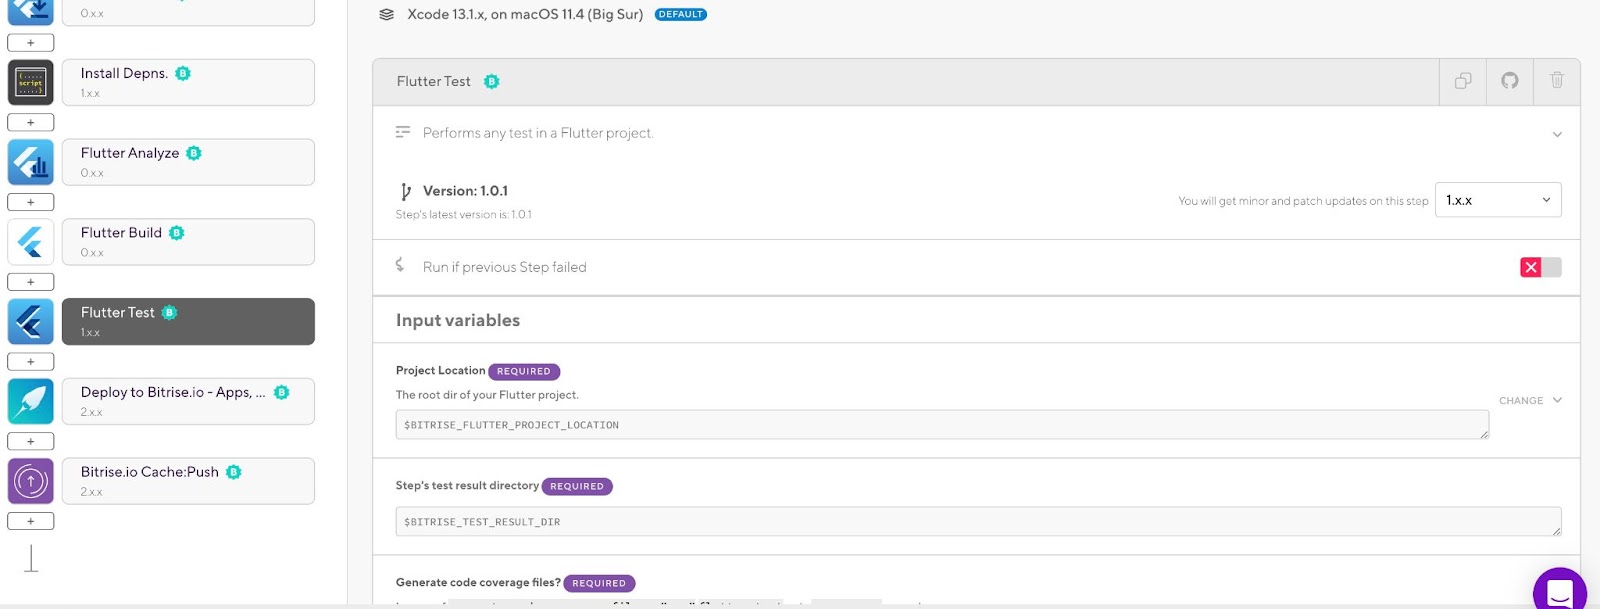
The Step runs the flutter test command with the specified flags.
Let’s assume that we have the following Flutter Workflow to build and test our Flutter application, including the Flutter Test Step to run the tests and publish the results to the Test Report add-on:
Conclusion
Unit testing is an important and highly recommended technical practice for developers and mobile engineers to reduce the cost of defects, code complexity, bugs, and allow better refactoring of code. But alone, it’s not enough — as we mention in this article, we have other types of tests we need to consider to cover the functionalities of mobile apps, such as integration and E2E testing.
Future Reading
- The ultimate guide to unit and UI testing for beginners in Swift
- Building a unit testing suite with XCTest, Swift, and Bitrise
- A guide to writing your tests for your Android apps
- Testing on the CI
- Write your tests for your Android libraries and plugins
- An introduction to unit testing | Flutter
- XCTest, Apple Developer Documentation
- Testing Basics


