
There are different frameworks for UI testing, but most of them do not cover UI view testing, nor do they ensure that the app’s users see exactly what the developers want them to see. Many developers do not write tests because of the lack of functionality. For this reason, we put together some tips & tricks to make it easier for you to do iOS snapshot testing. (Psst: check out Bitrise for iOS here.)
What’s snapshot testing?
Snapshot testing involves taking a screenshot of your user interface and storing it as a reference image. Then, doing tests to take screenshots of the same UI and comparing the layout to the reference images pixel by pixel. This is a fast and cost-efficient way to ensure that code changes won't lead to unexpected UI changes.
Today, teams besides unit testing, UI testing, and integration testing rely on snapshot testing as a required step in the CI/CD pipeline before releasing their applications.
For example, based on this Mobile Native Foundation discussion:
- Spotify had ~1,600 snapshot tests
- Robinhood had ~400 snapshot tests
- Shopify ~2300 screenshot tests
Source: Building Mobile Apps at Scale: 39 Engineering Challenges
There are different testing frameworks and tools that make this process really easy such as ios-snapshot-test-case. The library was created by Facebook and has now been renamed to iOSSnapshotTestCase and is maintained by Uber. Moreover, we also have SwiftSnapshotTesting.
Why do snapshot testing?
Developers strive to implement the changes exactly how designers planned them under different circumstances, without introducing visual regression bugs. To get to this point, they often use snapshot testing to record an image of a view, then later, compare that view with the recorded snapshot, and see whether there is a difference or failure.
As we know, UI functional testing can take a lot of effort and resources to design and implement in a test automation framework. Snapshot testing is required only to add the tool or the framework in the project, and then you can already start implementing the tests.
Advantages of snapshot testing
Snapshot tests are ideal for verifying behavior that changes frequently, such as iOS app user interfaces, and SwiftUI views in particular. Let’s discuss the advantages of snapshot testing:
- Check for differences in appearance.
- Determine what has changed.
- Confirm what users see.
How does snapshot testing work?
A snapshot test case takes a configured UIView or CALayer and uses the necessary UIKit or core animation methods to generate an image snapshot of its contents — otherwise under the hood. SwiftUI makes use of these classes: it compares this snapshot to a reference image stored in your source code repository and fails the test if the two images don't match.
Source: https://github.com/uber/ios-snapshot-test-case
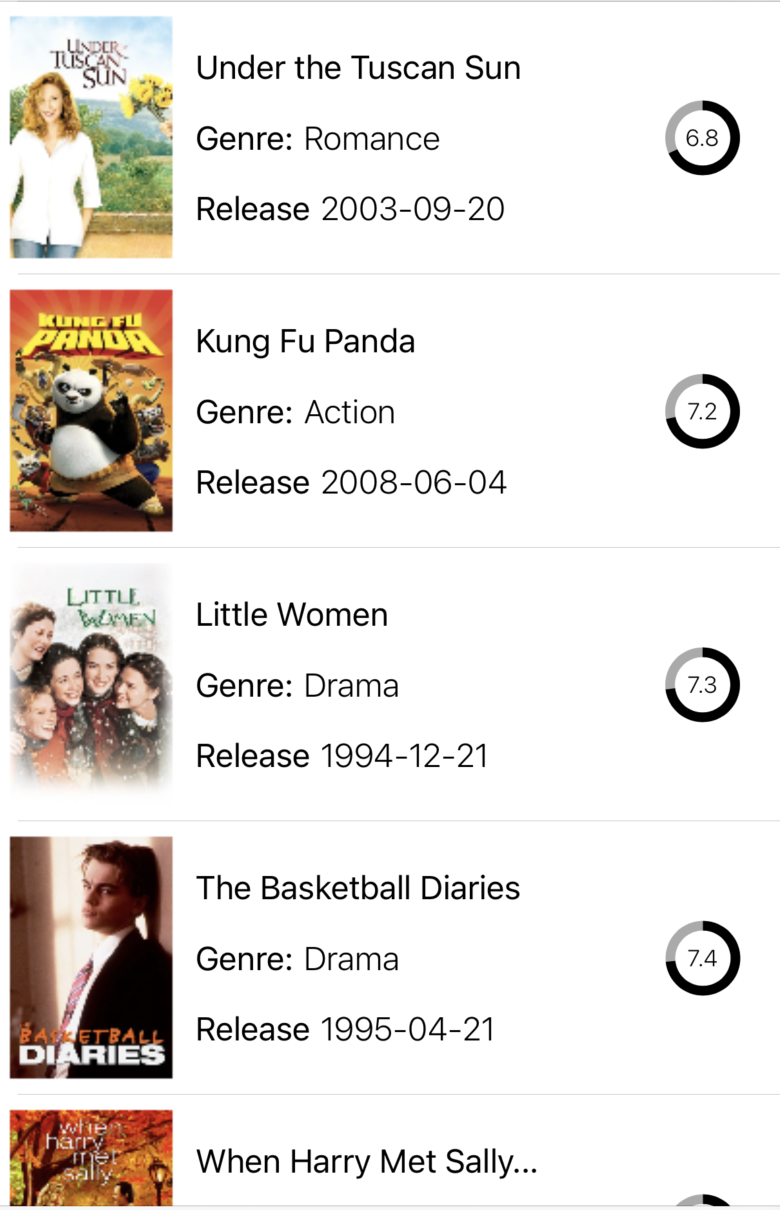
Consider a UI in an iOS movie app with a movie name, release date, and genre. What if the movie has a long name? The name wraps to a second line, truncates, or pushes the rank away. To ensure the view gracefully handles edge cases, we can record our design decisions as snapshot tests.
Snapshot testing framework for iOS
The snapshot testing framework supports testing UIViews and UIViewControllers using the image strategy or the recursive description strategy.
The image strategy takes actual snapshots of your UI as image files, then compares the images pixel by pixel. If the images are different, then the UI changes and your test will fail.
Let’s check an example with the swift-snapshot-testing.
swift-snapshot-testing
Swift-snapshot-testing is a delightful Swift snapshot testing, while most snapshot testing libraries are limited to UIImages of UIViews, snapshot testing can work with any format of any value on any Swift platform with a lot of features:
- Dozens of snapshot strategies
- You can write your own snapshot strategies
- Supports any platform that supports Swift
- Device-agnostic snapshots
- No configuration is required
Setting up an app for snapshot testing
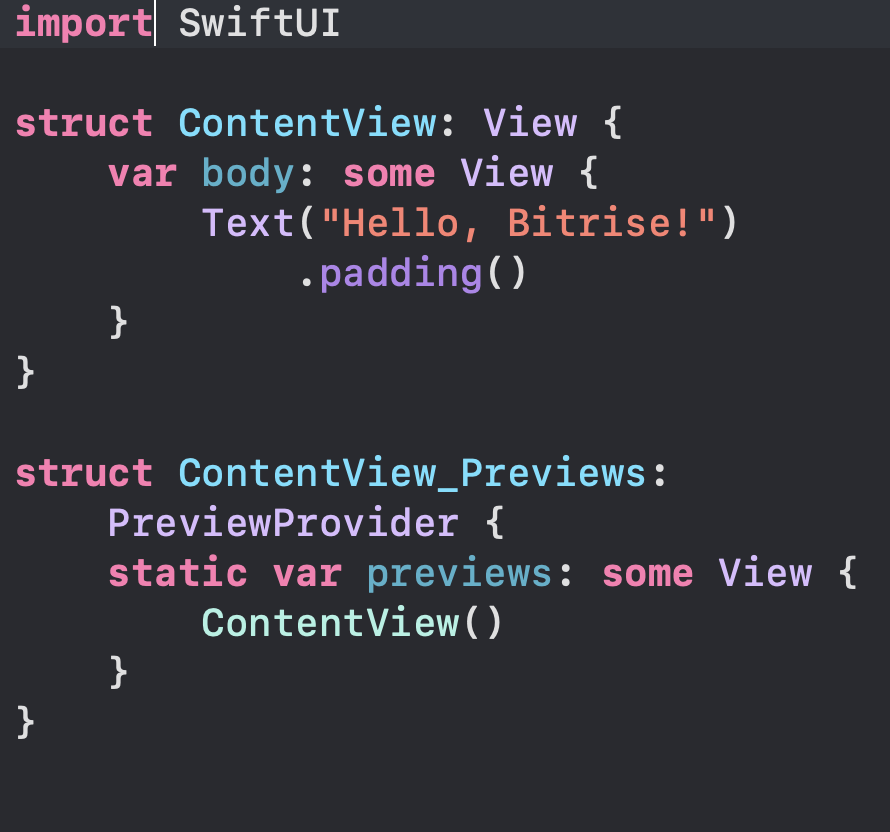
Let’s assume that we have a single view iOS app using SwiftUI. you can use it for UIKit projects as well. Then we will need to add the swift-snapshot-testing package by the following steps (I’m using Xcode 13.2.1):
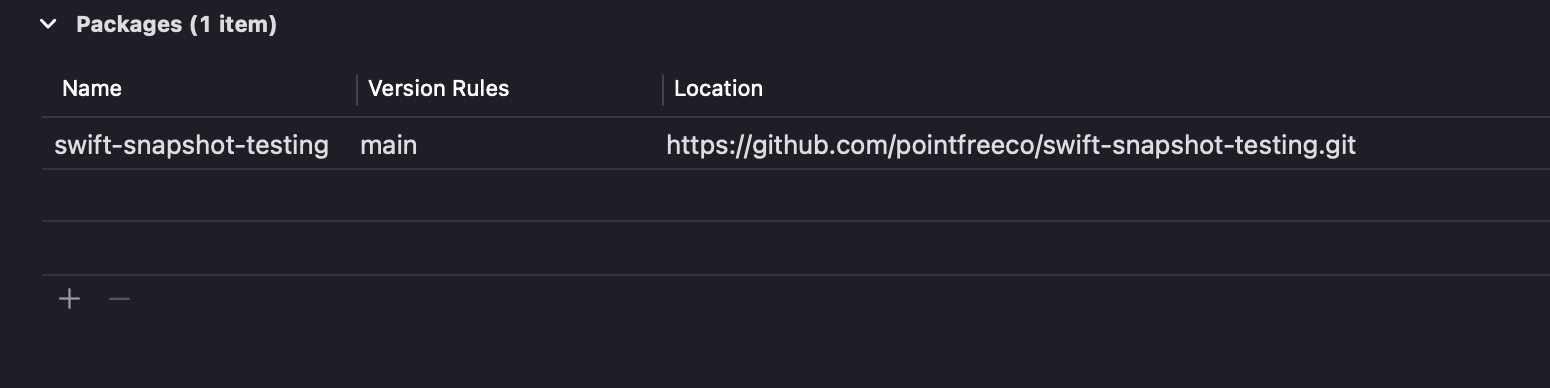
From the File menu, navigate select Add Package Dependency and enter package repository URL: https://github.com/pointfreeco/swift-snapshot-testing.git
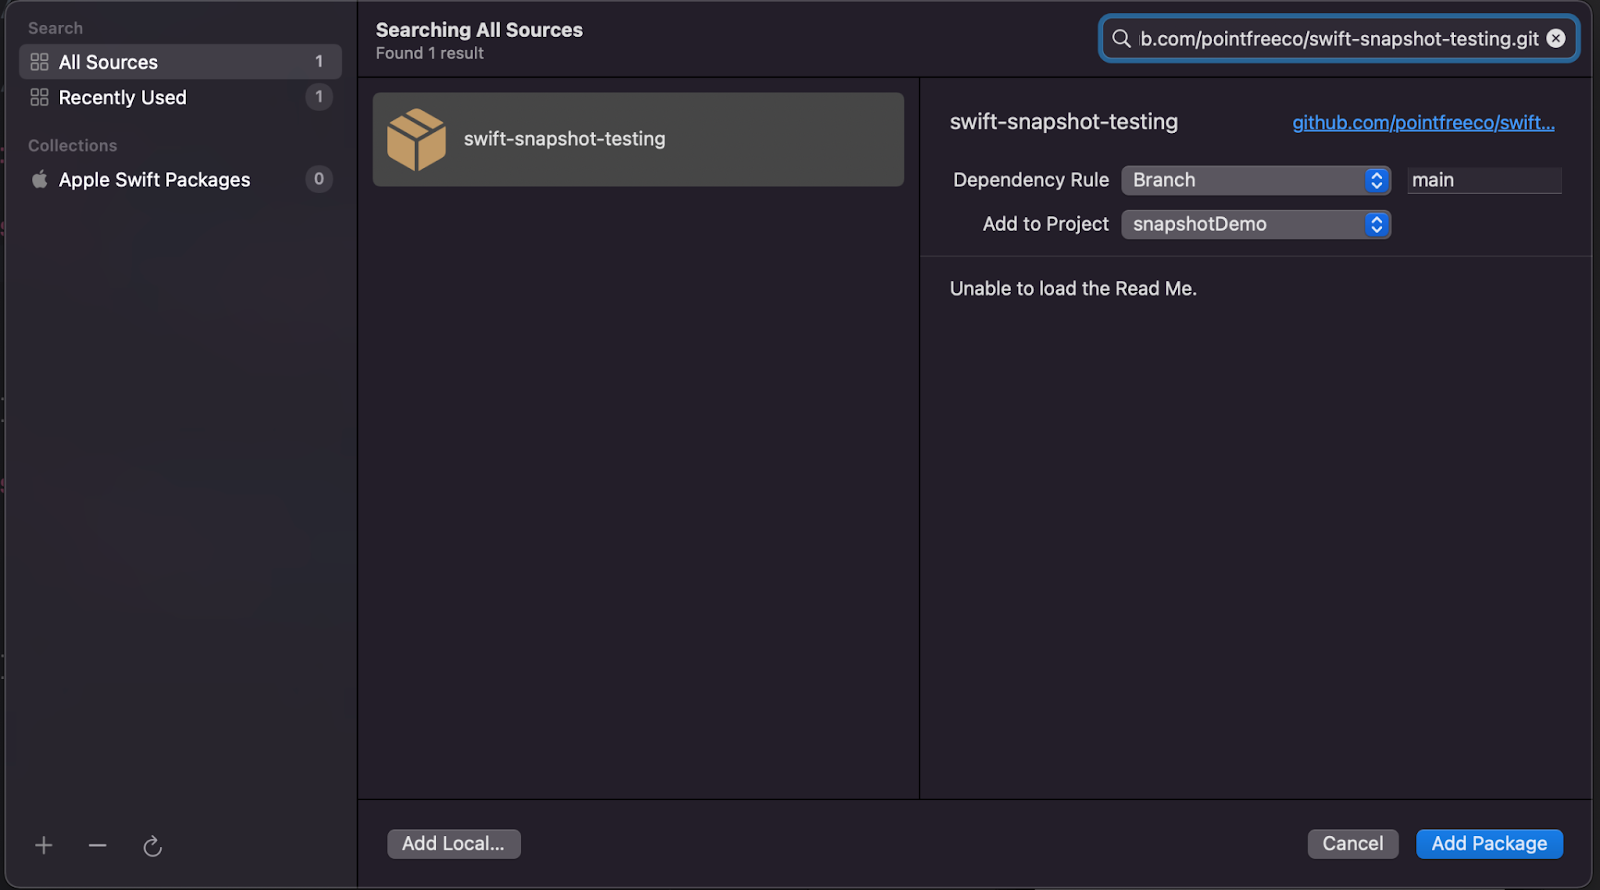
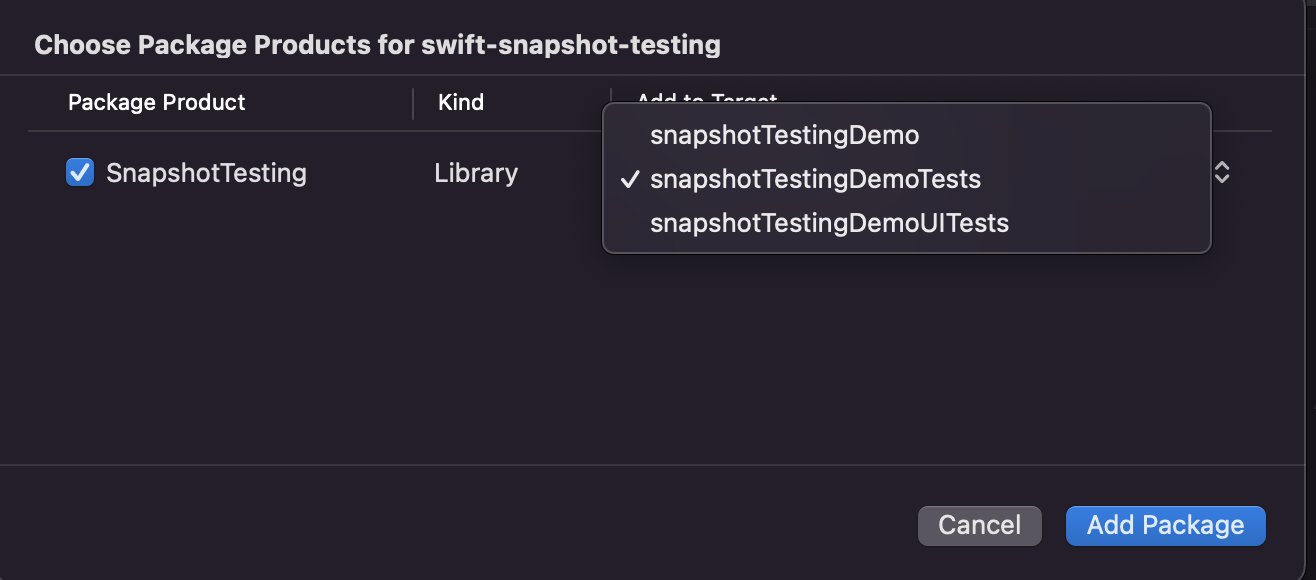
Confirm the version and let Xcode resolve the package.
If your project uses CocoaPods, add the pod to any applicable test targets in your Podfile:

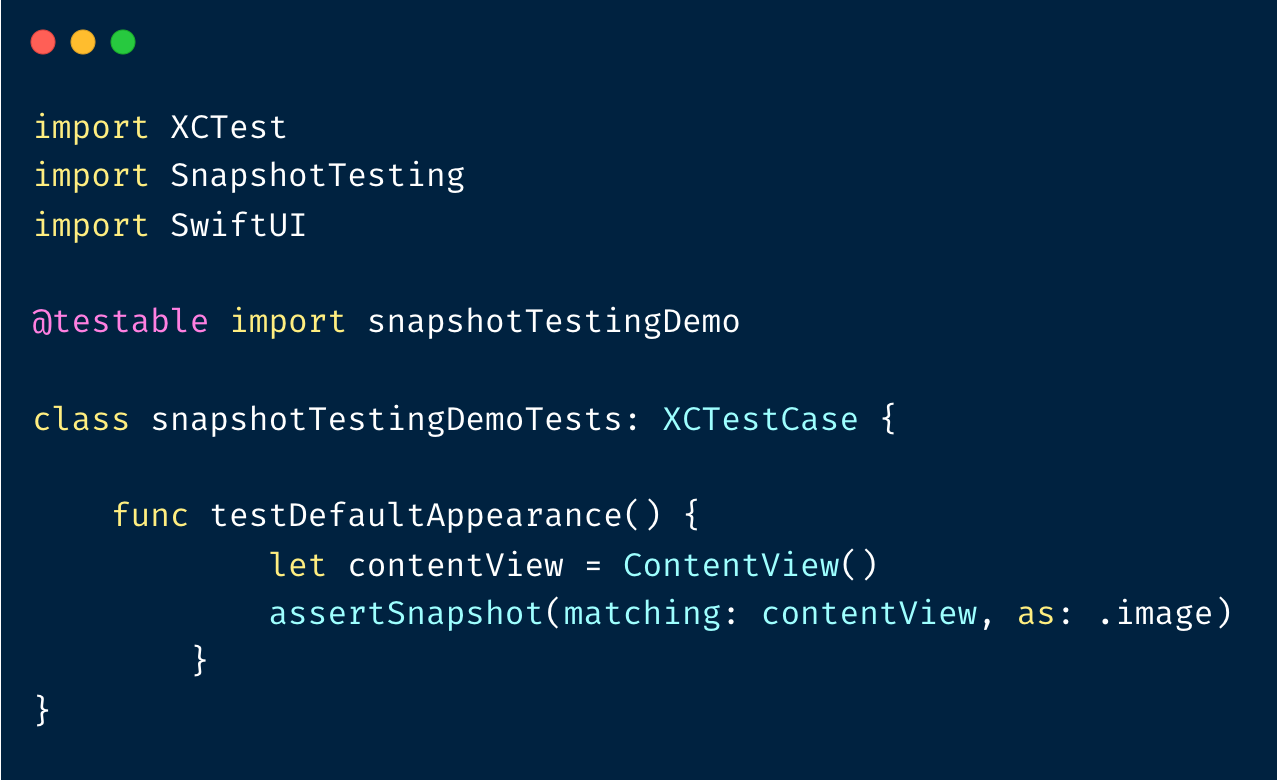
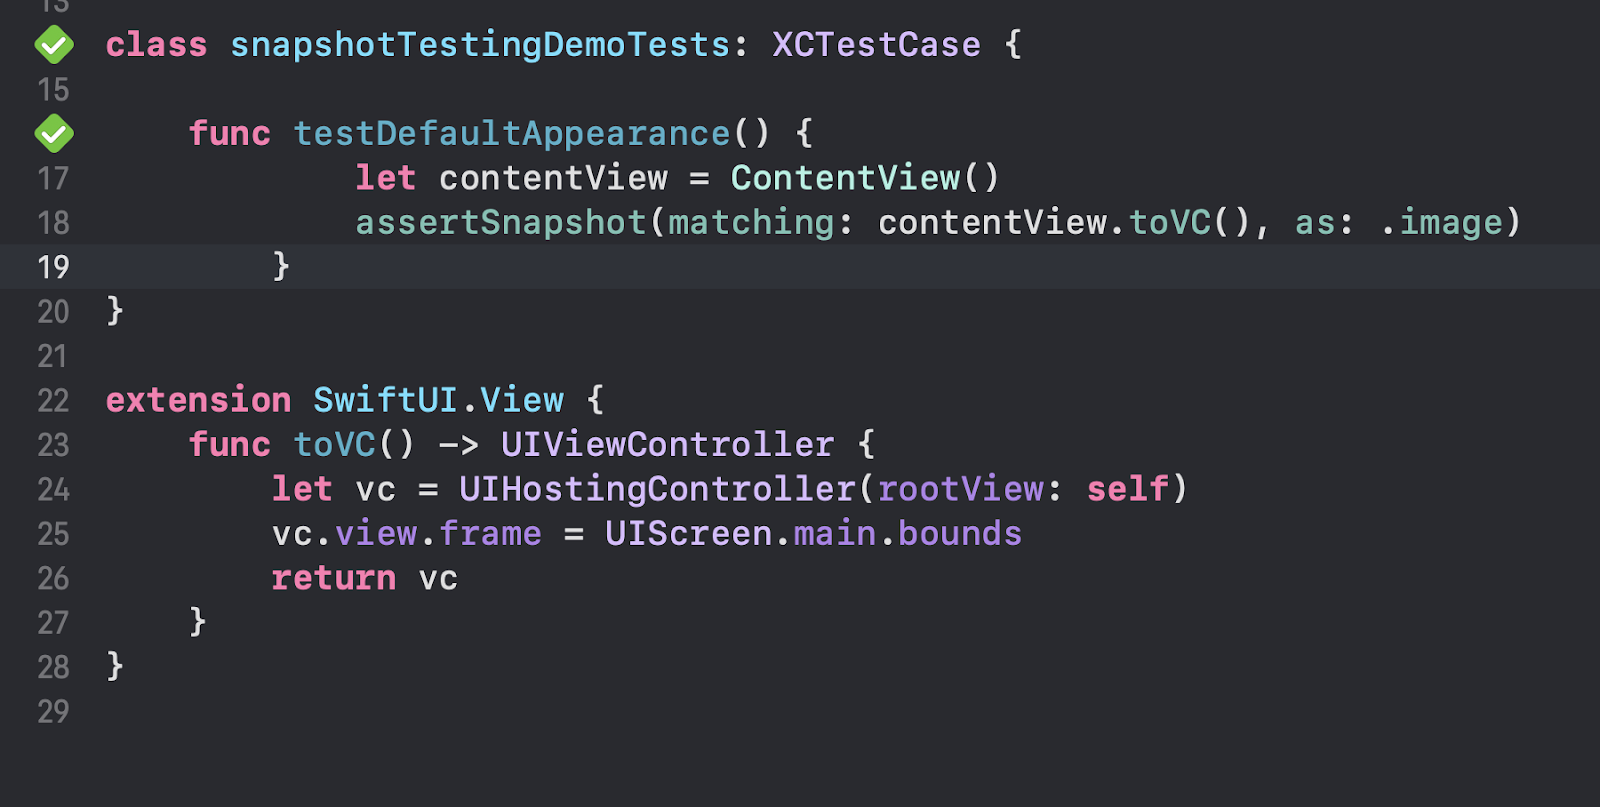
In the Unit Test Case Class file, we will import SwiftUI and SnapshotTesting into this test file, as well as declare the app as a @testable import. We will use XCTest for writing the test cases.
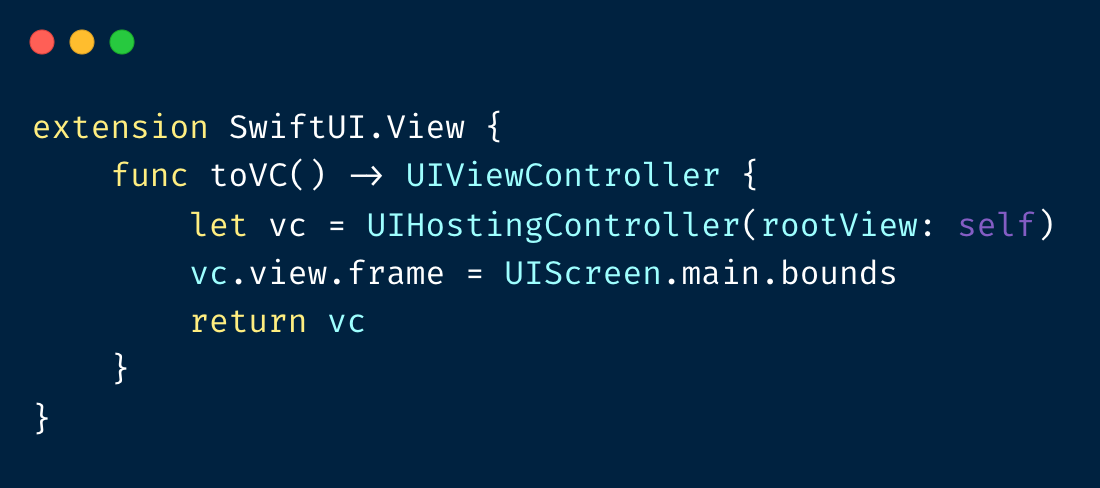
We can add an extension to SwiftUI’s view that wraps the SwiftUI View in a UIHostingController. It returns this as a UIViewController, which is a valid input for a snapshotter and can be converted to an image.
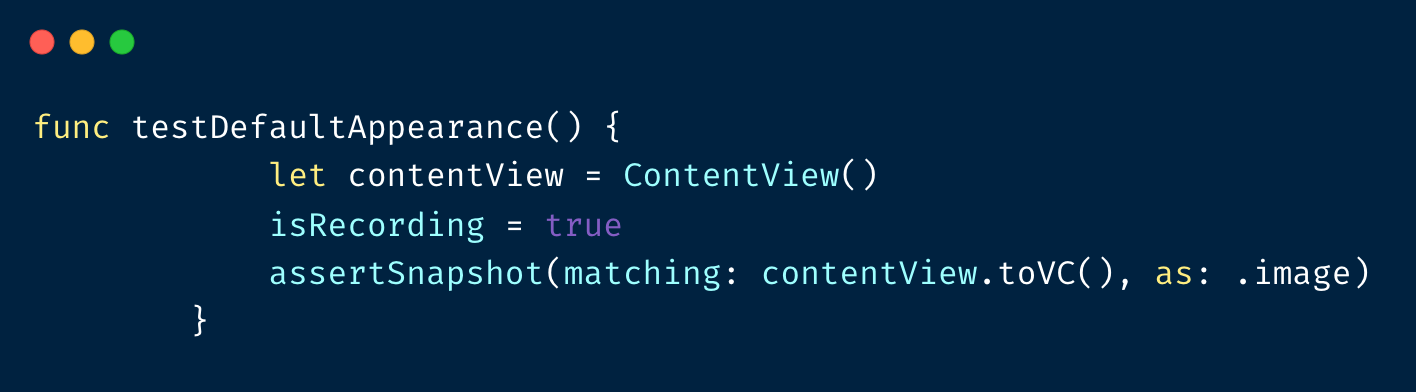
And now the test function will look like this:
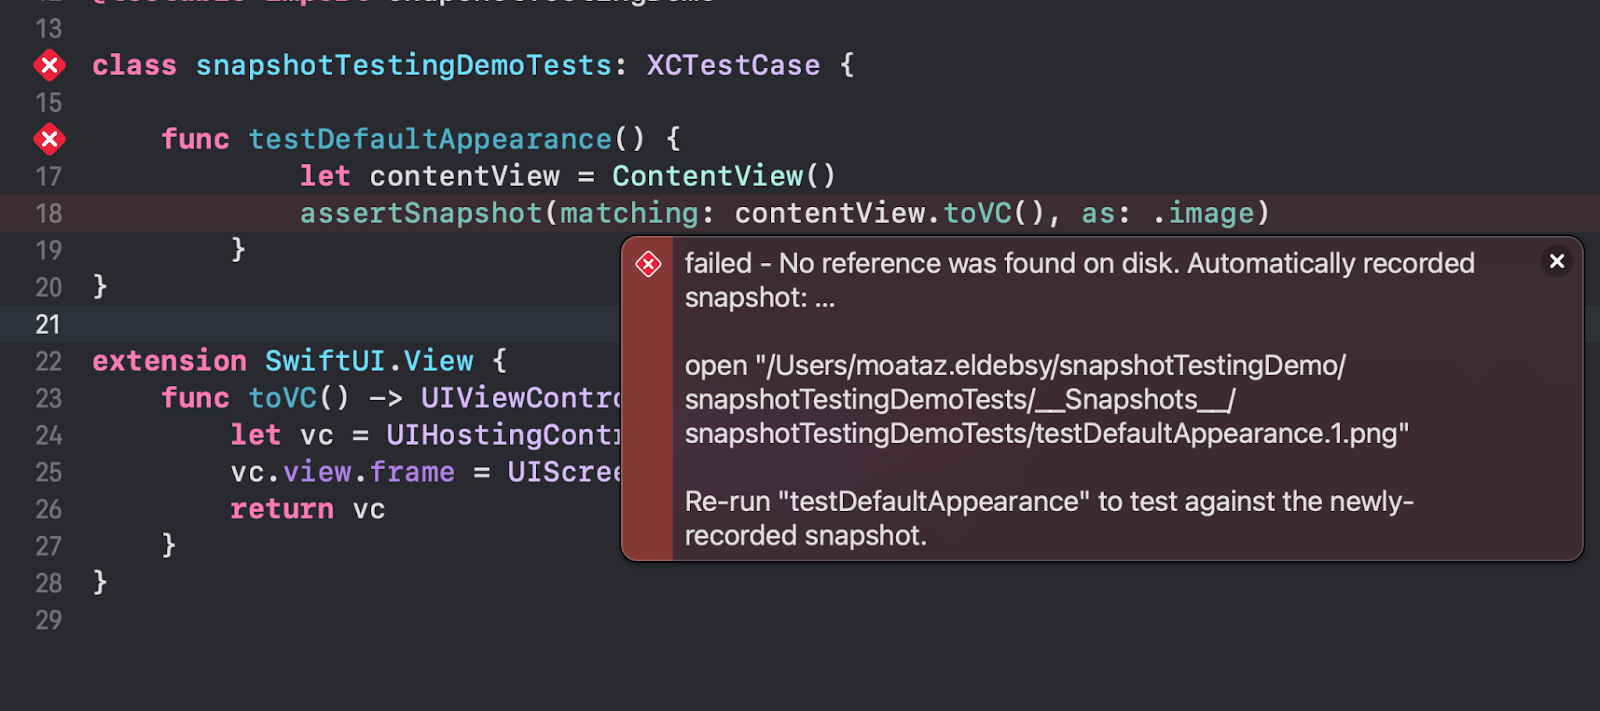

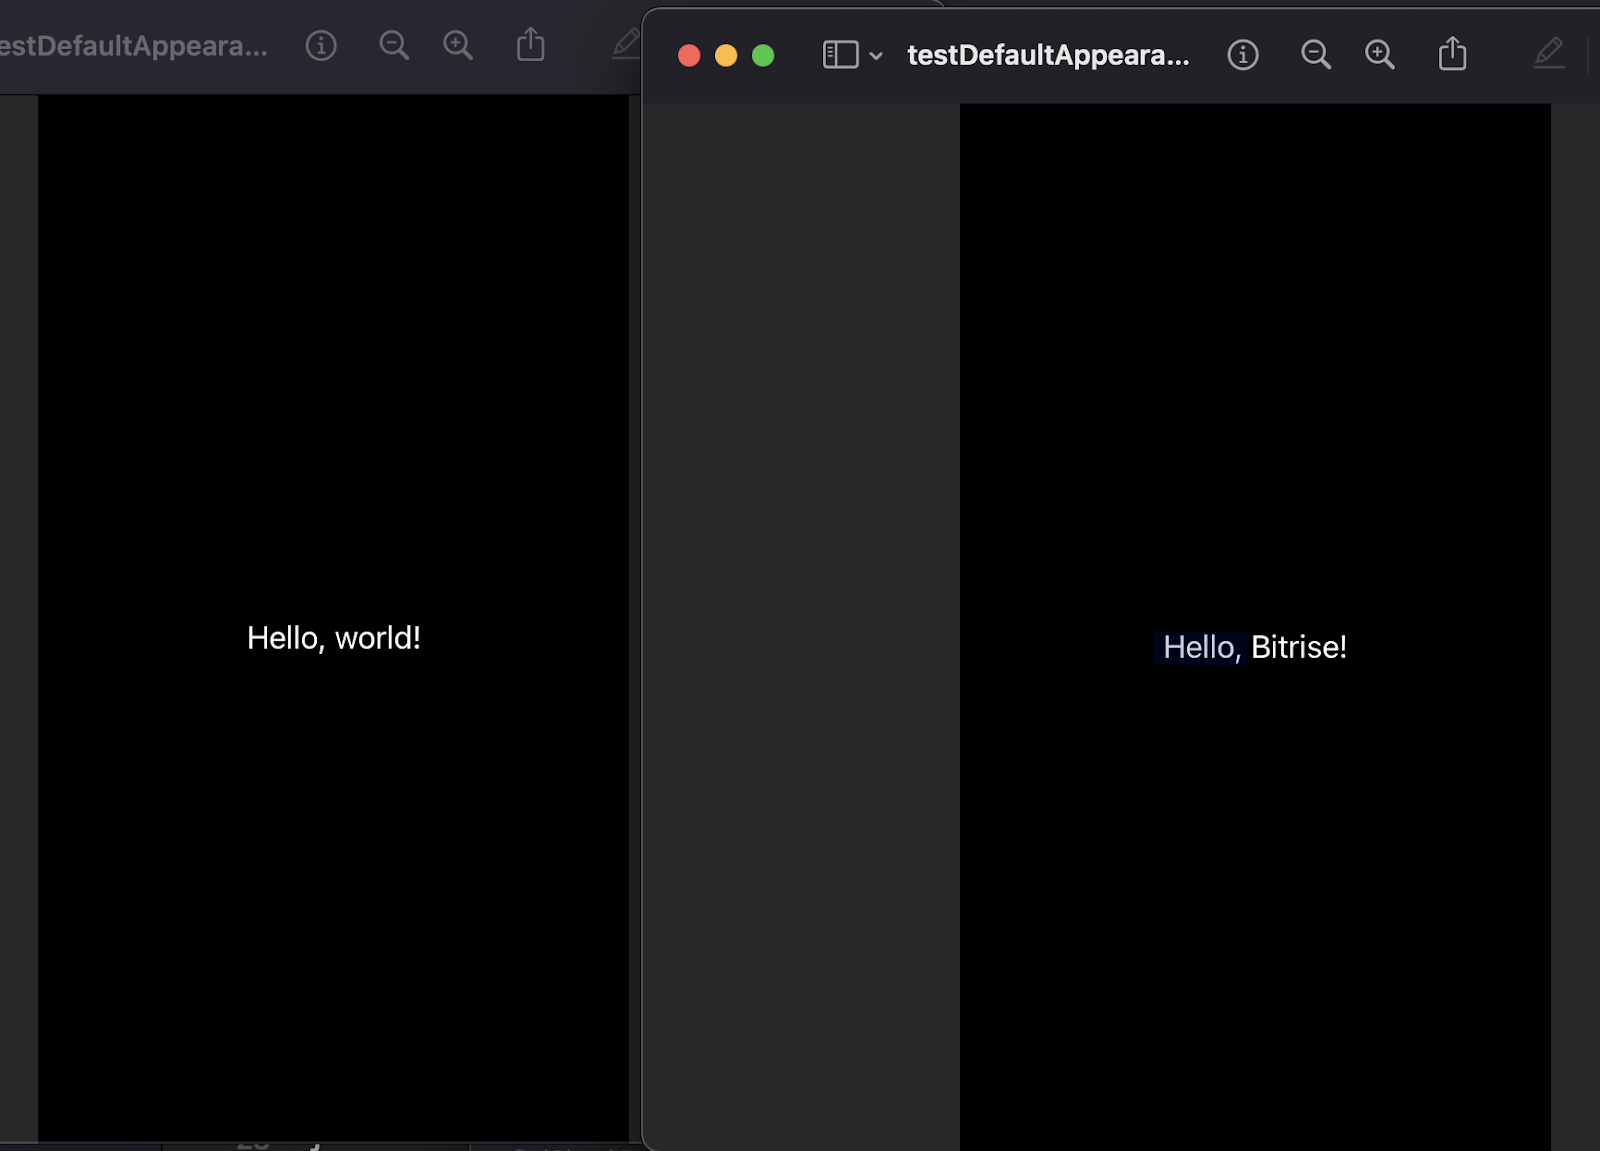
Run the test and it will fail as expected because there was no image to compare it with (base image). Checking the error message, I was able to see where the snapshot image was created.
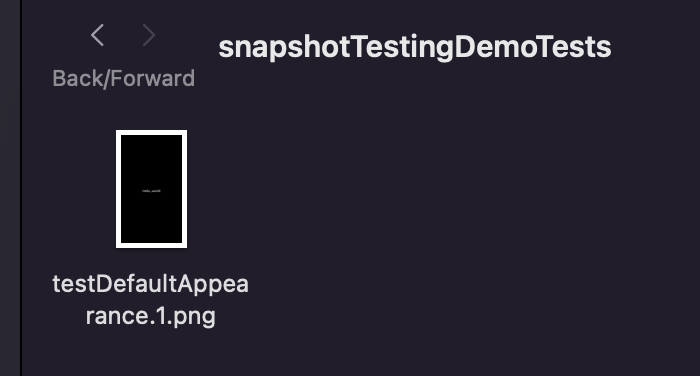
The second time I ran the test, it passed, because the base image already existed.
Our test has now already passed, but what if we change something in the UI?
Let’s change the label to another text (Hello, Bitrise!)
Run the test again and check the results
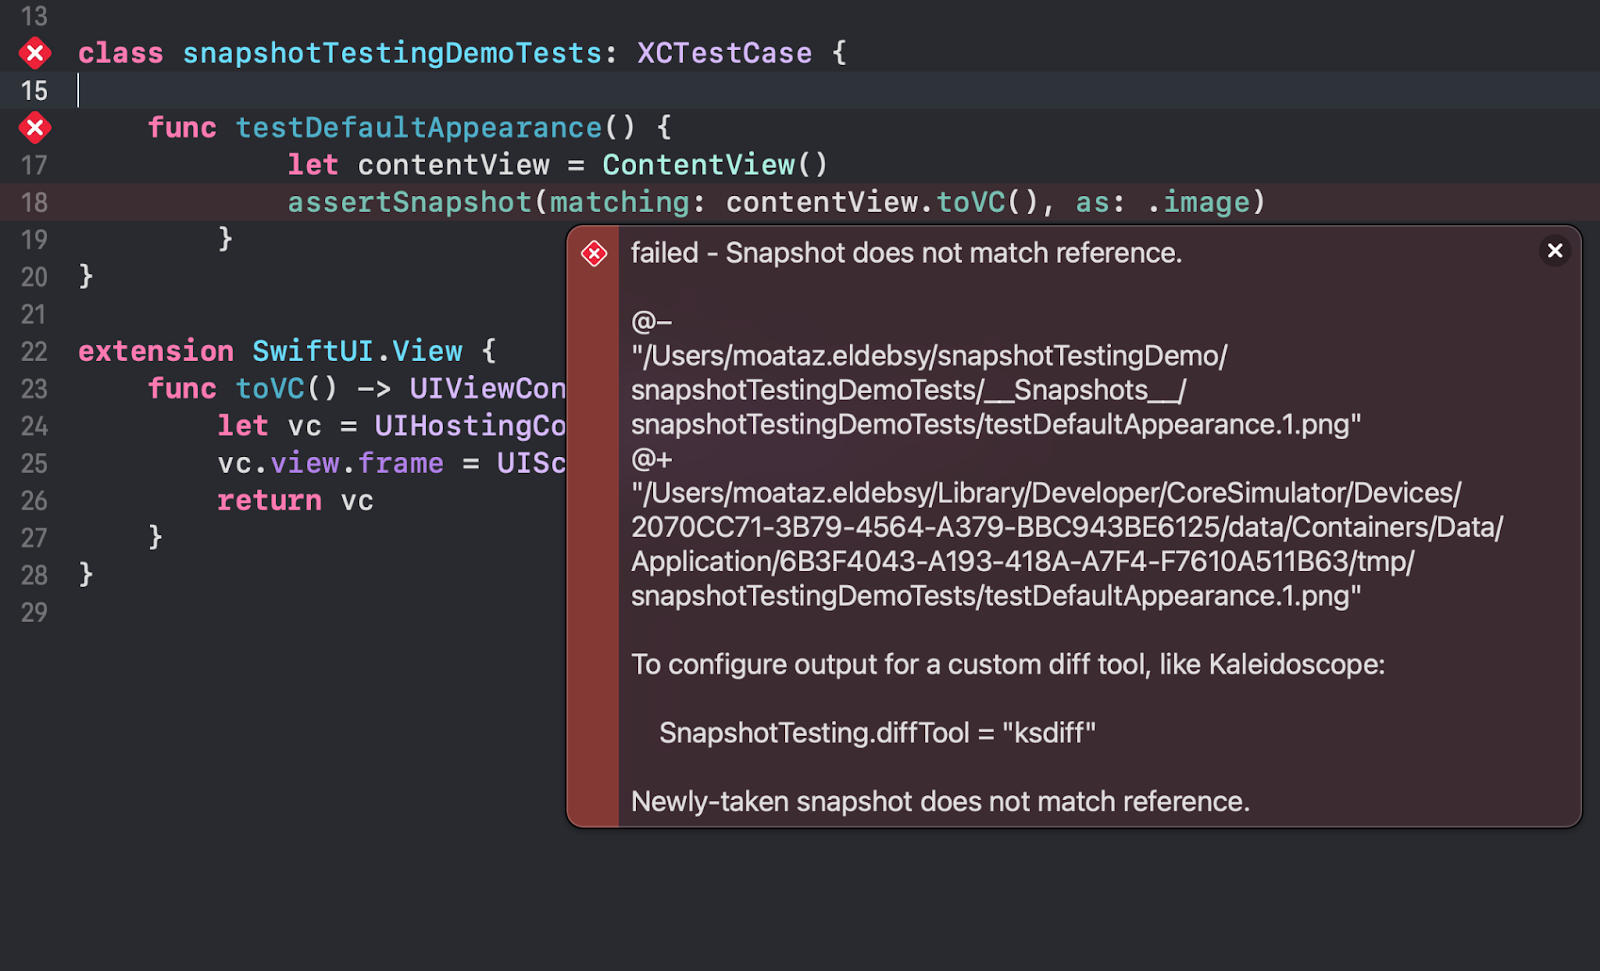
The test failed again. We can find the path of the two images to do a comparison:
Once we get confirmation from the design team (or the team who is responsible for the UI changes), that the new image is what we want and not a result of the error, we need to set the test to record a new result, so that the new version becomes the official test version.
This will cause a failing test again as the new version was written to the Snapshots folder, but after removing the isRecording = true line and re-running the test, it will pass again.
Run iOS snapshot testing on CI
After writing the iOS snapshot tests locally, it’s time to push the project to a source control management tool, such as GitHub, to be able to build and test your app via a CI pipeline, such as Bitrise.
At Bitrise we are building a mobile CI/CD platform as a service to help mobile engineers to deliver high-quality apps faster. Bitrise has +350 Steps including a many testing steps created by our community members and our official partners.
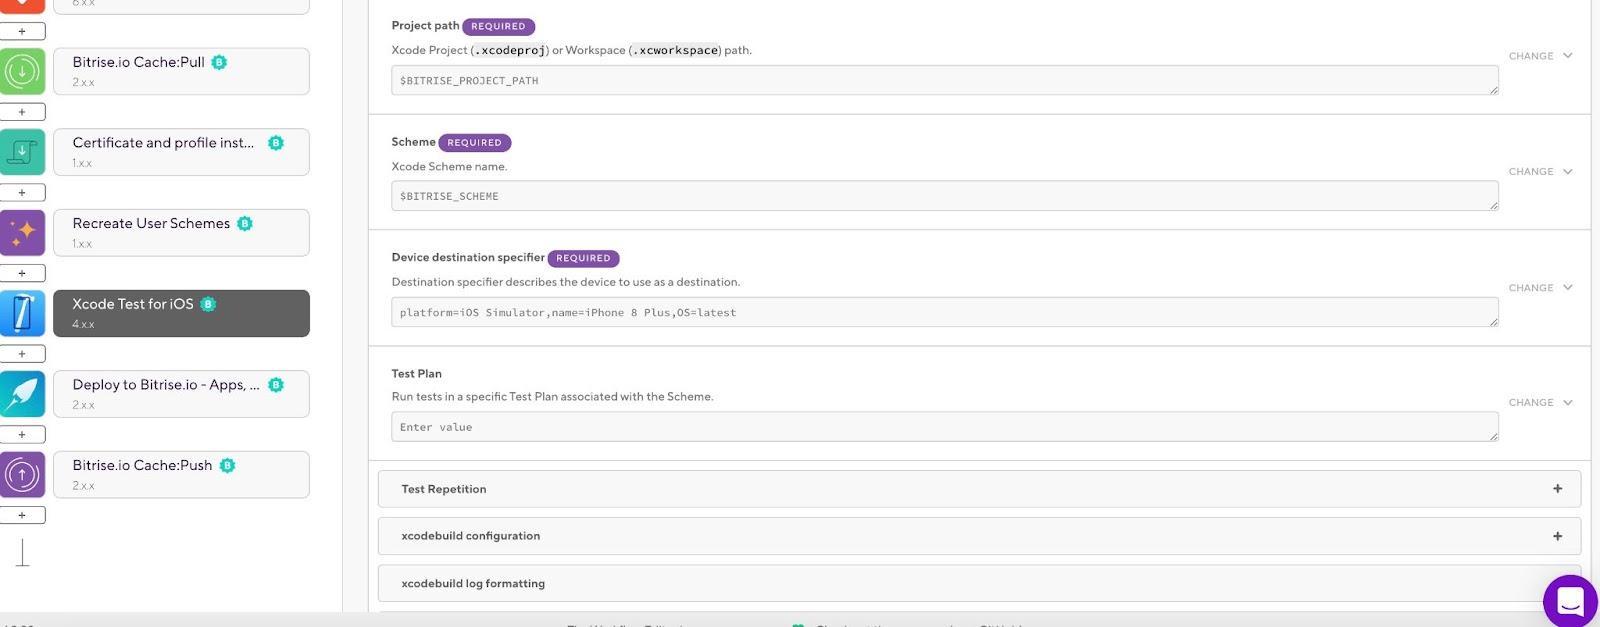
Because we are using XCTest with snapshot testing, we can use the Bitrise Xcode Test Step to run those tests on Bitrise.
Let’s assume that the following iOS workflow on Bitrise includes the Xcode Test for iOS Step for running all the Xcode tests that are included in your project.

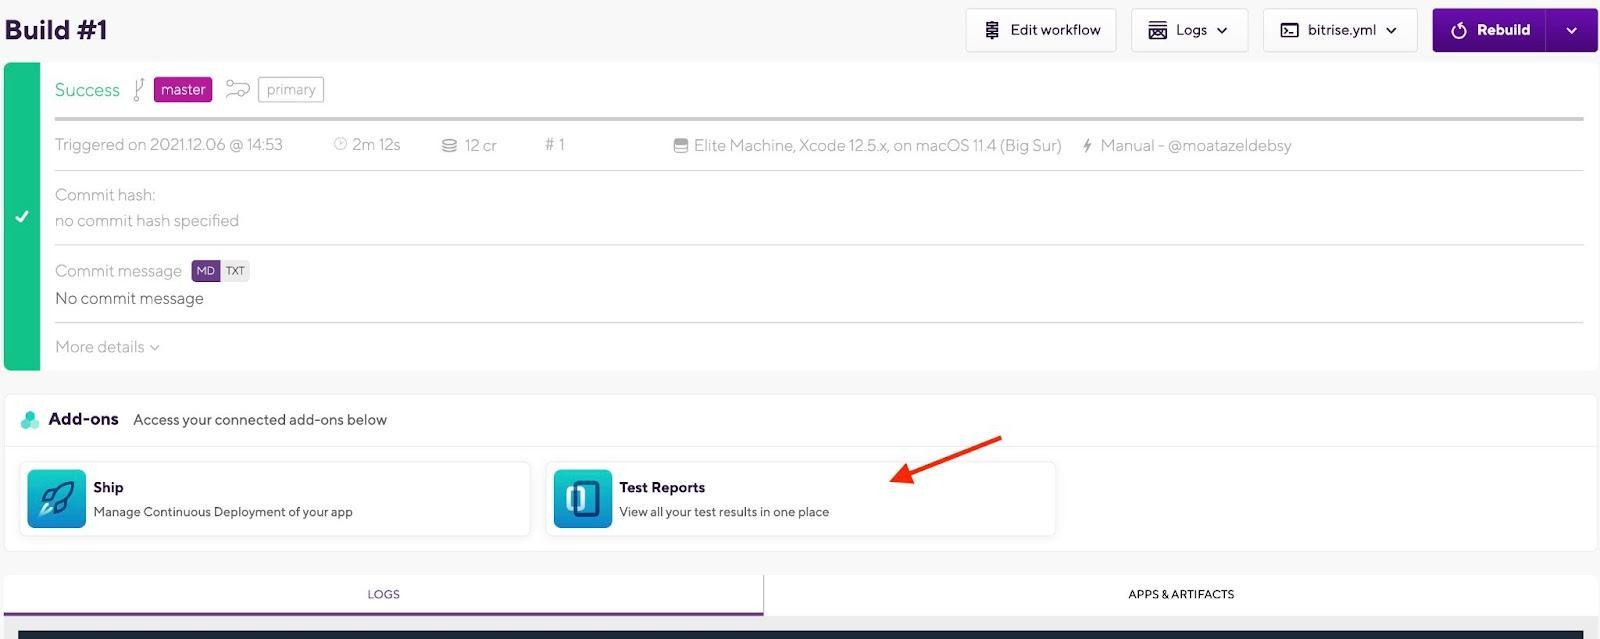
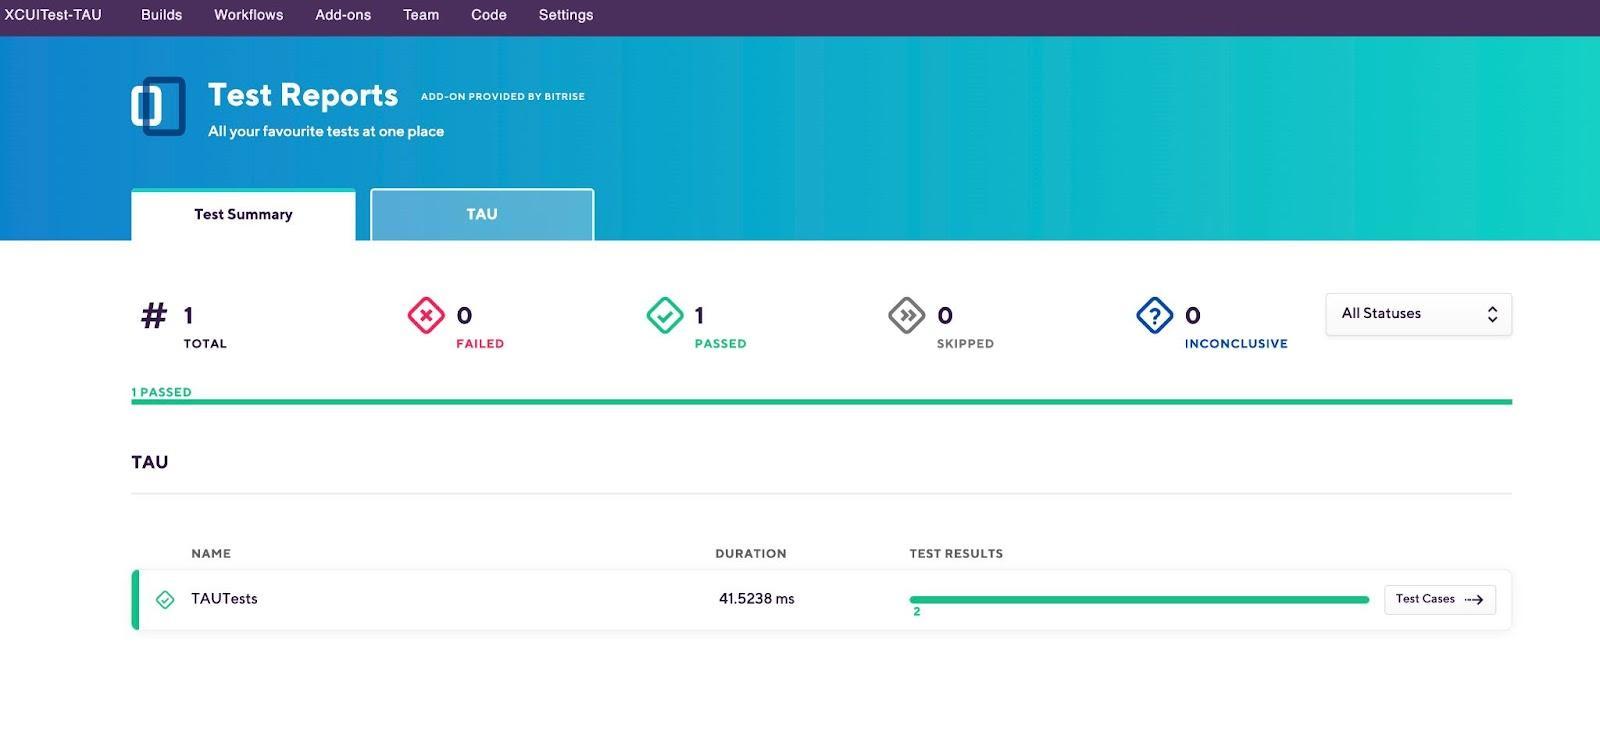
Once the build is finished, you can click on the Test Report button to view the test results like this:
Additionally, we can also customize the Test Report Add-on to attach the screenshots as test artifacts. For more information, check this open-source project from our community to find out how to save the screenshots on Bitrise.
Localization testing
We can use snapshot testing to test the localization of our mobile apps. As we know, localization is important if we are developing a multilingual app, in which we usually need to test the localization before the release.
Common localization bugs that can be detected by testers who are not language experts include:
- Untranslated text
- Layout corruption
- Inadequate fonts
- Wrong images and icons; and more
Visual test automation tools can automate most of the activities involved in visual testing. They can easily detect many common UI localization bugs. All a tester needs to do is to drive the Application Under Test (AUT) through its various UI states and submit UI screenshots to the tool for visual validation.
An excellent approach to visual UI testing for mobile apps is to utilize Applitools with Bitrise. The benefits of automated localization testing over manual testing is that we can speed the testing process with different screens at the same time with different languages and devices — to make sure that we cover the most critical test cases. Besides Applitools, there are other visual testing tools, such as Kobiton, and other open-source tools that we mentioned above.
Disadvantages of snapshot testing on iOS
Snapshot testing is a great tool, however, it has some drawbacks:
- The new version of iOS may break all tests. For instance Apple made the tiniest change to a shadow, that can result in any change to iOS breaking the test — even if it's a tiny one.
- Getting to add/update snapshots will mean that your Bitrise builds might fail, which can slow you down.
- Code coverage is thrown out since it would appear that you have tested more of the code than expected.
- Sometimes it may be very difficult to detect the issue, for example, if someone changes the color by 1%. You may need to invest in a good diff tool to detect these problems.
- You have to run your tests against the same simulator every time — or at least against a simulator with the same screen dimensions.
- The reference images for snapshot tests can become a problem if they are stored in the repo when there are more such tests. With hundreds or thousands of test cases, these images take up a lot of space, which slows repositories checkouts and updates. Because of that, you as a team need to always consider this challenge. It can be useful to build a custom solution outside the code repository, such as using S3 storage bucket, or any other cloud storage to avoid this issue in the future.
Conclusion
Mobile testing practices, such as snapshot testing are recommended to ensure that the UI doesn't change between releases and to avoid unexpected app behavior. Snapshot tests are better for SwiftUI because it does not provide access to its view tree, so we cannot inspect view contents manually otherwise.


.jpg)
