
This guide will walk you through all the steps from adding your Android project to Bitrise to deploying the apk built from your project to Google Play Store.
For this guide, we will use a dummy Android app: sample-apps-android-googleplay
Create your project on Bitrise
First of all, we'll need to set up a project, so:
- Open bitrise.io and create a new Bitrise project.
- Let Bitrise scan your project and create the initial configuration for your Android project.
- Once the scanner has finished working, the generated config will look like this:
'4'xf
default_step_lib_source: https://github.com/bitrise-io/bitrise-steplib.git
project_type: android
trigger_map:
- push_branch: "*"
  workflow: primary
- pull_request_source_branch: "*"
  workflow: primary
workflows:
  deploy:
    steps:
    - [email protected]:
        run_if: '{{getenv "SSH_RSA_PRIVATE_KEY" | ne ""}}'
    - [email protected]: {}
    - [email protected]: {}
    - [email protected]:
        title: Do anything with Script step
    - [email protected]: {}
    - [email protected]:
        inputs:
        - gradle_file: "$GRADLE_BUILD_FILE_PATH"
        - gradle_task: assembleRelease
        - gradlew_path: "$GRADLEW_PATH"
    - [email protected]: {}
    - [email protected]: {}
  primary:
    steps:
    - [email protected]:
        run_if: '{{getenv "SSH_RSA_PRIVATE_KEY" | ne ""}}'
    - [email protected]: {}
    - [email protected]: {}
    - [email protected]:
        title: Do anything with Script step
    - [email protected]: {}
    - [email protected]:
        inputs:
        - gradle_file: "$GRADLE_BUILD_FILE_PATH"
        - gradle_task: assembleDebug
        - gradlew_path: "$GRADLEW_PATH"
    - [email protected]: {}
    - [email protected]: {}
app:
  envs:
  - opts:
      is_expand: false
    GRADLE_BUILD_FILE_PATH: build.gradle
  - opts:
      is_expand: false
    GRADLEW_PATH: "./gradlew"
Generate a signed apk
For Android codesigning, we will use the sign-apk Step (read more about this Step here).
Do not forget to upload your keystore file to Bitrise.
After codesign setup the config will look like this:
workflows:
  deploy:
    steps:
    - [email protected]:
        run_if: '{{getenv "SSH_RSA_PRIVATE_KEY" | ne ""}}'
    - [email protected]: {}
    - [email protected]: {}
    - [email protected]:
        title: Do anything with Script step
    - [email protected]: {}
    - [email protected]:
        inputs:
        - gradle_file: "$GRADLE_BUILD_FILE_PATH"
        - gradle_task: assembleRelease
        - gradlew_path: "$GRADLEW_PATH"
    - [email protected]: {}
    - [email protected]: {}
Setup a Google Play Store project
If you have ever deployed your app to Google Play Store, skip to no. 3.
To use Google Play Deploy step the following setup has to be done:
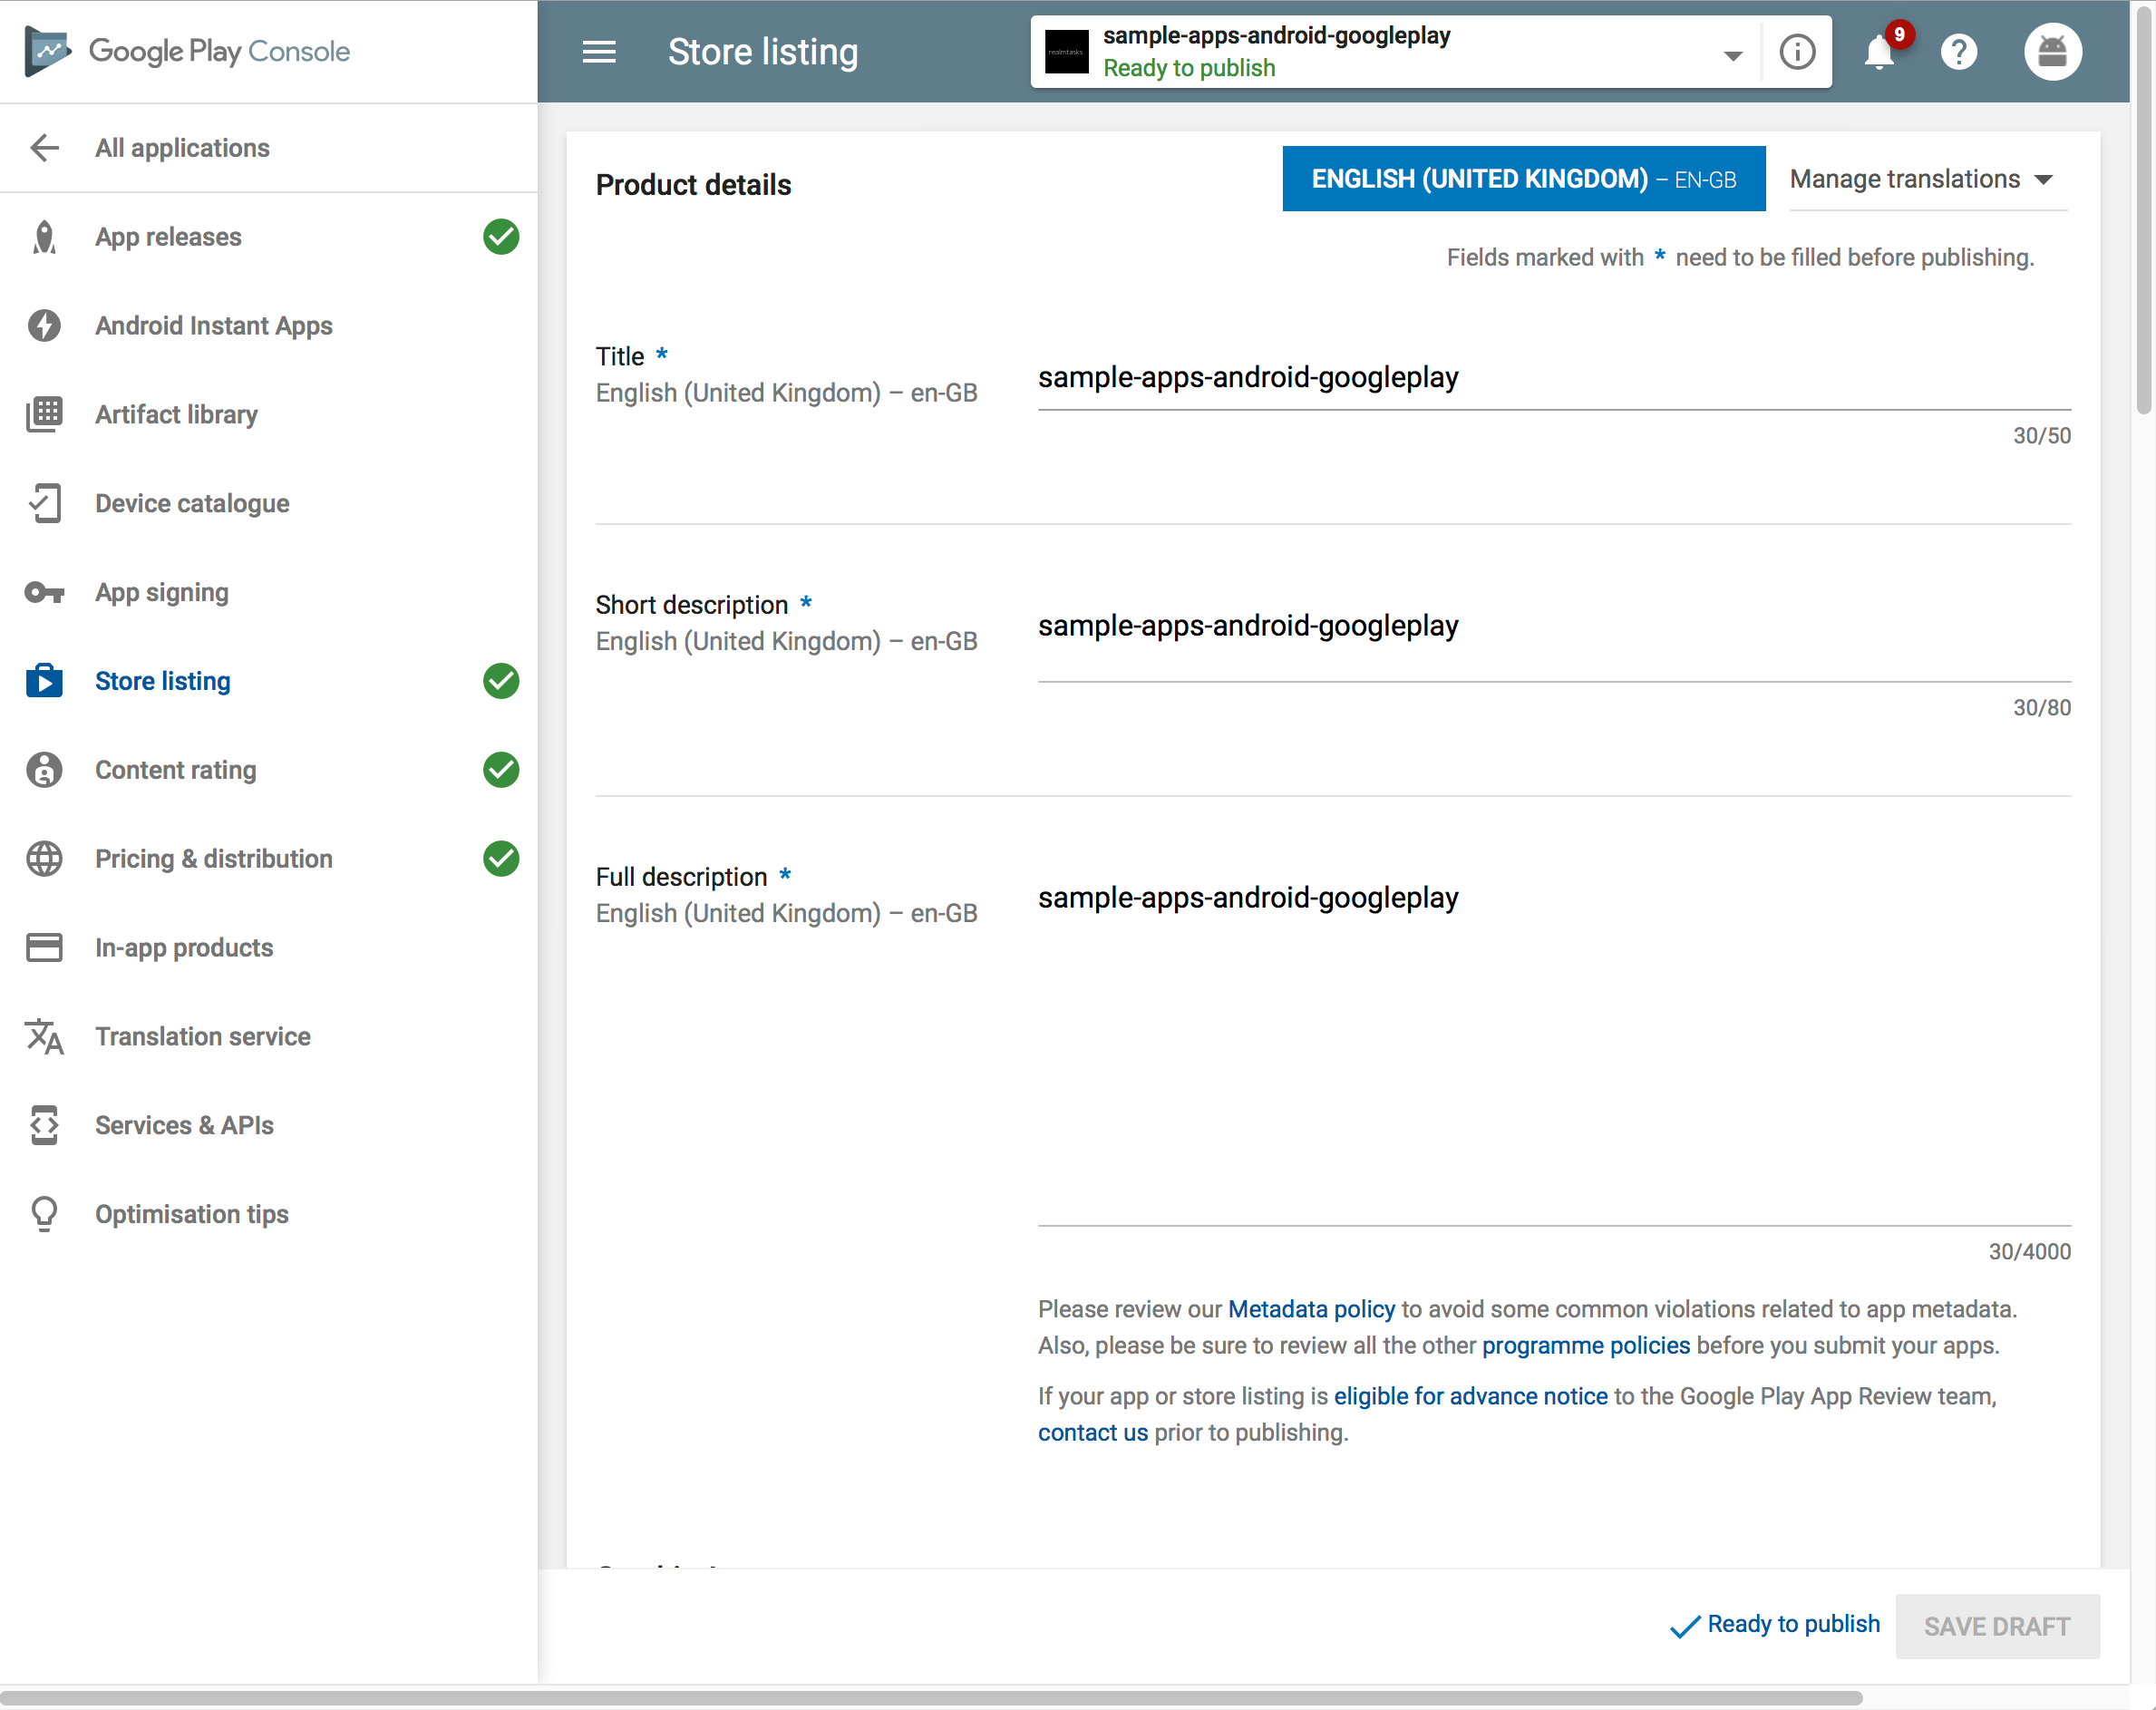
- Do not forget to create your app's Store Listing, fill in the content rating questionnaire and set up pricing & distribution.
- You must upload an APK before filling in the content rating questionnaire. Navigate to your Play Applications App releases page and select either MANAGE ALPHA / MANAGE BETA / MANAGE PRODUCTION, then add your first apk in the APKs to add section and save changes. Click Preview to review your release once more. 😉
- You do not need to finish the release: once the first apk is uploaded, it is accessible in the Artifacts Library and you can continue with Content Rating.
Once the first upload is done, App releases, Store listing and Content rating should have a green check each on your application's page.
- Link your API Project by Creating a new API project or Using an existing API project.
- Set Up API Access Clients Using a service account and do not forget to download the service account's json key.
- Grant Release manager role to the Service Account.
At this point, your Google Play console project has been prepared and a services credential account has been created too, which is authorized to manage your releases. Save your service account's json key, you will need it later.
Deploy to Play Store using Bitrise
By now you already have a project on Bitrise which generates a signed apk for you and you have prepared a Google Play project with a service account, which can deploy your apps. Well done, so far. 😎
Now you need to finish your Bitrise workflow:
- Go to the Workflow tab of your Bitrise project.
- Open the Code Signing tab of the Workflow Editor.
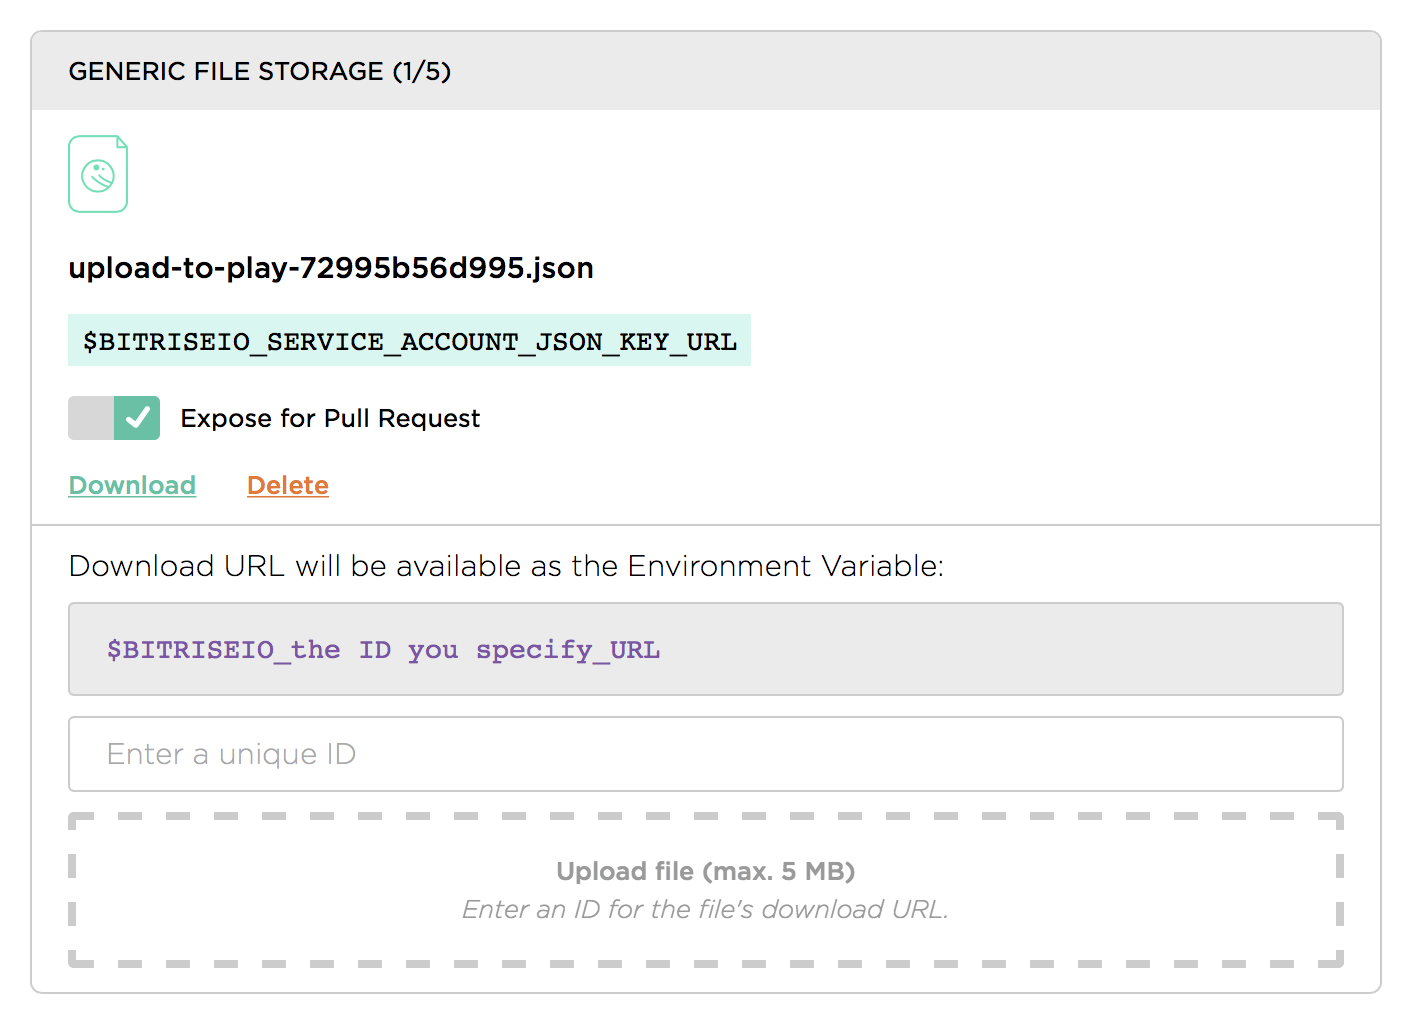
- Upload the service account json key into the GENERIC FILE STORAGE and copy the env key which stores your uploaded file's url, let's say: BITRISEIO_SERVICE_ACCOUNT_JSON_KEY_URL
- Navigate to the Workflows tab of the Workflow Editor.
- Add the Google Play Deploy step next to the Sign APK step.
- Fill in the step's required inputs:
- Service Account JSON key file path: this input can accept a remote url, so just provide the env which holds your uploaded service account json key, for example: $BITRISEIO_SERVICE_ACCOUNT_JSON_KEY_URL
- Package name: your Android app's package name
- Track: the track to which you want to deploy your apk (alpha / beta / rollout / production)
After doing everything described above, the final config will be the following:
workflows:
  deploy:
    steps:
    - [email protected]:
        run_if: '{{getenv "SSH_RSA_PRIVATE_KEY" | ne ""}}'
    - [email protected]: {}
    - [email protected]: {}
    - [email protected]:
        title: Do anything with Script step
    - [email protected]: {}
    - [email protected]:
        inputs:
        - gradle_file: "$GRADLE_BUILD_FILE_PATH"
        - gradle_task: assembleRelease
        - gradlew_path: "$GRADLEW_PATH"
    - [email protected]: {}
    - [email protected]:
        inputs:
        - package_name: io.bitrise.googleplay
        - service_account_json_key_path: "$BITRISEIO_SERVICE_ACCOUNT_JSON_KEY_URL"
    - [email protected]: {}
    - [email protected]: {}
And you are done!
Happy building!


.jpg)
