
For almost the last three years in my career, I was working on mobile testing and started learning more about mobile development for native apps (Android and iOS). But I also heard about cross-platform platforms like React Native and Flutter and one of the interesting things I found during my learning journey is Koltin Multiplatform Mobile (KMM), an SDK for cross-platform mobile development.
Let’s find out how to get started with KMM and integrate it with Bitrise!
What’s KMM?
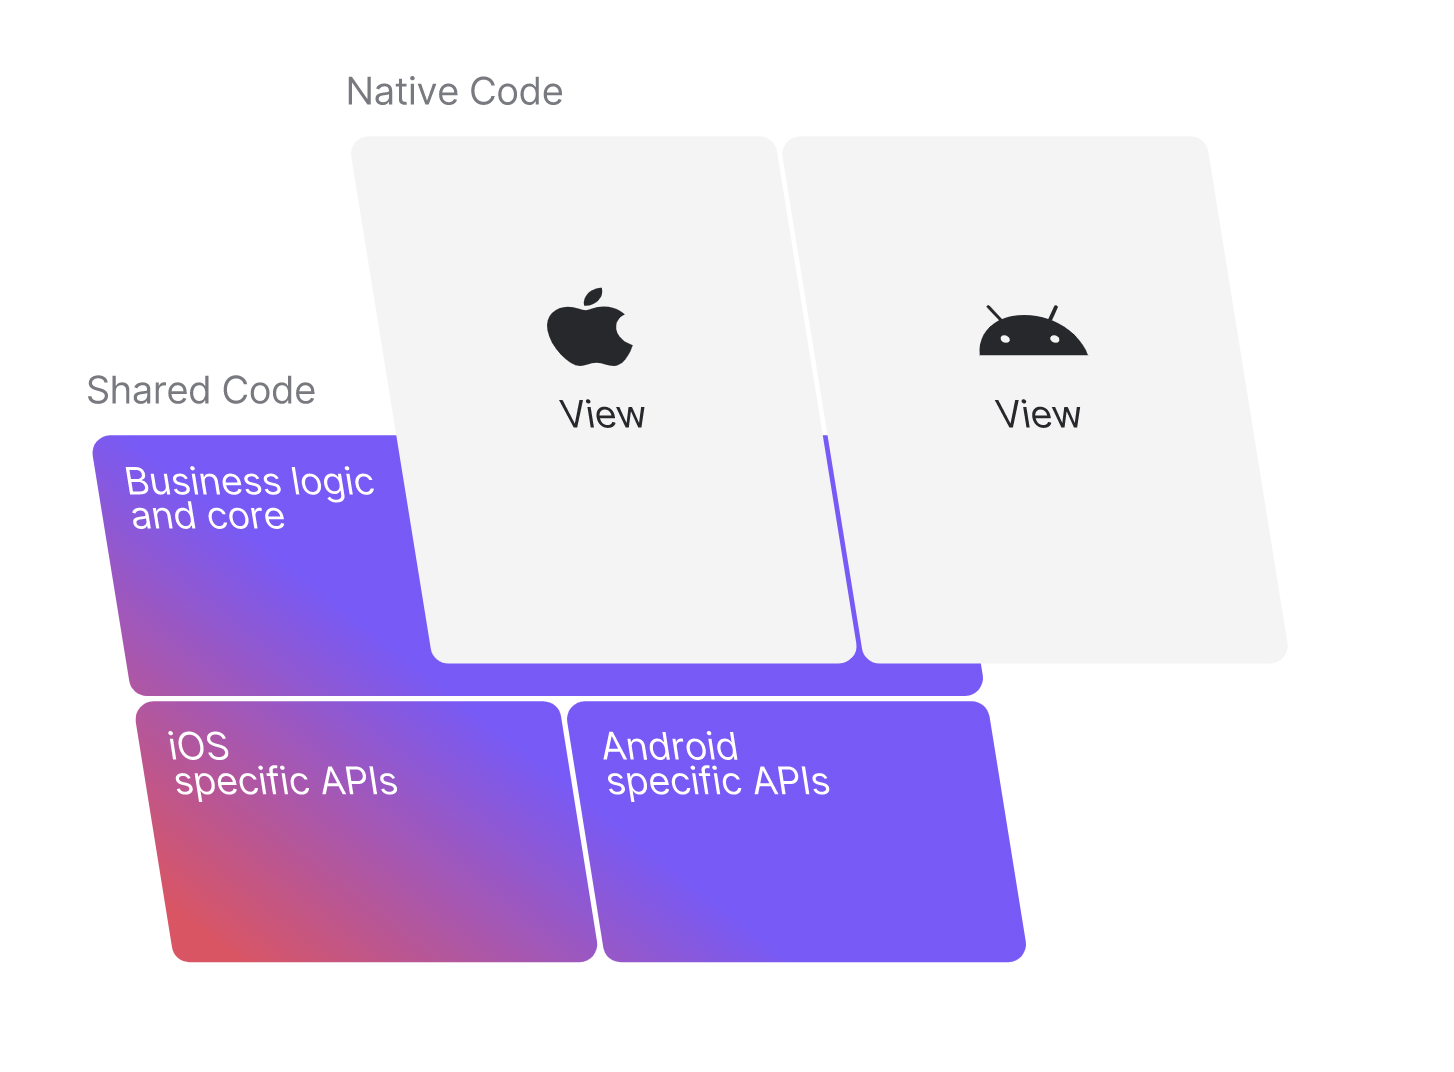
KMM (Kotlin Multiplatform Mobile) is an SDK for cross-platform mobile development. With KMM, you can develop multiplatform mobile applications and share parts of your applications between Android and iOS, such as core layers, business logic, presentation logic, and more. What’s new in Kotlin for KMM can be found in the documentation and KMM roadmap.
KMM uses the multiplatform abilities of Kotlin and reduces time spent writing and maintaining the same code for different platforms while retaining the flexibility and benefits of native programming. And you can use iOS and Android features without any overhead.
Before you get started with KMM you need to have knowledge about Kotlin. To learn more, read the Get started with Kotlin tutorial from KotlinLang.
KMM prerequisites
To be able to start using KMM you should install the following:
- Java JDK version 11
- Ruby and Bundler
- Android Studio — version 4.2 or higher — here, I’m using the latest version Arctic Fox
- Xcode - version 11.3 or higher
- Xcode command line developer tools
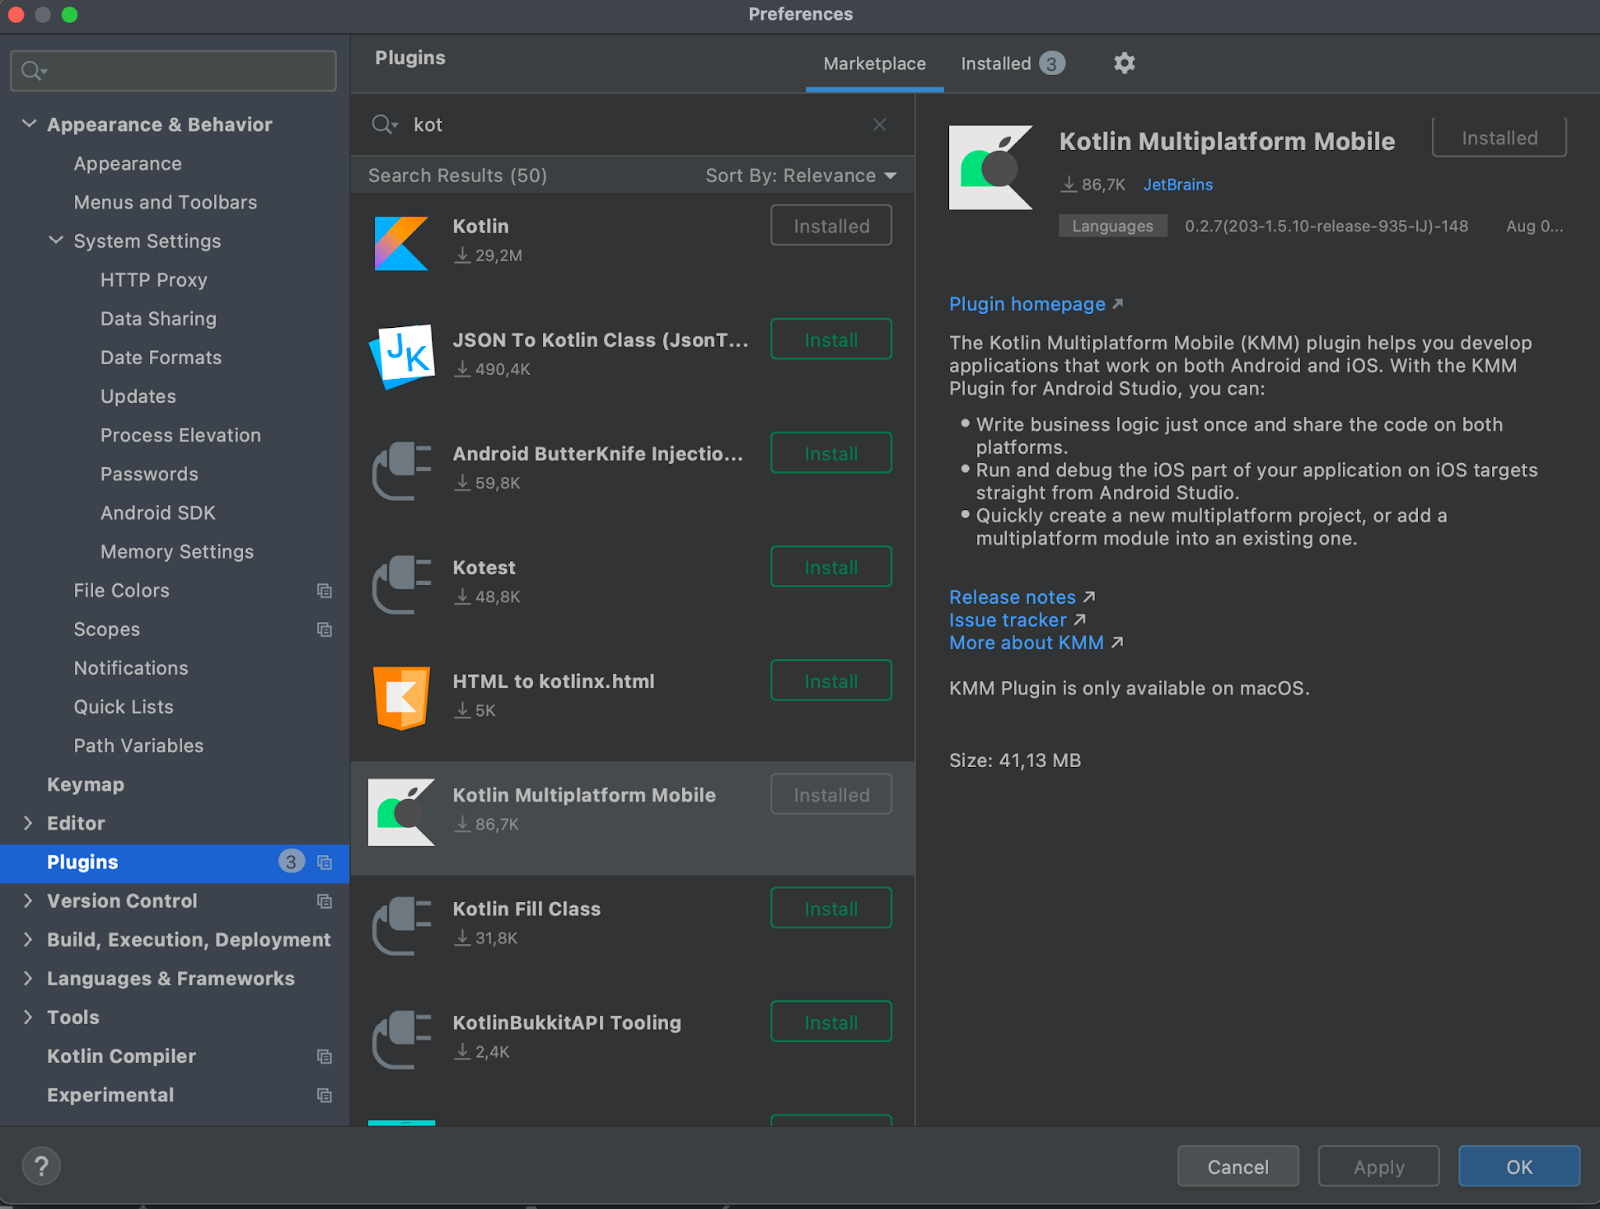
- Kotlin Multiplatform Mobile plugin for Android Studio (read the plugin release updates). In Android Studio, select Preferences > Plugins > search for the plugin Kotlin Multiplatform Mobile in Marketplace and install it:
You are ready now and it’s time to create your first KMM project. 🚀
Create your first KMM project
You can create your first KMM project using the following steps:
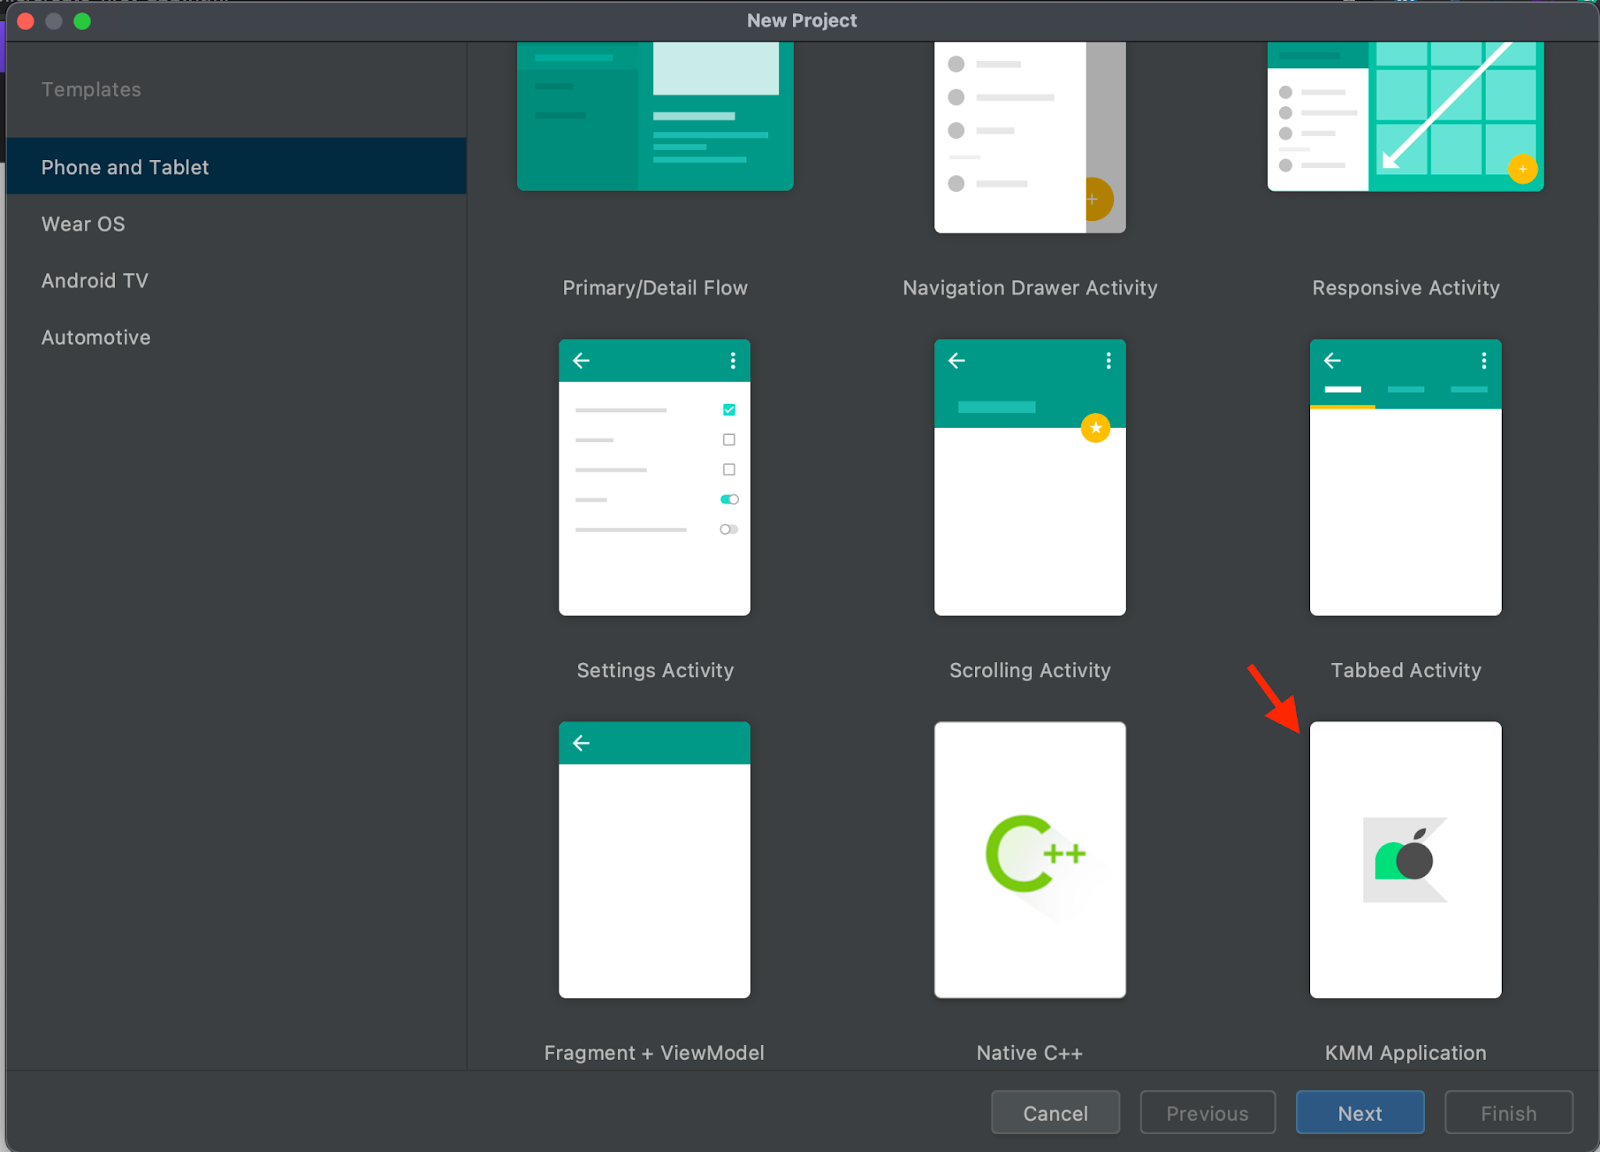
- Open the Android Studio and click on New Project:

- In the project’s templates, scroll down and you will see that we now have the KMM Application. Select it and click the Next button:
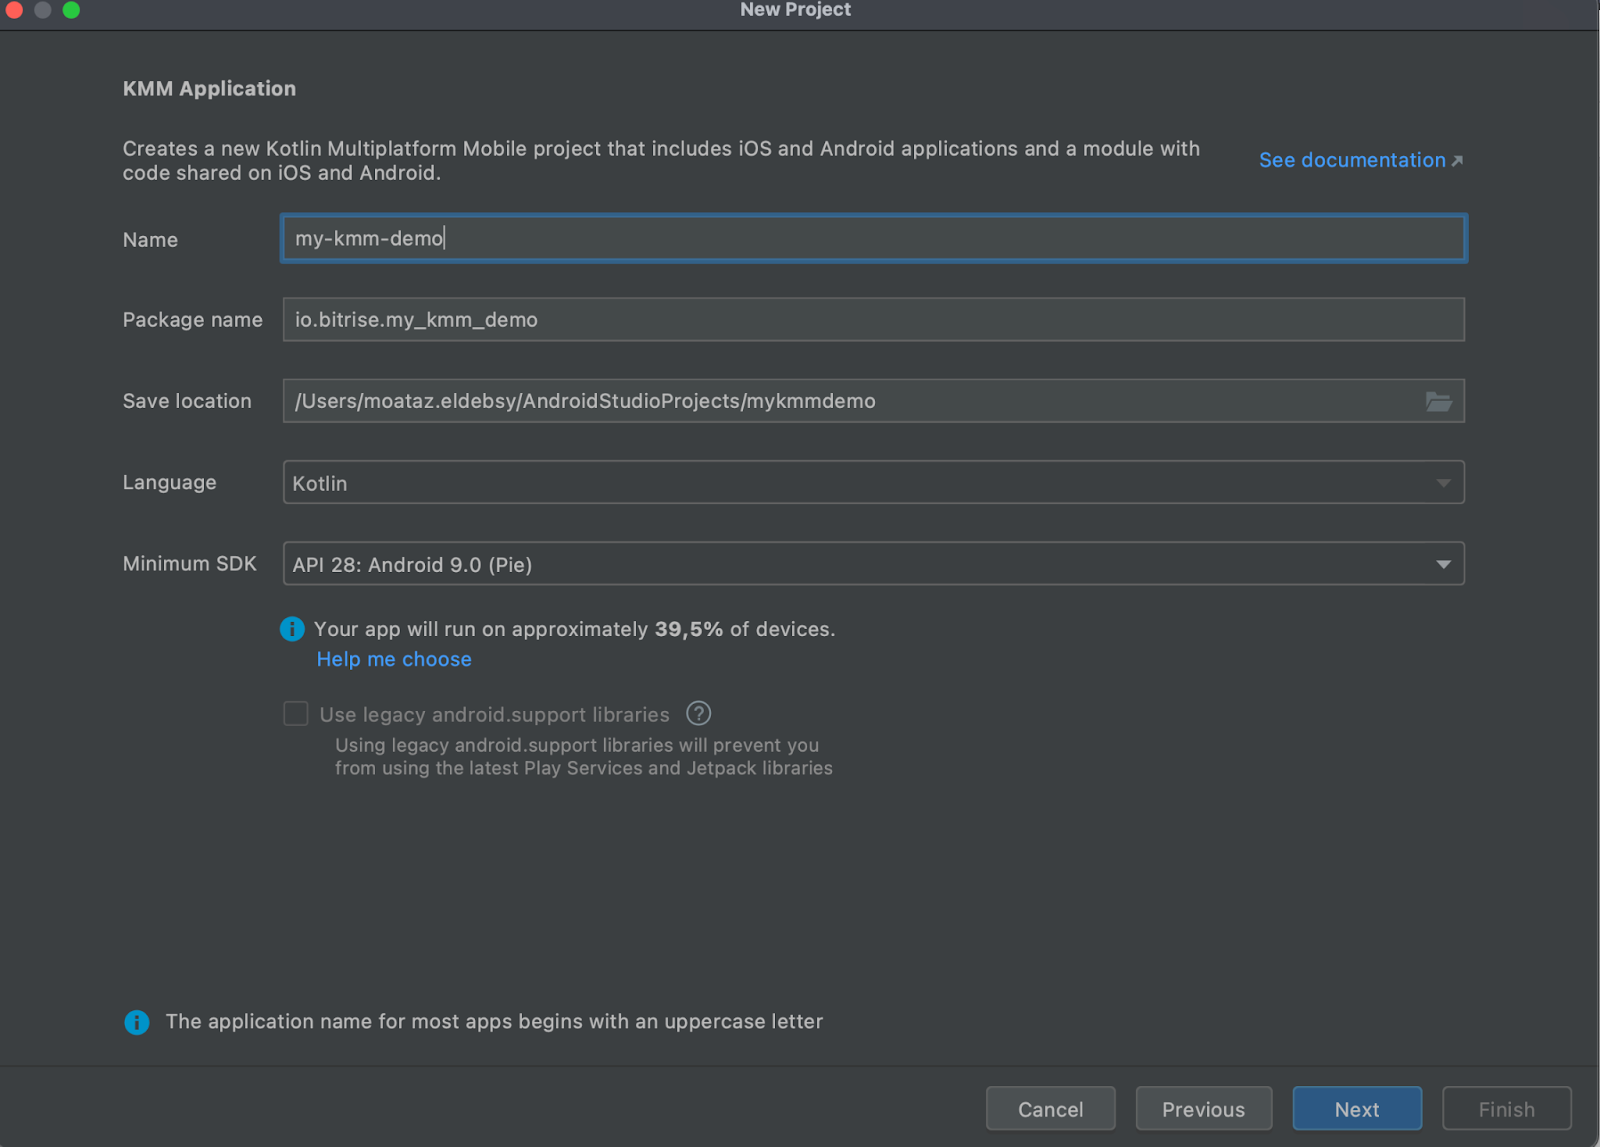
- Enter your project name, the language you want to use, and the minimum SDK then click the Next button:
- Change the application name for Android and iOS. You can also change the Shared Module Name but in my case, I will leave the default values and select Add Sample tests for Shared Module:
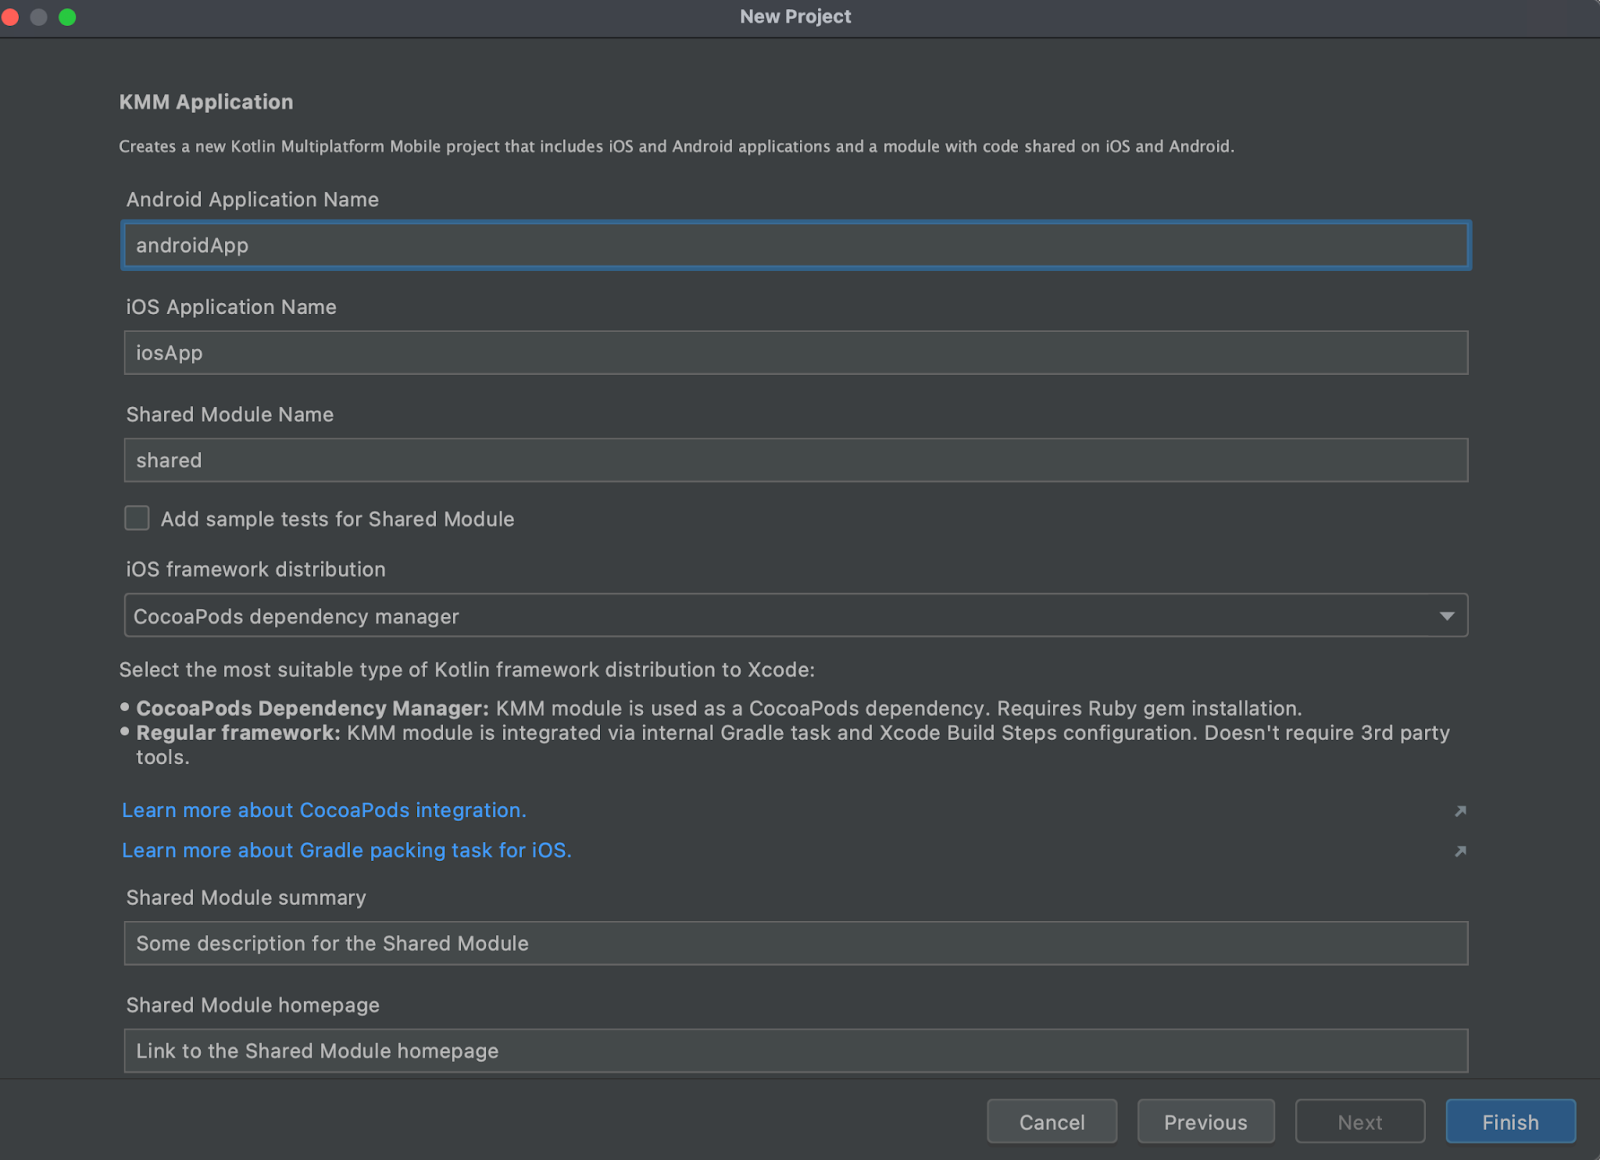
- For the iOS app, you can switch the dependency between the regular framework or CocoPods dependency manager because in the prerequisites I mentioned that we need to install Ruby for CocoPods.
- Click the Next button and wait until Gradle finishes setting up the project:
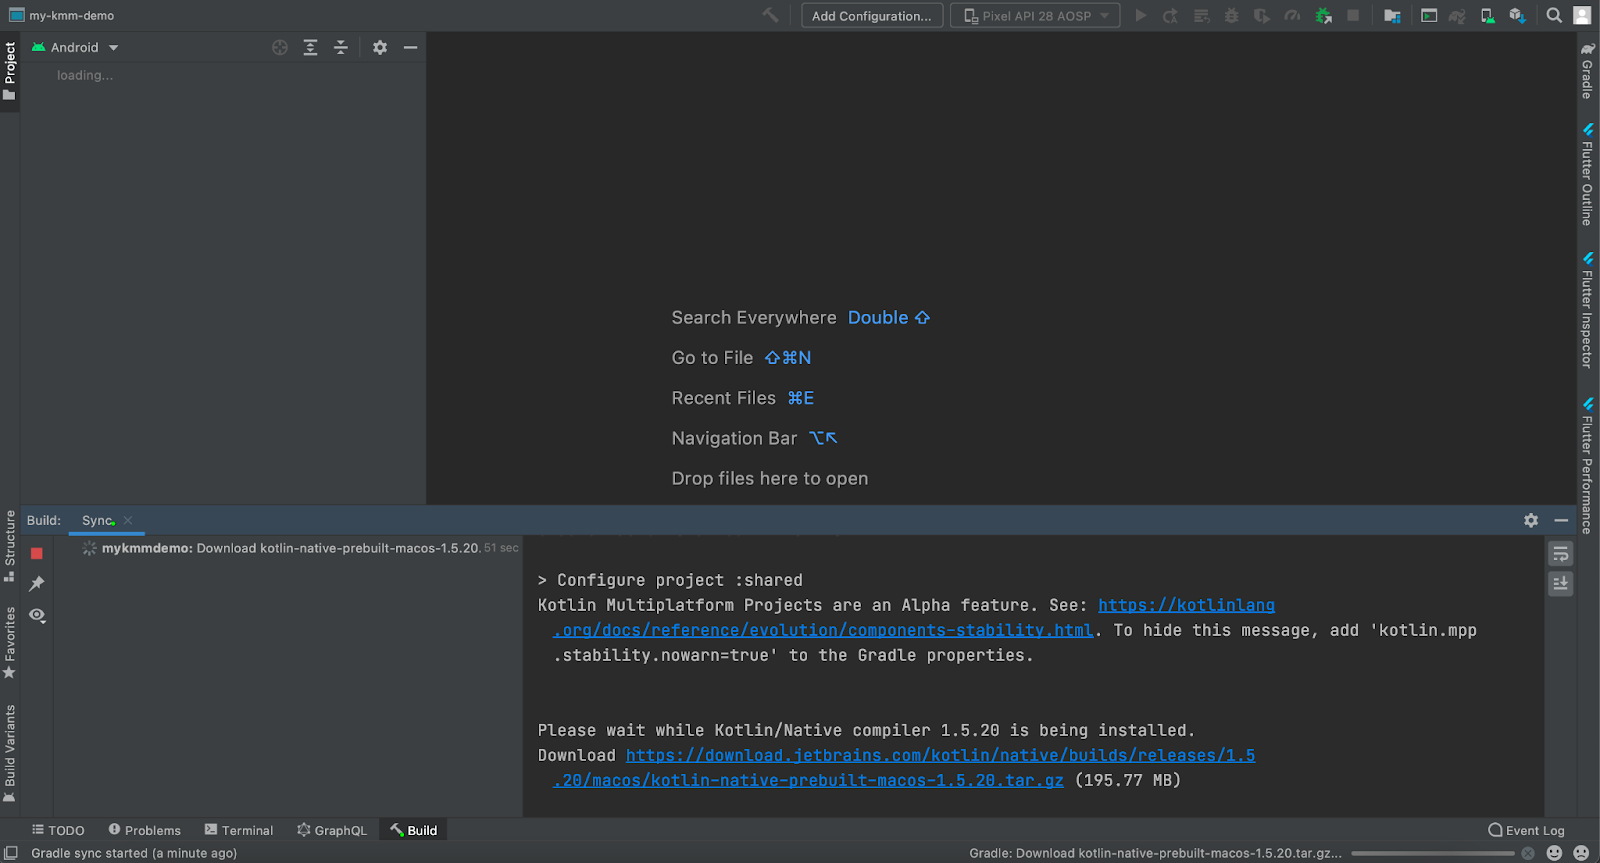
- After the project is successfully loaded, now you can find all the app modules in the project:
- androidApp
- iOSApp
- Shared Modules

- To run your project we will start with the Android app. You can find in the configuration that we have androidApp and iOSApp, so we will select androidApp and select the Android Emulator or the connected device and click Run:

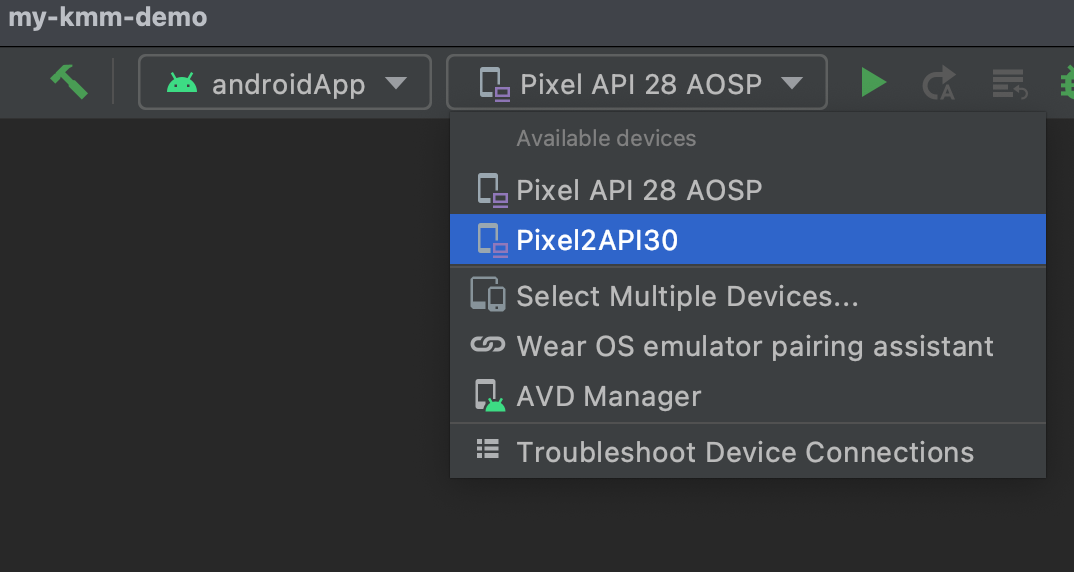
- If everything is built without problems, the androidApp will be installed and opened successfully on the device:

- Let’s run our iOSApp by selecting the Edit Configuration option and then Select iOS Application > iosApp and select your preferred iOS SDK or target, then click the OK button:
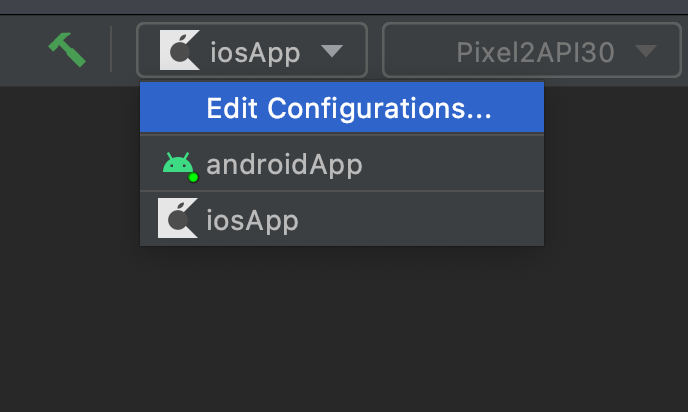

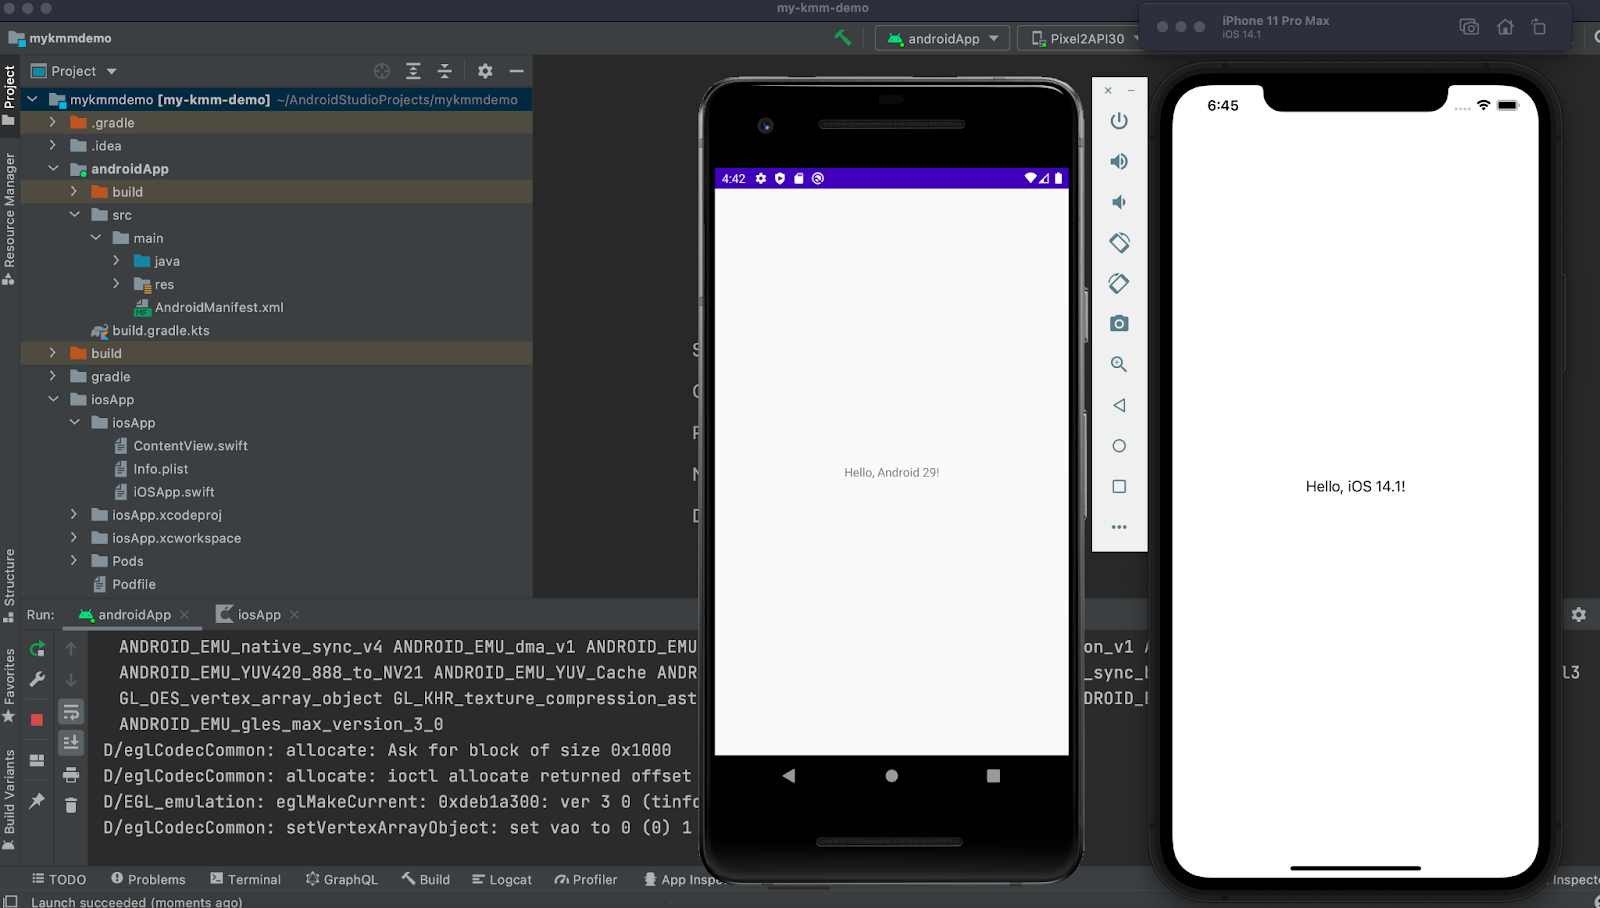
- Click the Run button and if everything is built without problems, the iOSApp will be installed and opened successfully on your device.

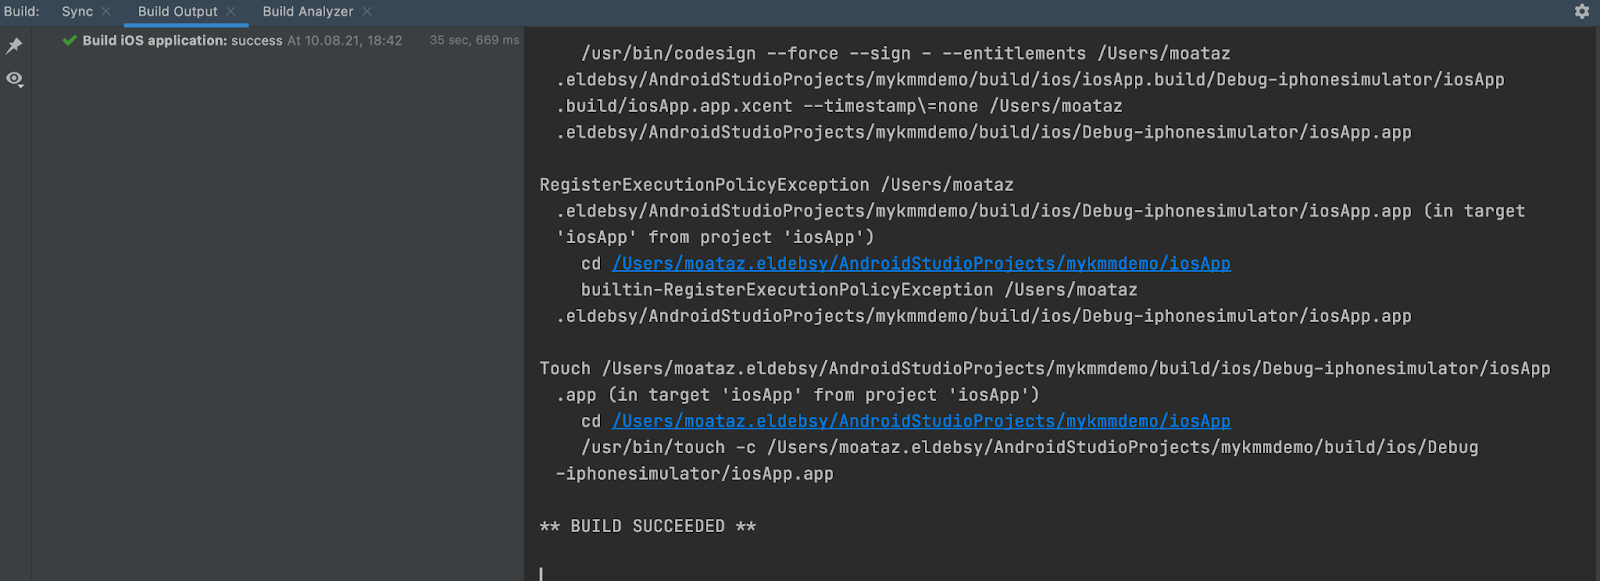
You will notice that we are now building our iOS app from the Android Studio 🥳
Now you can open your iOS app with Xcode and start creating your own stuff with iOS and also you can do the same for Android from Android Studio.
For the Android developers it looks normal. They are usually using Android Studio, Kotlin, and the rest in their daily work, but for the iOS developers it may look a little bit different because they usually use Xcode for iOS native apps.
Learn more about organizing a process around KMM.
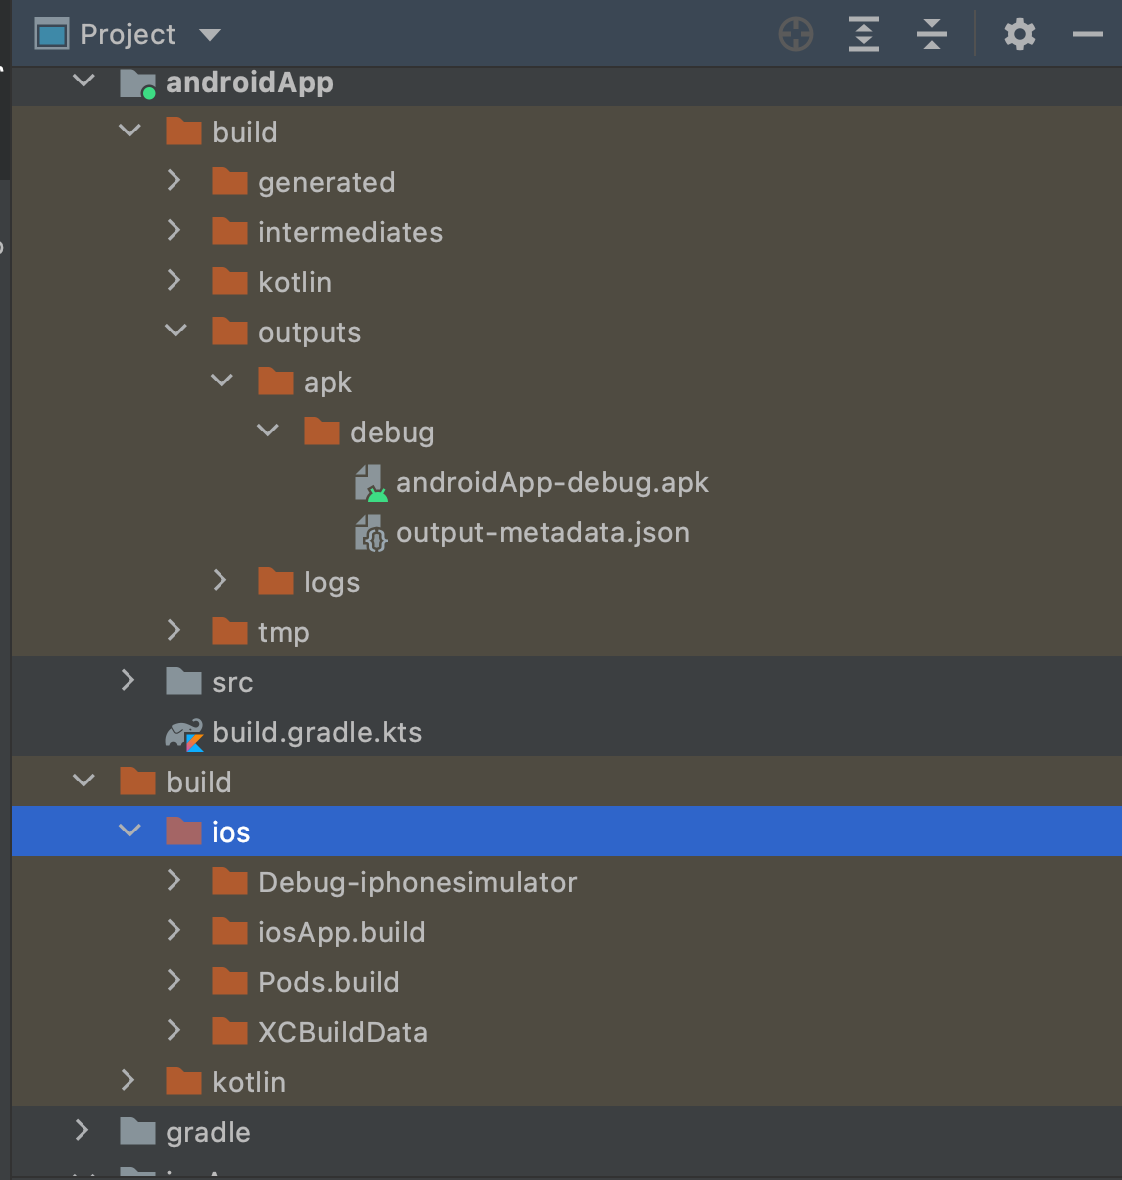
You will find that you have the Android APK file and the iOS App in the build folder:
Run the tests
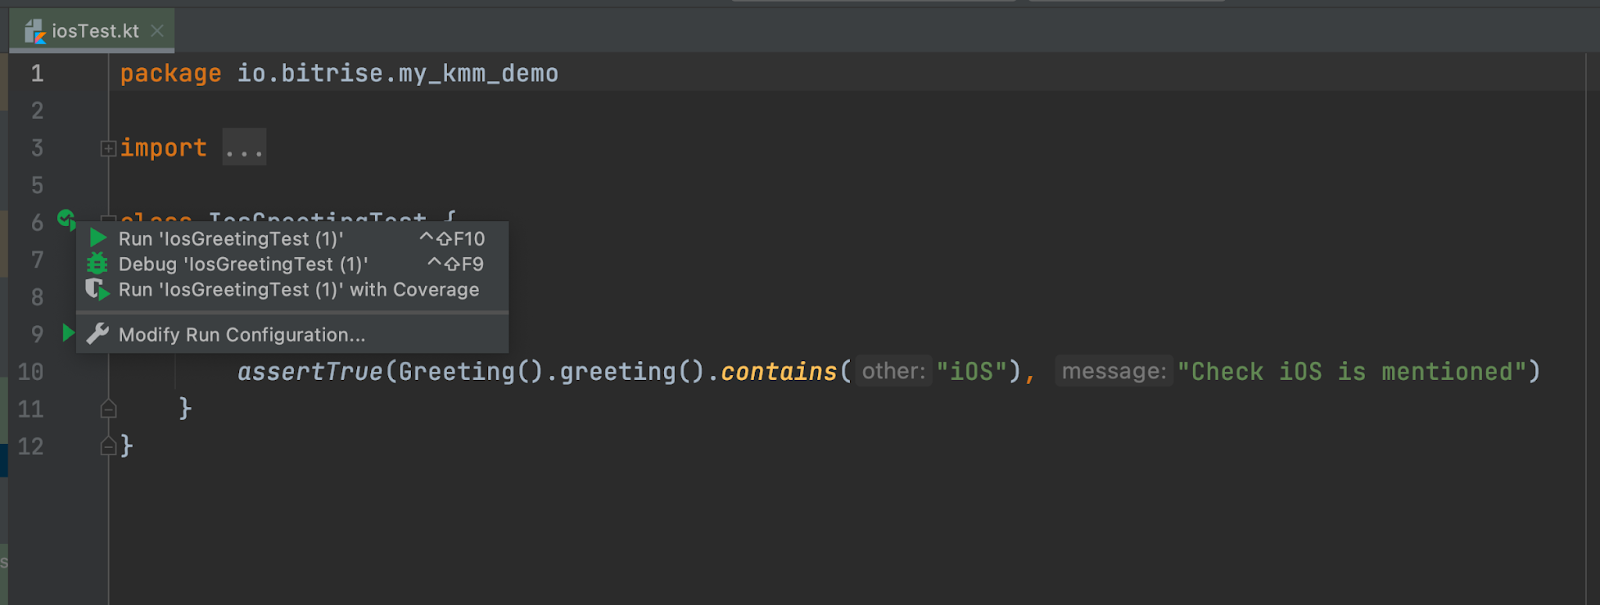
Inside the project, you will find different sample tests for Android and iOS:
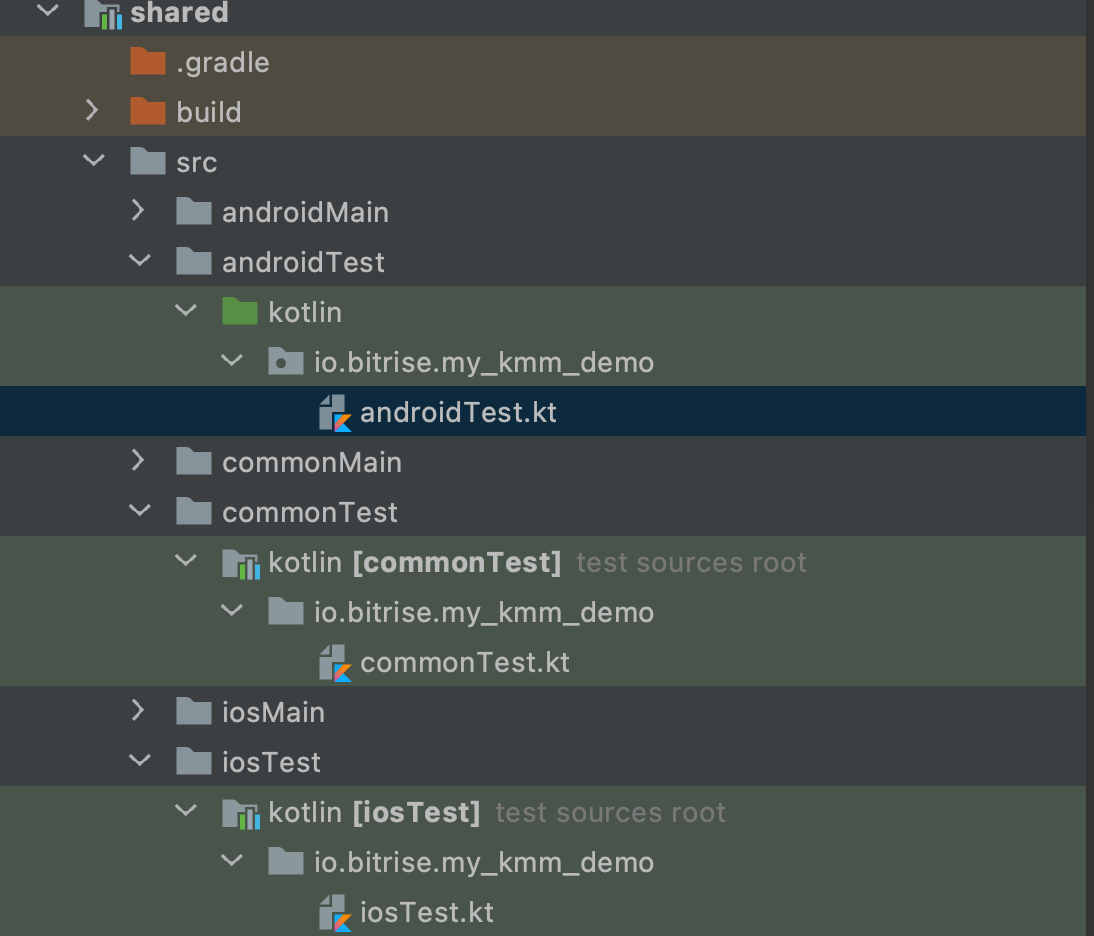
Open the iOSTests.kt and click run:
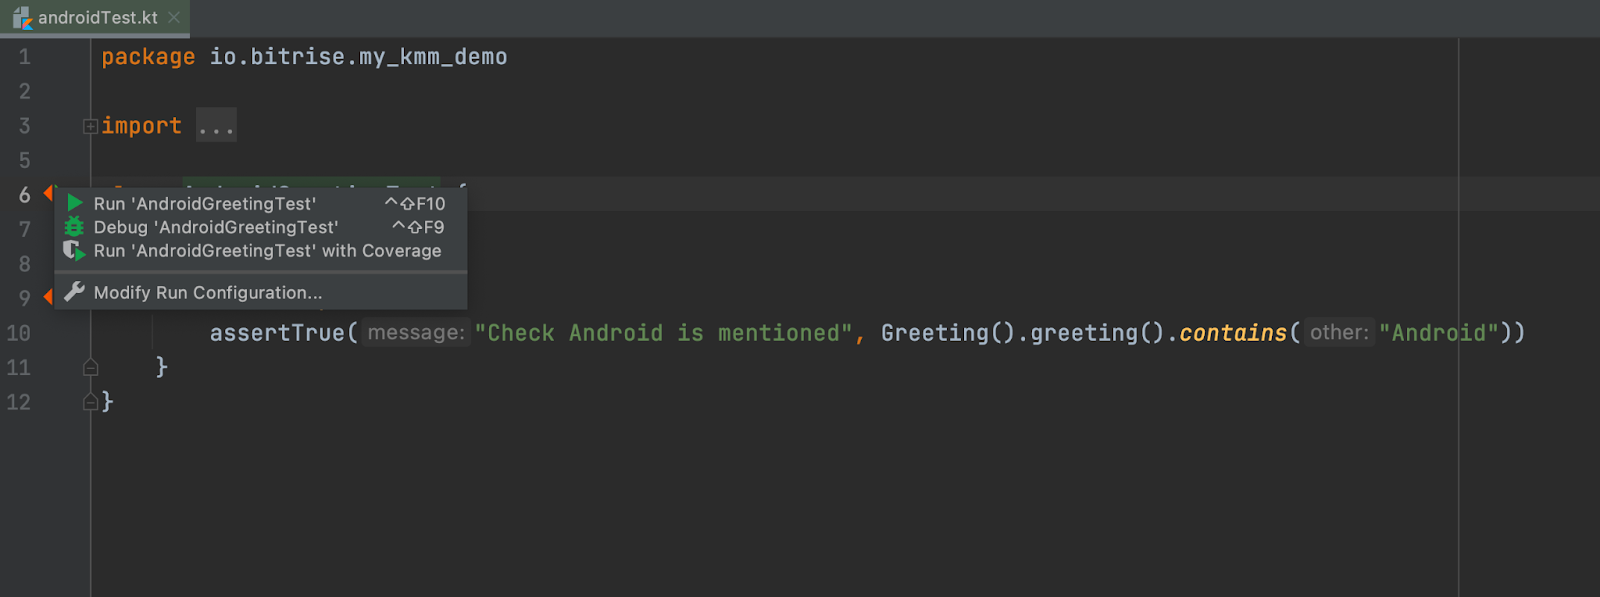
And also you can do the same for the androidTest.kt:
To know the Gradle tasks that you have in the project you can run ./gradlew tasks
And you will have a list of commands like the following:

Kotlin Multiplatform Mobile and Bitrise
Now it’s time to integrate your KMM app with a CI/CD pipeline to be able to build, test, and deploy your apps easily and smoothly.
Let’s get started.
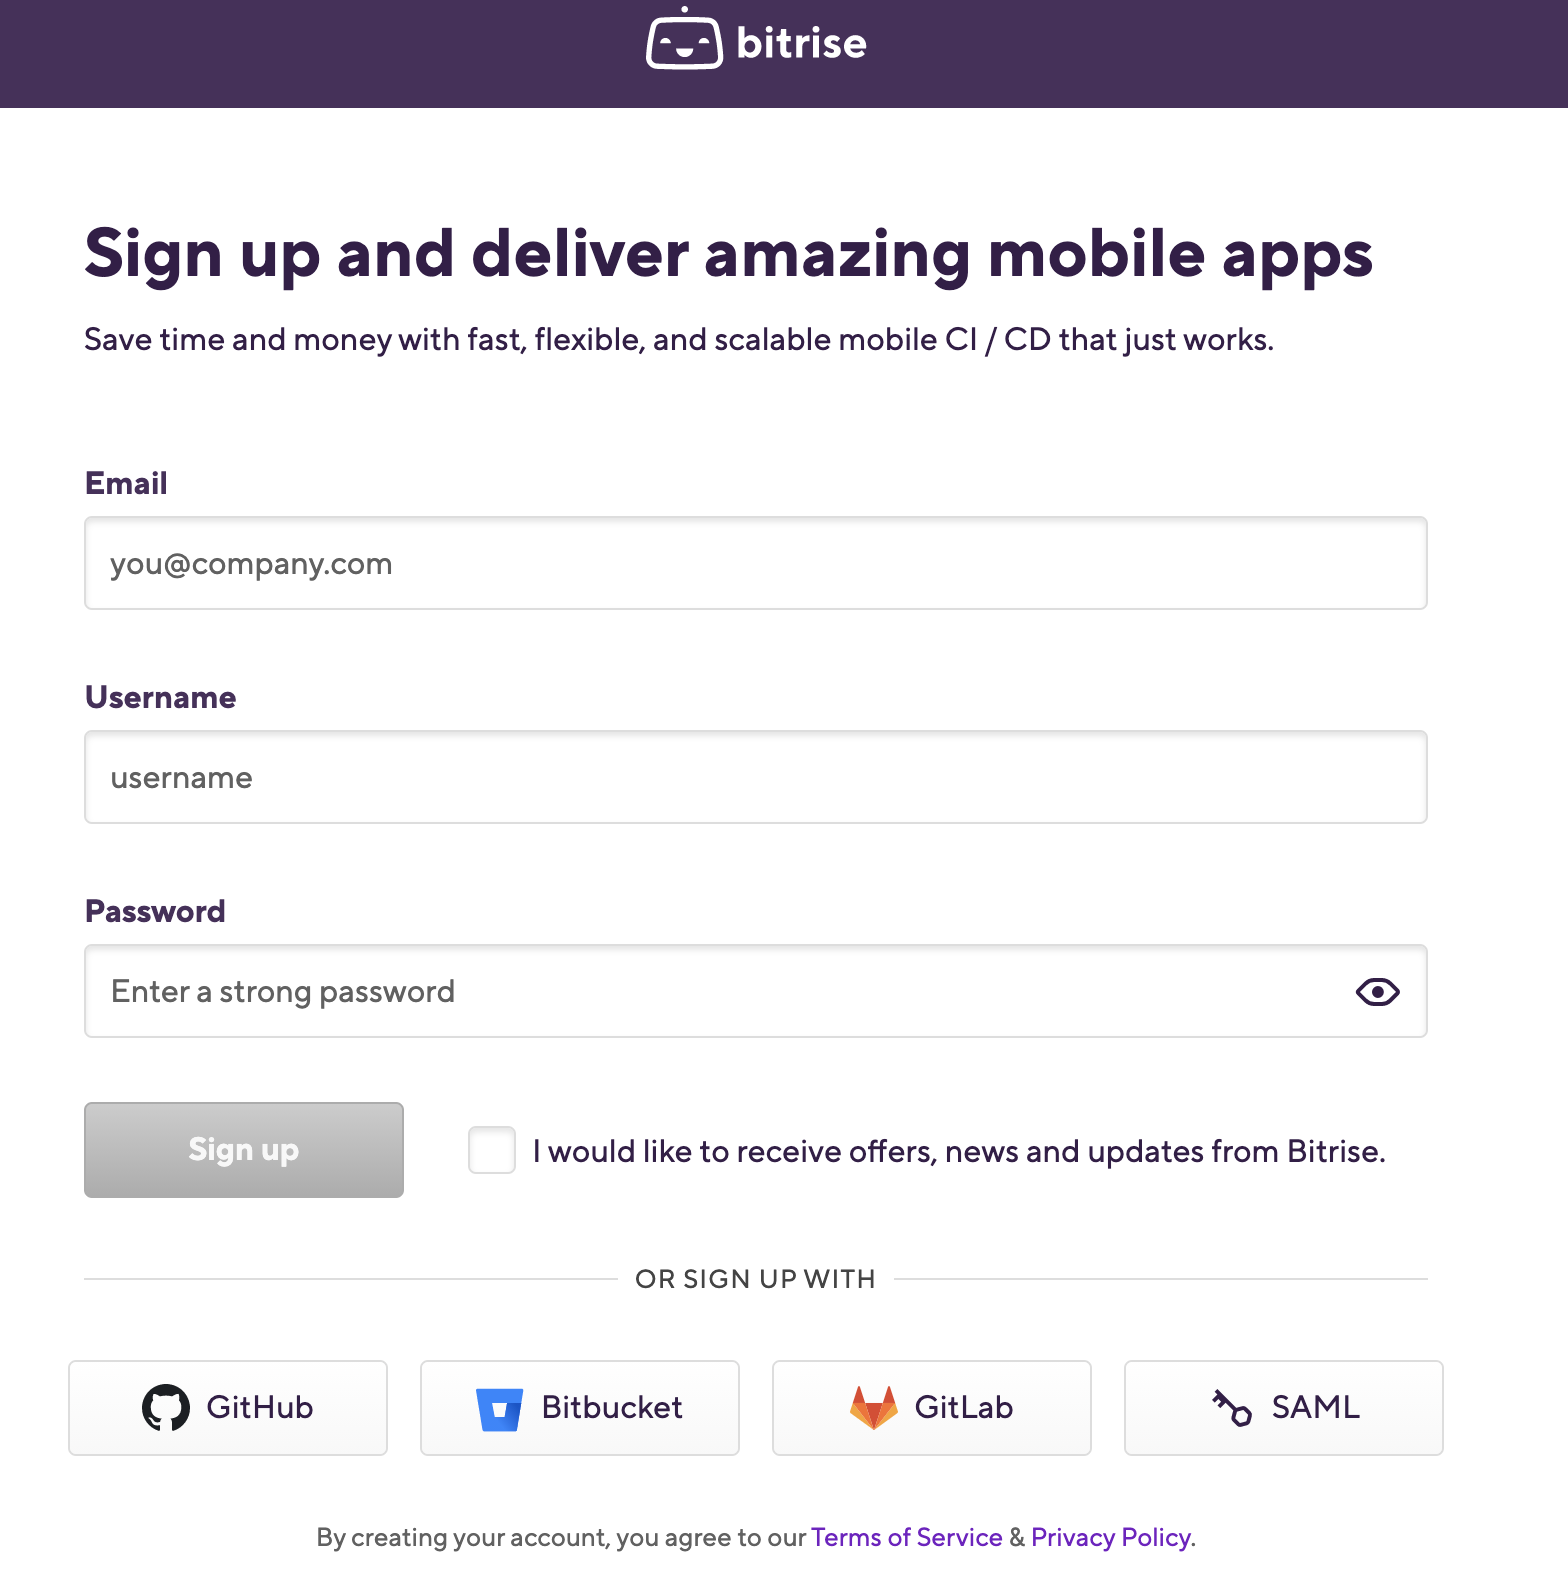
1. First, you need to create a free Bitrise account:
2. After logging in, you will have a blank dashboard and you can start adding your projects.
3. Click the Add your first app button.
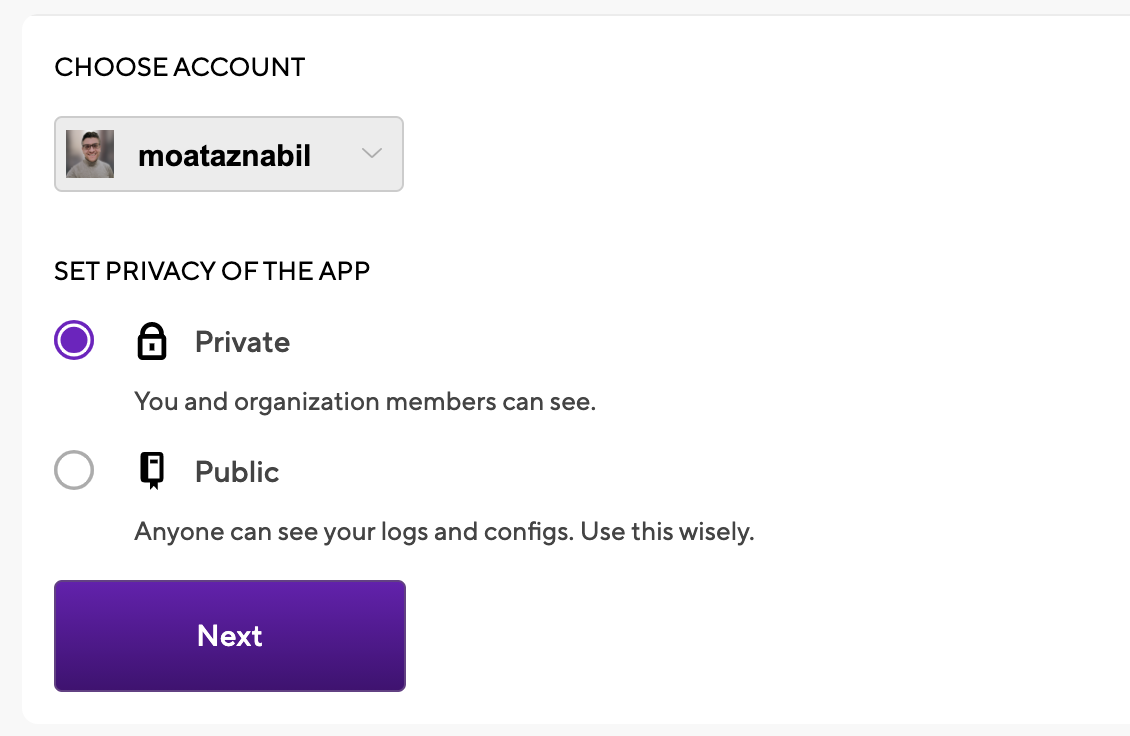
4. Select your account and set the privacy for the App (Private or Public) and click Next:
5. Choose the repository but before that, you have to give Bitrise access rights to your source code provider (e.g. GitHub).
6. You need to set up the repository access, so either auto-add an SSH key or manually add your own SSH key:

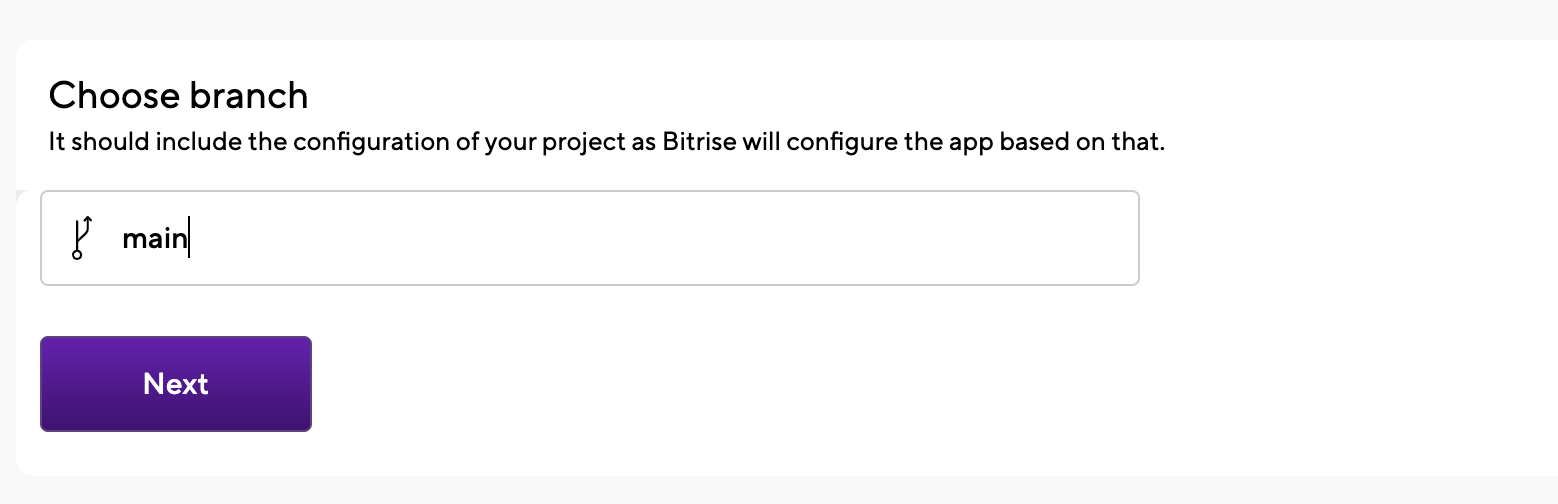
7. Choose the branch name (e.g. master/main branch) and click Nex:
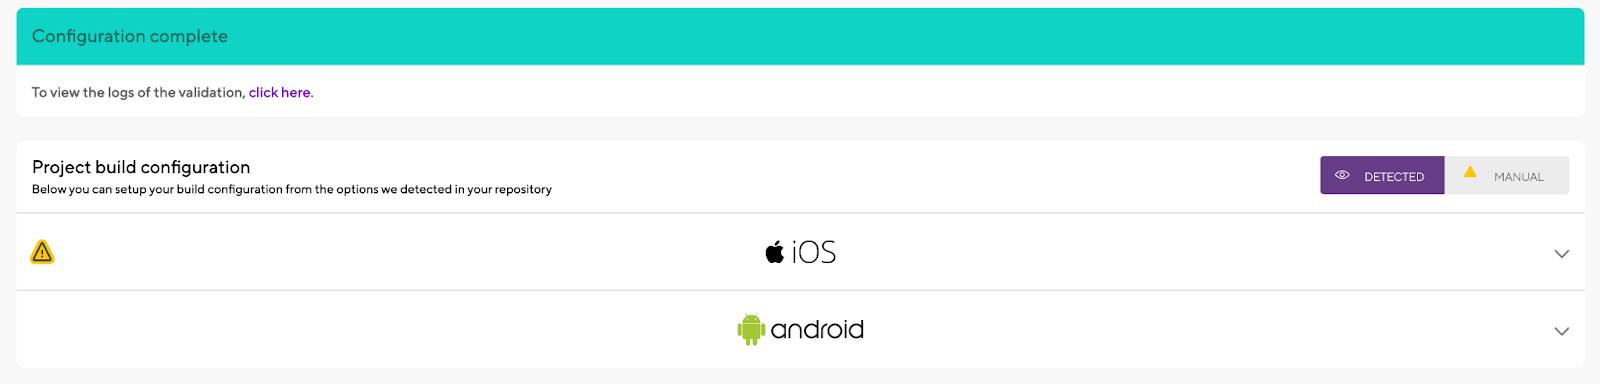
8. Next, Bitrise will run a validation with your repository and configuration:

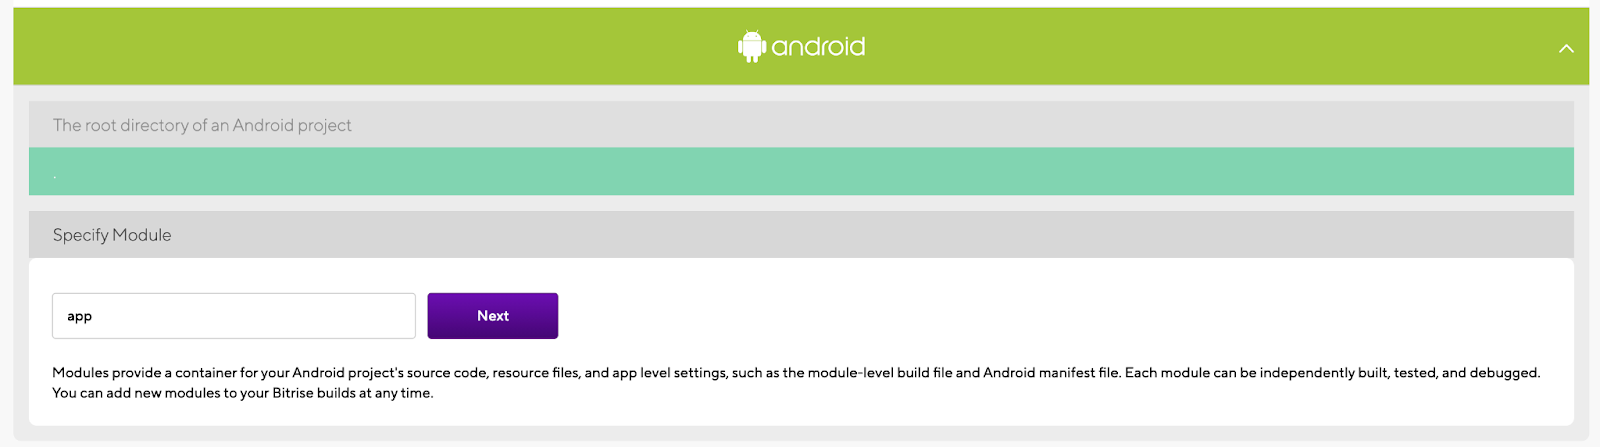
9. After validating, the project build configuration will display successfully (e.g. Android App). The scanner detected that the project type is Android and iOS because the scanner step detected two different apps, so we need to select one. I will select Android and in the Workflow Editor we will add the steps for the iOS app as well:
You can also edit this configuration if you need to use a different stack. We will use macOS and Xcode stack because we are planning to build and run the iOS app as well with Android:
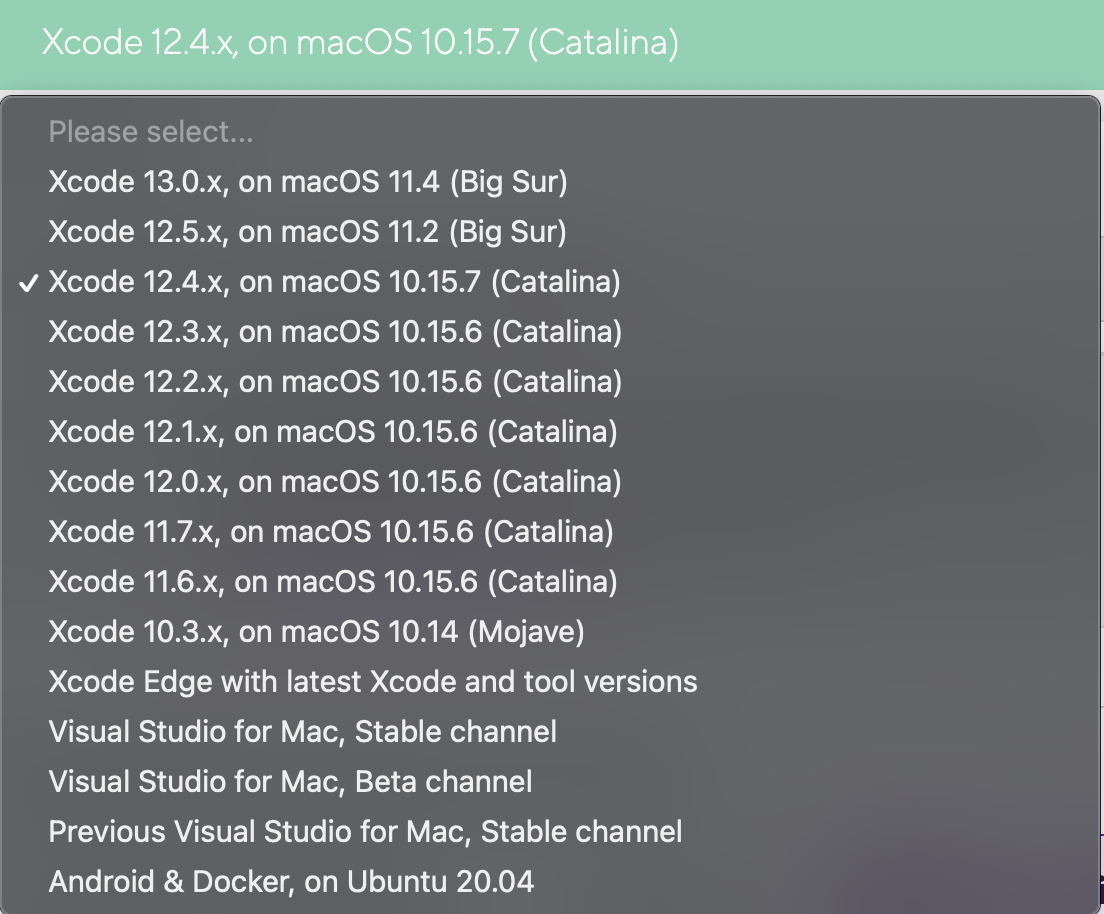
TIP
Bitrise supports the latest Xcode versions within 48 hours of Apple’s announcements to give mobile engineers the opportunity to update their apps and use new features with the latest SDKs for iOS, iPad, watchOS, and the latest OS like macOS Big Sur. For more info read our article on Xcode availability benchmarks.
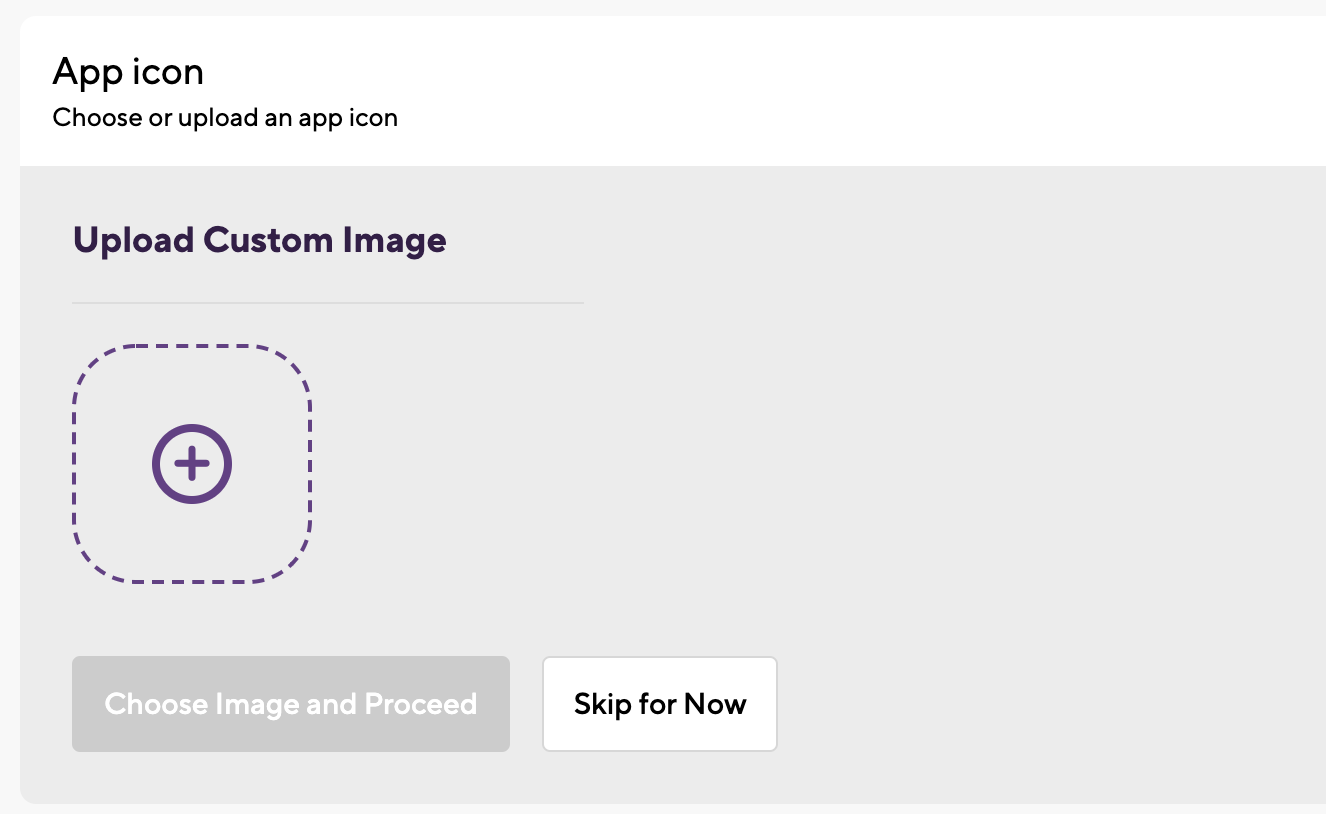
10. Click the Confirm button after reviewing the workflow stack. You can add the app icon as well or you can skip it for now:
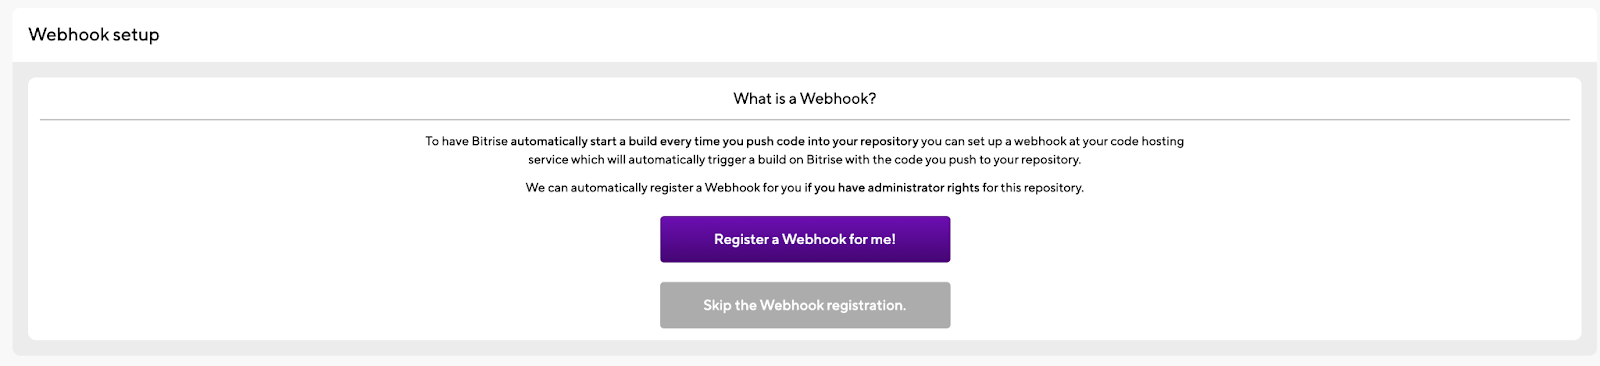
11. The final step is Webhook set up: you just need to select Register a Webhook for me and you will trigger your first KMM build for your project 🚀 🎉

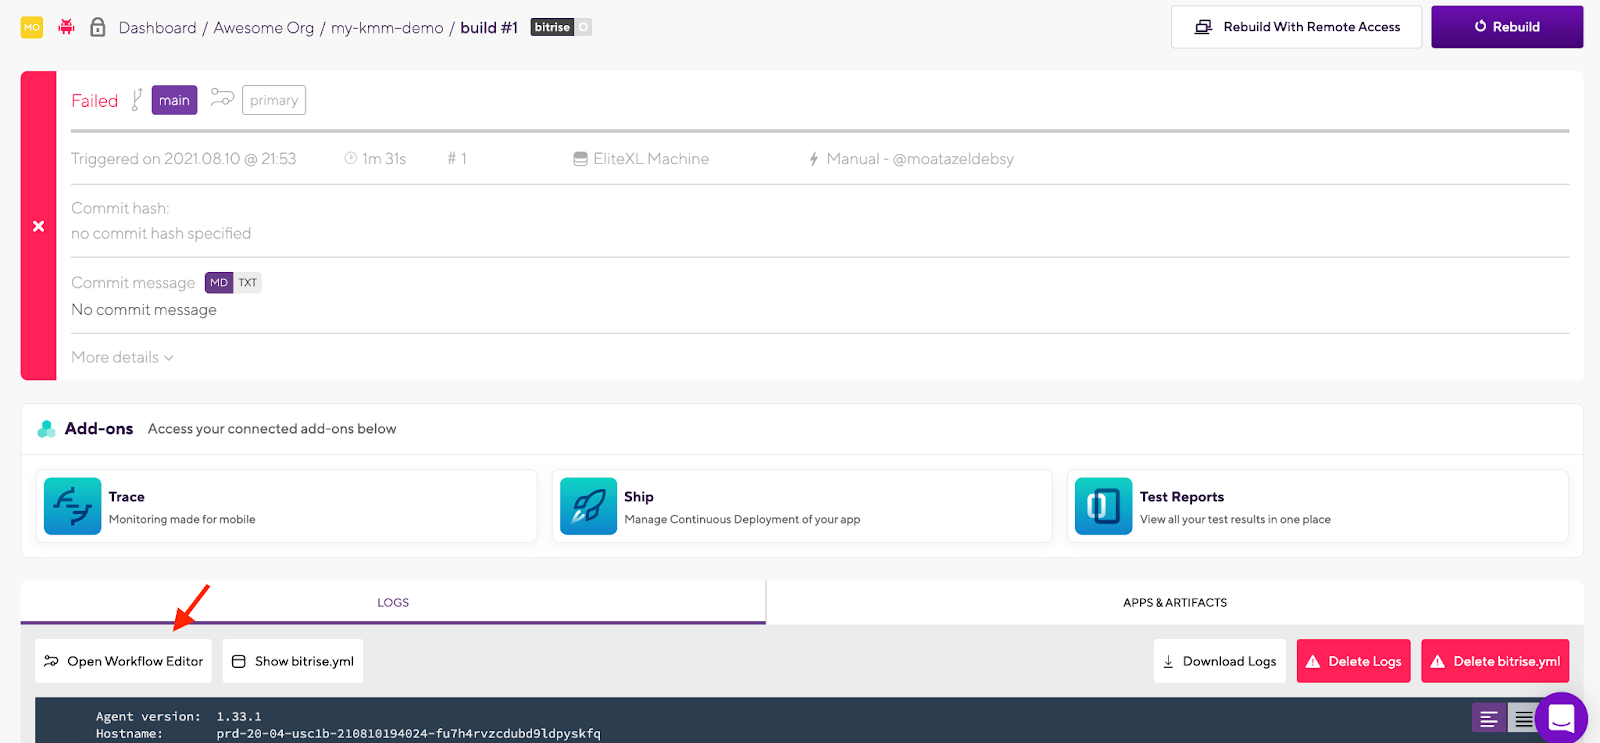
12. You will be redirected to the build log and you can check the Steps and the build status:
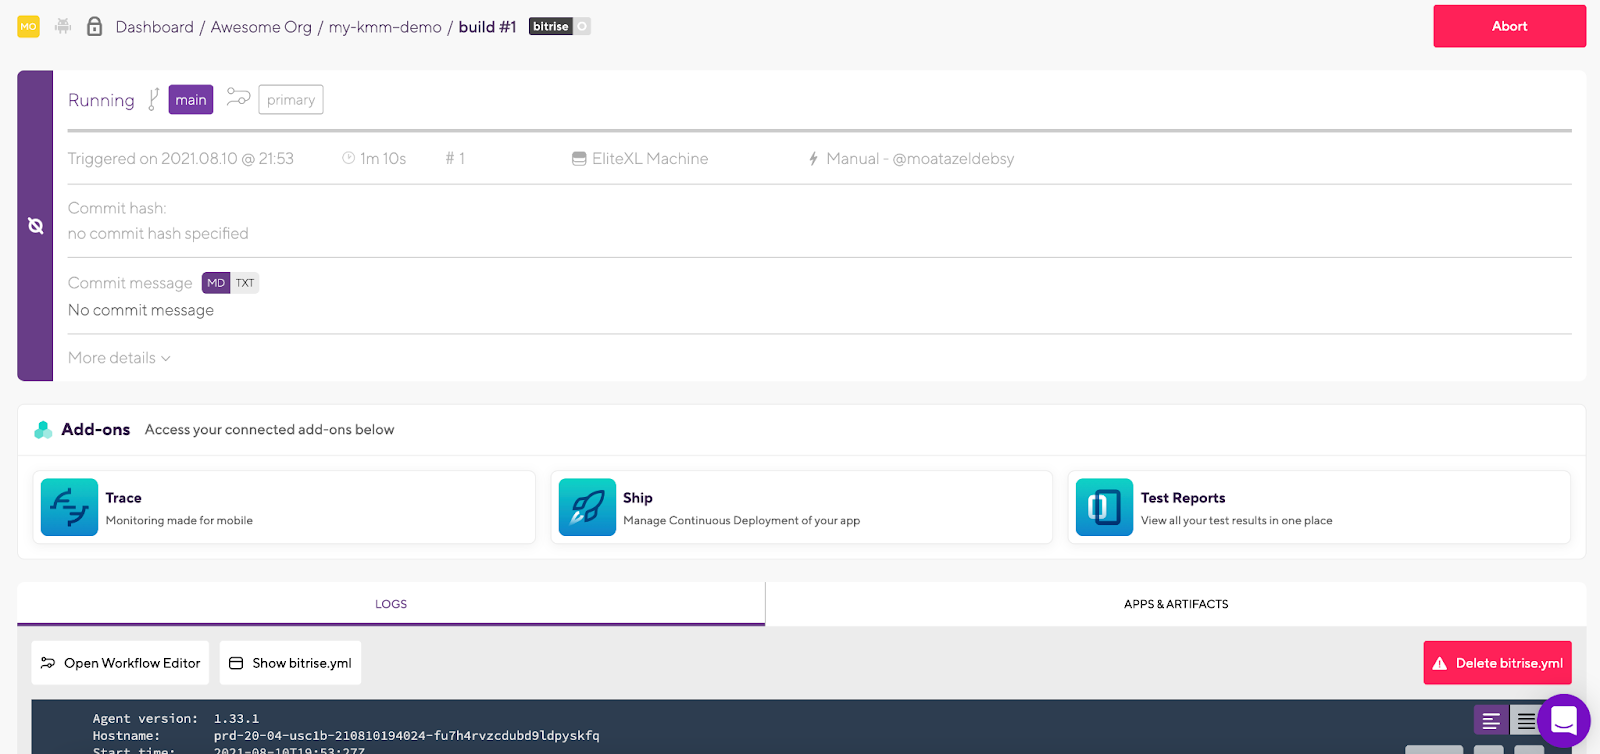
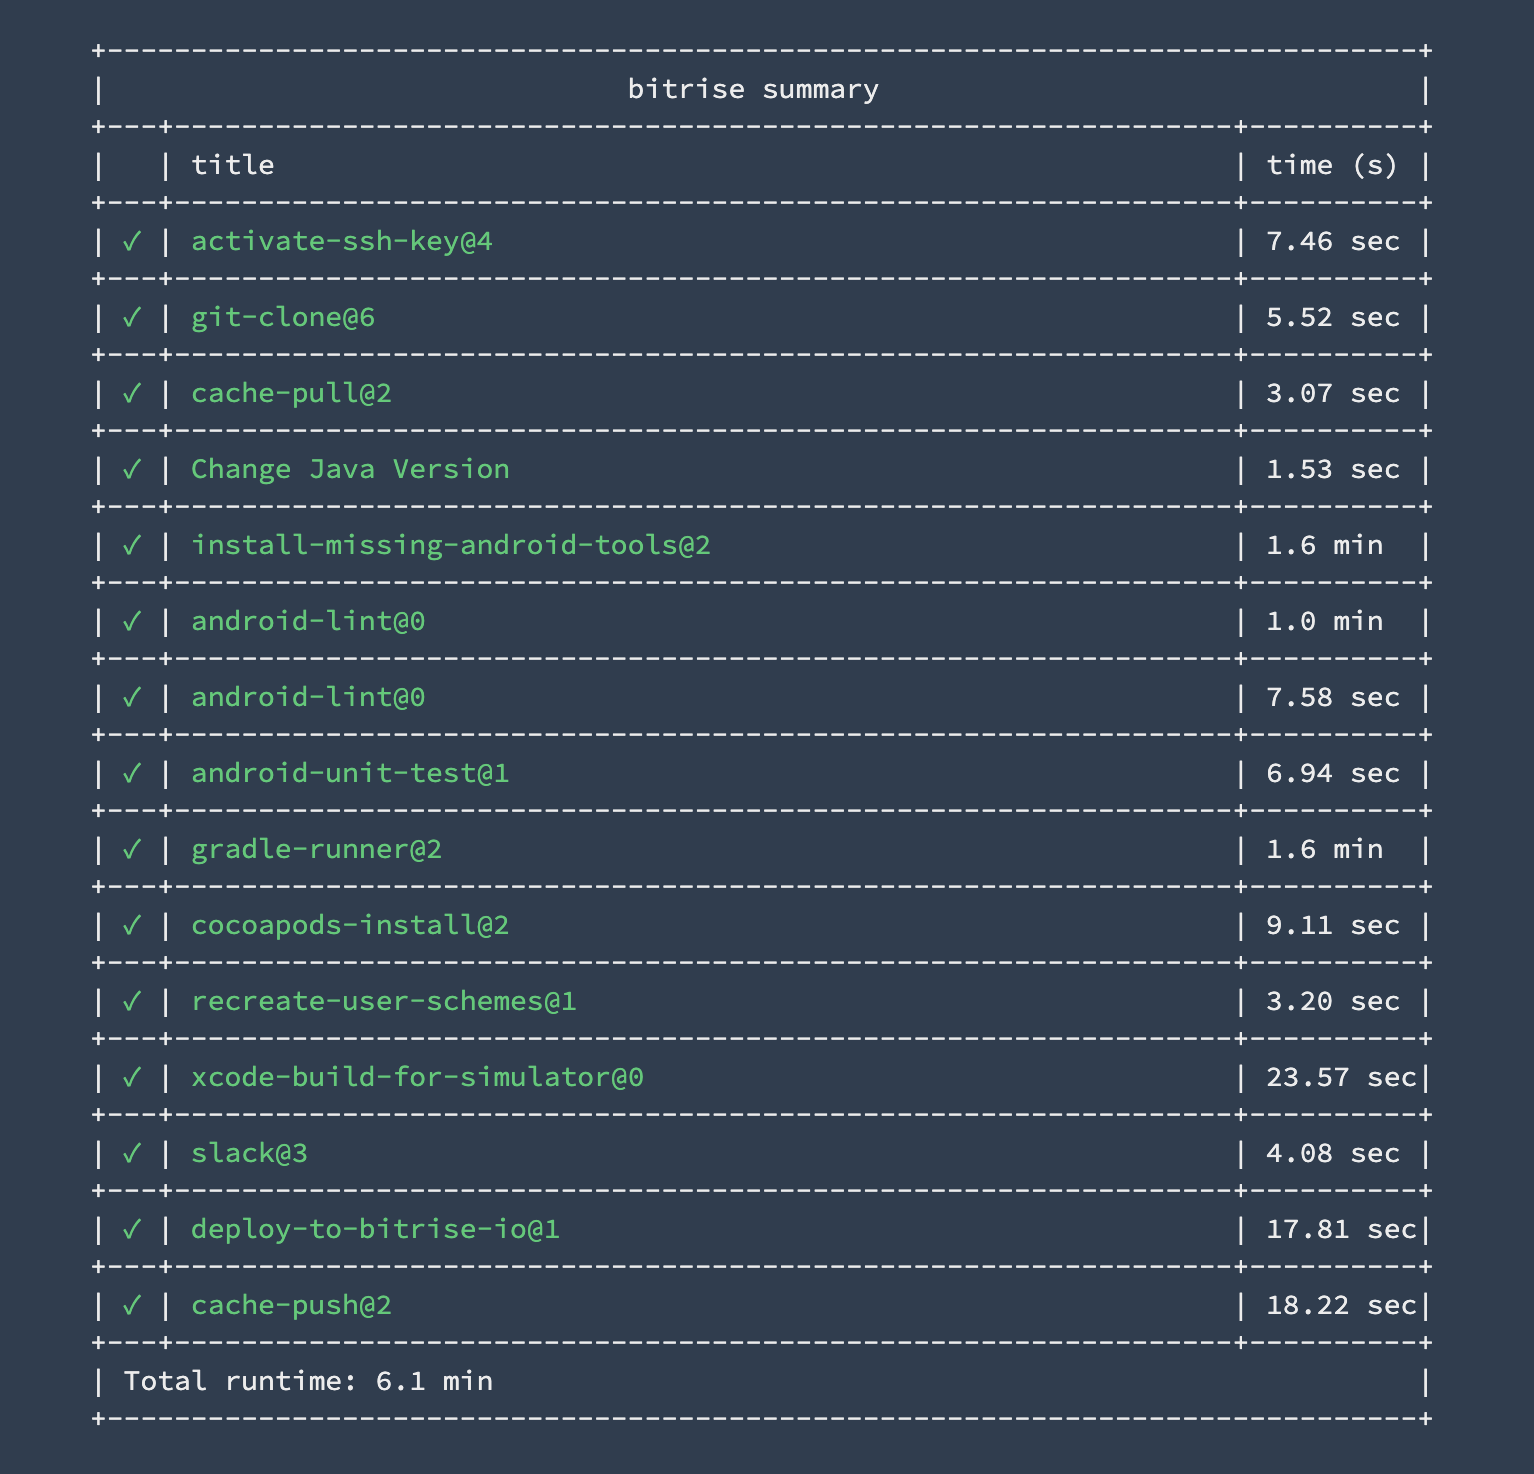
13. At the end, you will find a summary of all the tasks that you have run during the build with the time and Step names. You can also download logs or check the apps and artifacts.
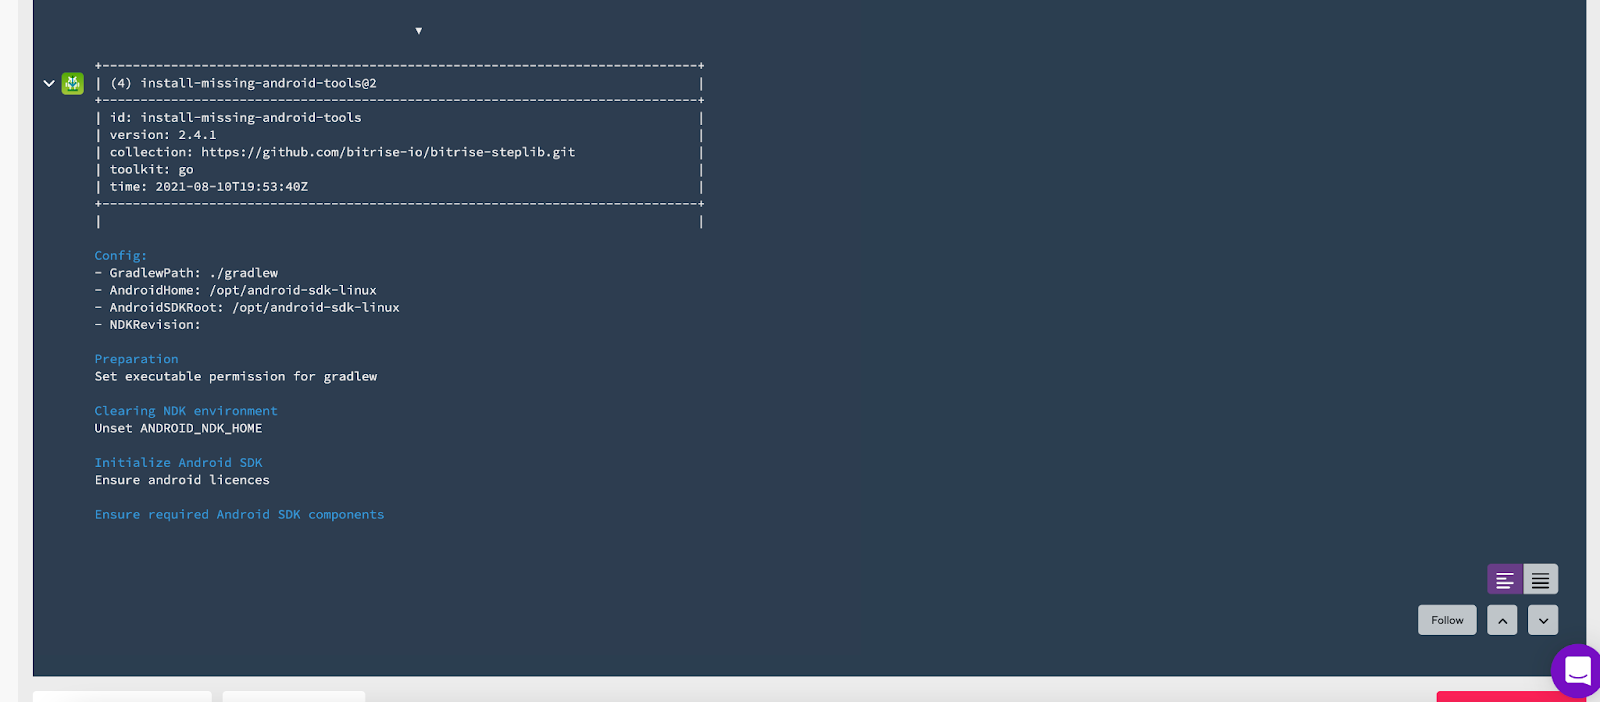
You will notice that the first build will fail because the Android Gradle plugin requires Java 11 to run. You are currently using Java 1.8:
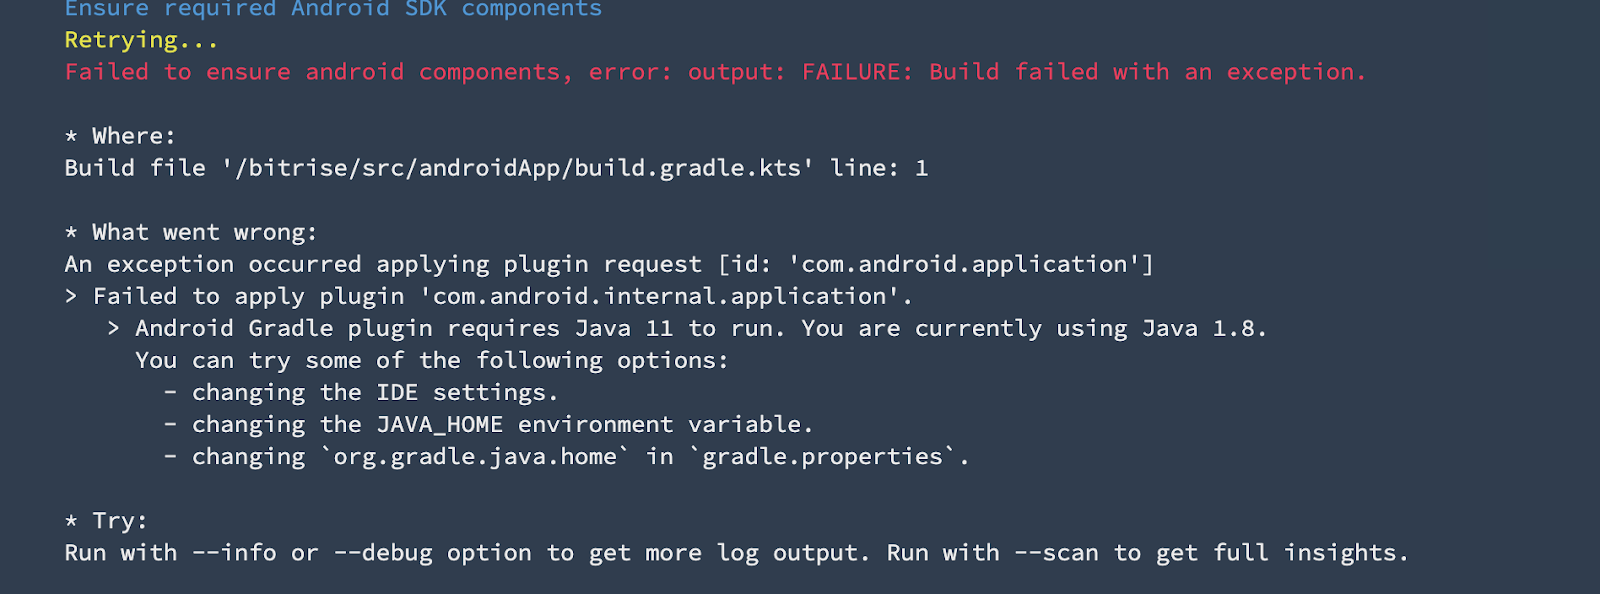
Don’t worry about that we will fix it in the Workflow Editor 😉
14. Now, let’s open the Workflow Editor to start adding the missing Steps:
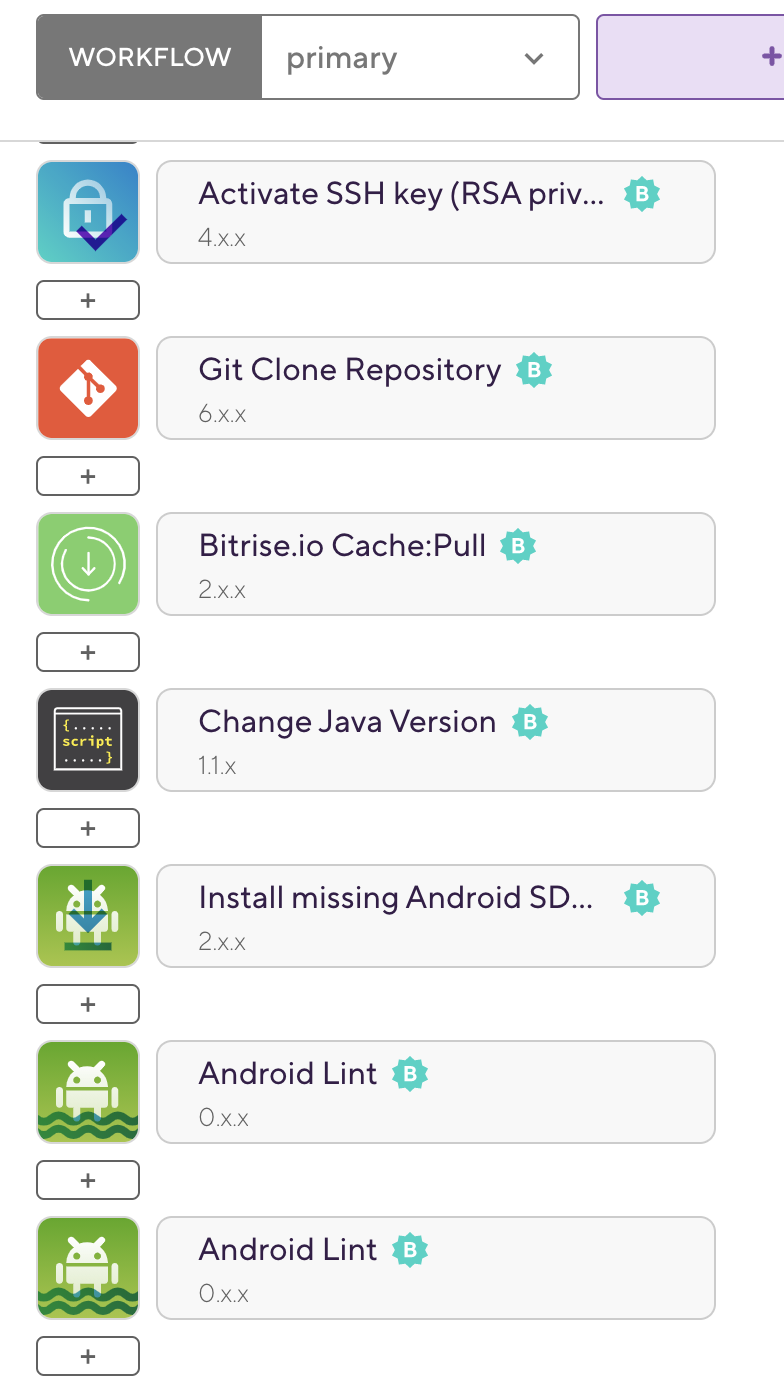
15. In the Workflow Editor, you will find that we already have the predefined Steps added:
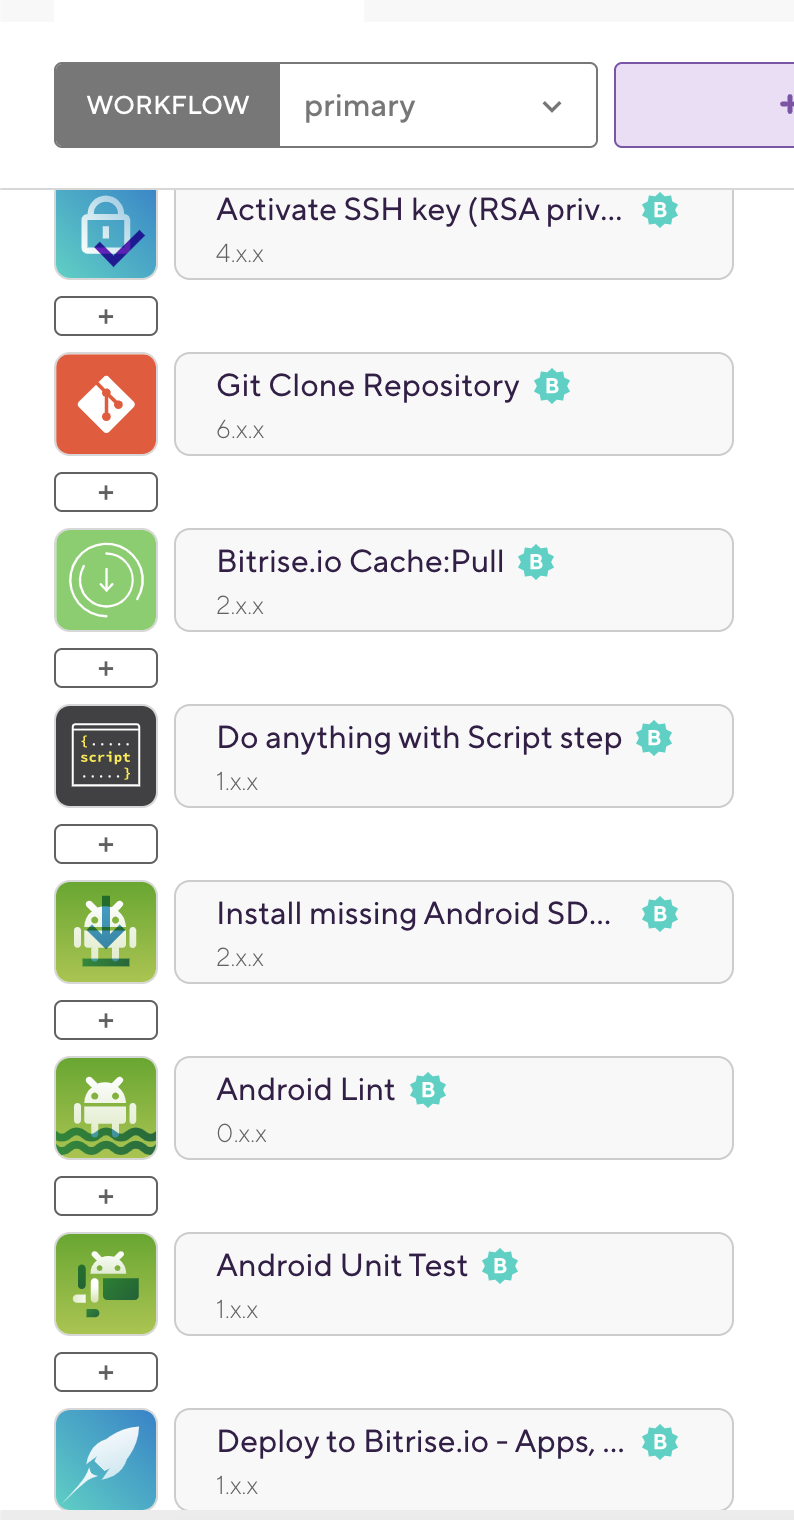
16. We already have a Step for the Active SSH Key, Git Clone Repository to be able to access and clone the source code from GitHub or any other source code management tool.
17. We will add new Steps to our Workflow to build, test, and deploy our Android and iOS apps by clicking the [+] button which will display all the integration Steps that we have for the KMM app in Bitrise:
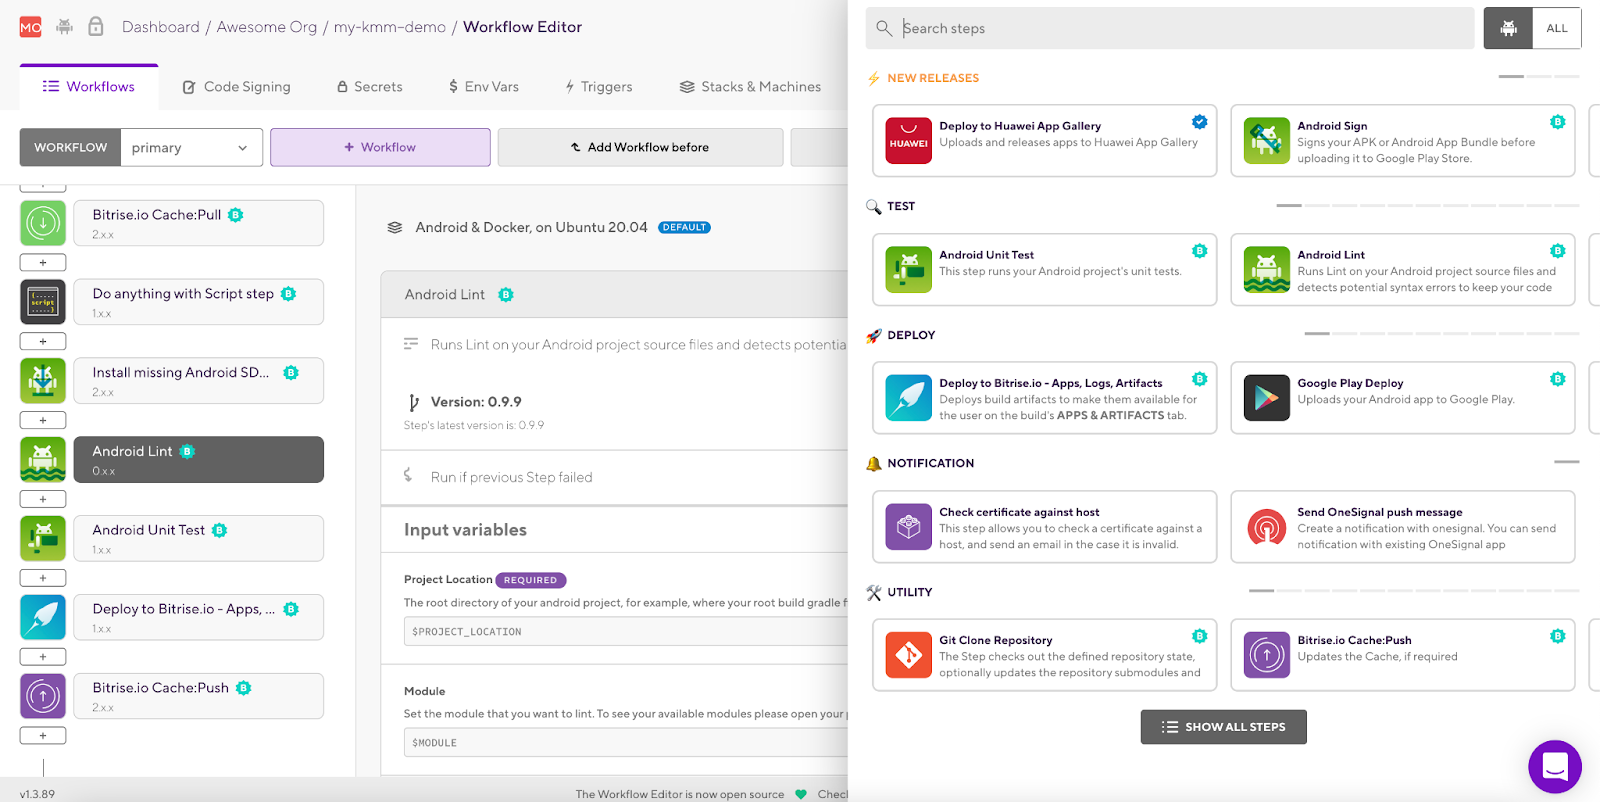
TIP: You can select All to display all the Steps for all platforms:
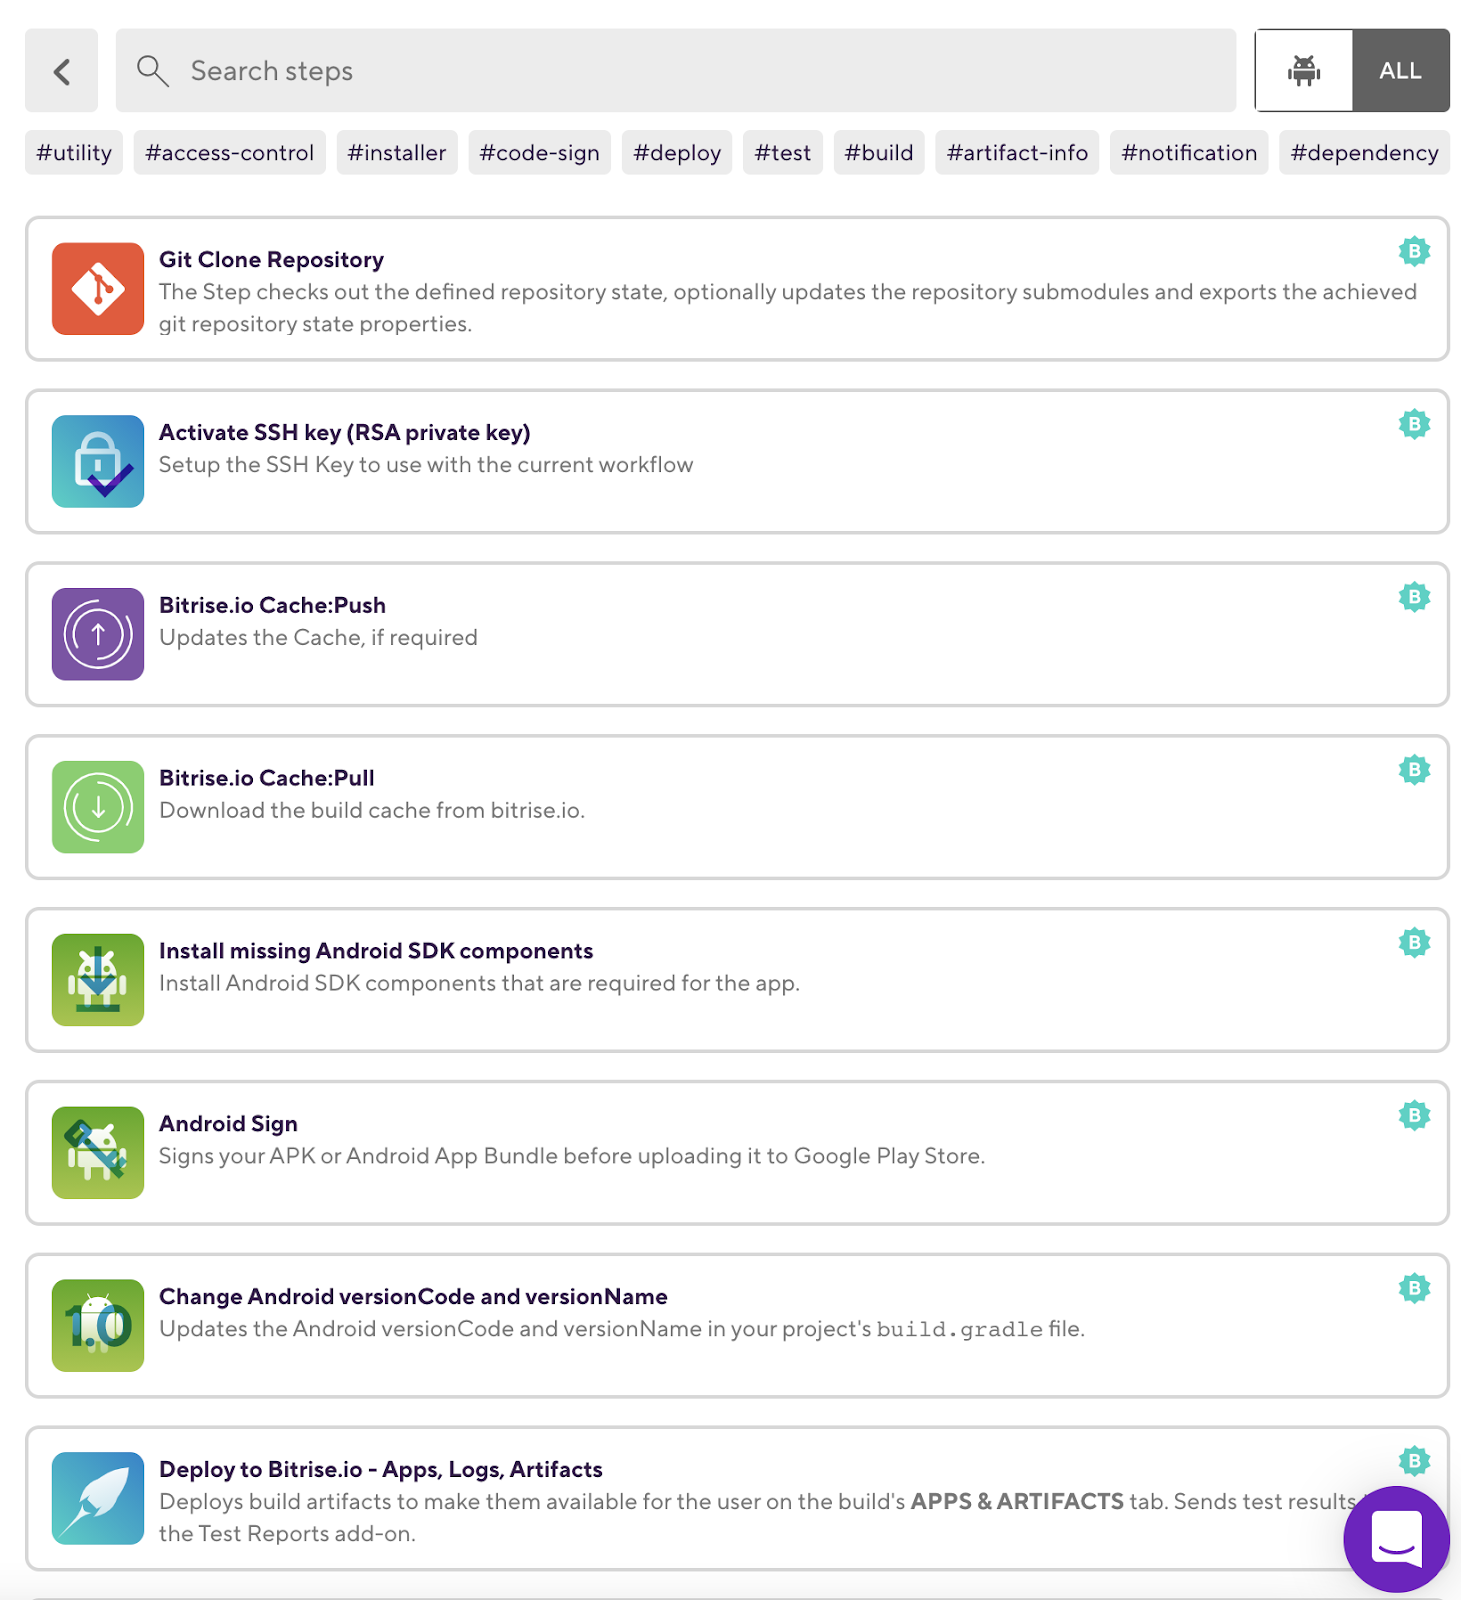
TIP: Bitrise has 320+ integration Steps for all the mobile platforms with different categories.
18. We have already a Script step in the workflow, we will use this Step to change the Java version to 11 instead of 1.8:
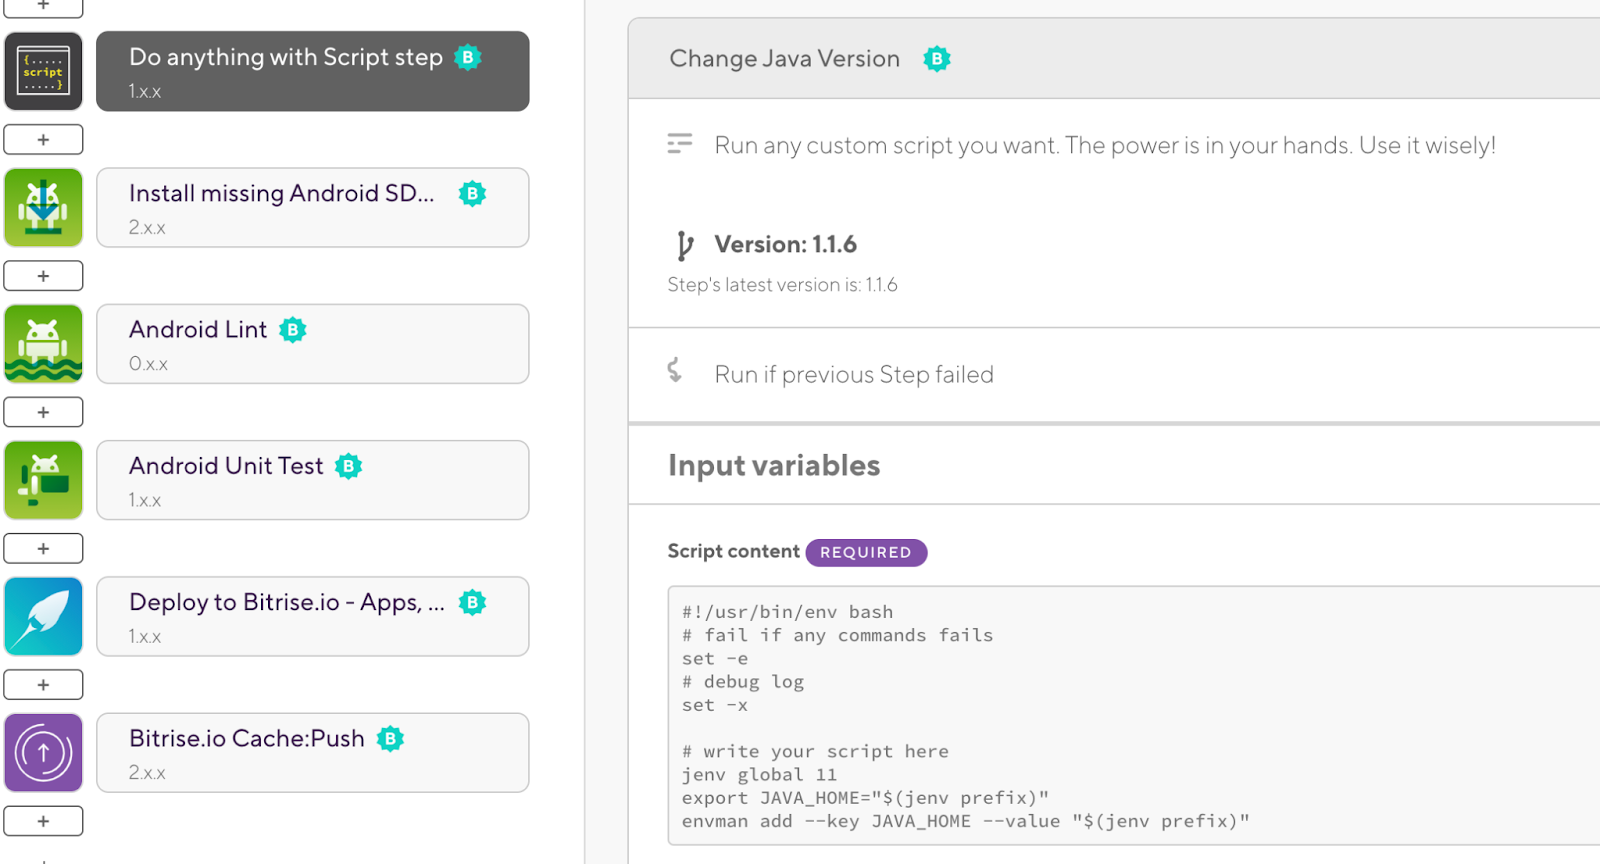
For more information, you can read our documentation on how to manage Java versions on Bitrise.
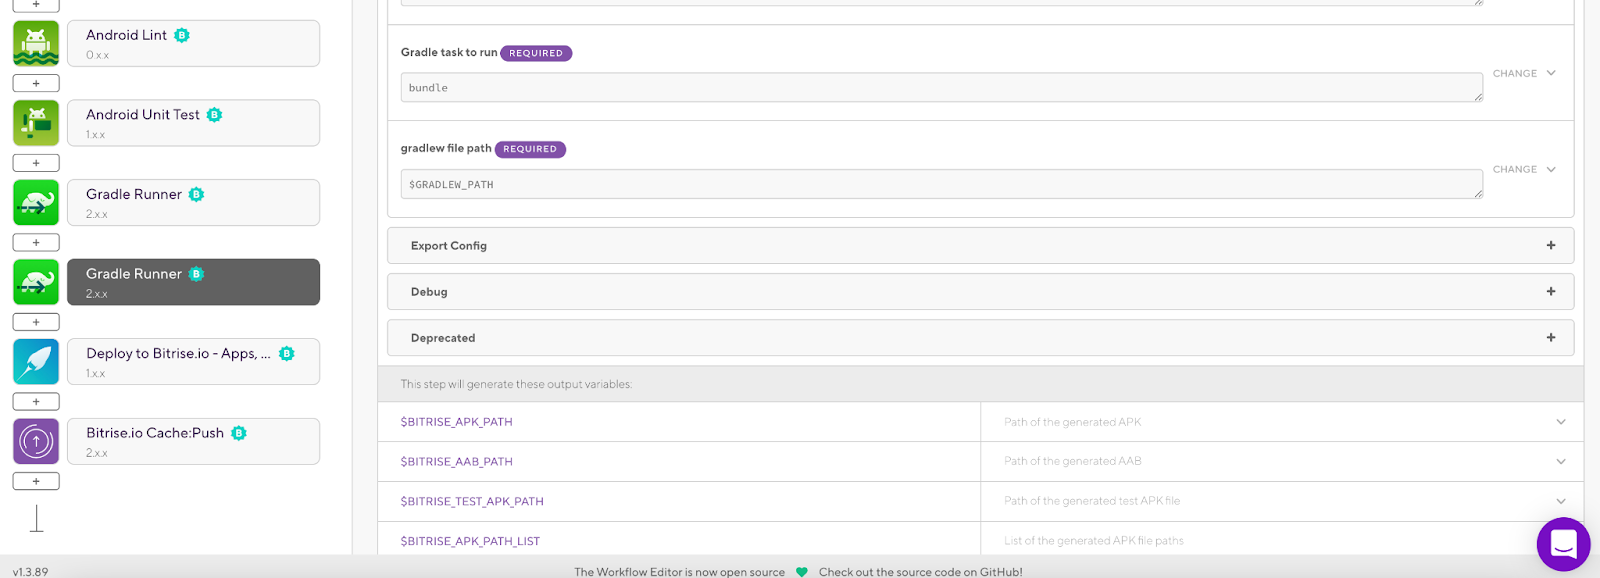
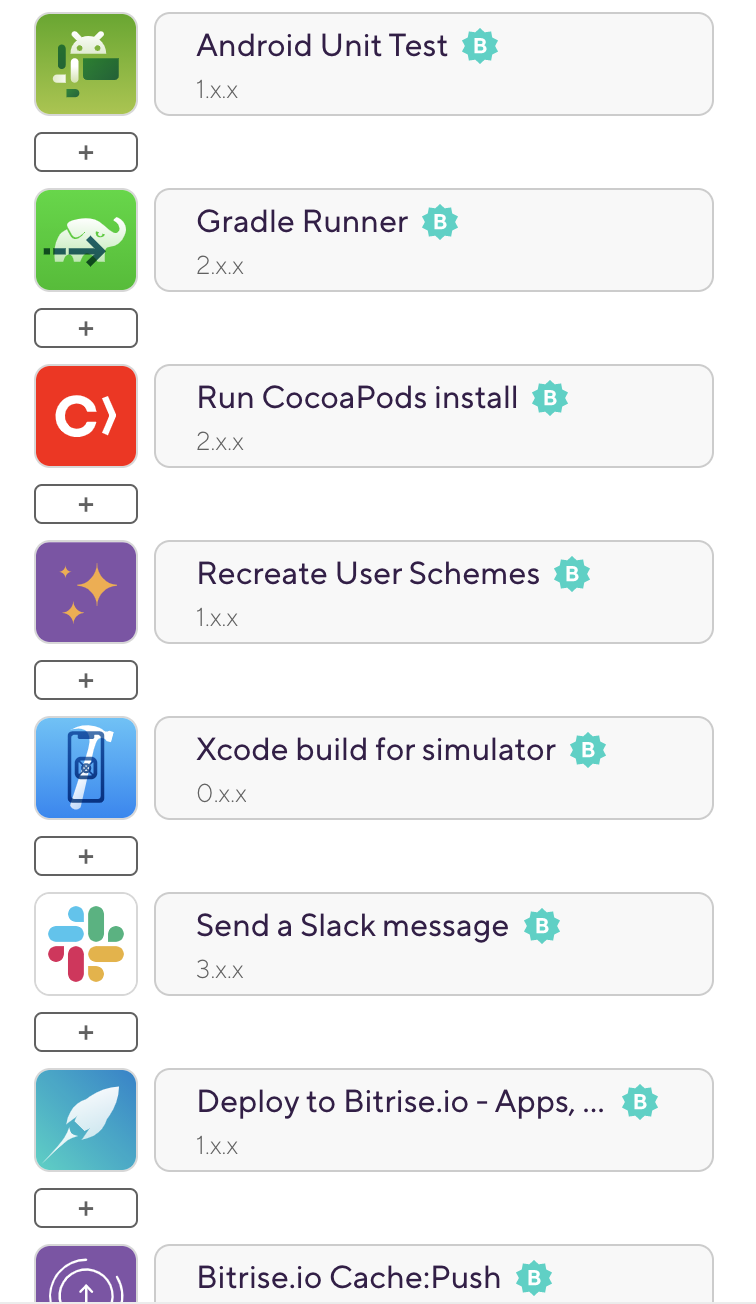
19. We can add different Steps to run different Gradle tasks for our KMM app:

20. Then we will add the Steps for the iOS app. Add the CocoPods install Step and specify the path of the Podfile inside the iosApp folder:

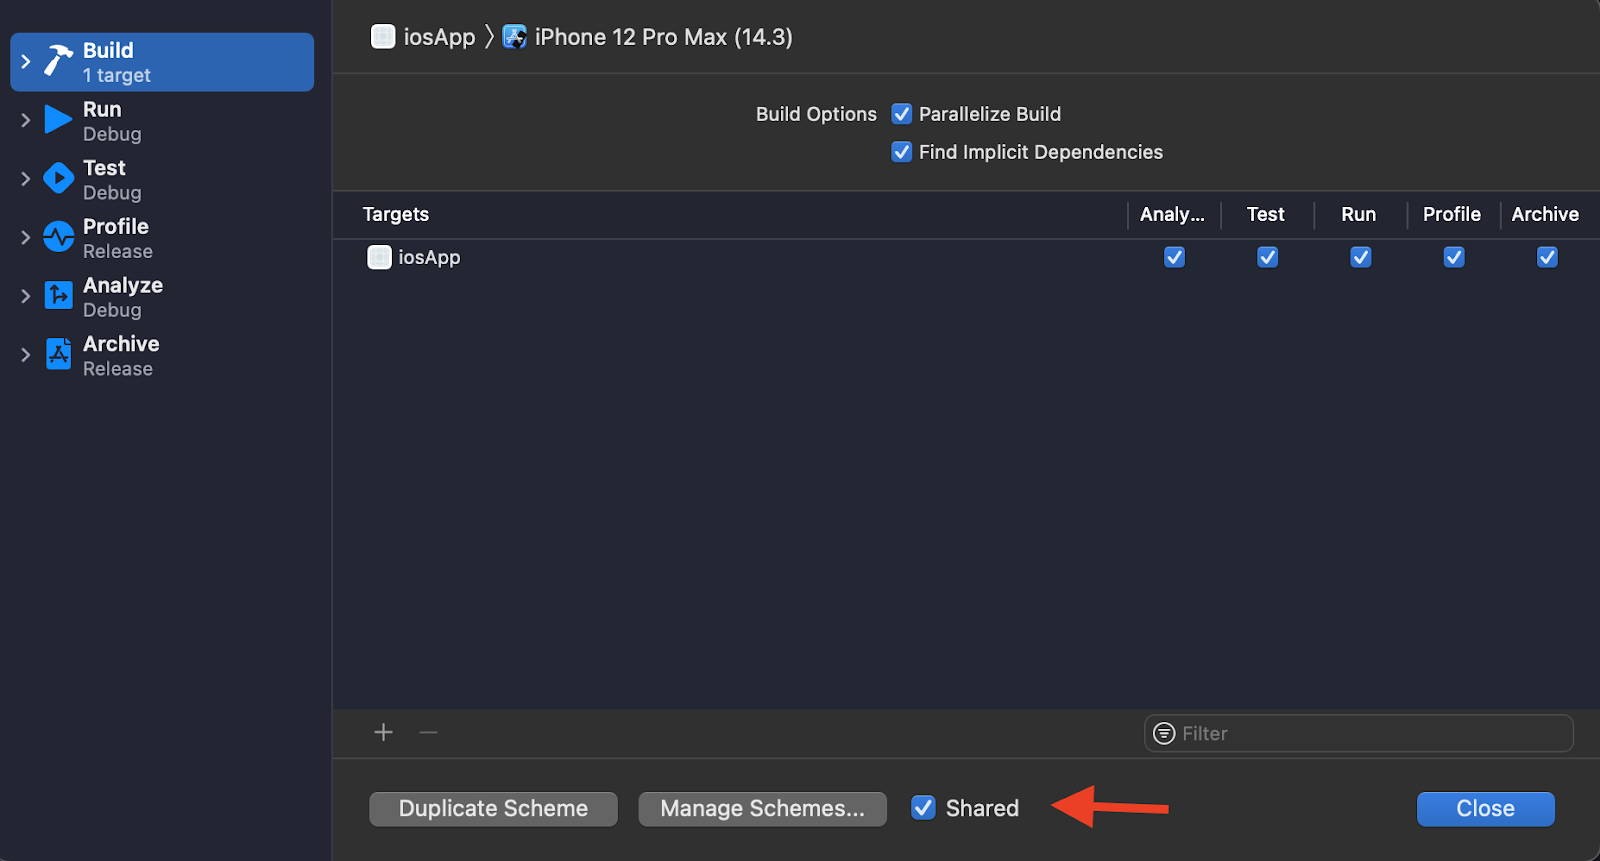
21. Add Recreate User Schemes Step to make sure that you are targeting the correct scheme from the iOS app:

Tip: To make sure that the scheme is shared in the iOS app, you can open Xcode, edit the scheme, and uncheck/check the Shared checkbox:
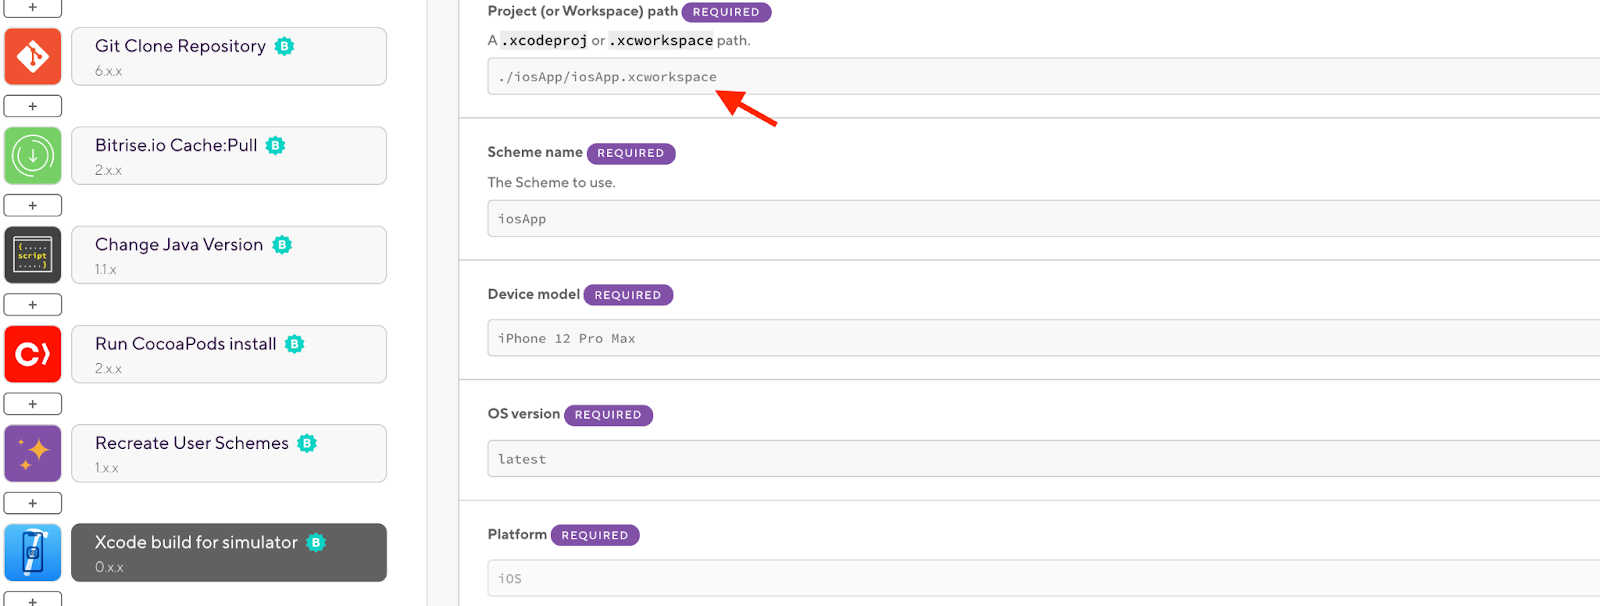
22. Add the Xcode build for simulator Step to build the iOS and change the xcworkspace path, Scheme name, Device model, and OS version:
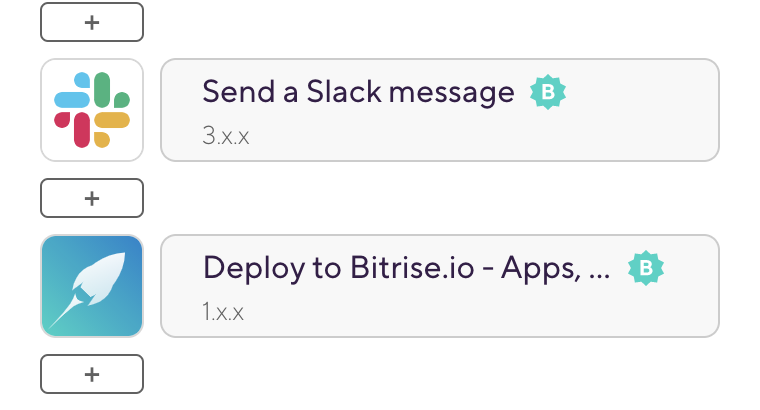
23. Add the Send a Slack message Step at the end of the Workflow to send the final status of the build:
TIP: For each step in the Bitrise Workflow we have the option to run the current Step, whether the previous Step failed or not. This will help us to abort the build if any previous Steps failed and avoid wasting any time: (It’s set to off by default)

And the final Workflow will be like the following:
24. You can now run your KMM CI/CD workflow manually by clicking Start/Schedule a Build or using the trigger map with Bitrise. For example, you can specify a GitHub Tag or branch with a specific Workflow:
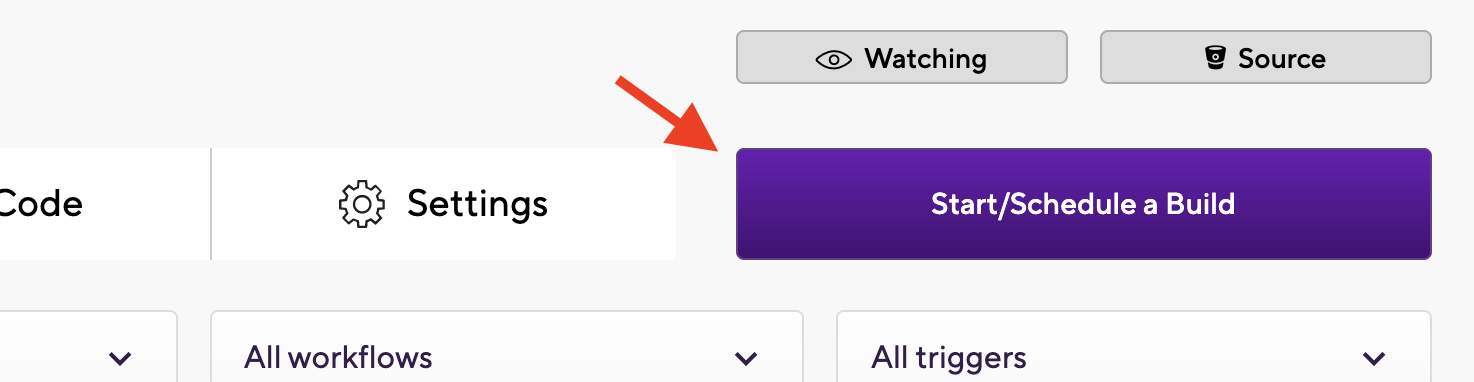

TIP: If you want to schedule the build to run nightly you can also configure it easily by selecting the date/time, branch name, and Workflow name:


And the build results will be like the following:

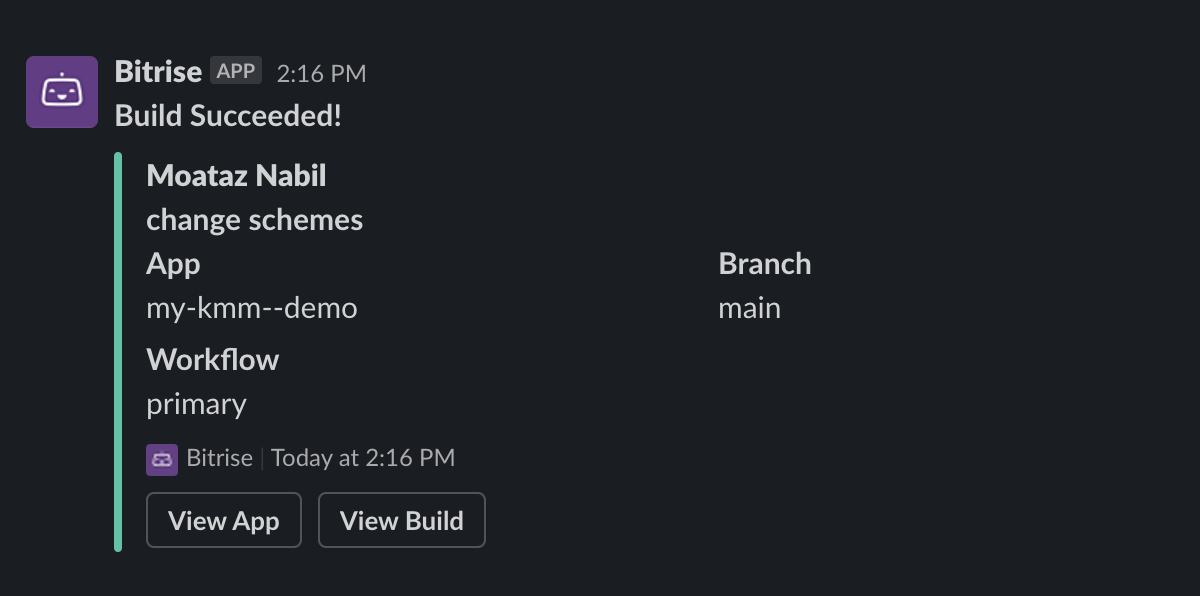
And we will receive a Slack notification with the build status:
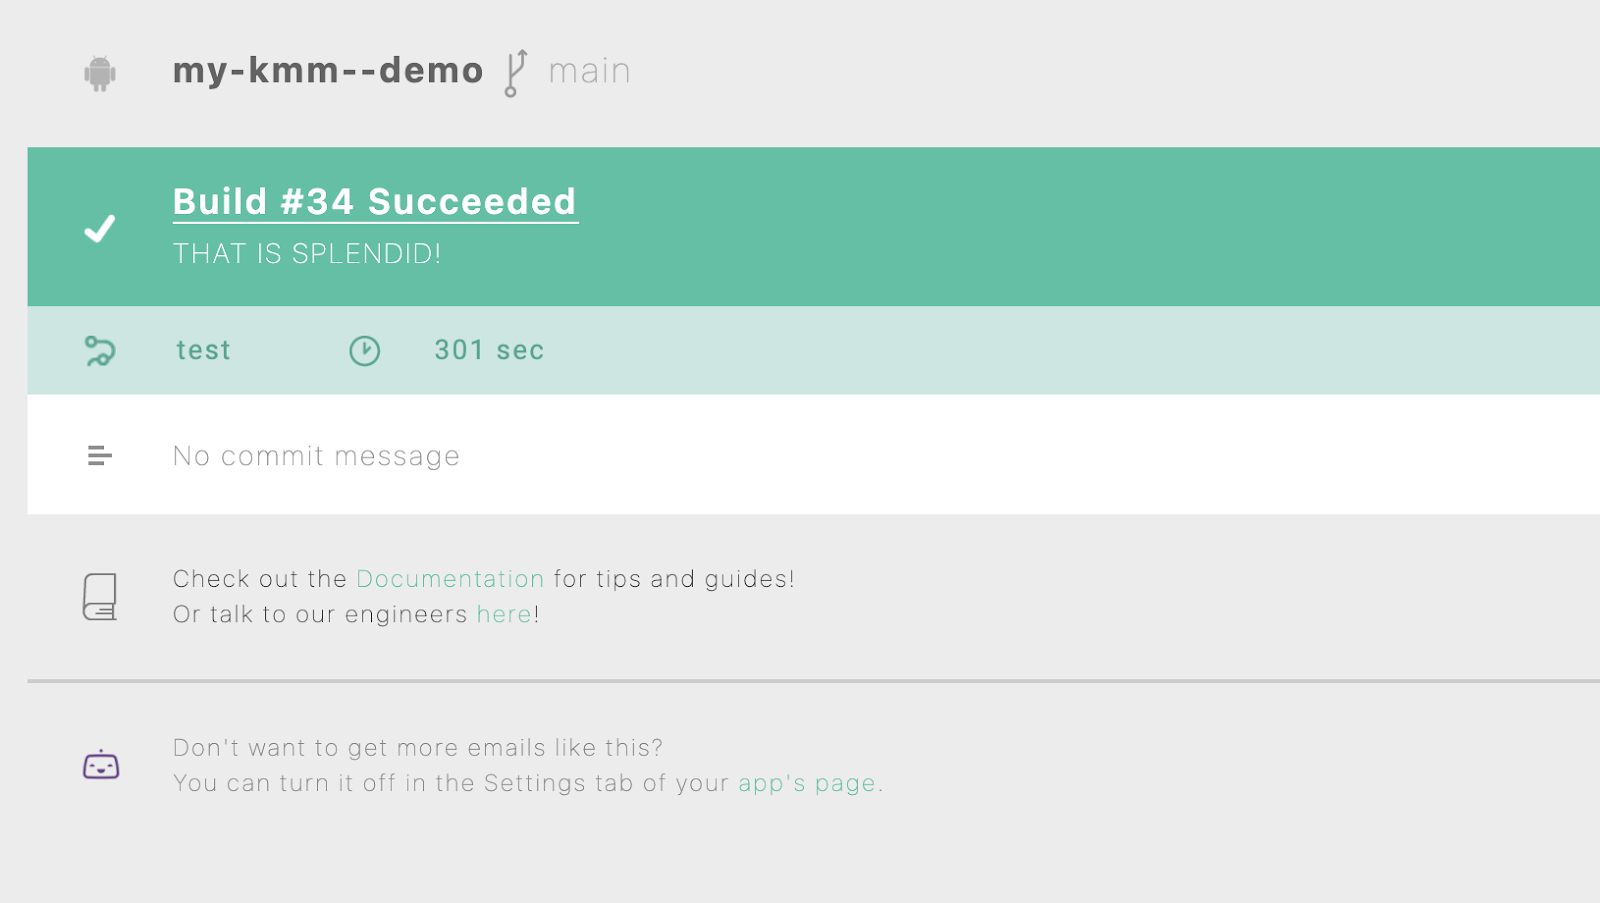
And also an email notification:
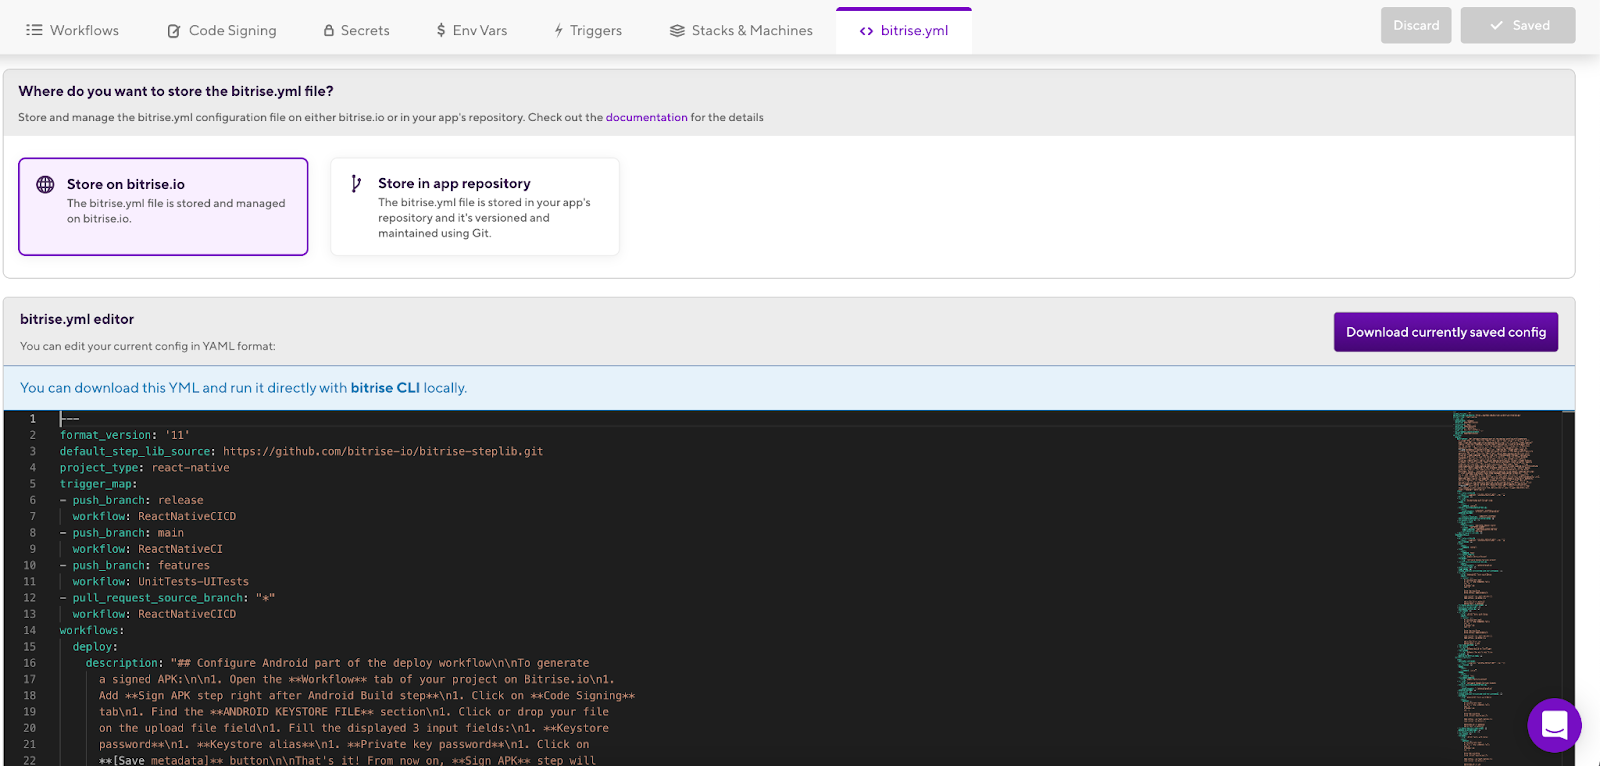
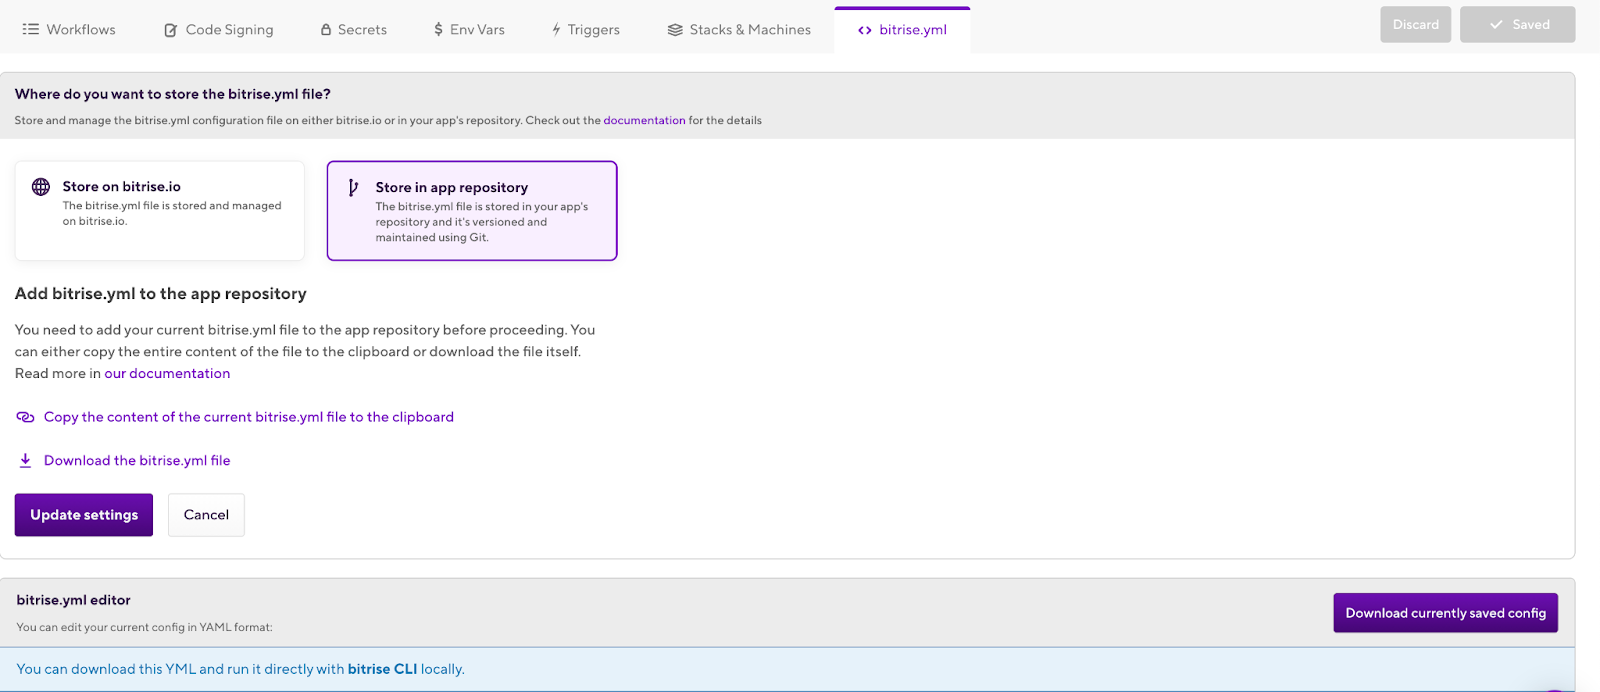
TIP: You can find the bitrise.yml file including all the Steps that we added in the Workflow editor and you can save it in your repository or store it on Bitrise.io:
Need to reduce the build time?
If your team is scaling and you need to reduce the build times even more, you can use an additional feature from Bitrise to run parallel builds. You can run different sub or small Workflows at the same time to reduce the main Workflow time. Check the Bitrise Start Build or our articles on fanning out tests on Bitrise for iOS and Android apps.
And one more thing that will speed up your builds — recently we introduced Gen2, the next generation of Bitrise Build Infrastructure with improved performance, stability, and security. Find out how Gen2 drastically reduced build times for six apps in our Gen2 Benchmark report.
Congratulations! 🎉 You have successfully created your KMM CI/CD pipeline app on Bitrise.
You can now start building and releasing your applications seamlessly, with no extra effort.
Future Reading
- Building Mobile Apps at Scale: 39 Engineering Challenges (Chapters 25-29: Languages and Cross-Platform Approaches)
- KMM documentation
- Architect your KMM application
- Set up an environment for KMM development
- Create your first multiplatform application
- Stability of Kotlin components
- Organize a process around KMM
I hope you found this article useful and if you have any questions, feel free to contact us on our Twitter or via email. If you’d like to find out more about how Bitrise can help you release better apps, faster, you can also request a demo here.


.jpg)
