
When building mobile apps, we usually need backend services to manage all the operations that users do from the UI screens like registration, login, search, or getting notifications.
AWS Amplify helps us to build mobile and web apps that scale.
What’s AWS Amplify?
AWS Amplify is a set of tools and services that can be used to help front-end web and mobile developers build scalable full-stack applications, powered by AWS.
With Amplify, you can configure app backends and connect your app in minutes, and easily manage app content outside the AWS console.
Amplify supports popular mobile platforms including Android, iOS, React Native, Ionic, and Flutter.
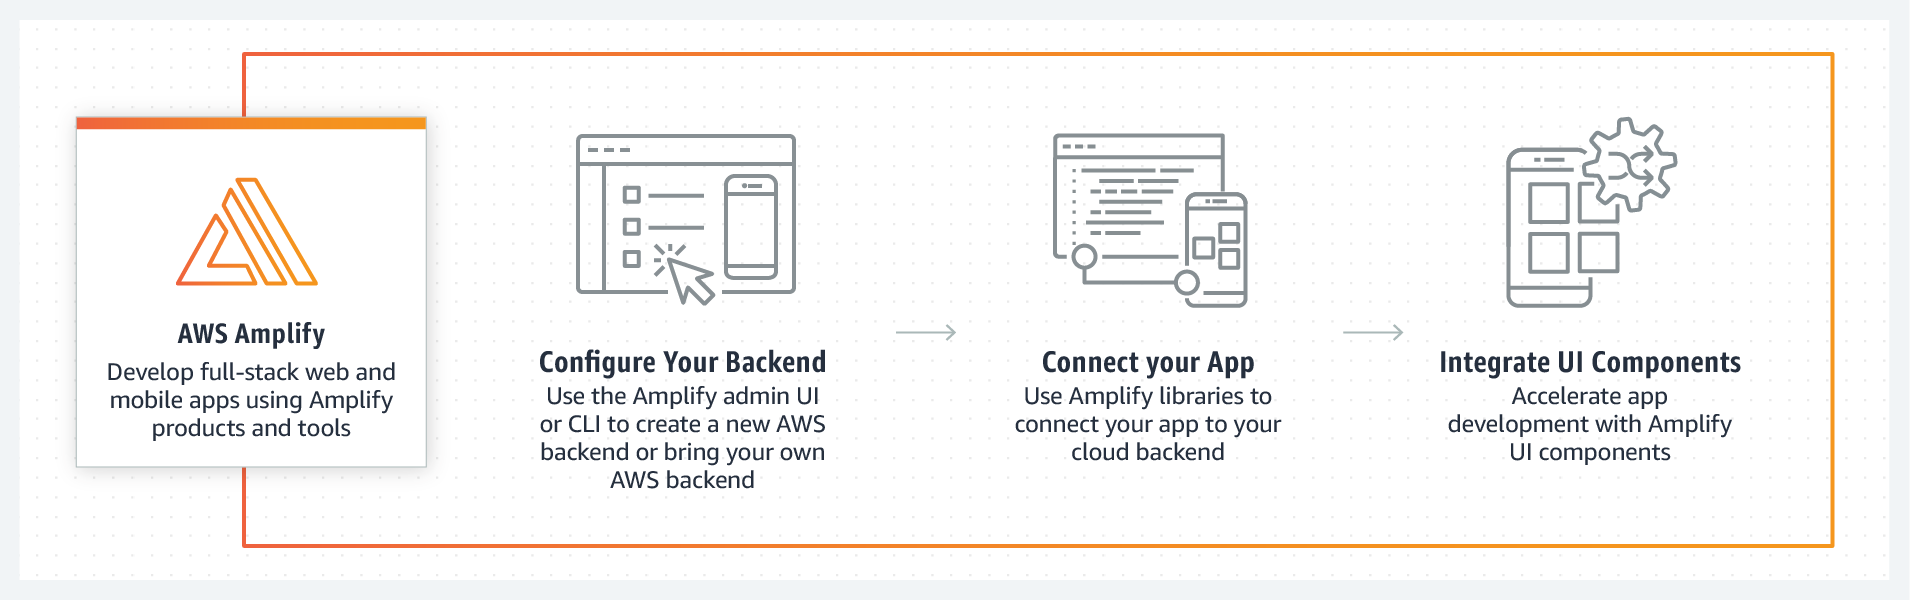
Image source: AWS
AWS Amplify Features
With AWS Amplify you use different modules we can use such as:
- Amazon Cognito: For the app authentication and authorization, the faster way to secure your mobile app
- API (GraphQL and REST): Make secure HTTP endpoints to access, manipulate, and combine data from one or more data sources such as Amazon DynamoDB and Amazon and AWS Lambda
- Storage: Store images, videos, or files with Amazon S3, and the data can be public, protected, private
- AI/ML Predictions: To add new functionalities to your app by adding AI/ML capabilities powered by Sagemaker
- Push Notifications: To increase your customer engagement by using marketing and analytics capabilities powered by AWS pinpoint.
And more features and services you can find on the AWS Amplify official page.
Prerequisites
- An AWS account (if you don’t have an account you can create a free-tier account to start using the AWS services). This should be created with AdministratorAccess to your account to provision AWS resources for you like AppSync, Cognito, etc. because Amplify CLI will ask you to provide the accessKeyId and the secretAccessKey to connect Amplify CLI with your IAM user.
And to be able to use AWS Amplify CLI you should install the following:
And for the Android project you should have:
- Android Studio version 4.0 or higher (I’m using the Android Studio Arctic Fox)
- Android SDK API level 16 or higher
Getting Started with AWS Amplify
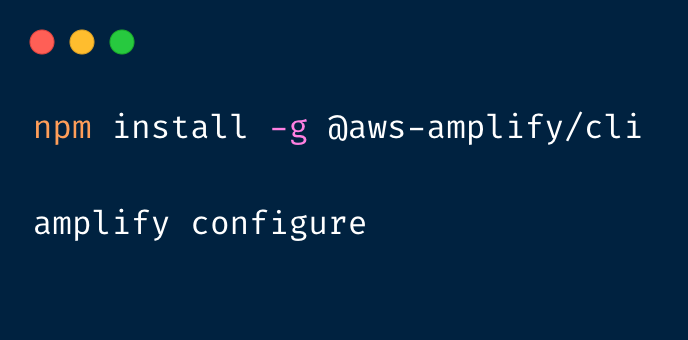
To get started with AWS Amplify, you should install and configure the AWS Amplify CLI on your machine with your AWS account to configure all the services needed through a simple command-line interface.
Install and configure the Amplify CLI as follows:
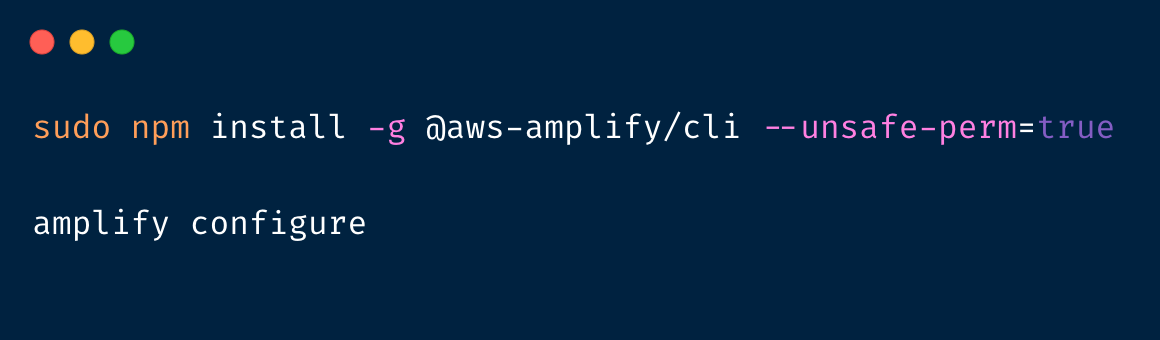
Note: If you're having permission issues on your system installing the CLI, please try the following command:
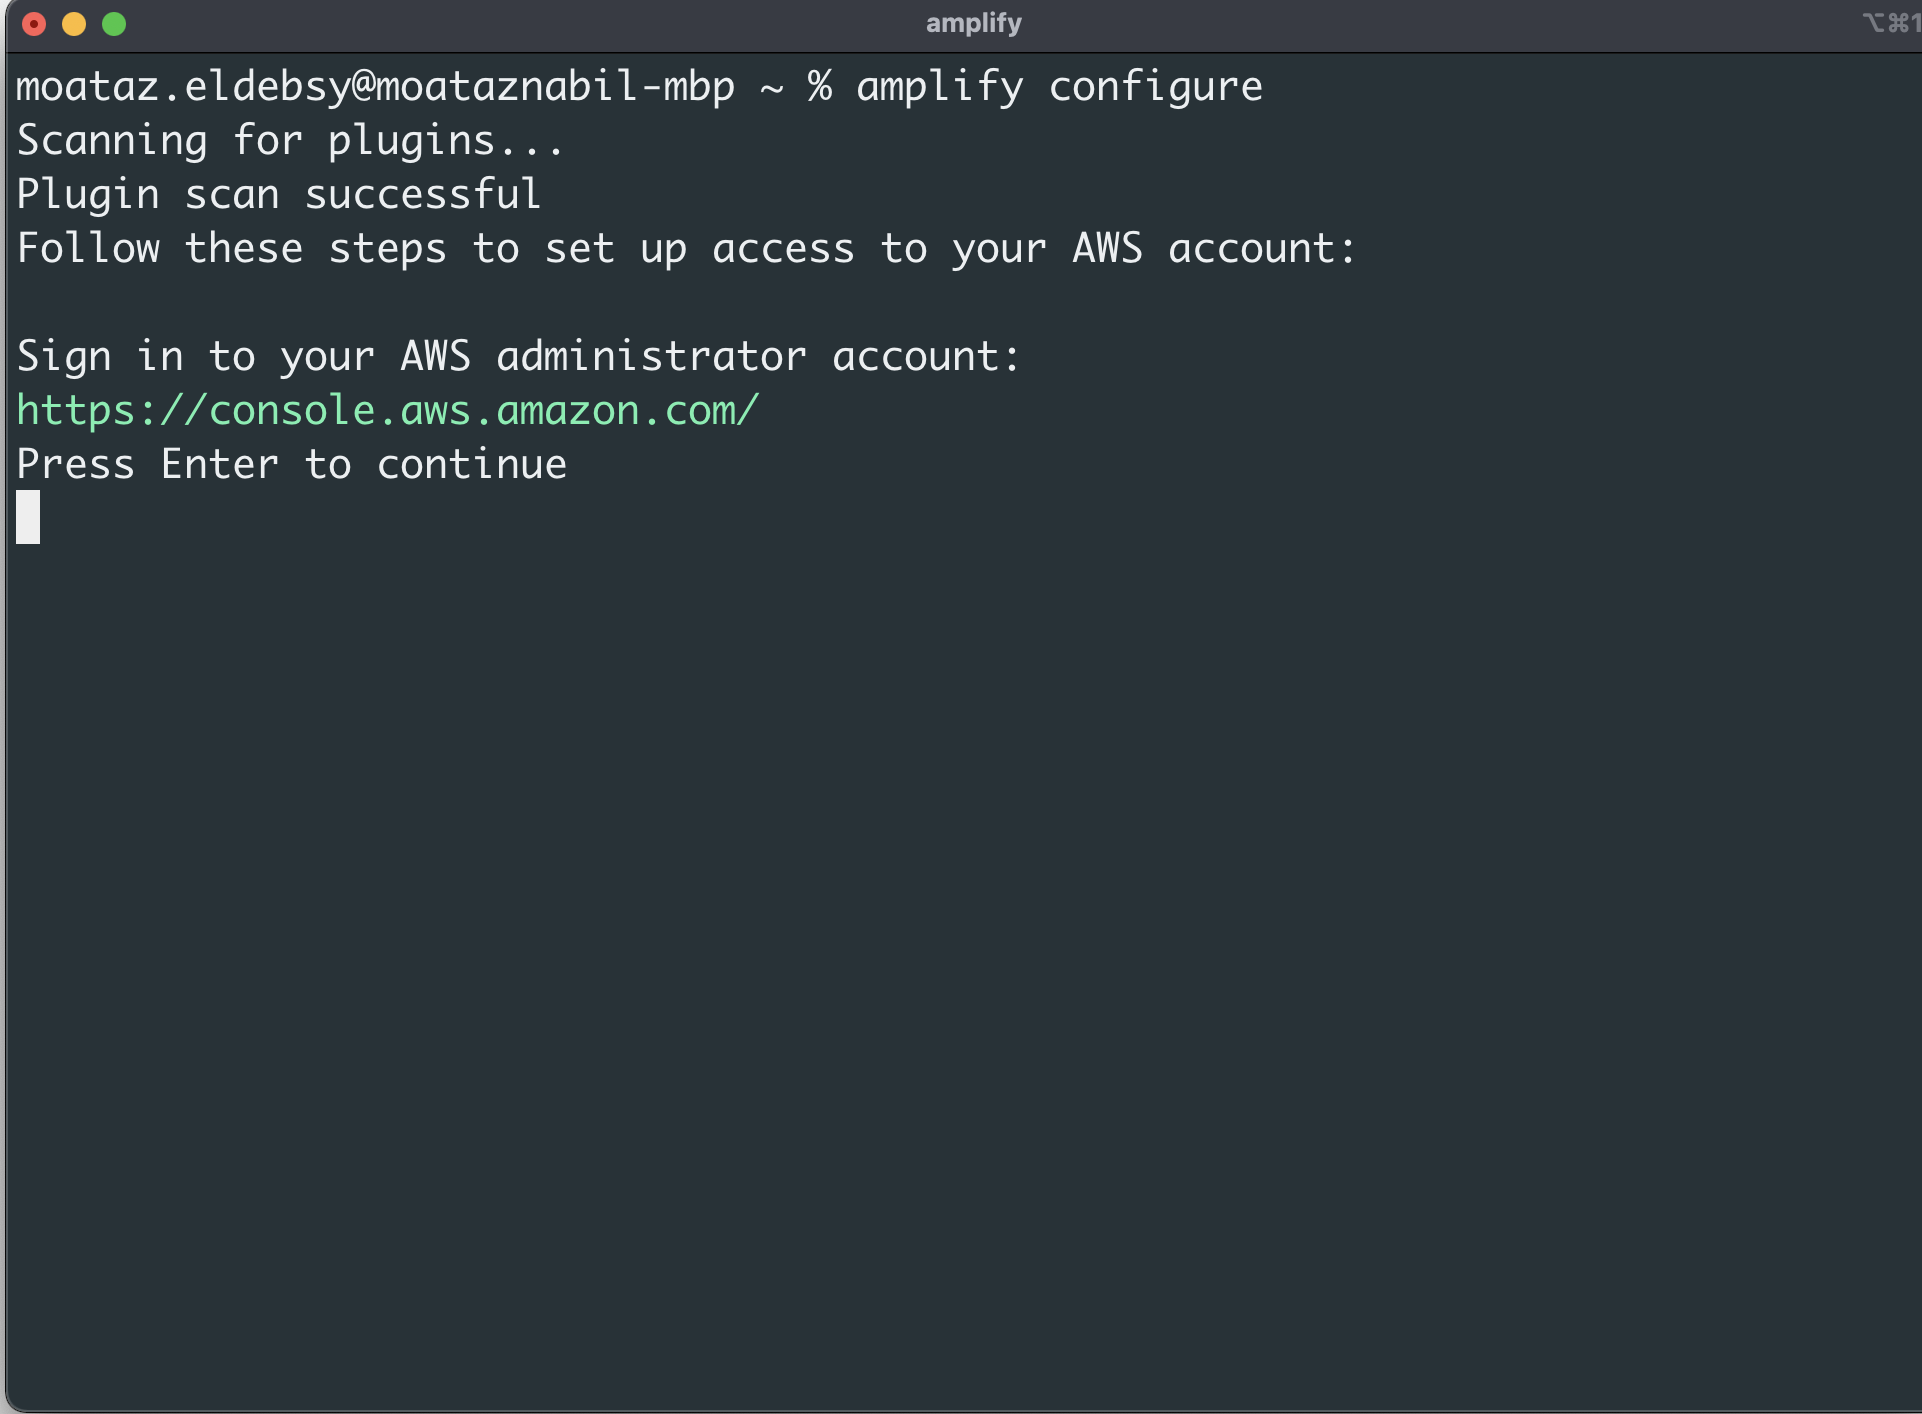
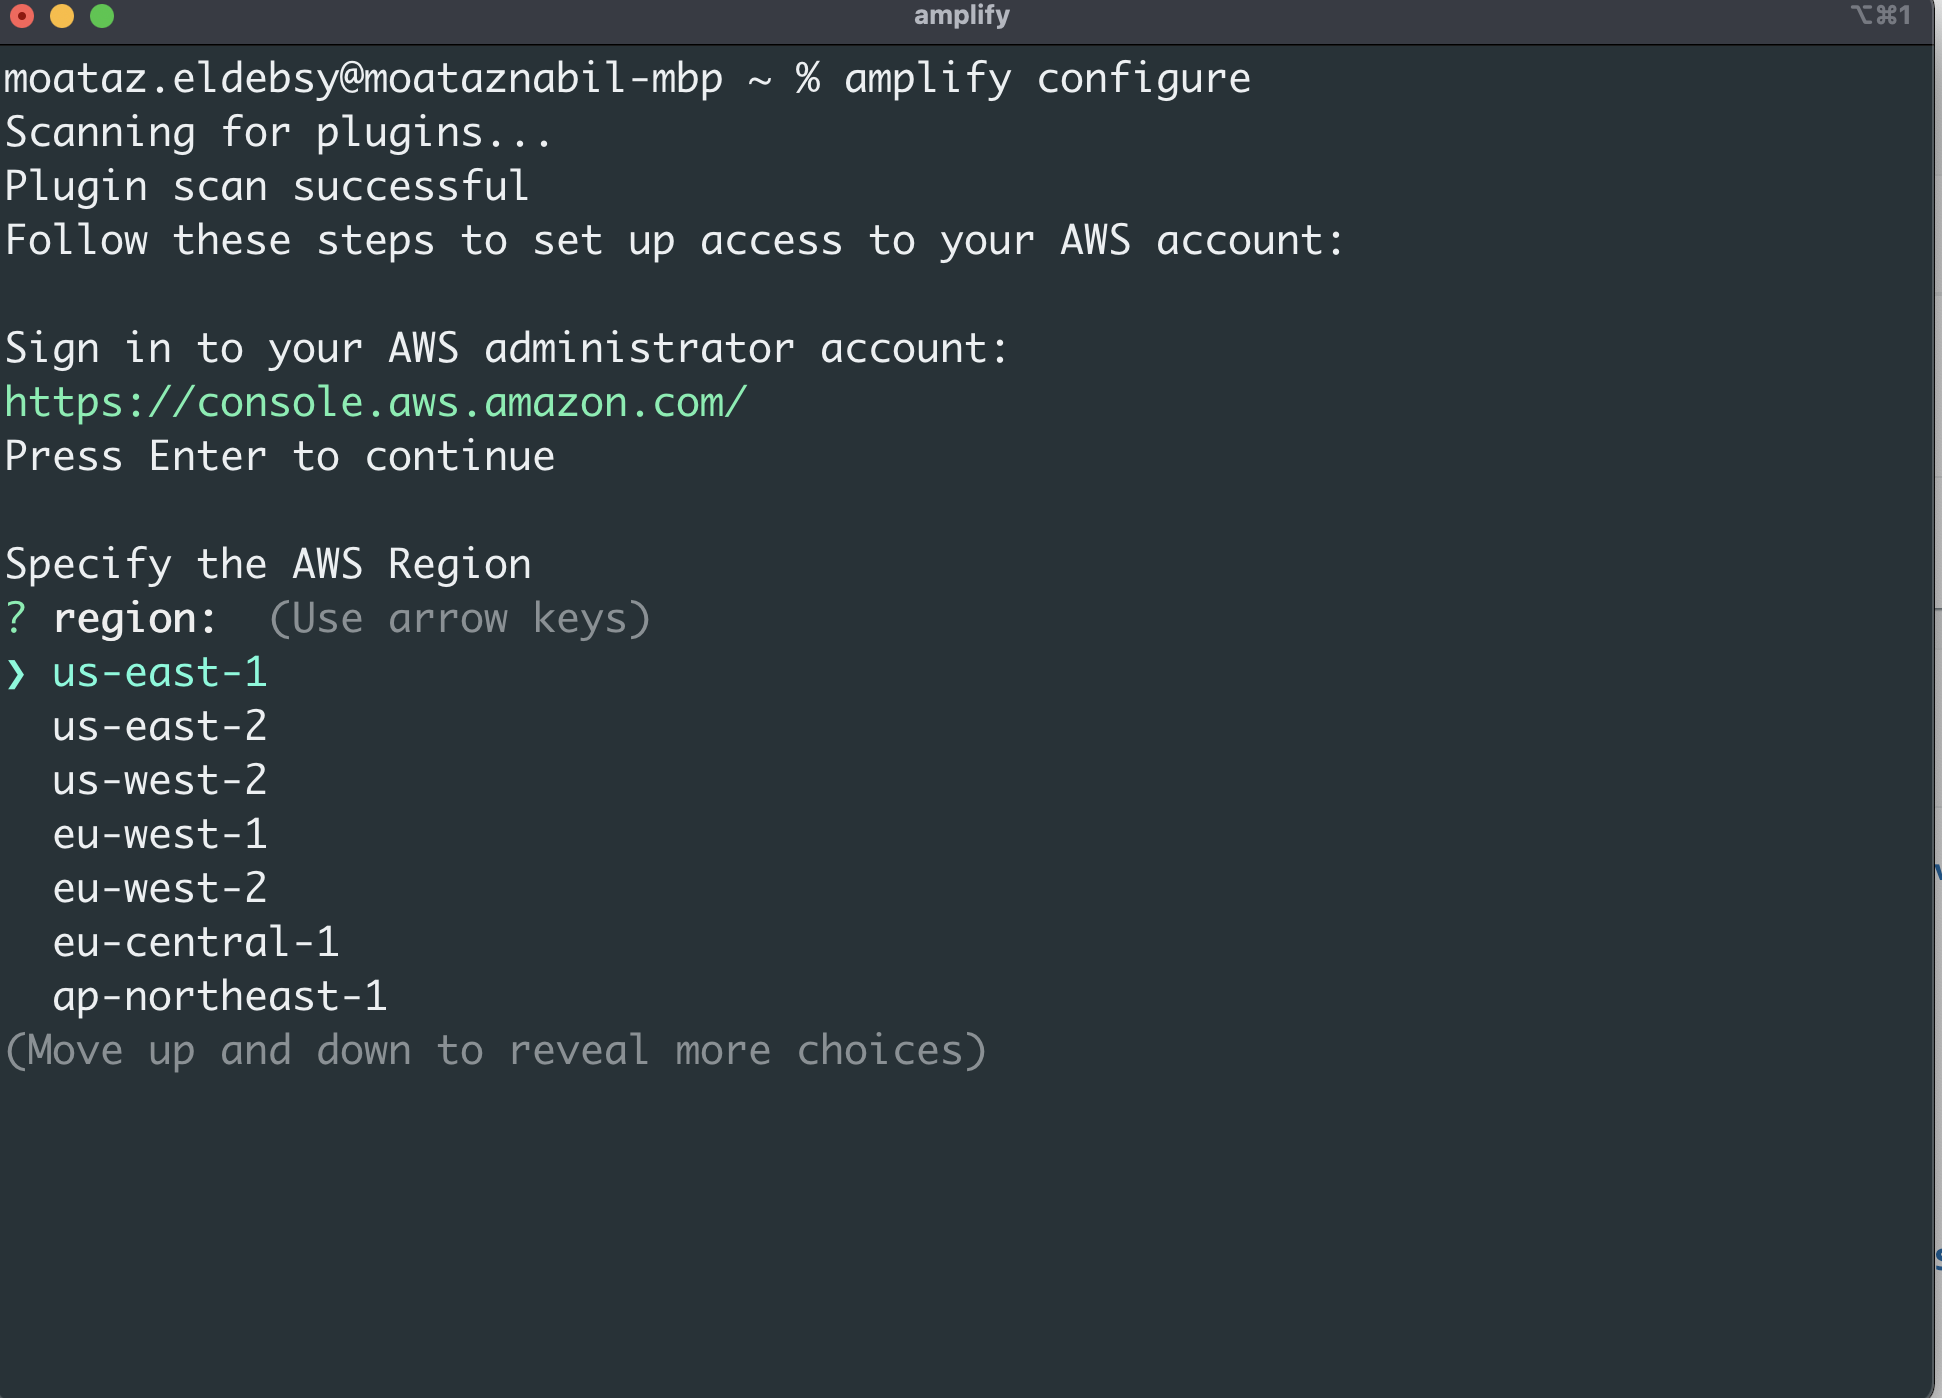
Then you need to login to the AWS Console to create the user account like the following images:
Sign in to AWS Console with the Administrator account.
Specify the AWS Region
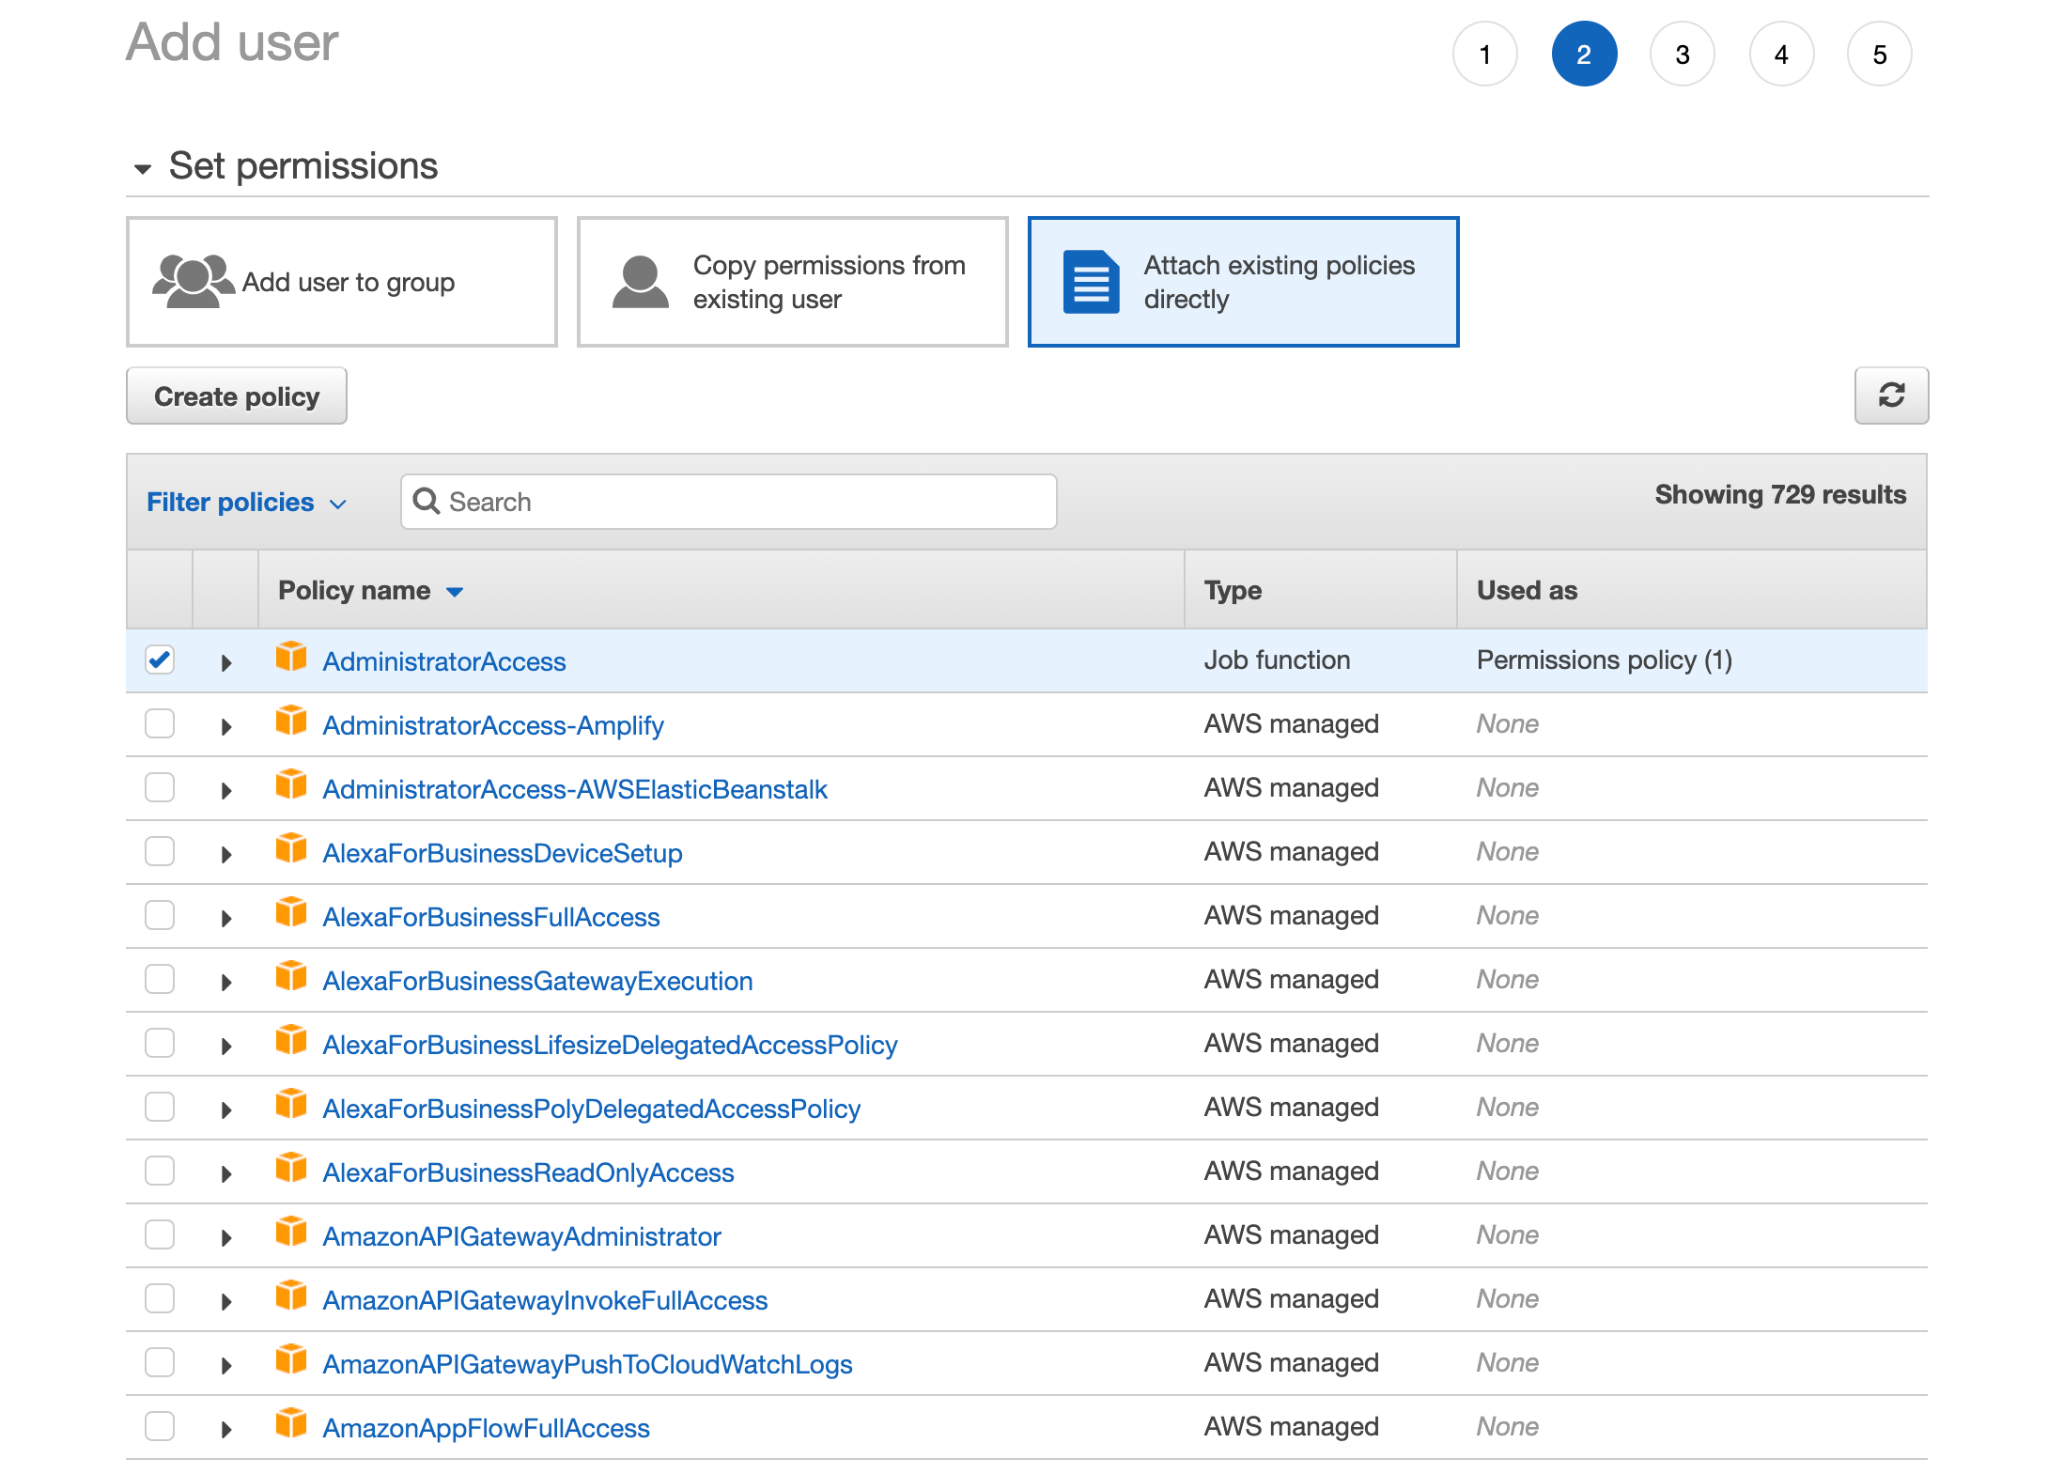
Add the username and the leave the options with the default values and click the permissions button

The AdministratorAccess will be selected by default. Leave it as default and click the Next:Tags button
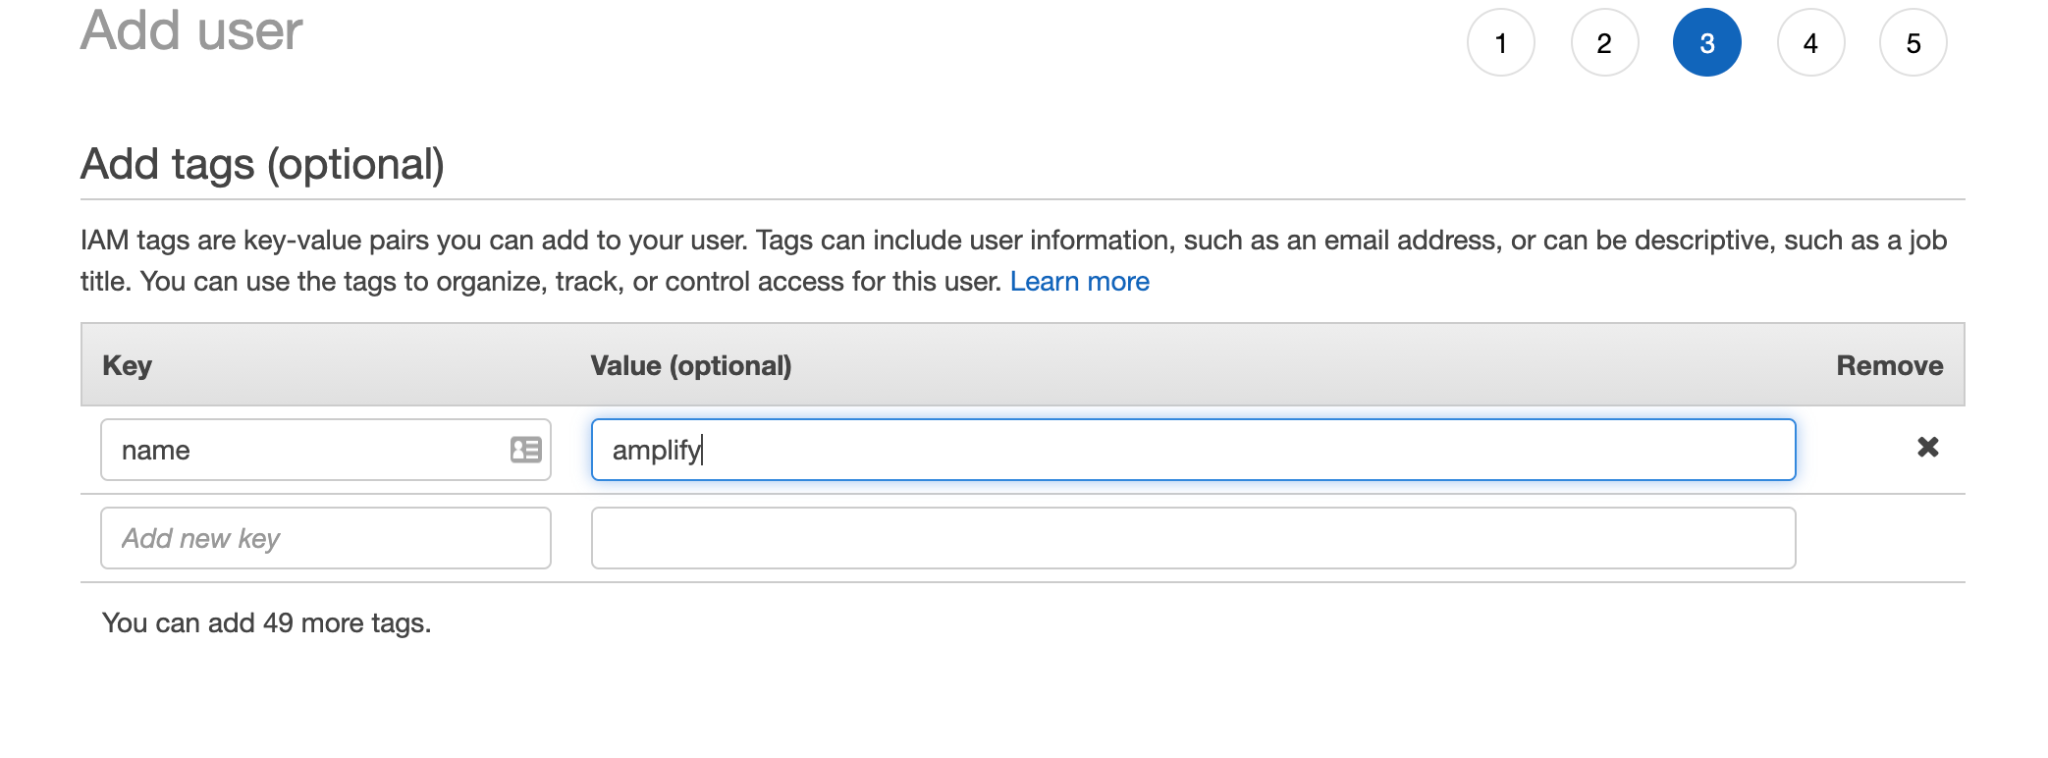

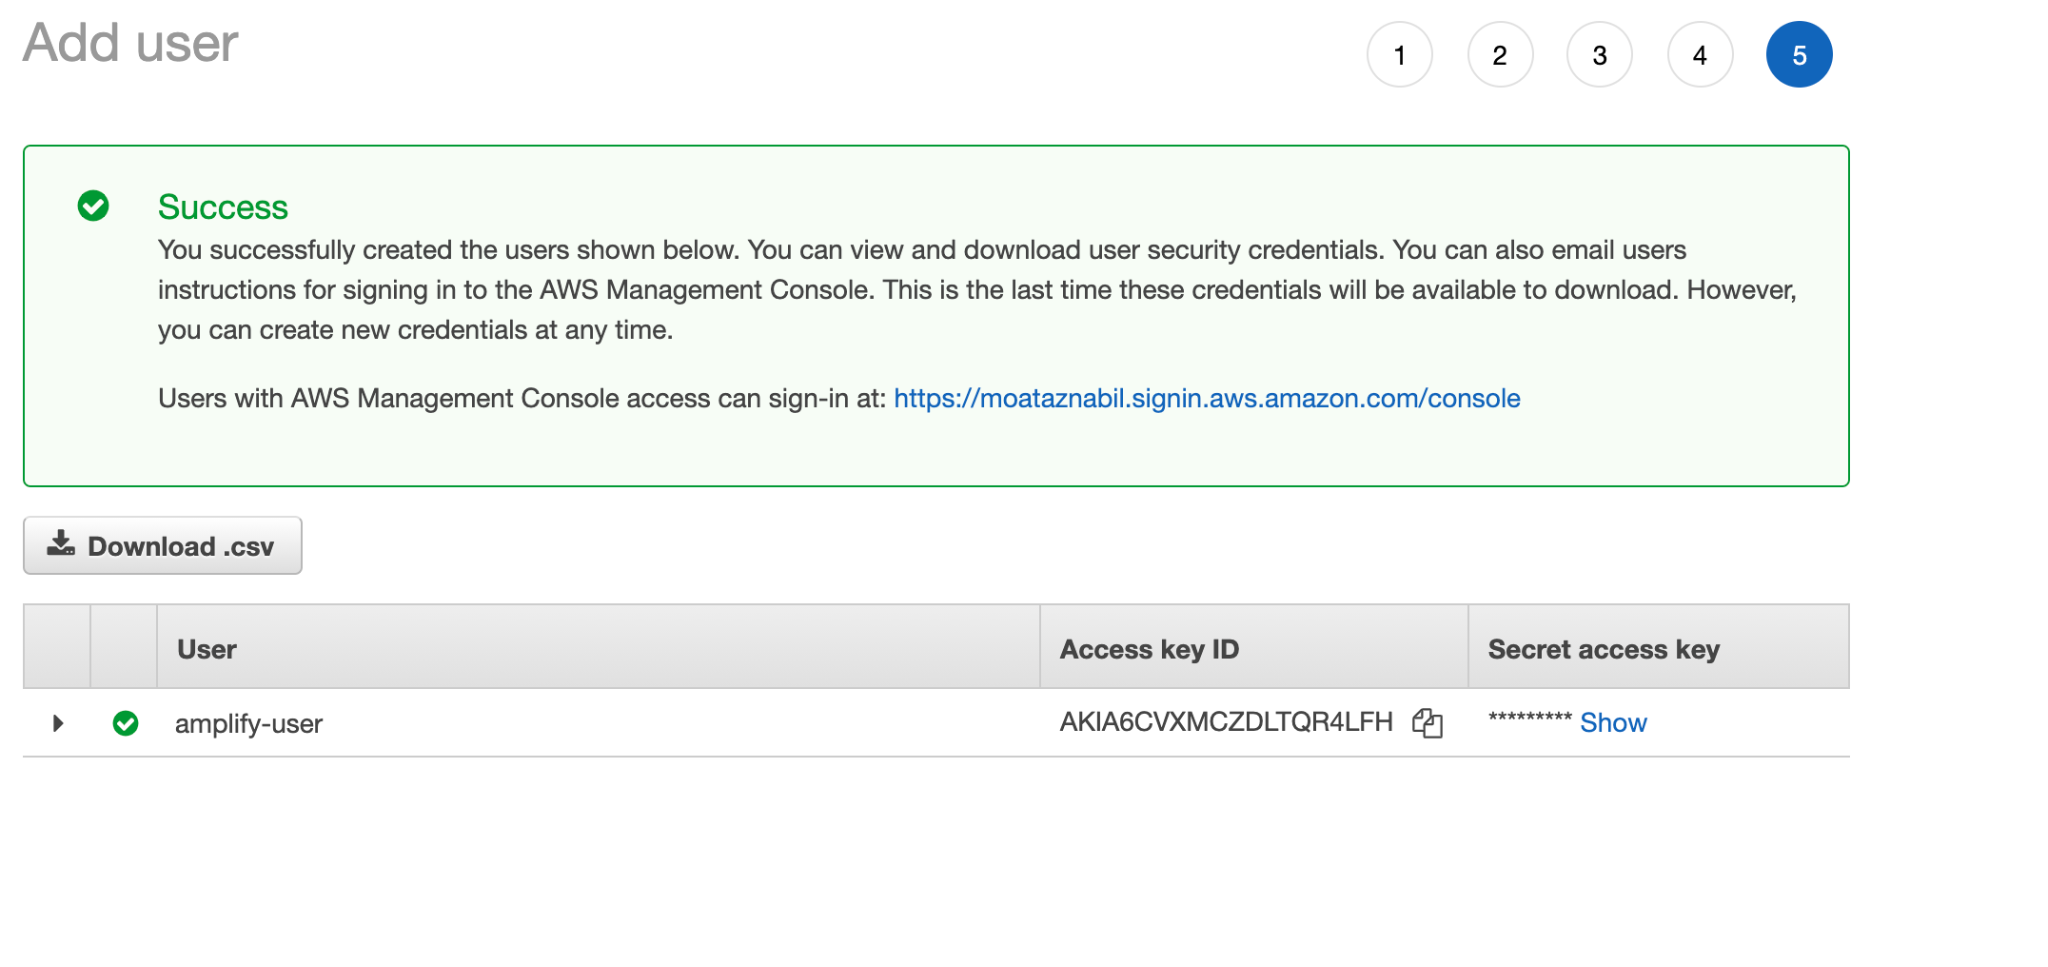
After that, the AWS Amplify CLI will ask you to add the accesKeyId and the secretAccessKey


Once you installed Amplify CLI successfully, you can use different commands such as the following:
- amplify configure: Configures the AWS access credentials, AWS Region and sets up a new AWS User Profile
- amplify init: Initializes a new project, sets up deployment resources in the cloud, and prepares your project for Amplify.
- amplify add <category>: Adds cloud features to your app such as auth or api
- amplify push: Provisions cloud resources with the latest local developments
- amplify pull: Fetch upstream backend environment changes from the cloud and updates the local environment to match that definition.
- amplify delete: Destroyed resources that tied to the project.
And more commands can be found in the AWS Amplify repository.
Now it’s time to create our Android project.
Create an Android App and Add AWS Amplify
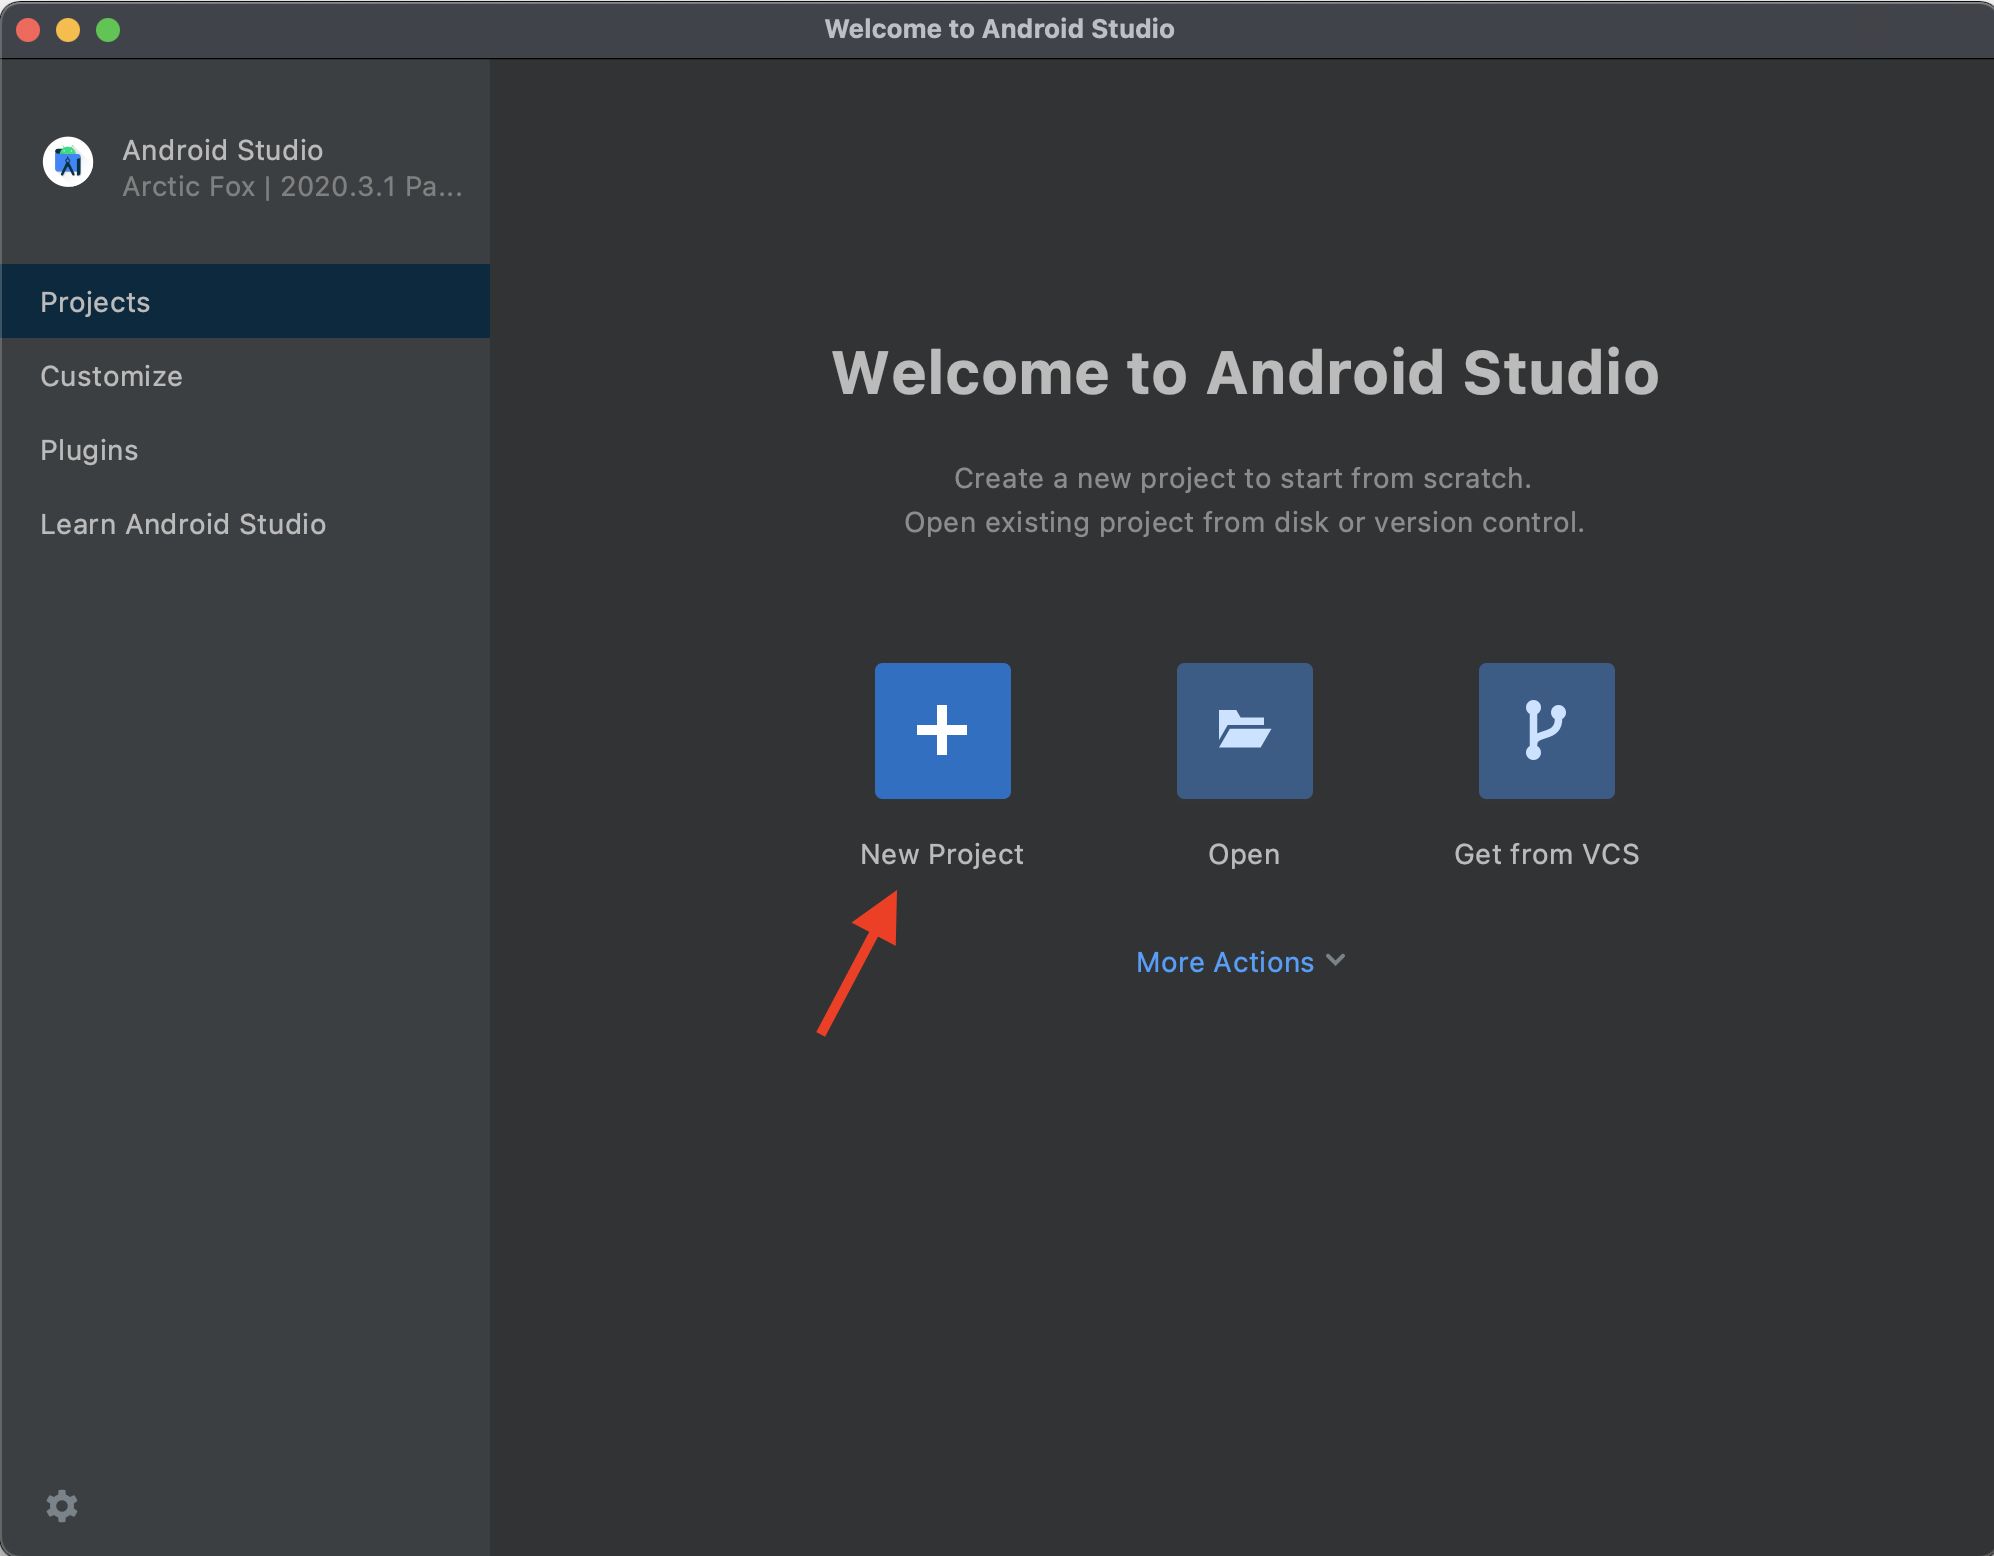
- Open Android Studio and select Add New Project

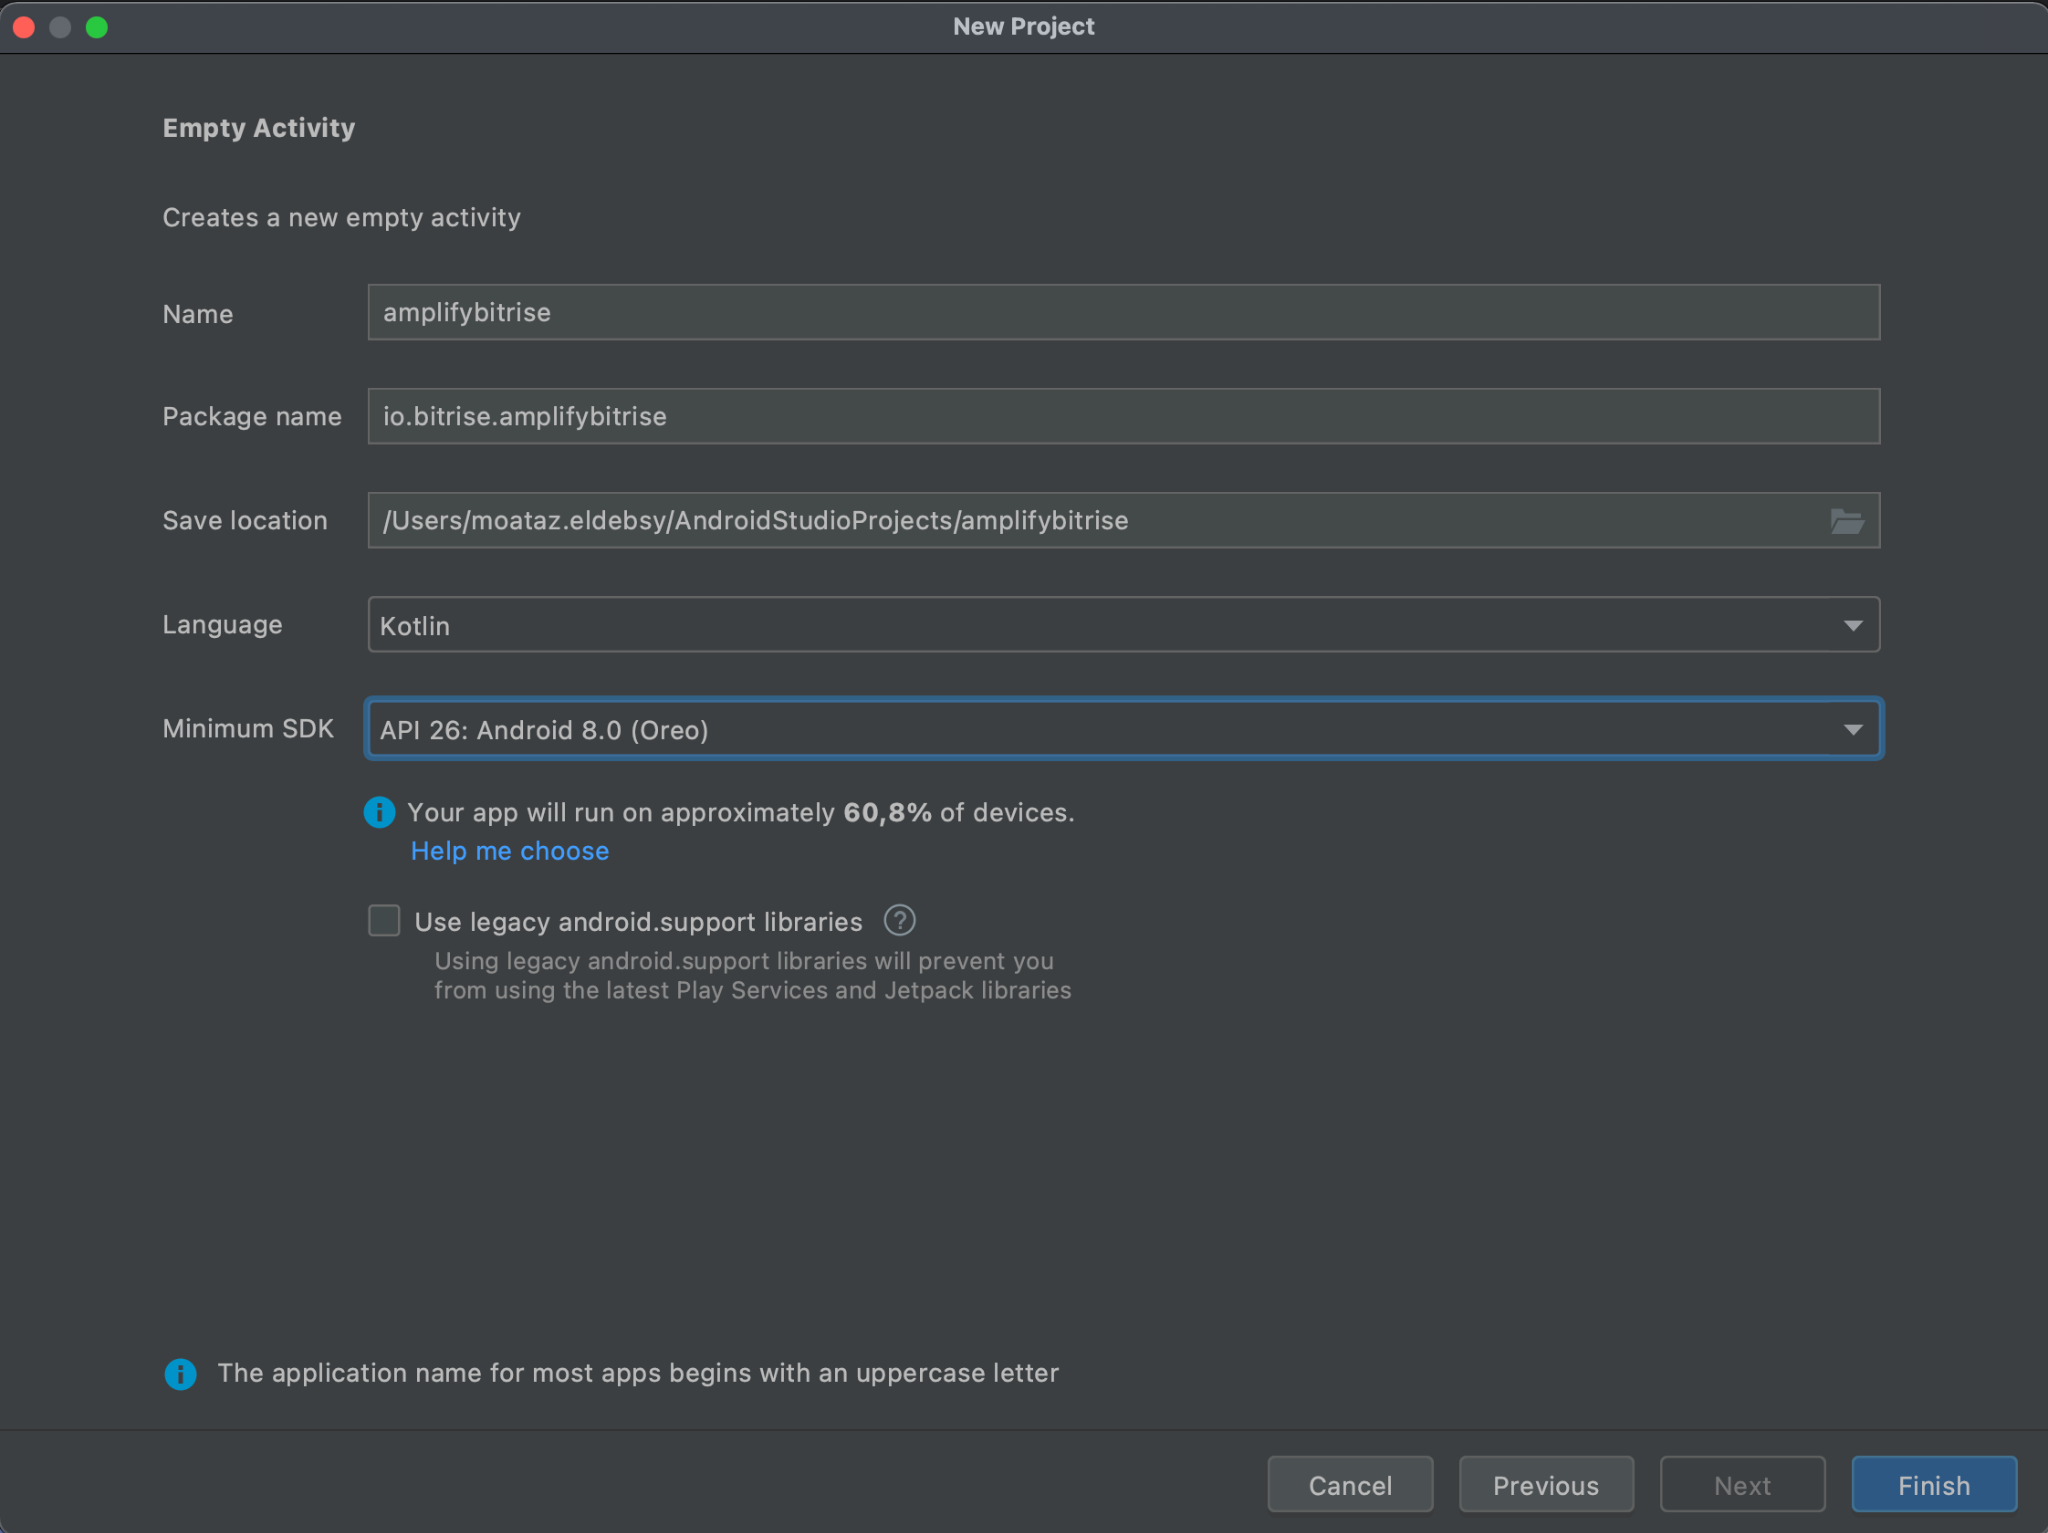
- In the Project Templates, select Empty Activity and click the Next button.

- Next, configure your project:
- Enter amplifybitrise in the Name field
- Select Kotlin from the Language dropdown menu
- Select API version 26 or as you preferred for the minimum SDK
- Press Finish
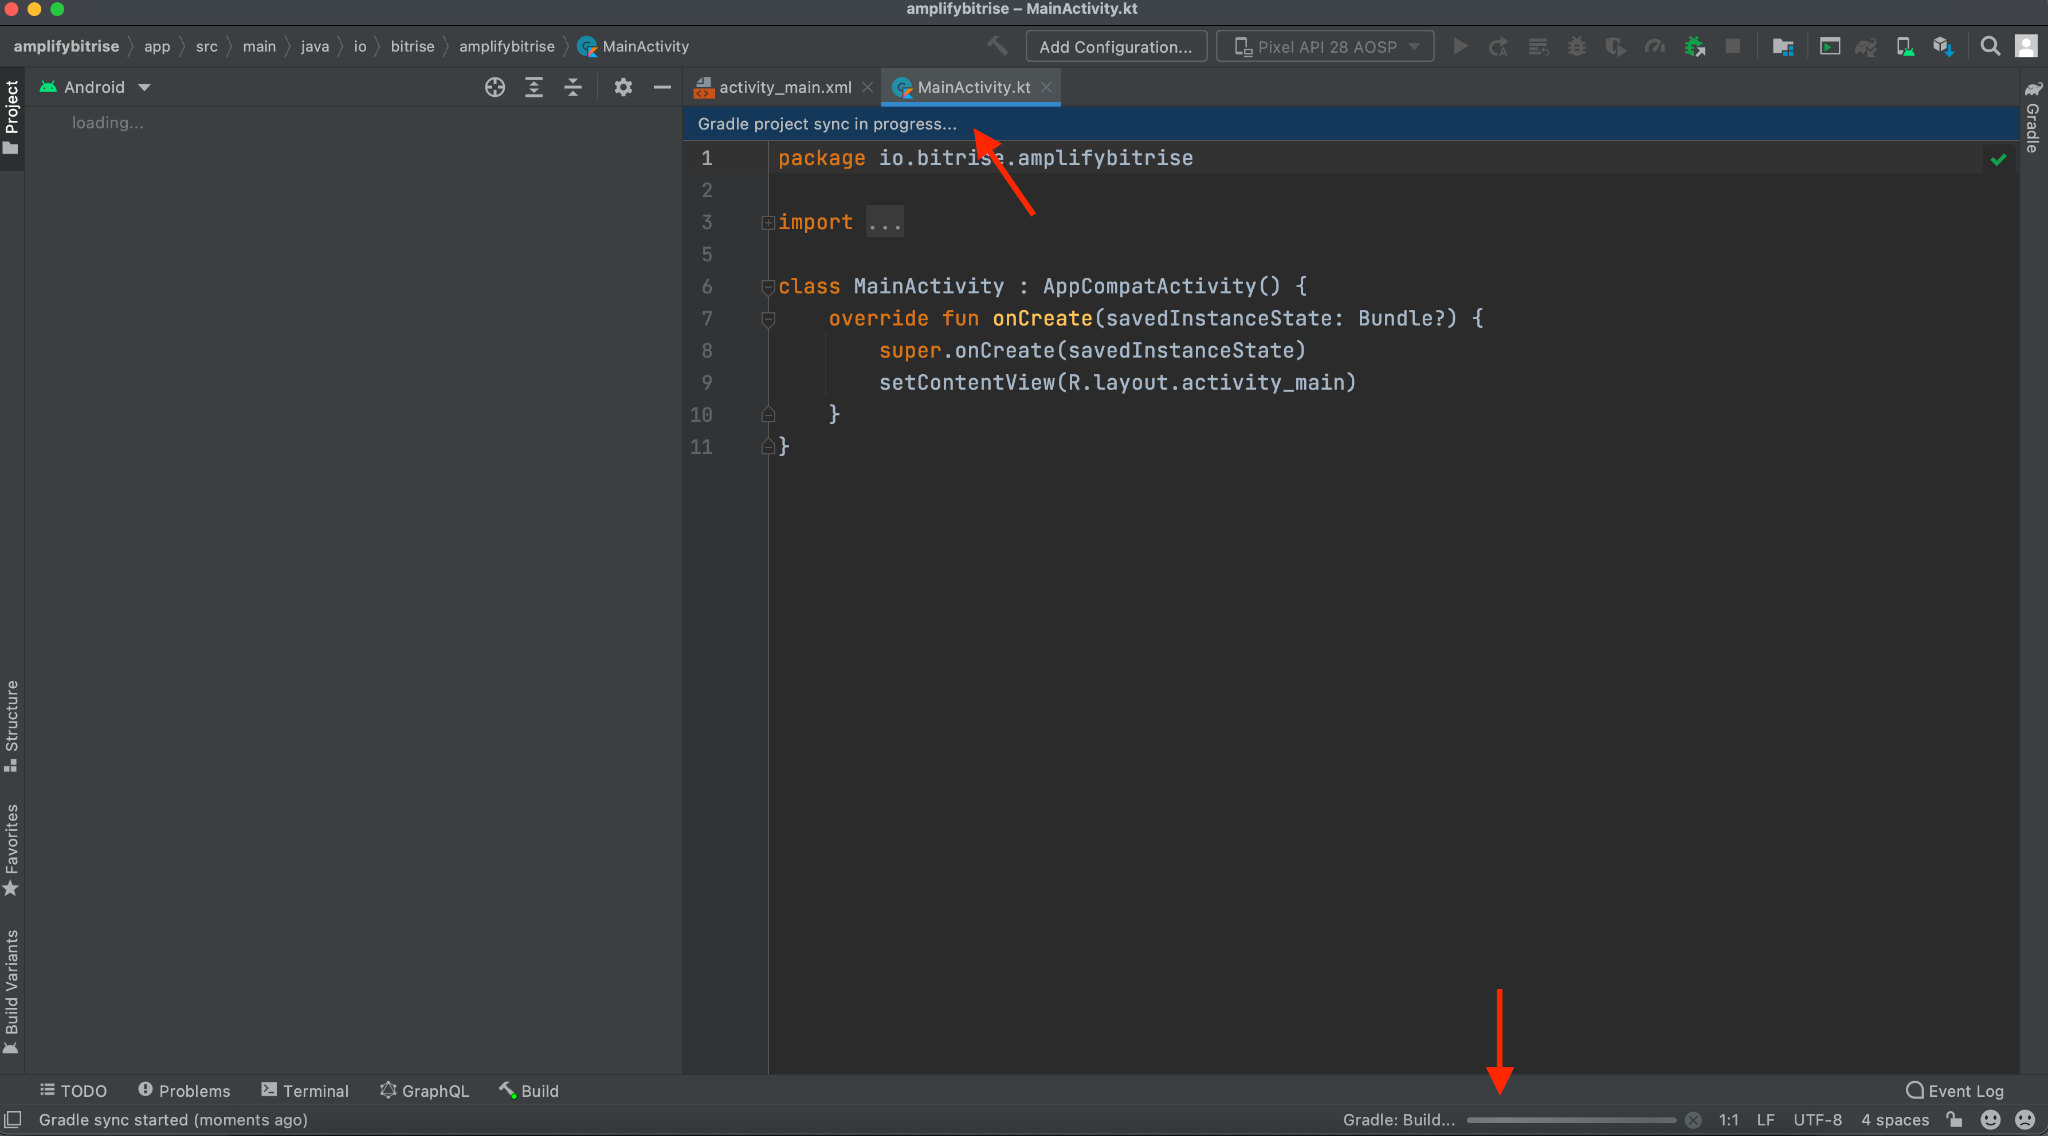
- The Android Studio will open your project and you should wait till Gradle finishes downloading the required files.
- open build.gradle (Module: amplifybitrise) and the compileOptions as the following image

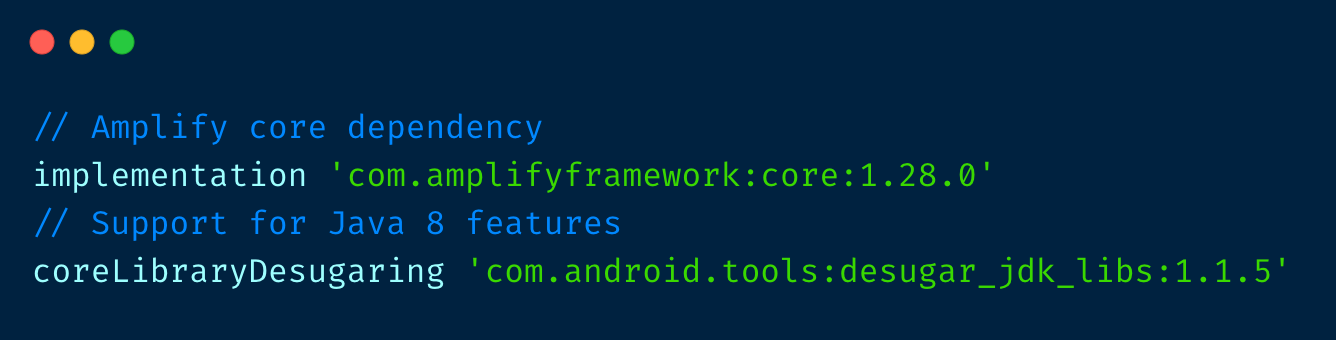
- And under the dependencies section, you can add the Amplify dependencies as the following image
- Run Gradle Sync to update the project
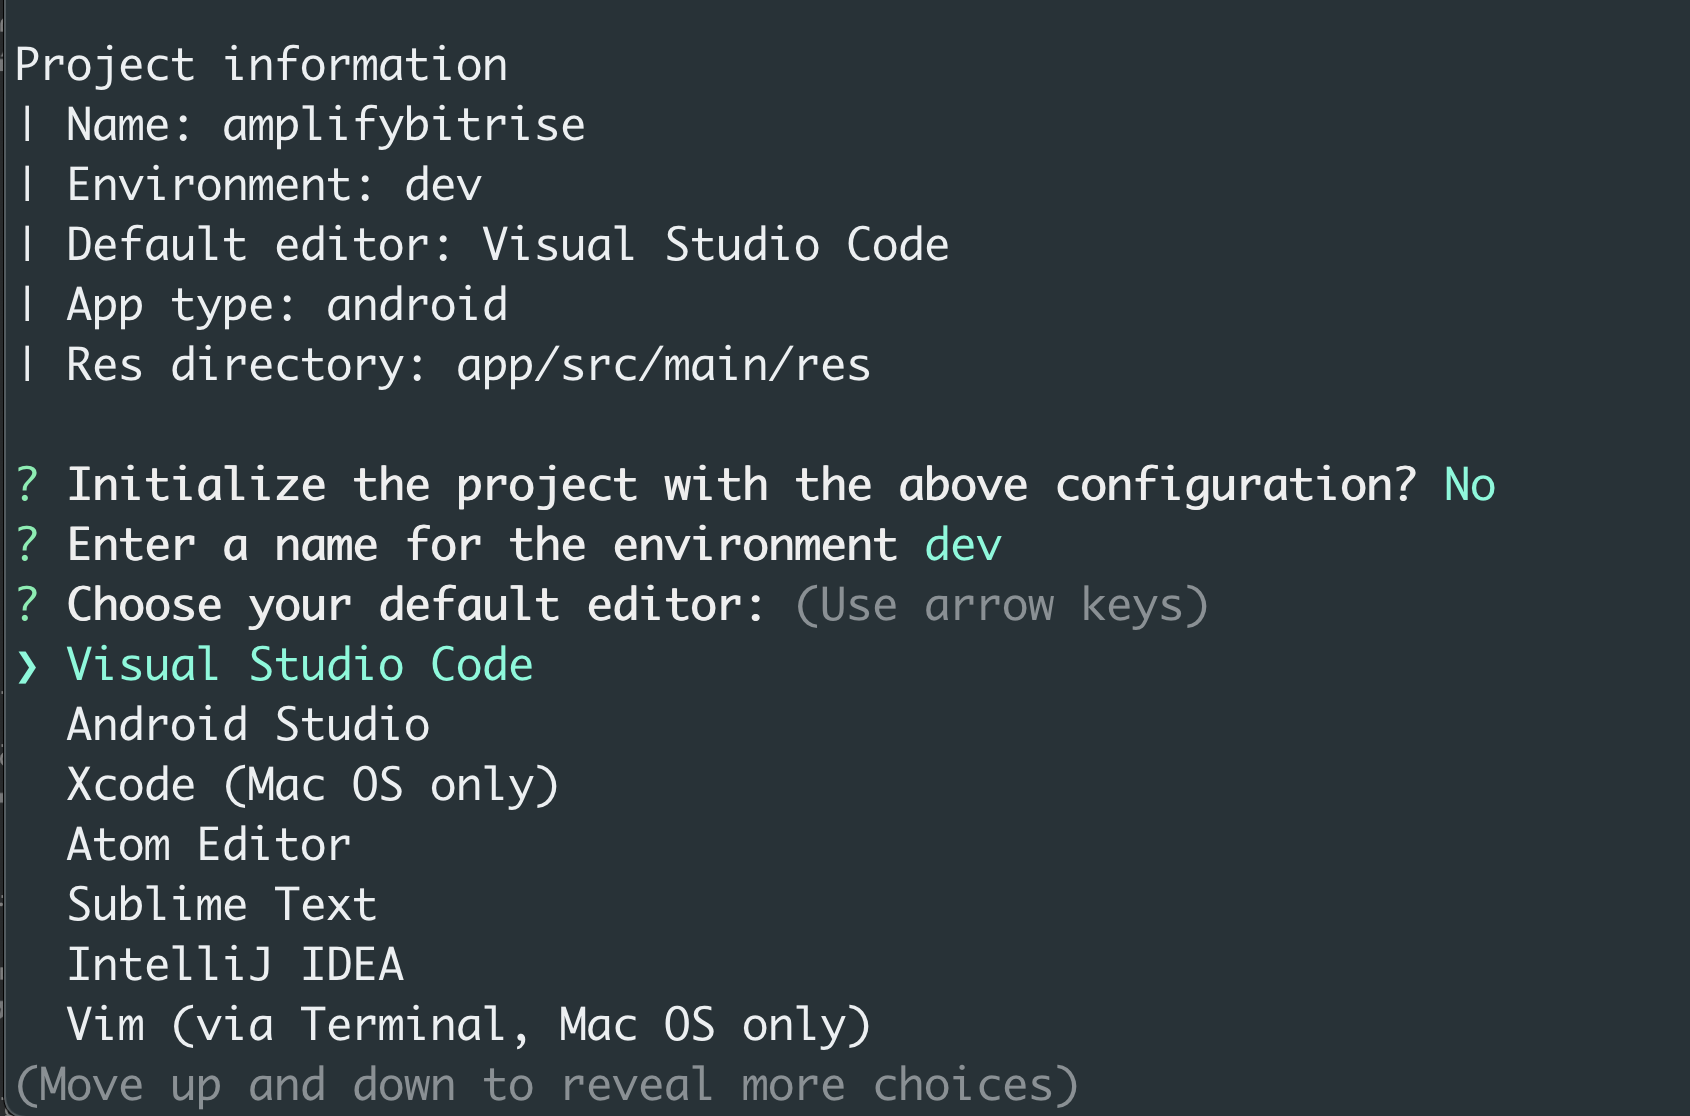
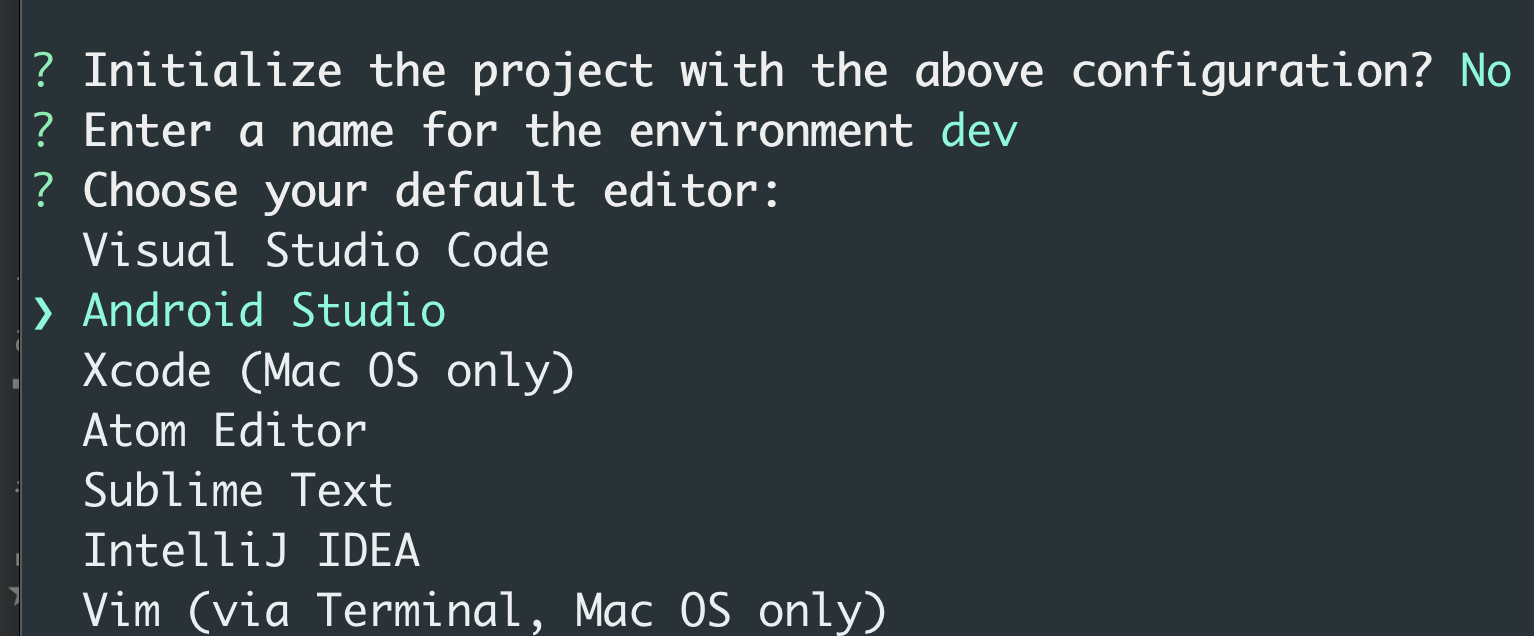
- To initial the AWS Amplify into our project we need to run the following command:
- Then you need to answer the questions from the wizard to set up your project like the following images:


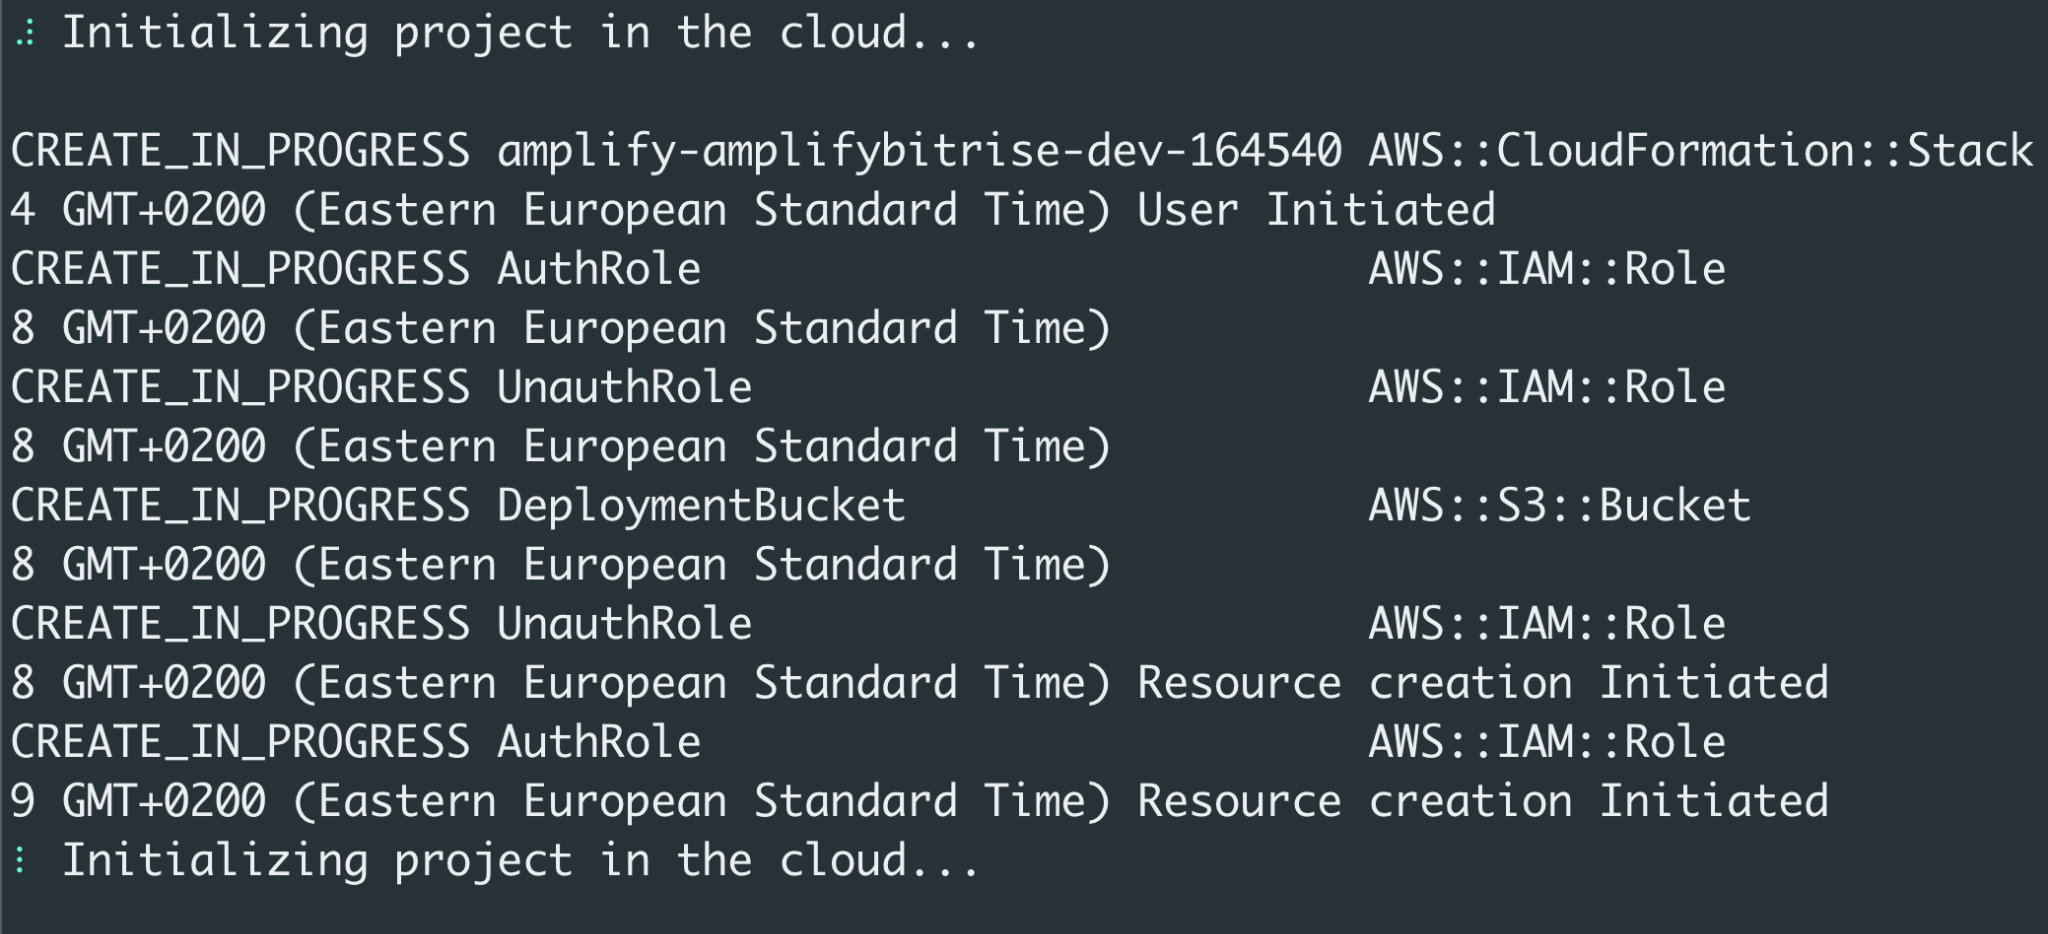
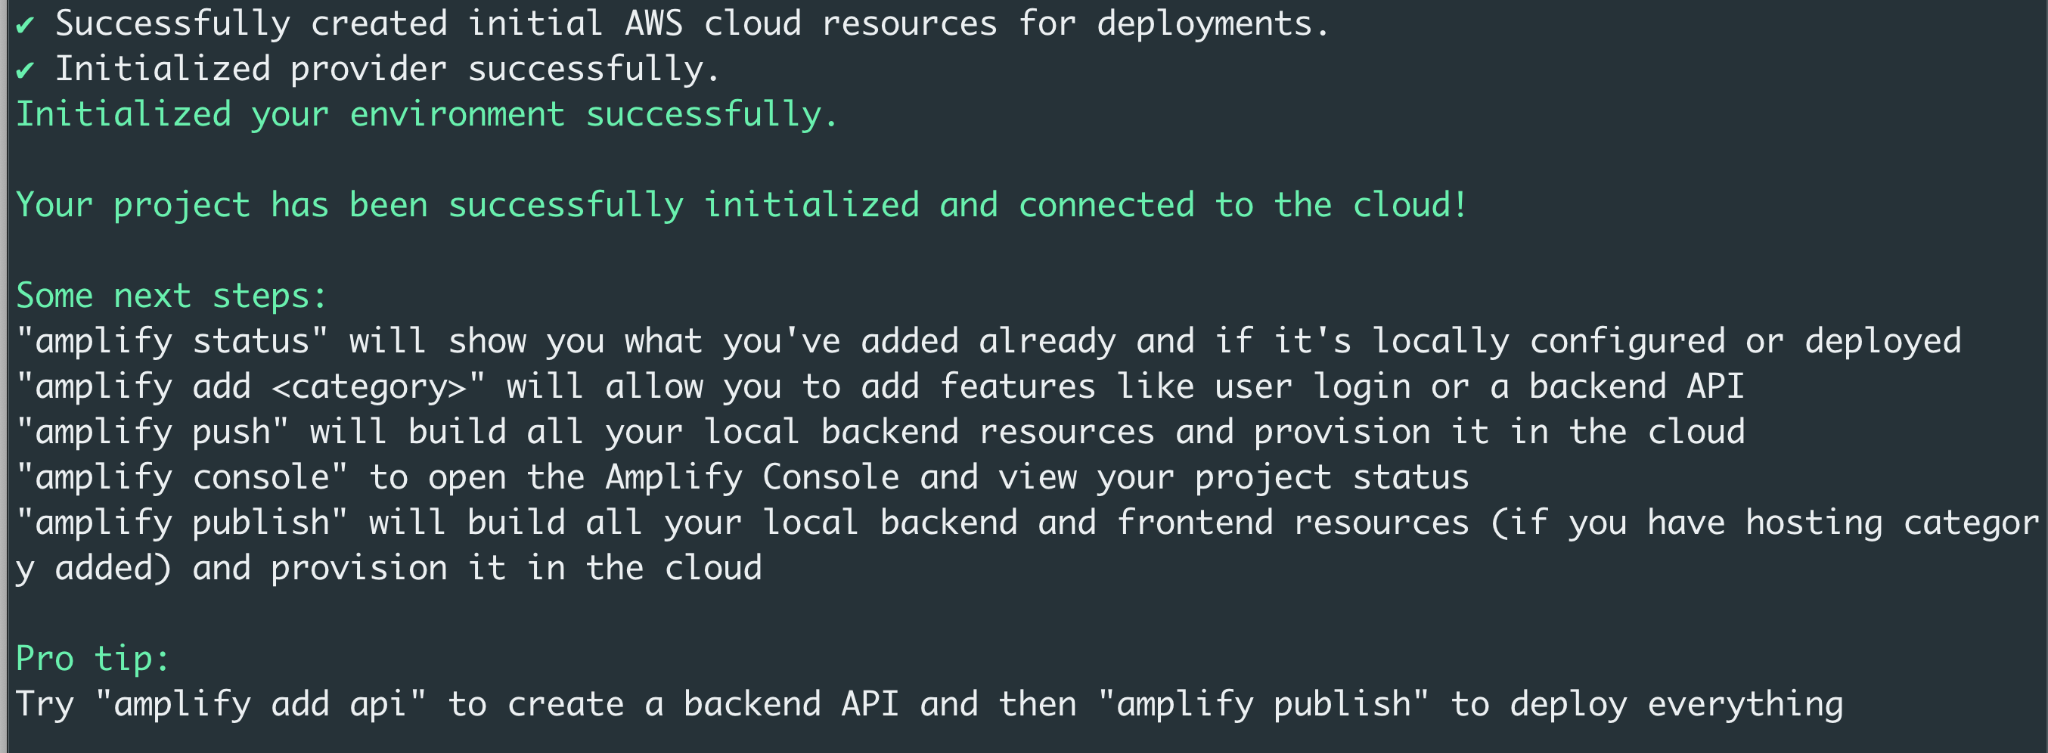
The project has been successfully created and connected to the cloud and now you can start using the different commands with AWS Amplify CLI for example you can use:
amplify add api to create a backend API for your application and publish it with amplify publish to deploy it to the cloud.
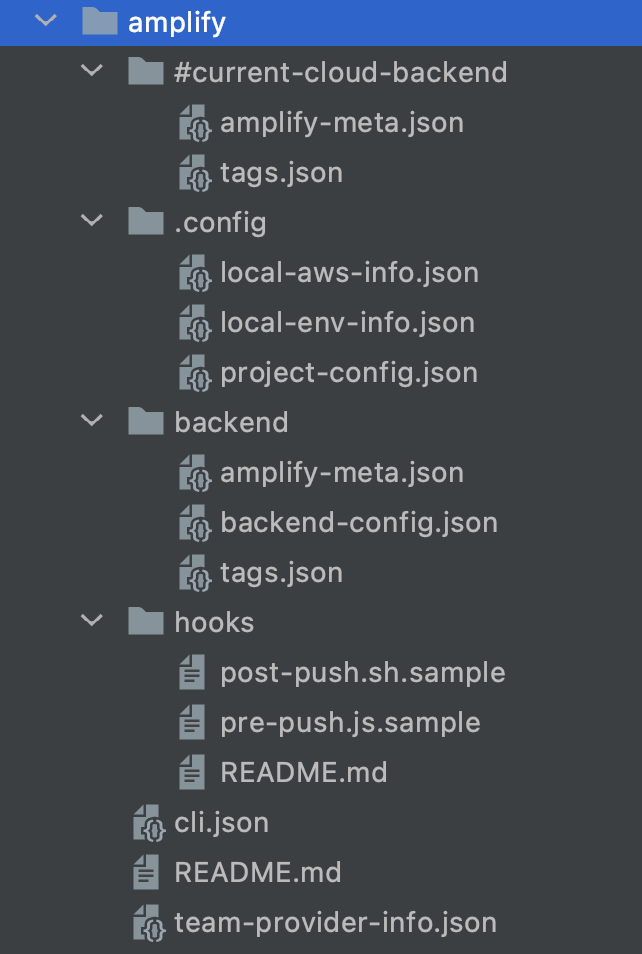
Inside the Android project, you will notice that we have a new folder called amplify including all the configurations for our project.
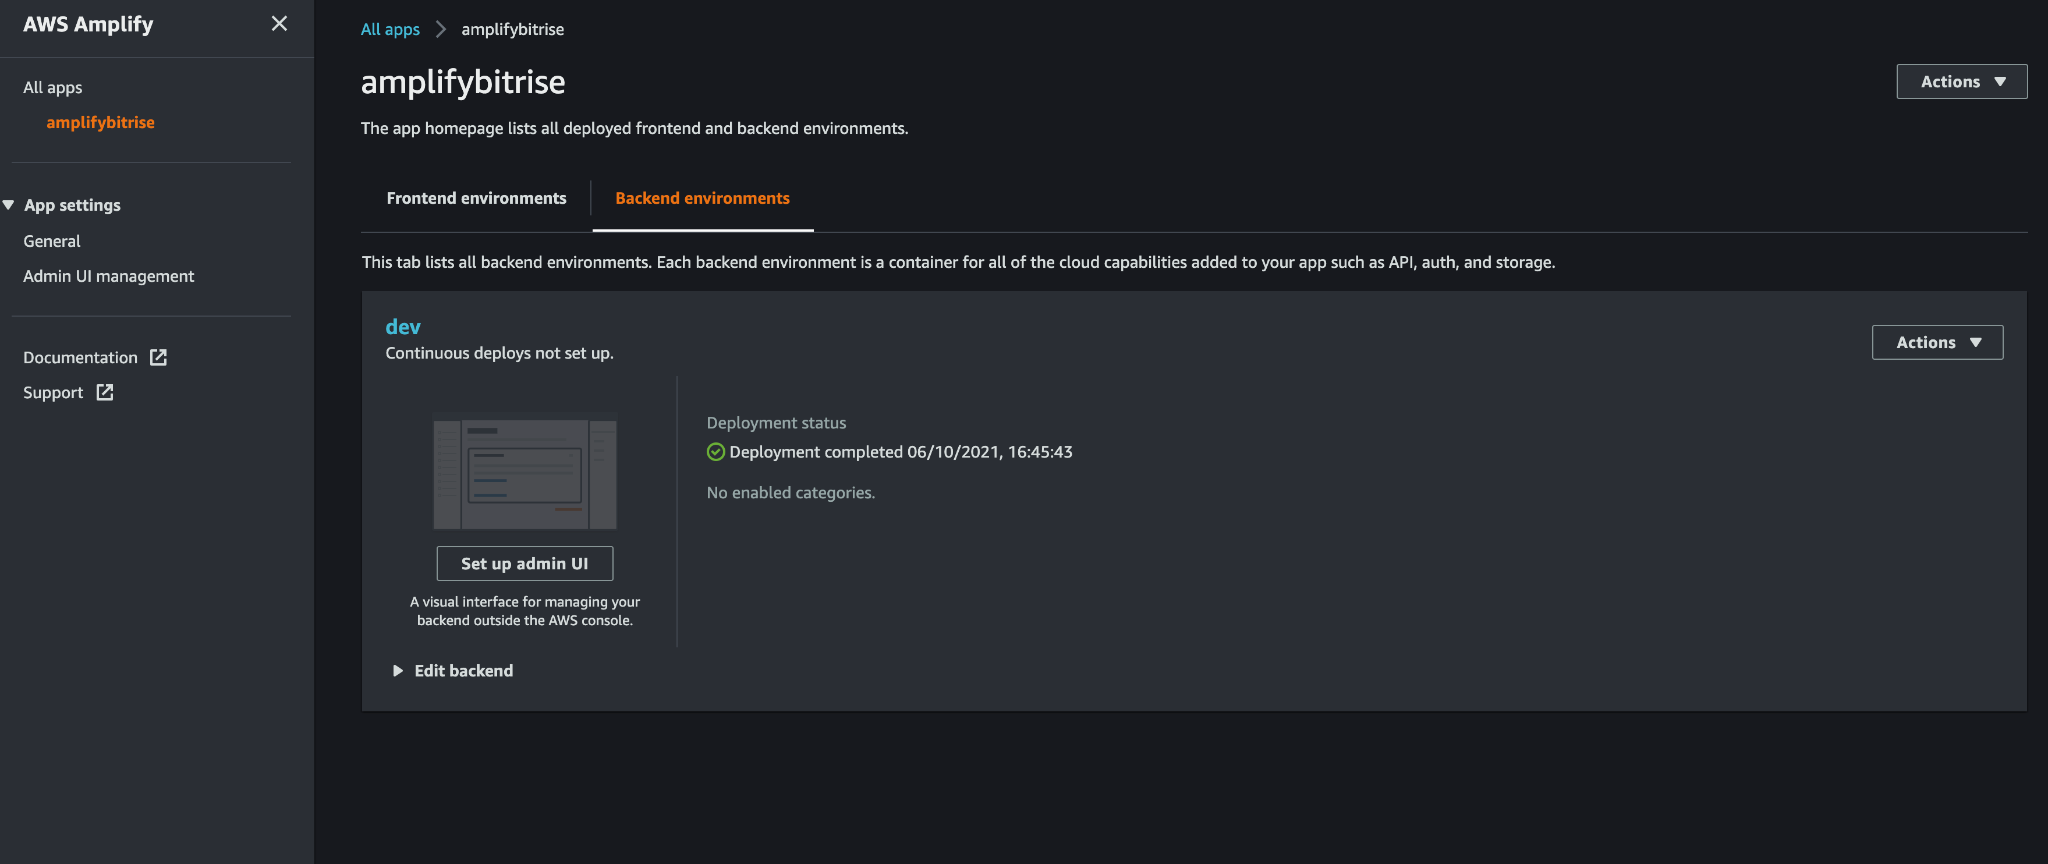
And if you open the AWS Amplify page from the Console you will find the project created successfully.

Initialize Amplify in the Android application
After we prepared our Android project successfully with Amplify, now we can initialize it in the app with the following steps:
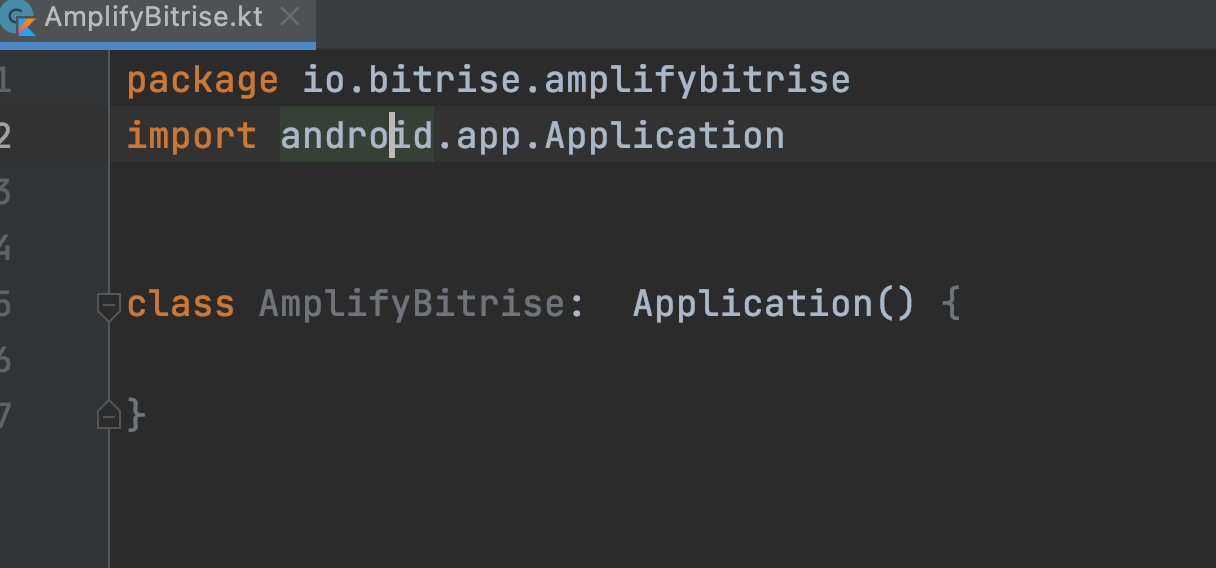
- Right-click on your project name (in my case: .io.bitrise.amplifybitrise), click New and click Kotlin File/Class.
- In the name enter AmplifyBitrise and Click Enter
- Extend the class from the android.app.Application by adding : Application()
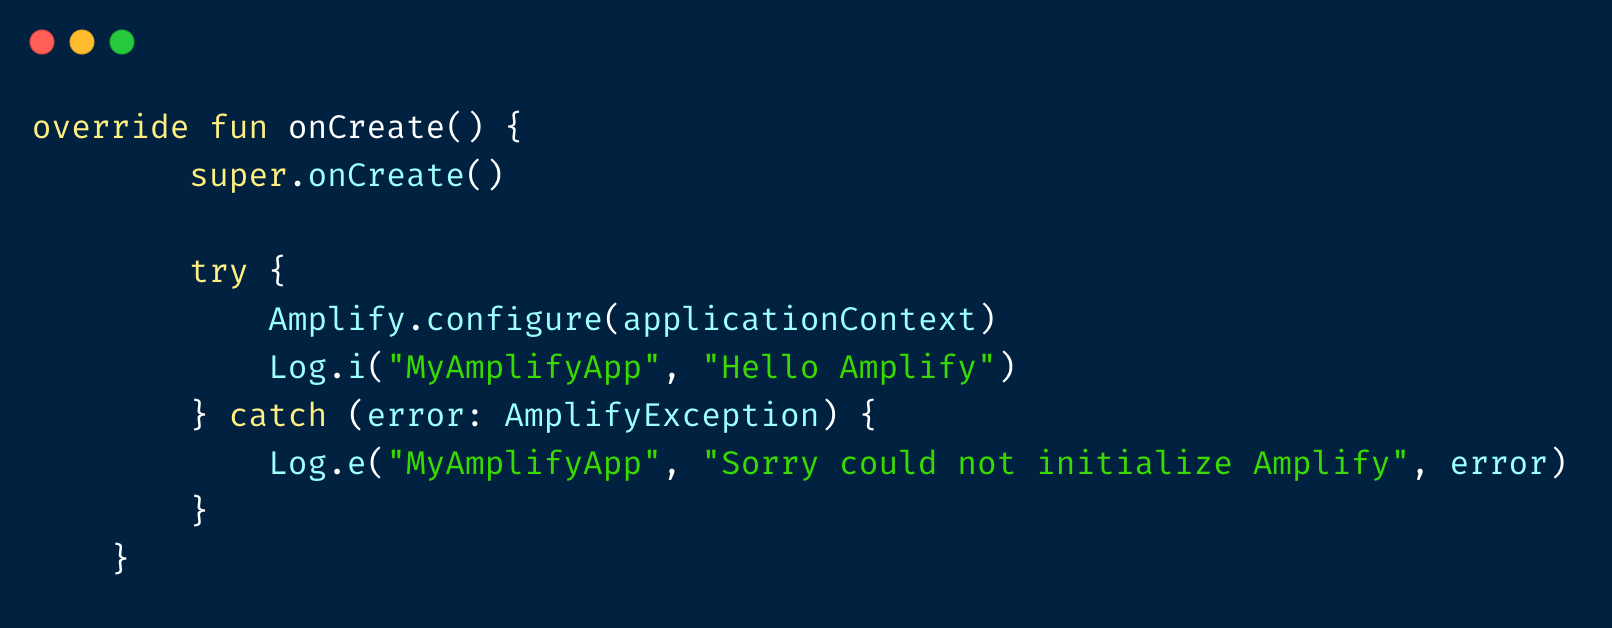
- Add an onCreate method to initialize Amplify when your application is launched with the following code:
- Open the AndroidManifest.xml, and add the android:name attribute with the value of your new class name:

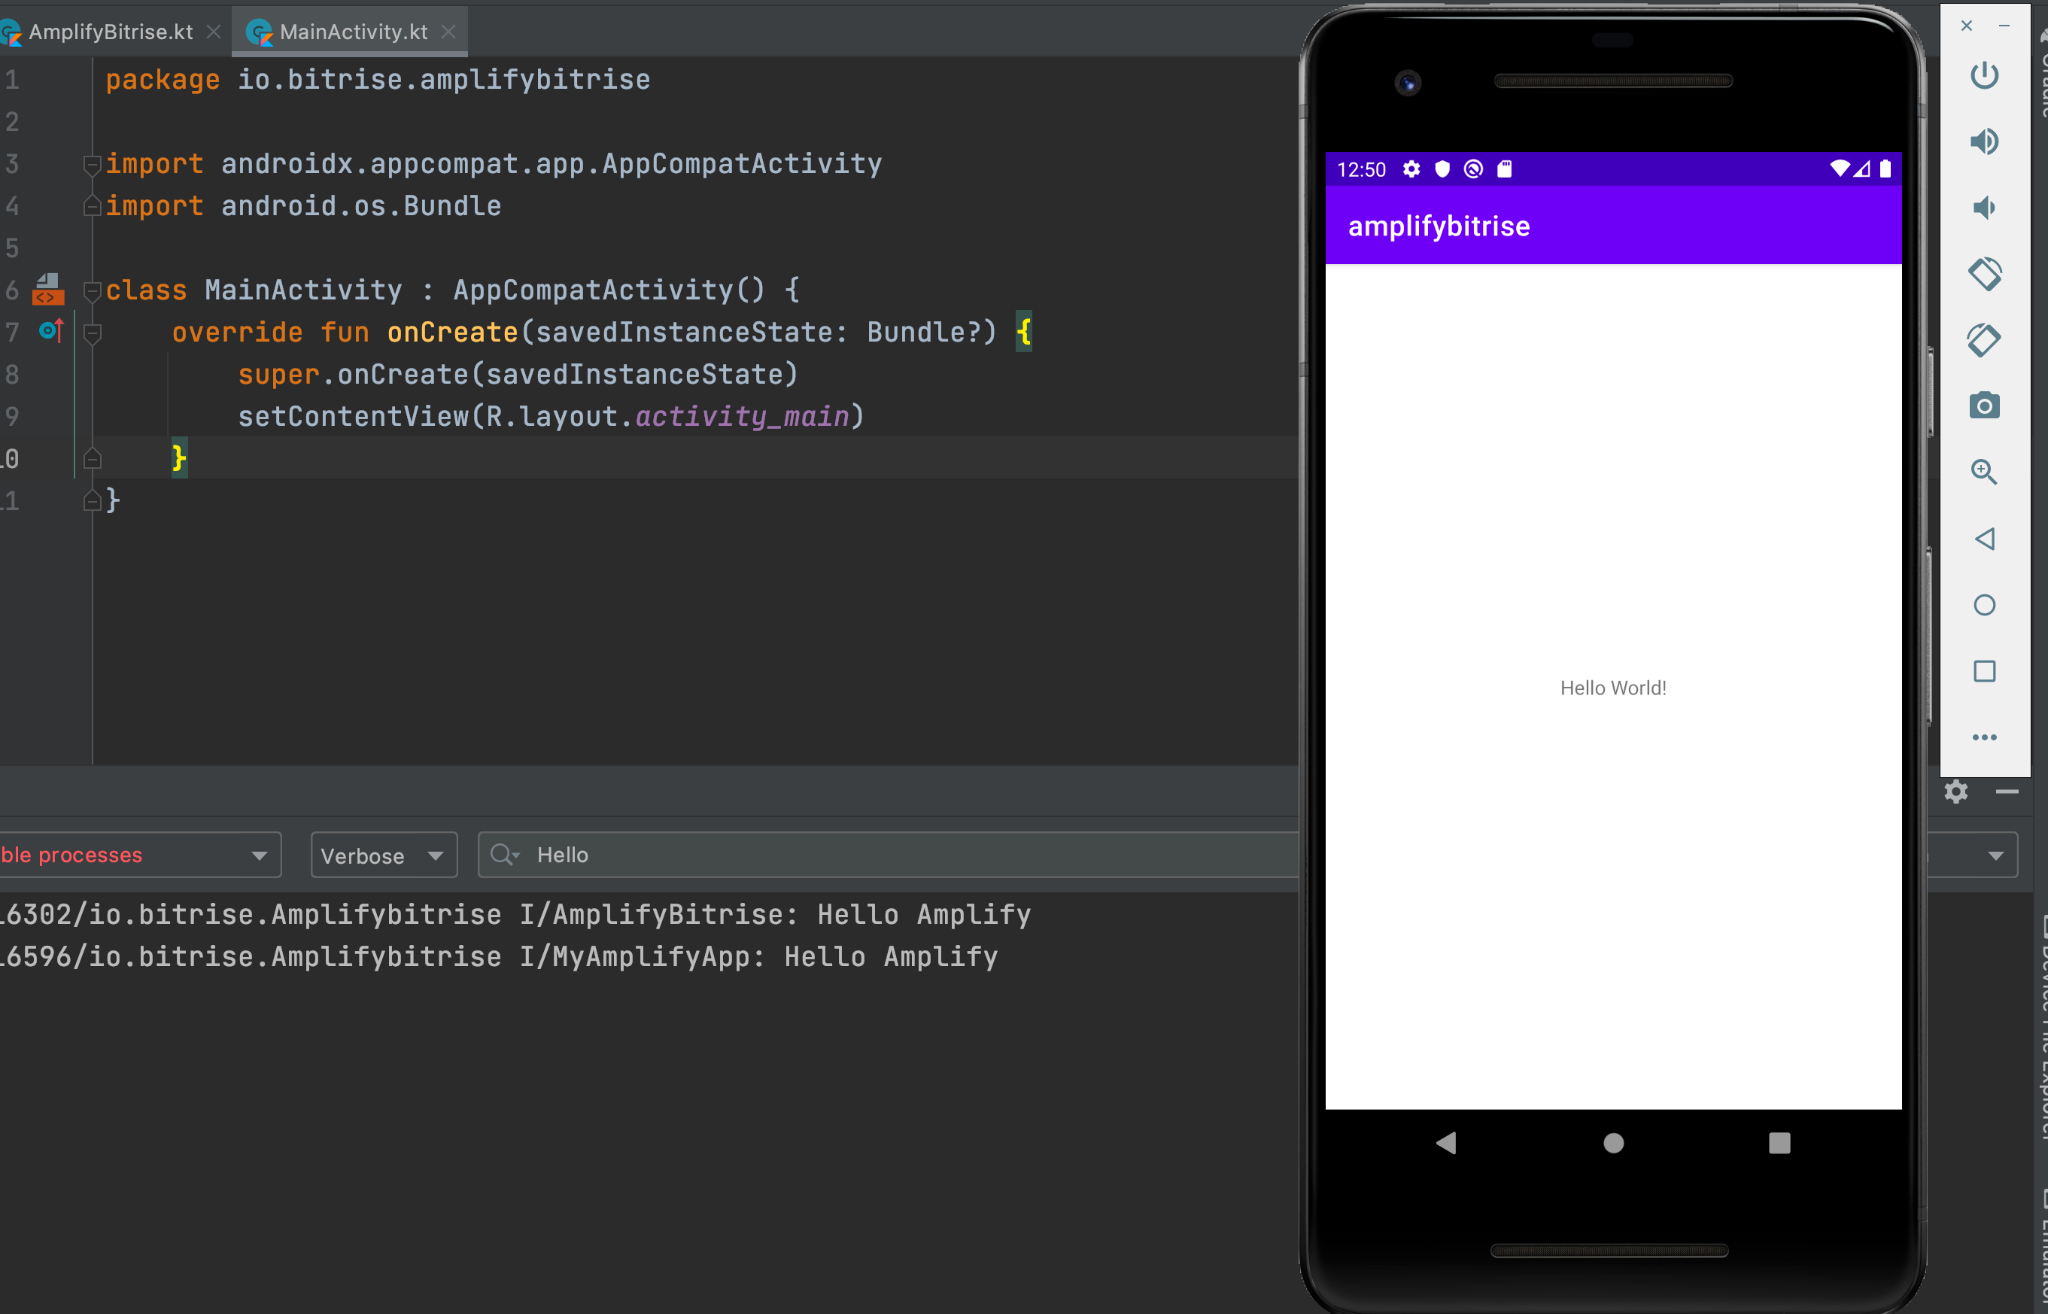
- Now build the app and open the logcat view to verify that the amplify initialized successfully:
Congratulations! 🎉 You've created a simple app and are ready to start adding Amplify categories to your application such as backend api, auth, storage, and more.
Add backend storage with Amplify
Now we can add another simple example using one of the Amplify categories, the storage, by taking the following steps:
- From the command line run the command amplify add storage, and follow the instructions:
- Select Content

- Select the name of the category in the project, bucket name, and authentication, you can leave the default value. Select the access level for the Auth and guest users.

- Select No for the Lambda, we don’t need to trigger it.

- To push your changes to the cloud, execute the command:
amplify push
- Add the following dependencies in the gradle.build file:

Click Sync Now to update the project.
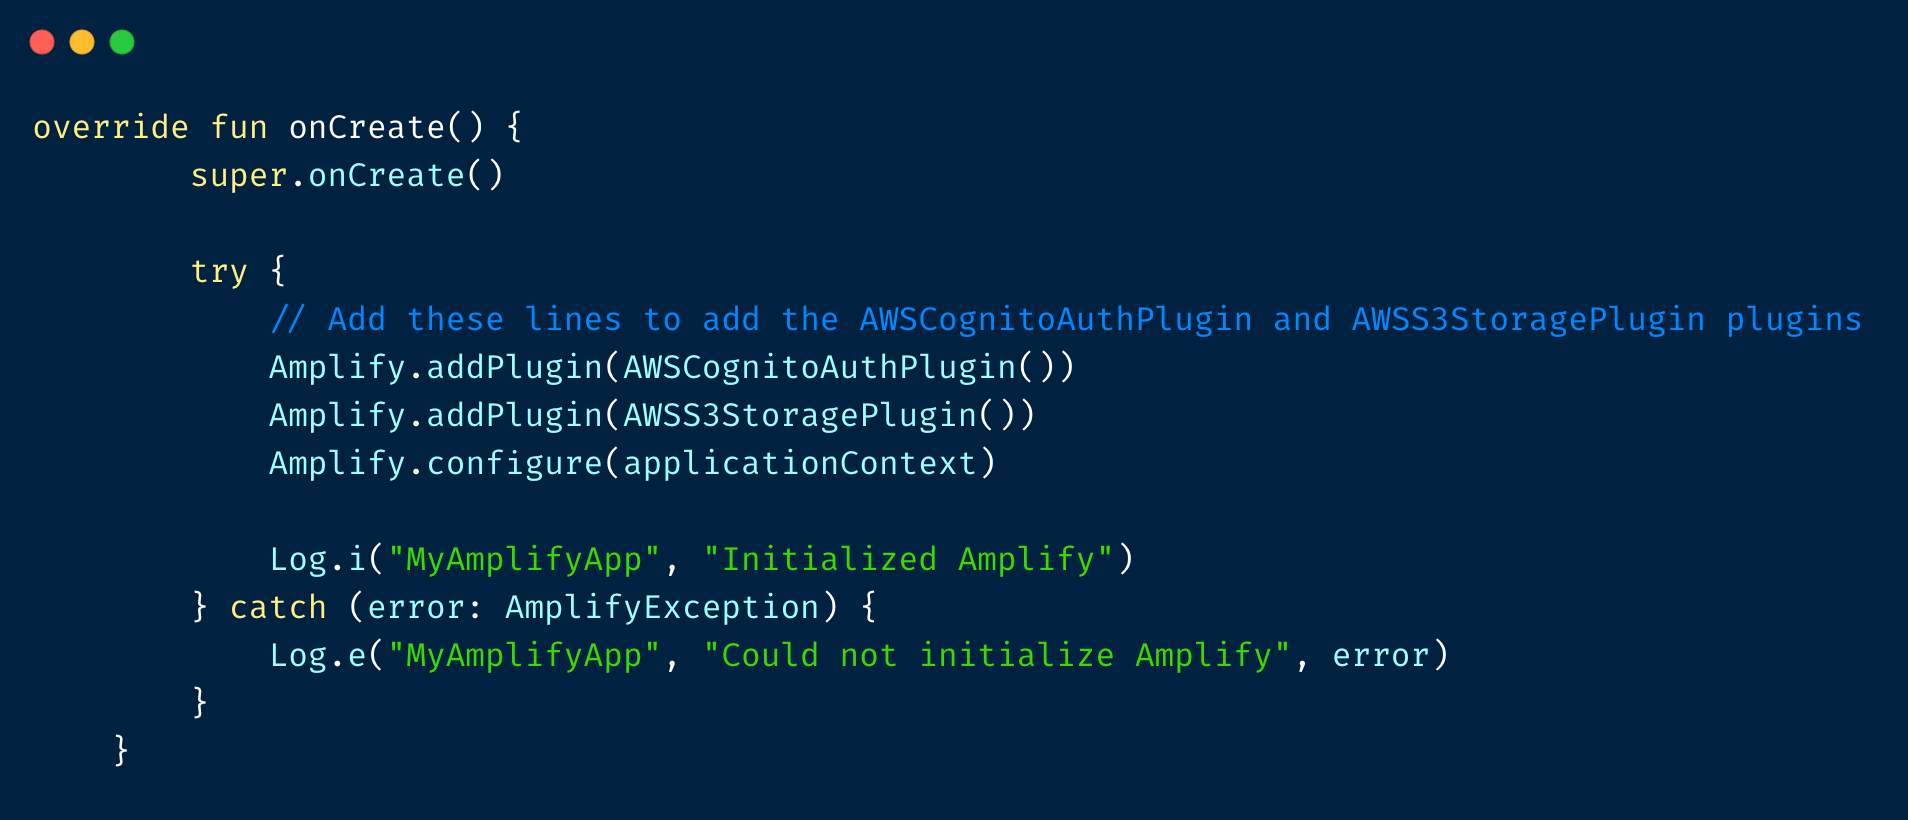
- Now we can initialize the amplify storage in our application class like the above example
- To test uploading data with the S3 bucket, you can add the following code to your MainActivity
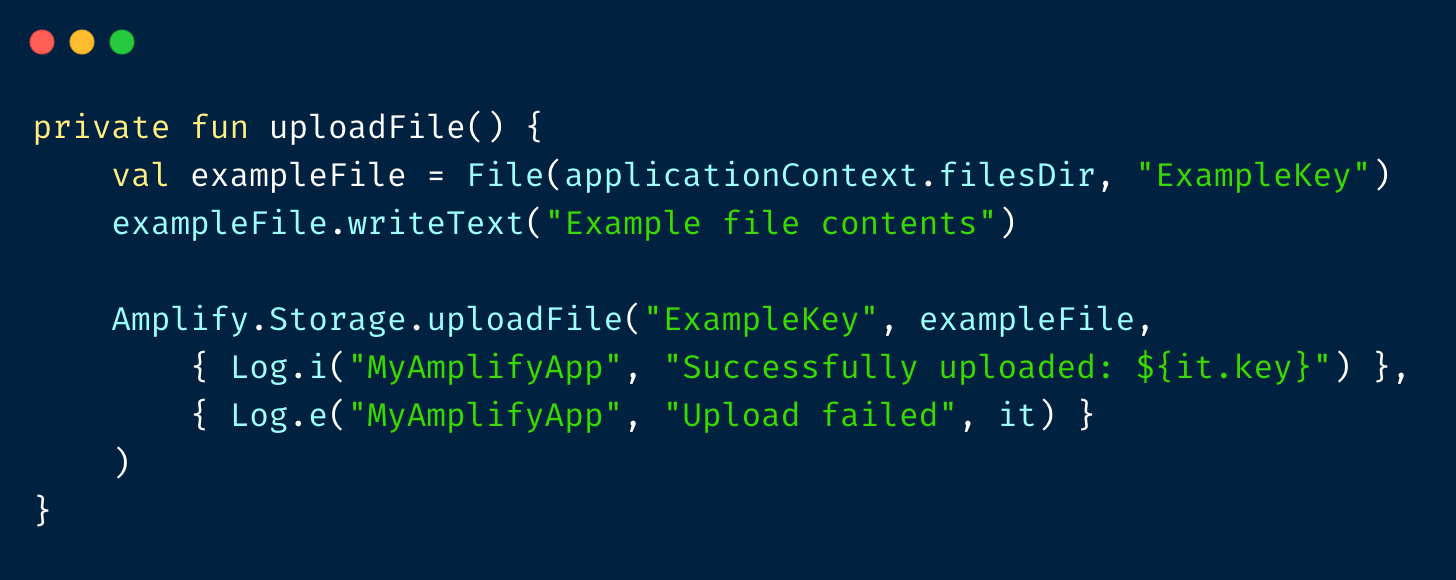
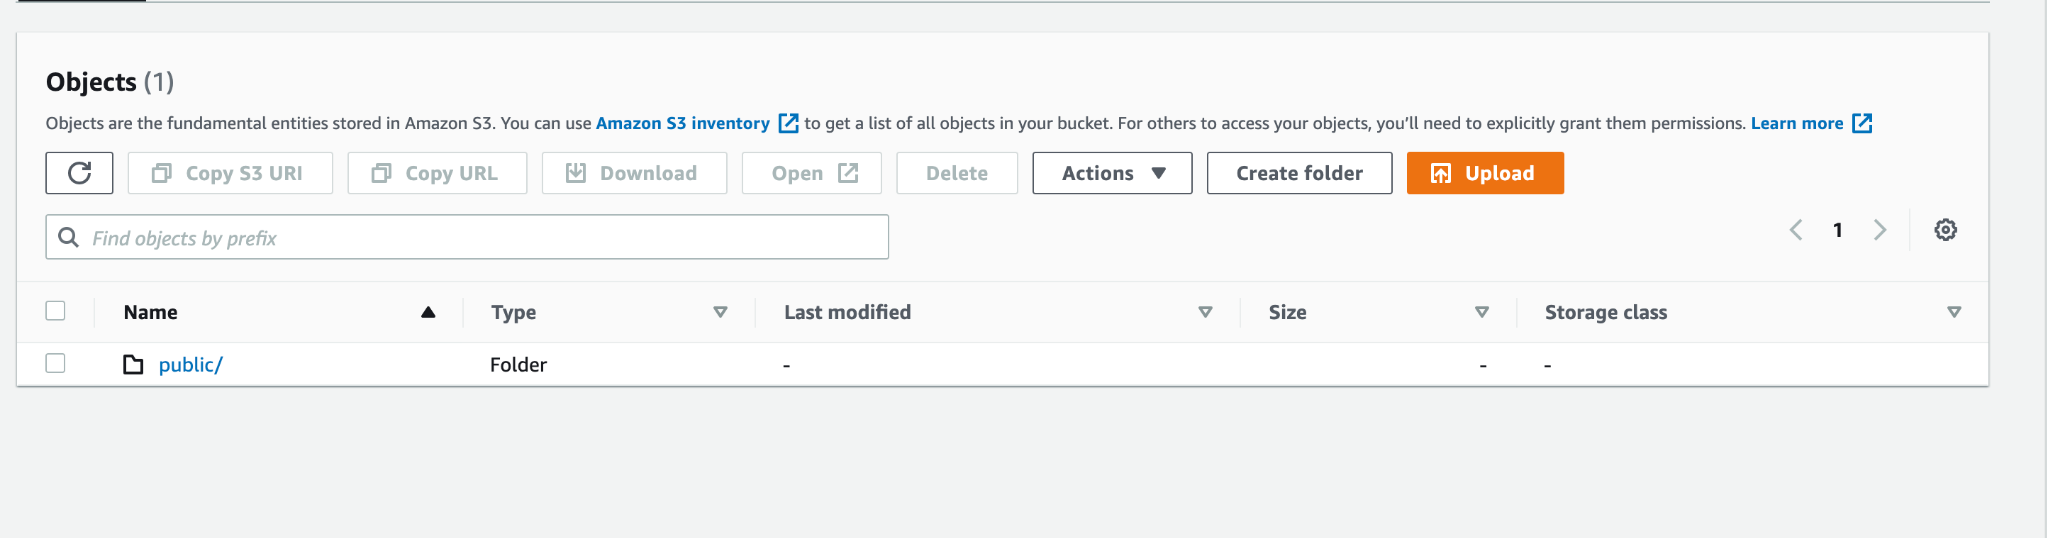
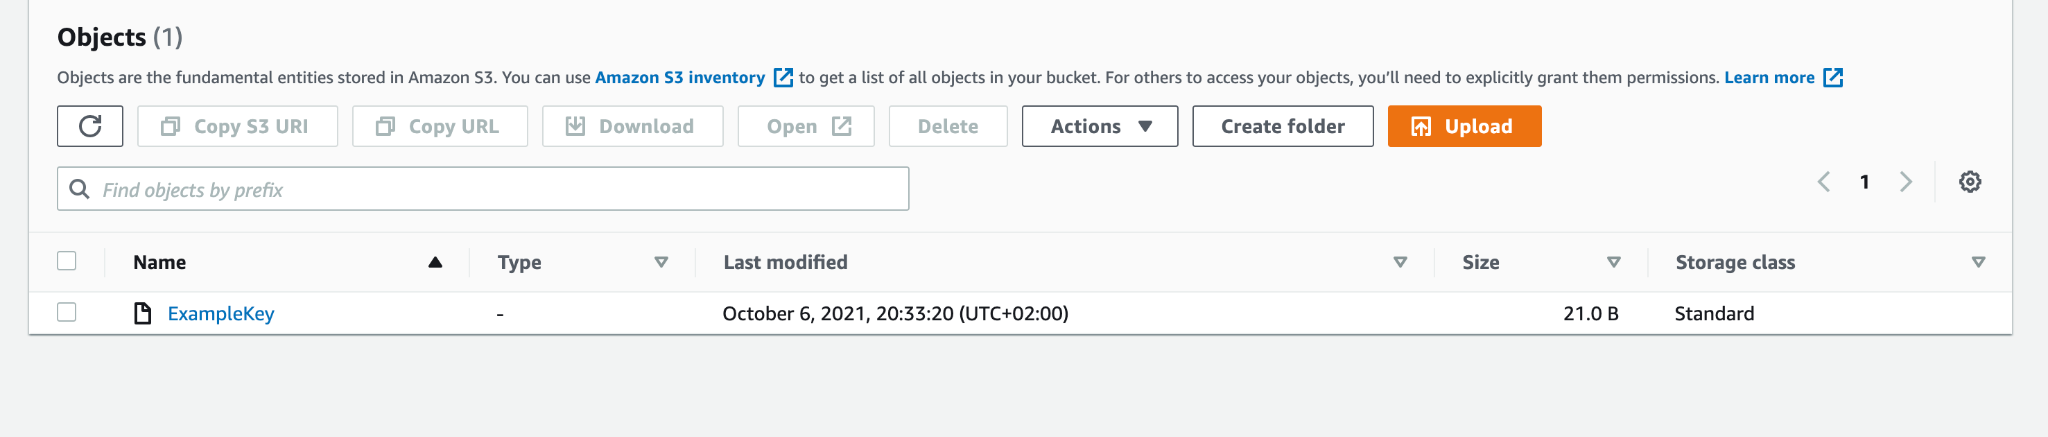
- After building and running the app successfully, you should see a new folder in your bucket, called public. It should contain a file called ExampleKey, whose contents are Example file contents.
AWS Amplify and Bitrise
After creating our application locally, it’s time to push the project to a source control management tool such as GitHub to be able to build, test and deploy it via CI/CD pipeline, such as Bitrise.
At Bitrise we are building a mobile CI/CD platform as a service, to help mobile engineers to deliver high-quality apps faster.
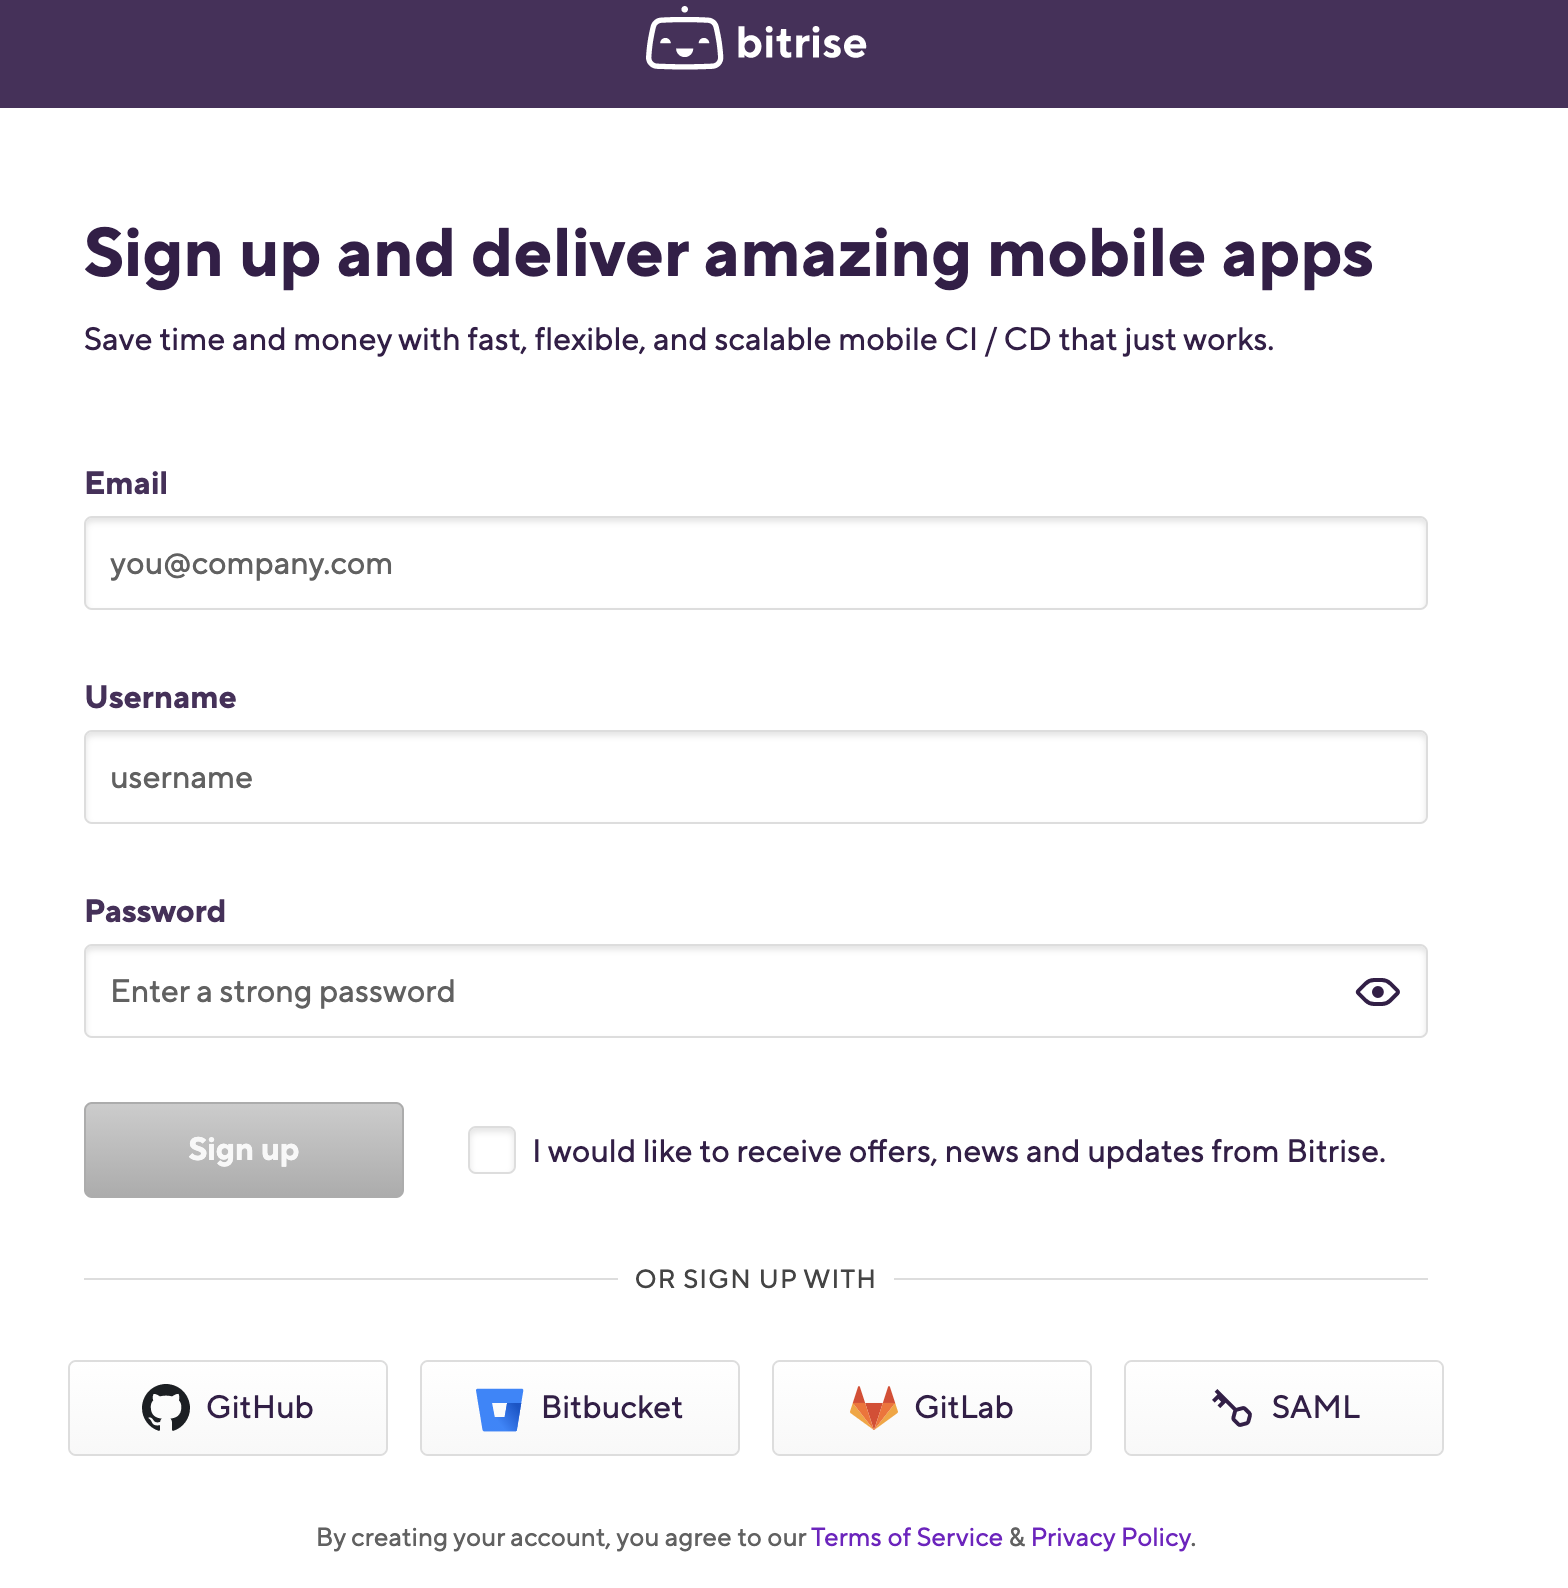
- First, you need to create a new free account from the Bitrise website, you can use your email or any other account you prefer as displayed in the following image:
- After successful login, you will have an empty dashboard and you can start adding your projects.
- Click on Add your first app button
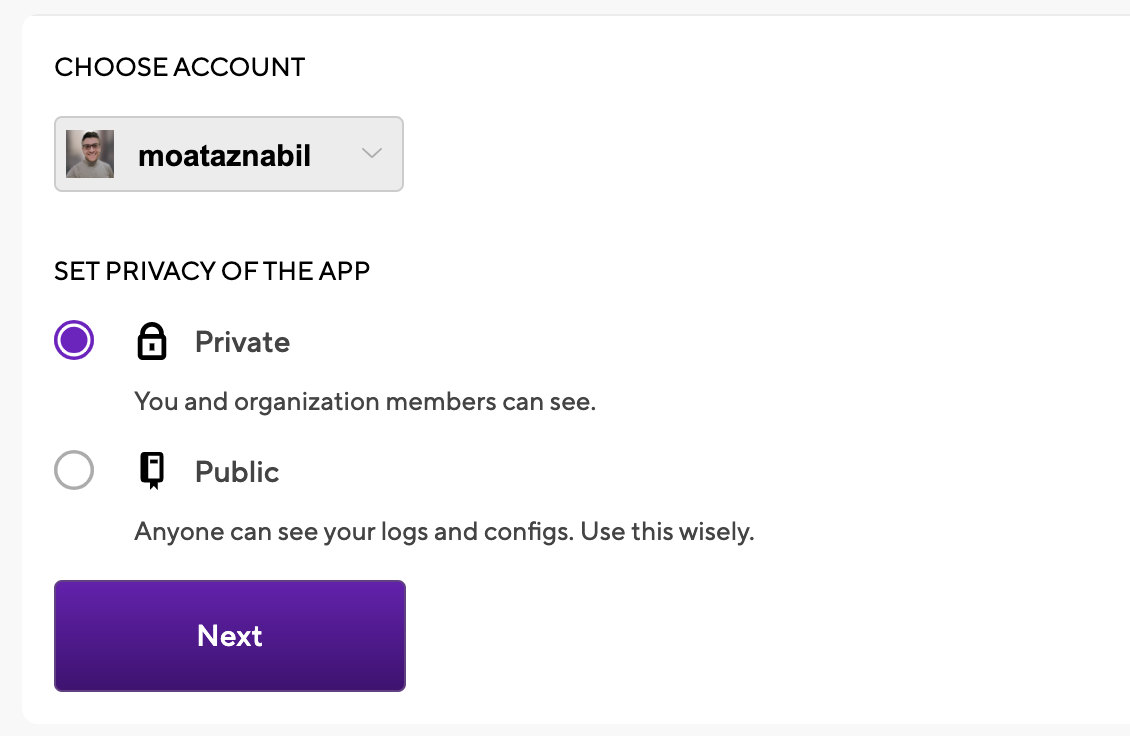
- Select your account and set the privacy for the App (Private or Public) and click Next
- Choose the Repository but before that, you have to give Bitrise access rights to your source code provider. (ex: GitHub)
- You need to set up the repository access, so you can click on auto-add SSH key or add your SSH key

- Choose Branch name (ex: main or master branch) and click Next
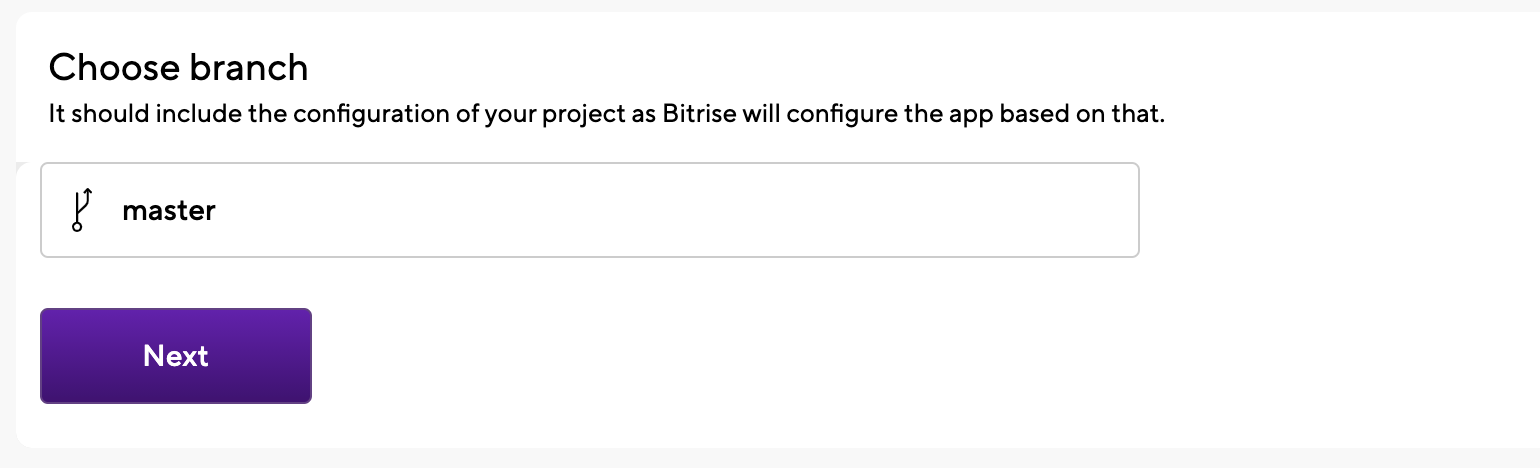
- Once we click next, Bitrise will run a validation with your repository and configuration

- After validating the Project build configuration will display successfully (ex: Android App)

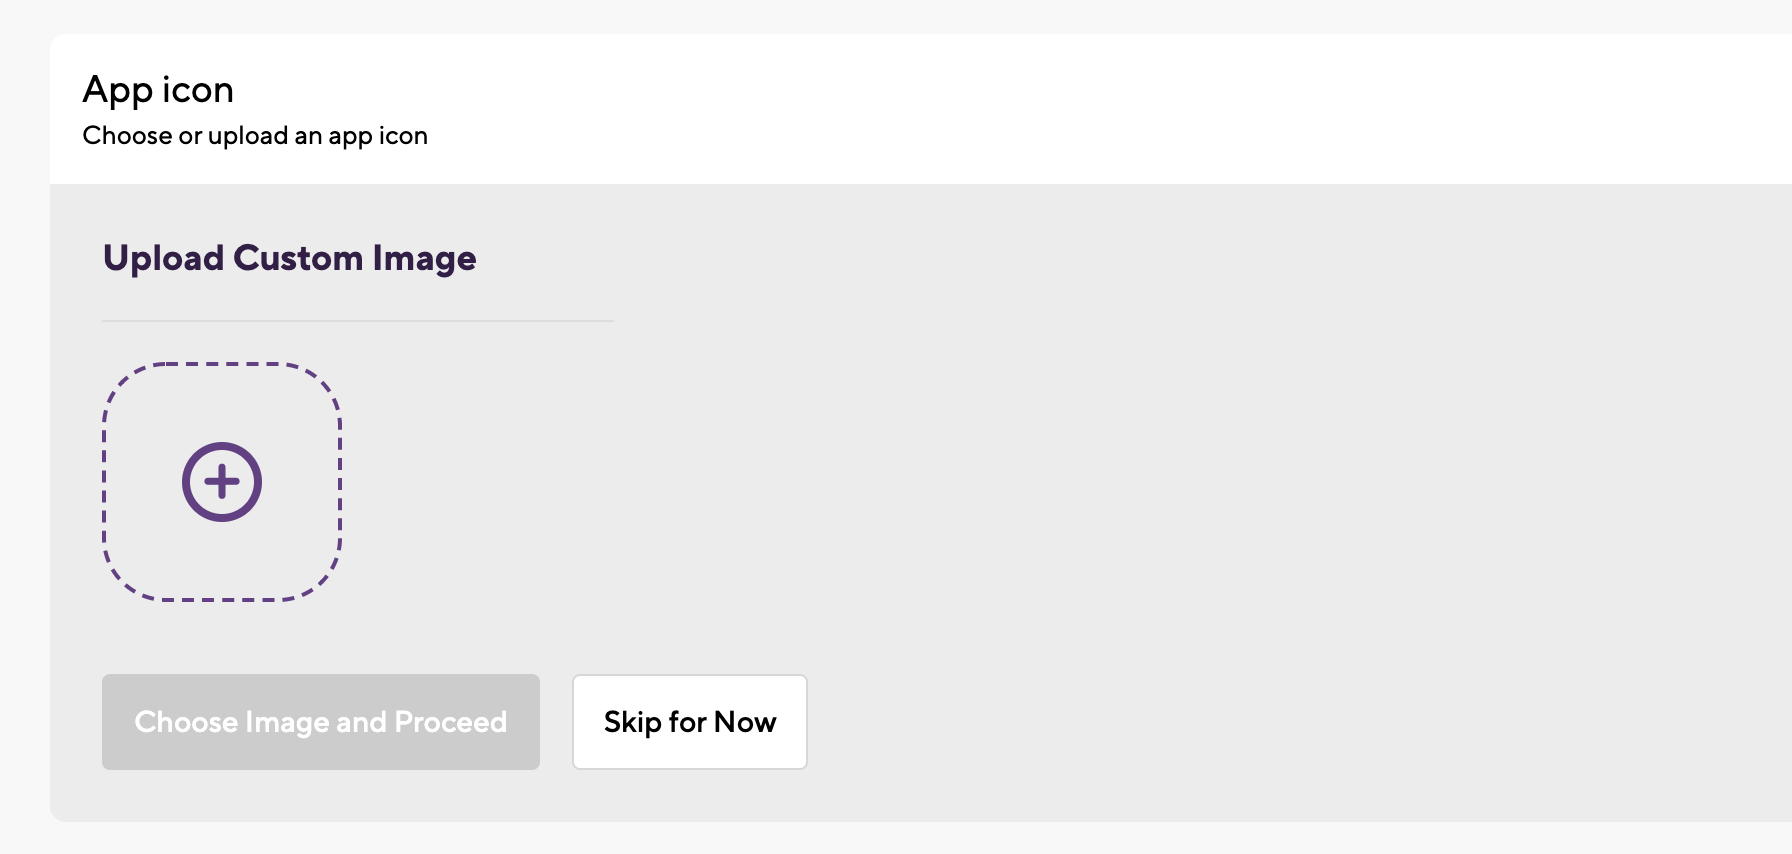
- Click the confirm button after reviewing the workflow stack. You can add the app icon as well
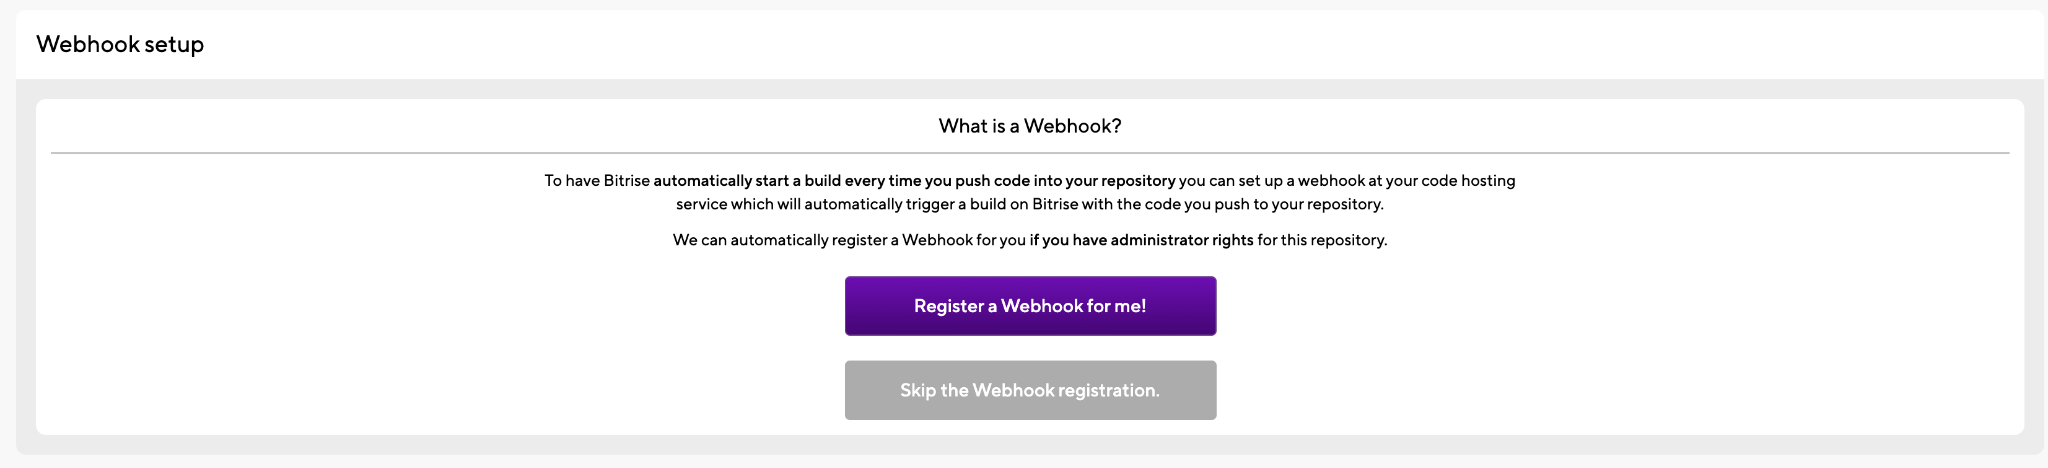
- The final step is Webhook setup, we just need to click on Register a Webhook for me! Button and you will trigger your first android build for your project 🚀 🎉

- You will redirect to the build log and you can check the steps and the build status.
- In the end, you will find a summary of all the tasks that you run during the build with time and Steps name and you can also download logs or check the Apps and artifacts.
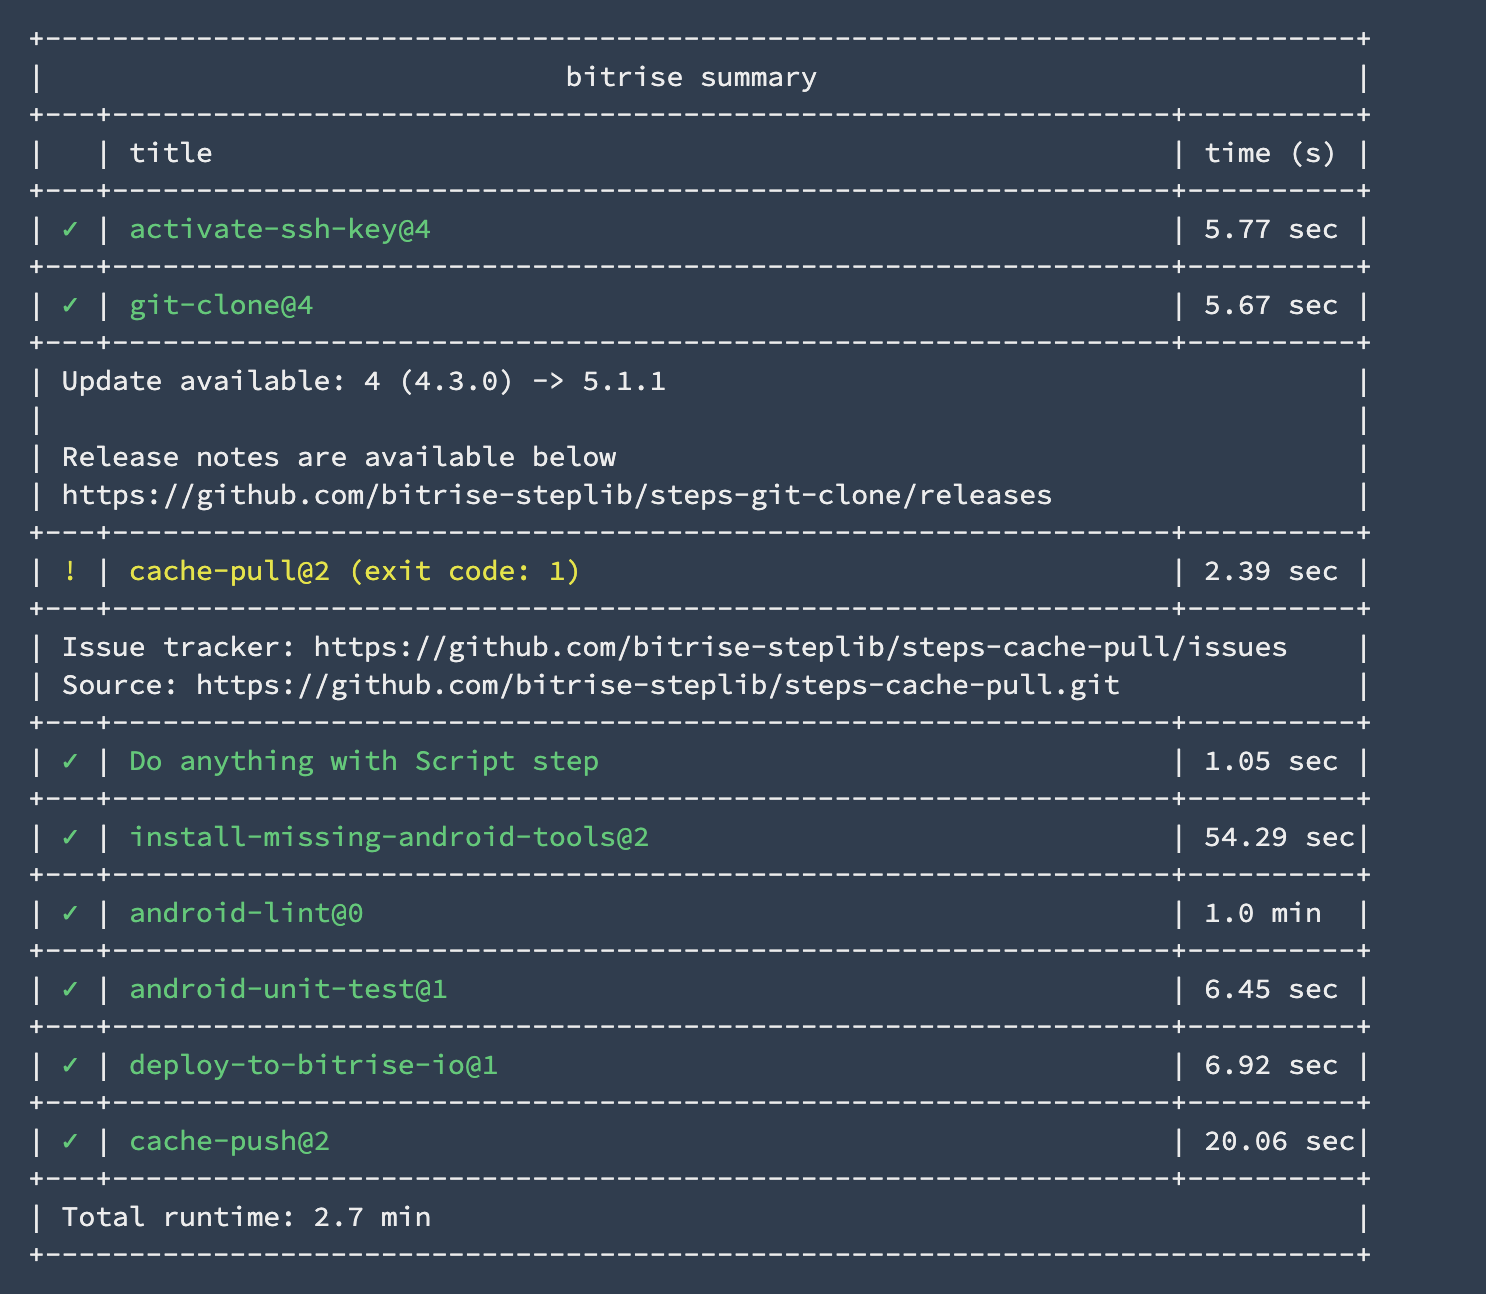

- And you will also receive an email notification about the build status.

NOTE: As you noticed that we didn’t need to configure anything related to the infrastructure or the stack because Bitrise is managing all of these things instead of us for example Install and configure Java, Android SDK, Gradle, or Git.
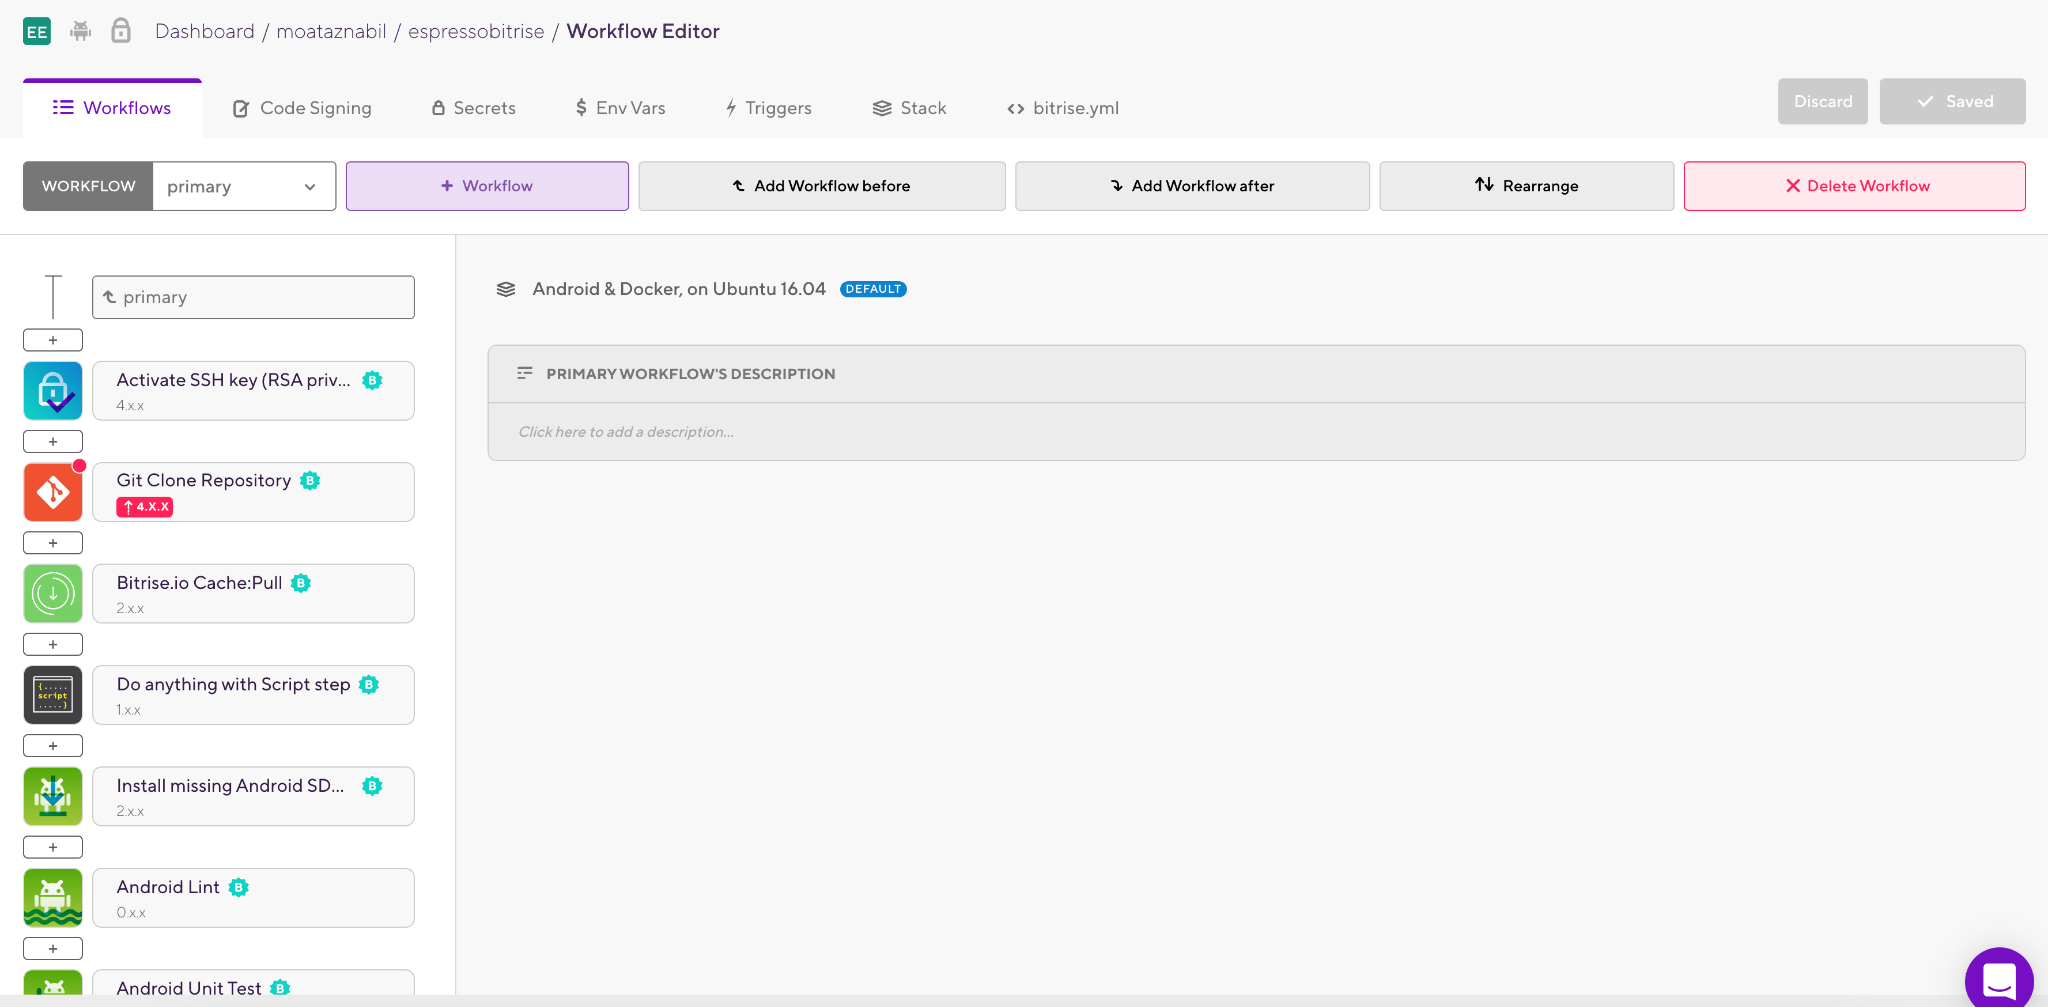
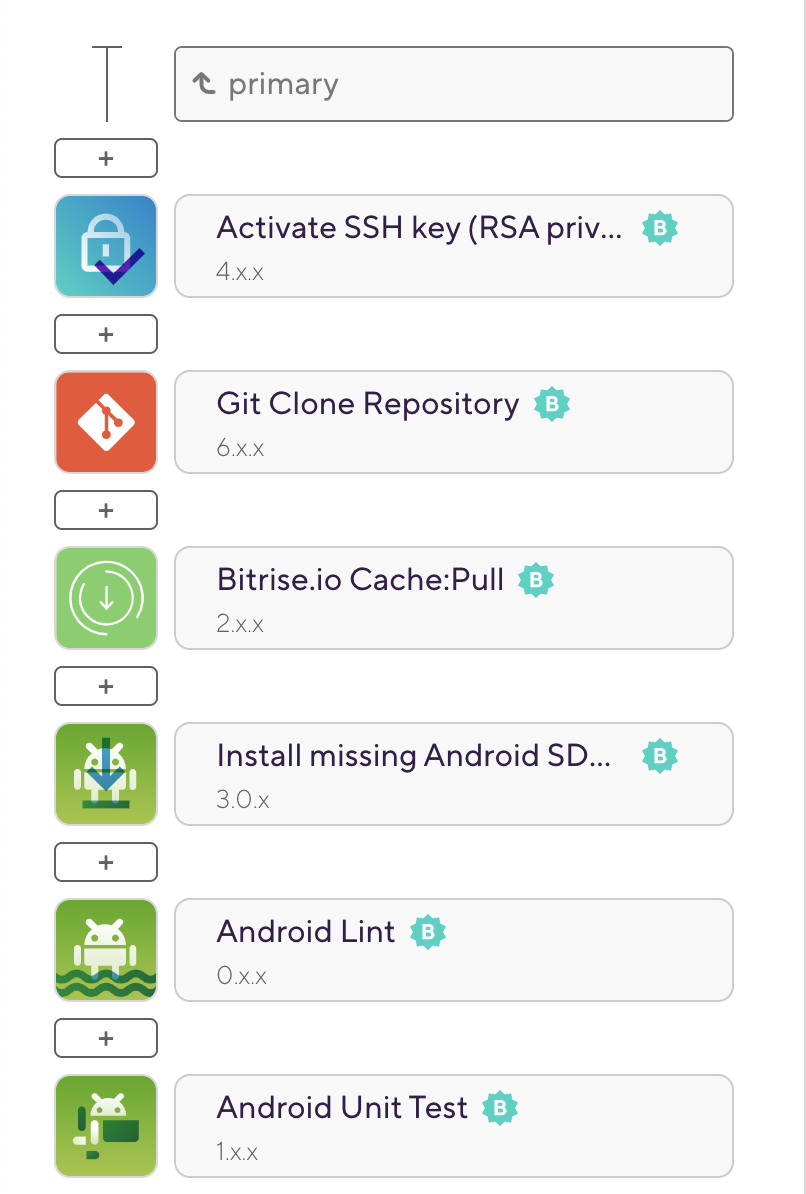
- Now let’s open the Workflow Editor to start to add/removing all the required steps that we need to build our app
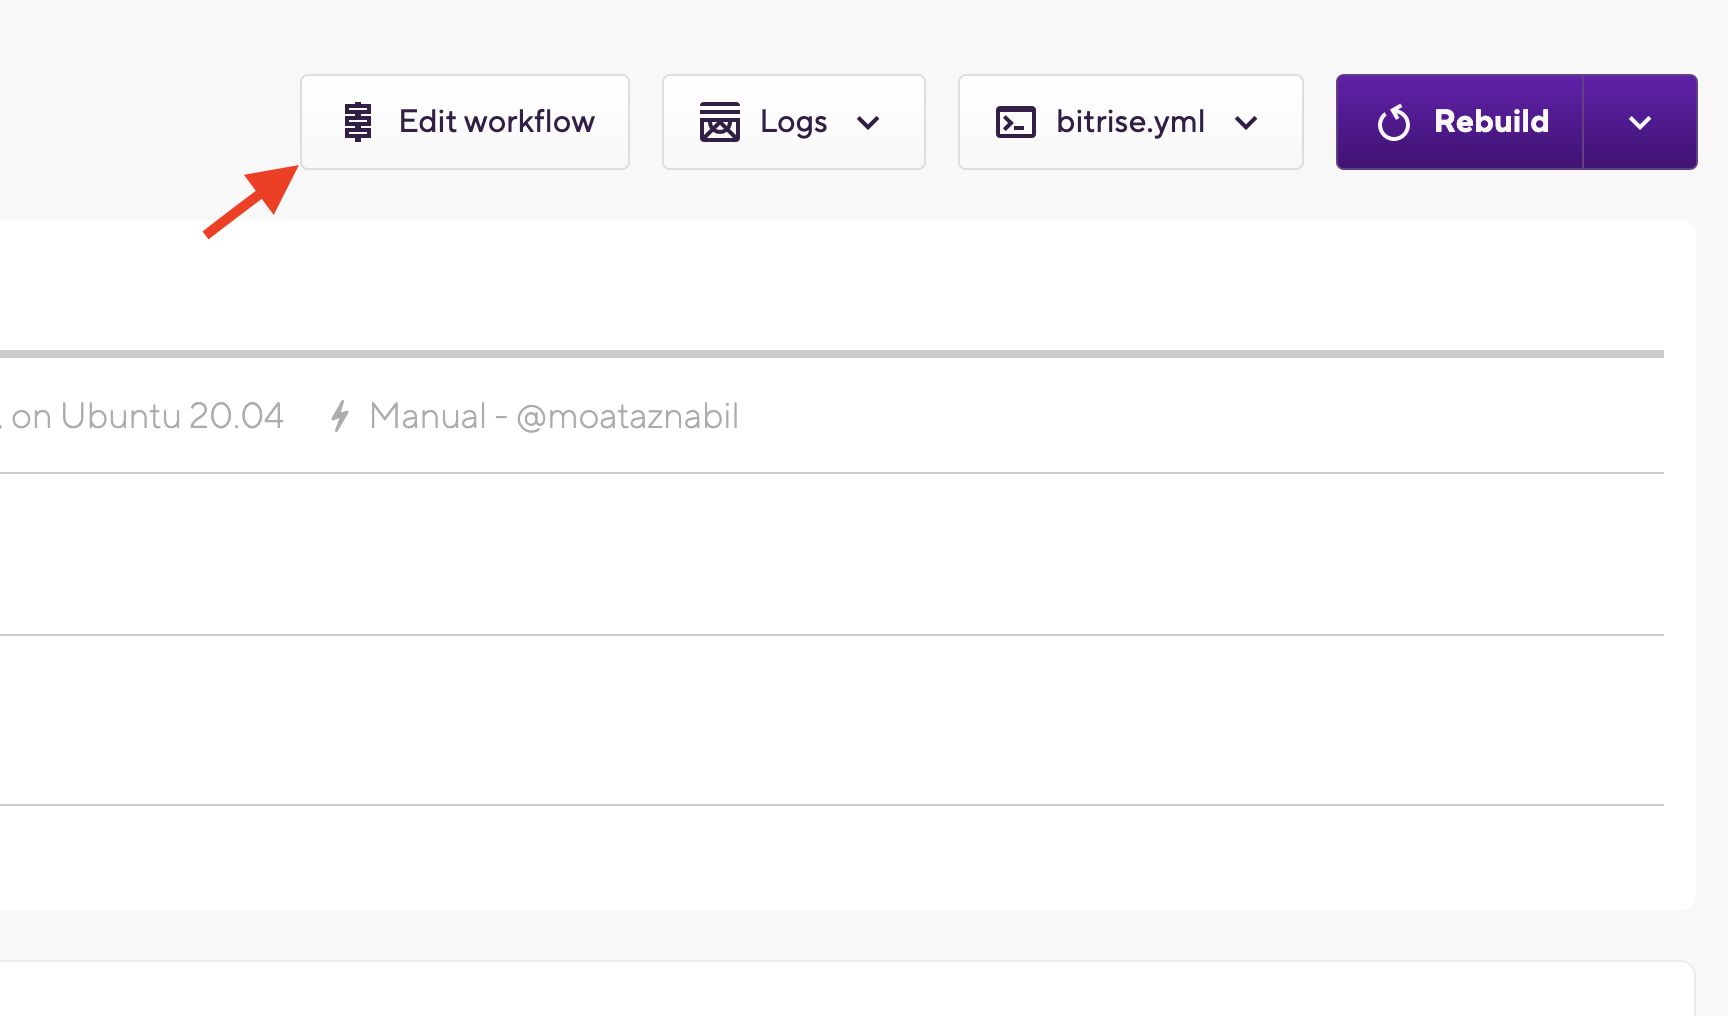
- In the Workflow Editor (the Bitrise visual editor for adding steps in our pipeline or configure or remove the existing steps) you will find that we have already predefined Steps were added.
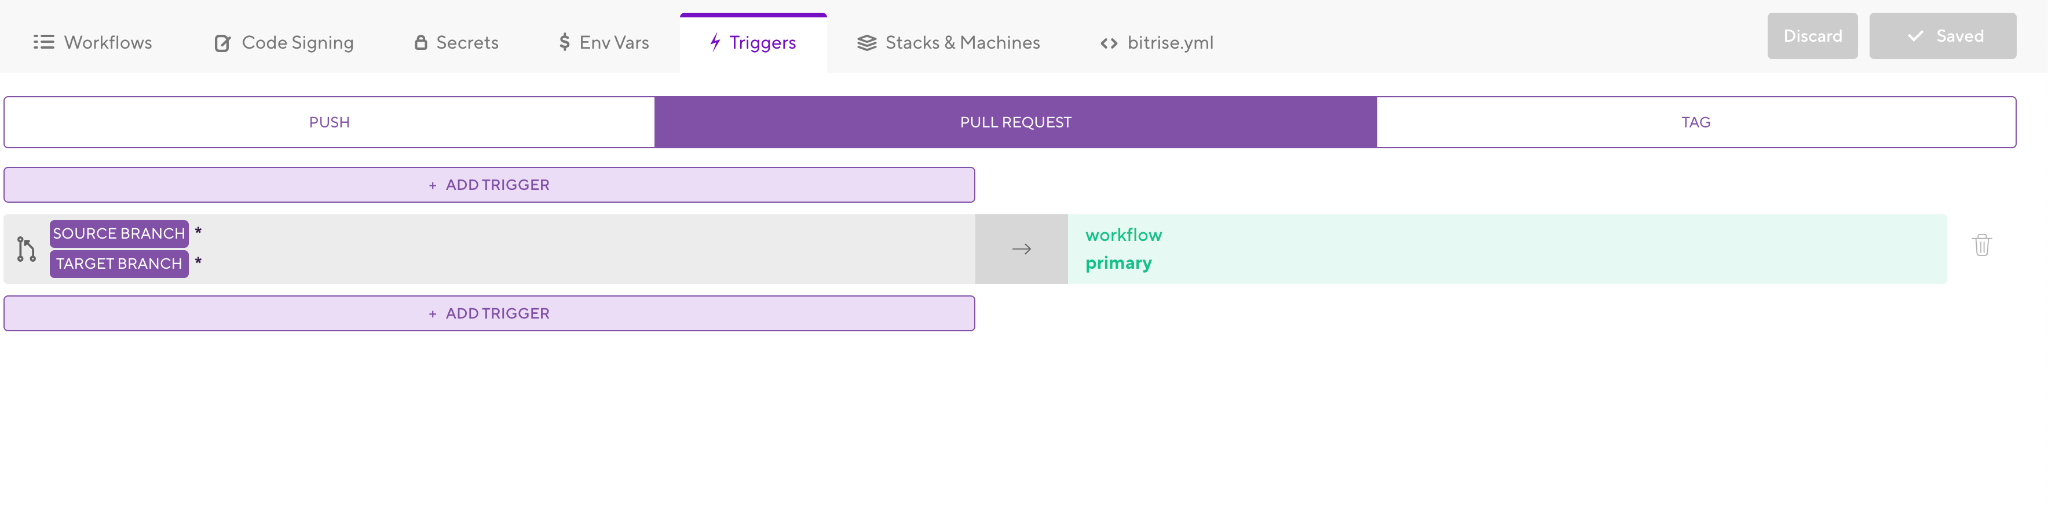
- Click on the Secrets tab to add your Environment variables such as AWS Access Key, AWS Secret Key, and the AWS Region.

- Click on Workflow Editor Tab to start adding any missing steps into our CI/CD workflow
TIP: Bitrise has 330+ integration Steps in different categories for all mobile platforms.

- In the end, your Android CI/CD Workflow can include various Steps to build, test and deploy your app easily and quickly:

- To run your Workflow, there are different ways to do that, you can use Gitflow if you have different branches or manually if you want to trigger it immediately.
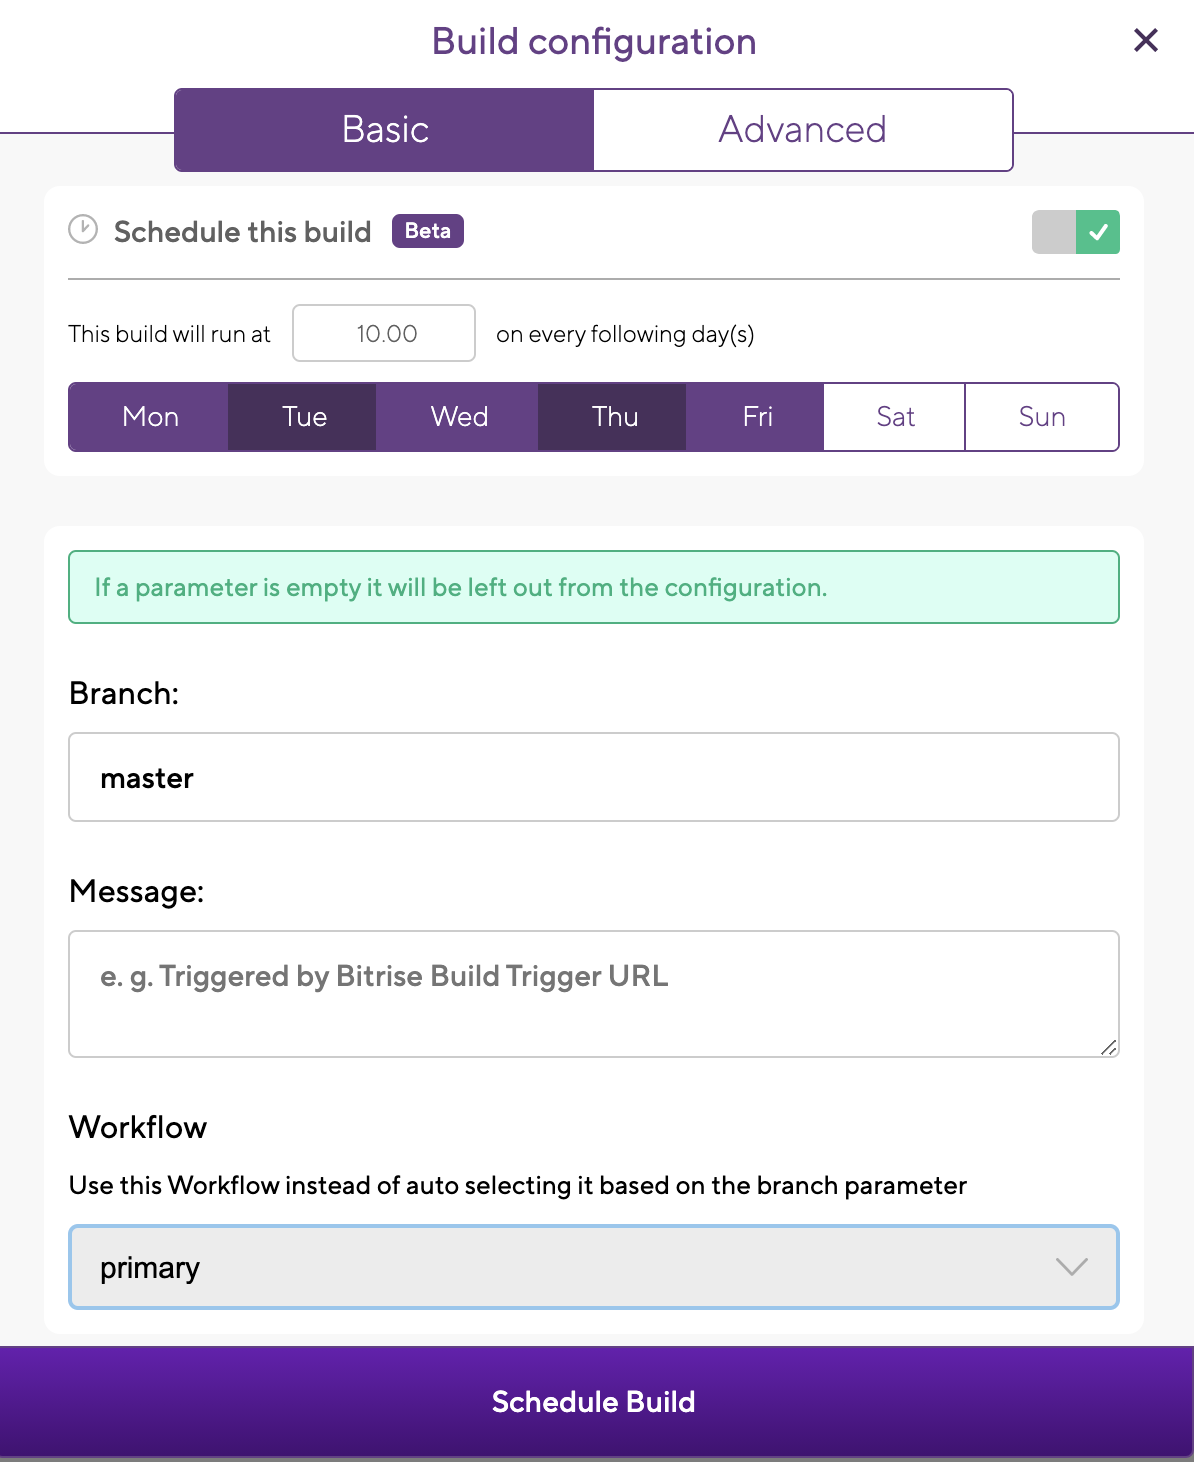
Or you can click on the builds and click on the Start/Schedule Build button

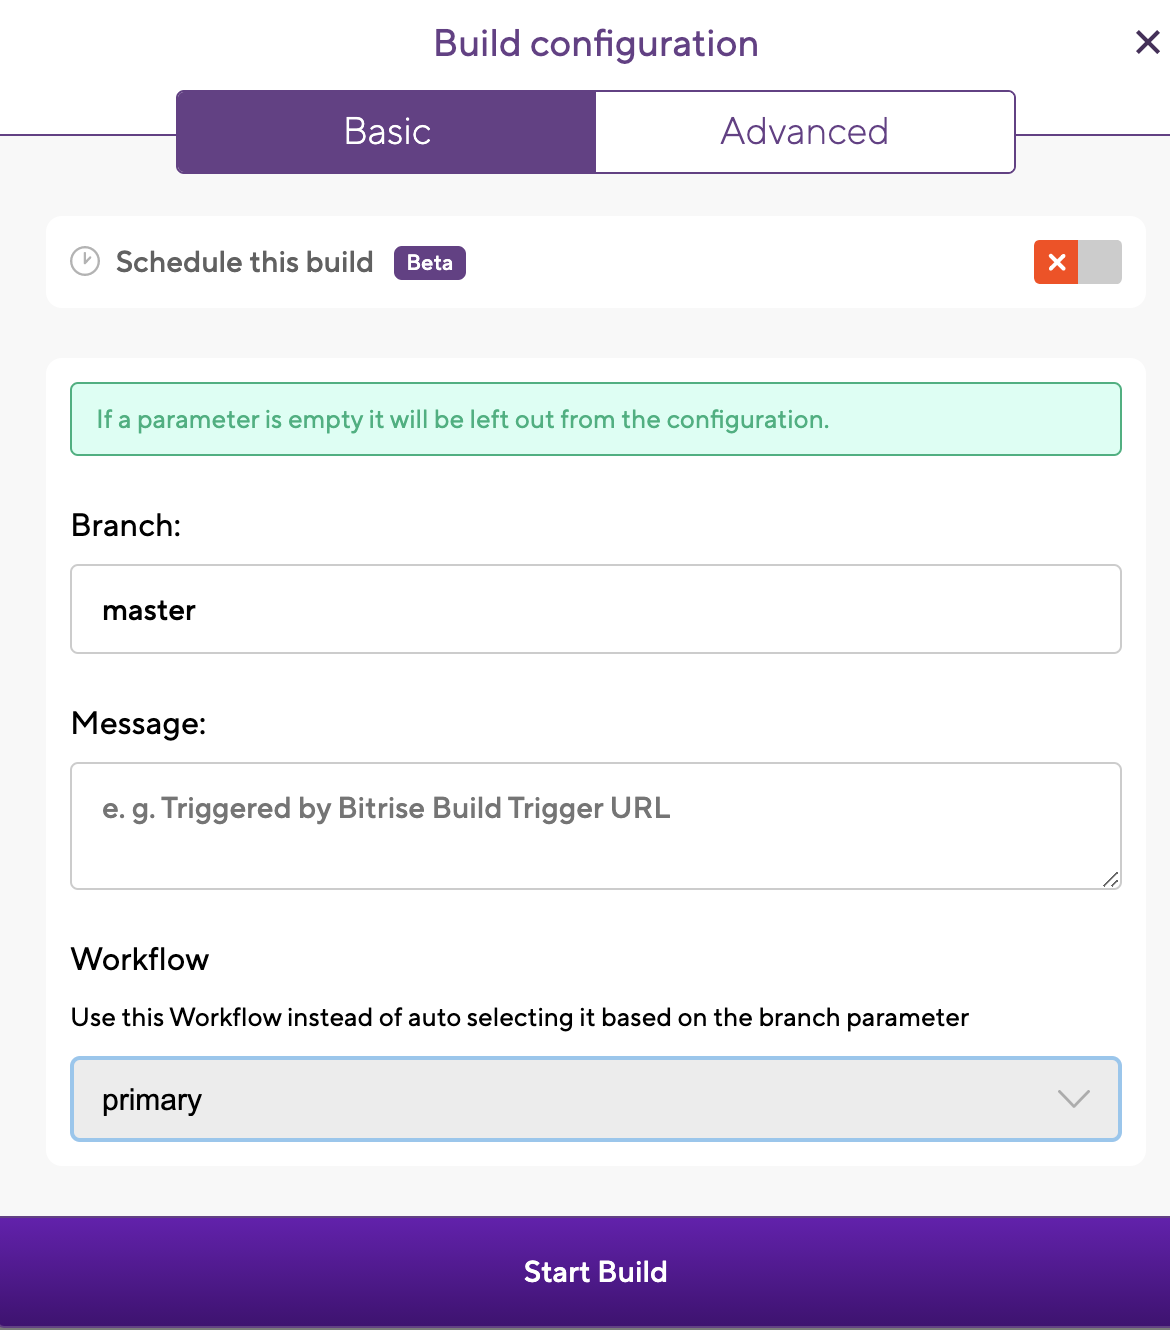
TIP: If you want to schedule the build to run nightly you can also configure it easily by selecting the date/time, branch name, and the workflow name

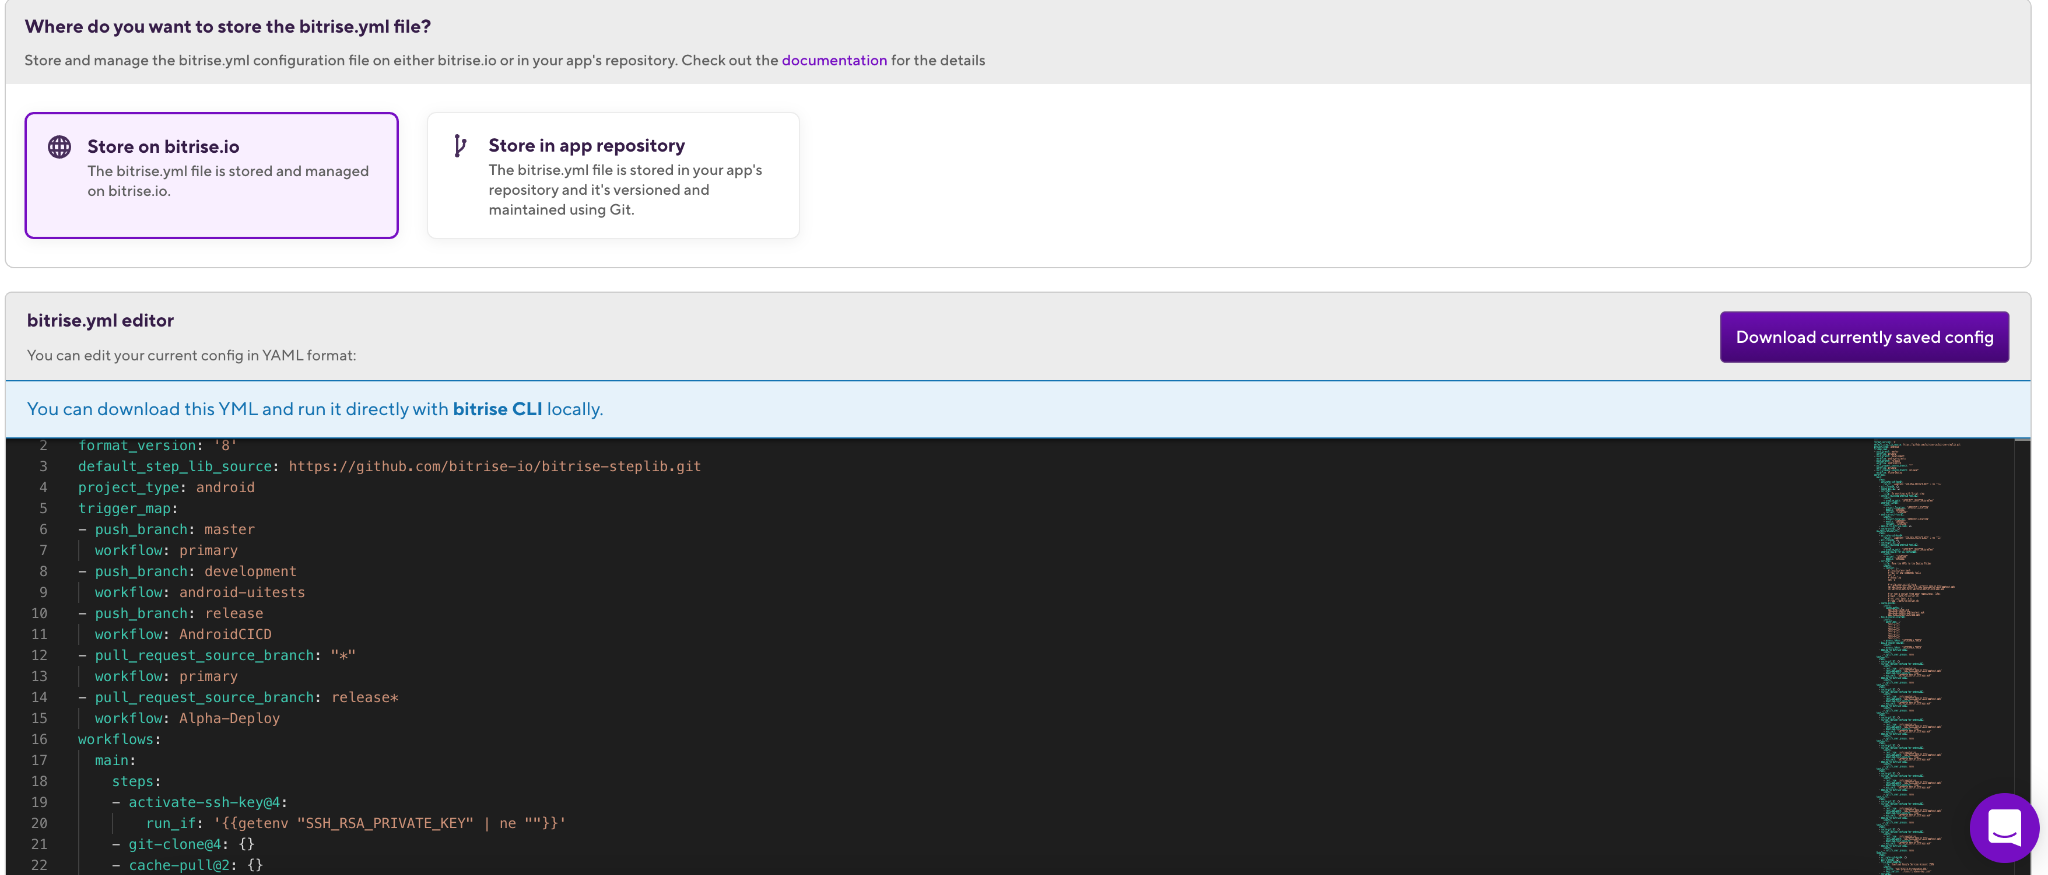
TIP: You can find the bitrise.yml file including all the Steps that we added in the Workflow Editor and you can save it in your repository or leave it on the Bitrise.io website.
In the end, we successfully integrated our Android app with AWS Amplify to Bitrise easily and we can now start building and releasing our applications smoothly with no extra effort.
Happy building!


.jpg)
