What’s Appium?
Appium is an open-source project and ecosystem of related software, designed to facilitate UI automation of many app platforms, especially for mobile apps such as iOS, Android, and Flutter.
Using Appium, you can automate your UI testing across any number of platforms in a standard way. Many tools allow UI automation on platforms, but these are typically platform-specific native tools such as Espresso for Android and XCUITest for iOS and require specific programming language knowledge and toolchains.
The Appium framework aims to integrate all these automation technologies into a stable interface accessible through the most popular programming languages including Java, Python, Ruby, C#, and Javascript.
Overview of Appium 2.0
Appium 2.0 (still beta) reenvisions Appium as a platform where “drivers” and “plugins” can be easily created and shared independently.
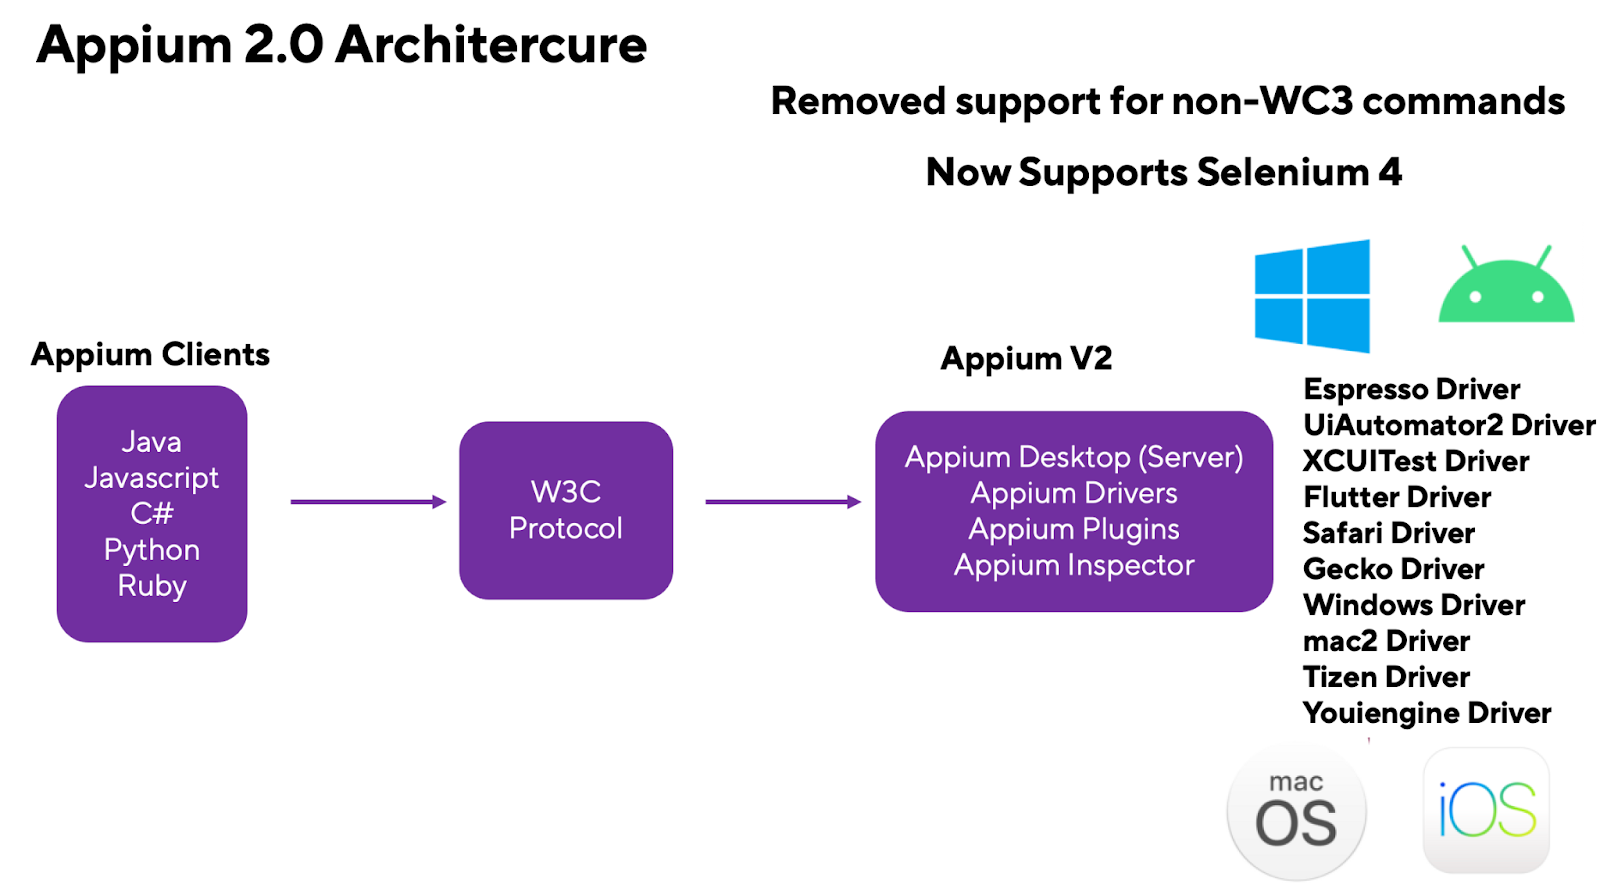
- Drivers: gives you the ability to install and work with de-coupled drivers based on your application platform (iOS, Android, Windows OS, Flutter, such as Espresso driver “appium driver install espresso”.
- Plugins: gives you the ability to modify the Appium framework by adding new features via plugins and through integrations with other technologies such as the images plugin: “appium plugin install images”, then activate the plugin with your server by “appium --use-plugins=images”
- Appium Desktop: is still available, but now comes in two packages:

- With Appium 2.0, you should also ensure you’re sending W3C standard capabilities within your test code such as the following capabilities:
{
  "platformName": "Android",
  "appium:platformVersion": "9",
  "appium:deviceName": "emulator-5554",
  "appium:automationName": "Espresso",
  "appium:app": "app-debug.apk"
}
Getting started with Appium 2.0
Before getting started with Appium v2 you need to know the requirements, then with Appium 2.0 you need to follow the following steps:
Step 1: Install Appium v2
npm install -g appium@next
🗒️NOTE: Currently, you must use appium@next instead of just appium. Once Appium 2.0 has been officially published, you can simply use appium.
To make sure which appium version is installed, run the following command:
appium -vThe output should be 2.0.0-beta.46
After installing Appium v2 you will have the ability to extend the CLI with plugin and driver commands.
Step 2: Install an Appium driver and its dependencies
To install the Appium driver and its dependencies, we'll be using the Espresso, XCUITest, and Flutter drivers.
appium driver install espresso
appium driver install xcuitest
appium driver install flutter
To make sure that all the drivers are installed successfully, run the following command:
appium driver list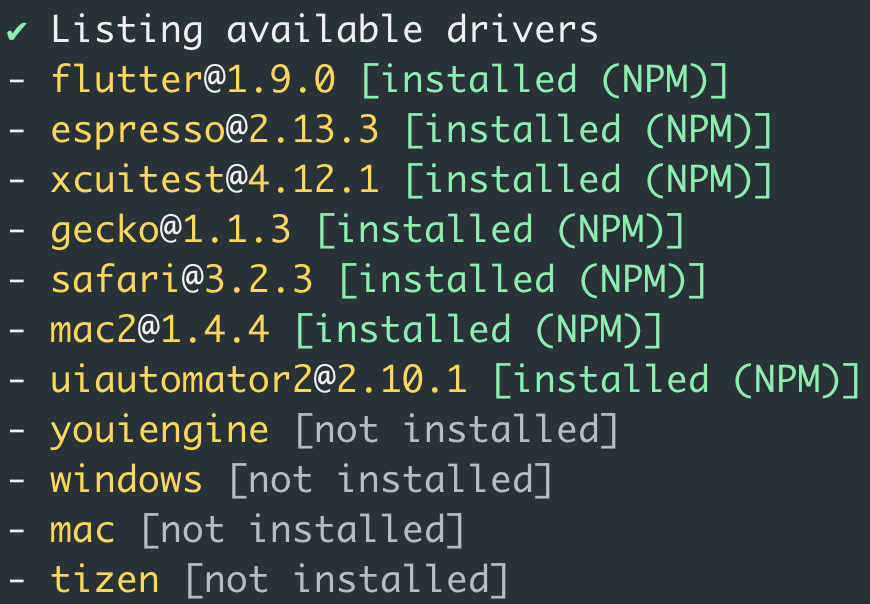
Step 3: Install the plugins
To install the plugins, run the following command to get a list of the available plugins and then install any of them:
appium plugin list
To install any plugin, such as images, use the following command:
appium plugin install images
And to use it with the Appium server, use the following command:
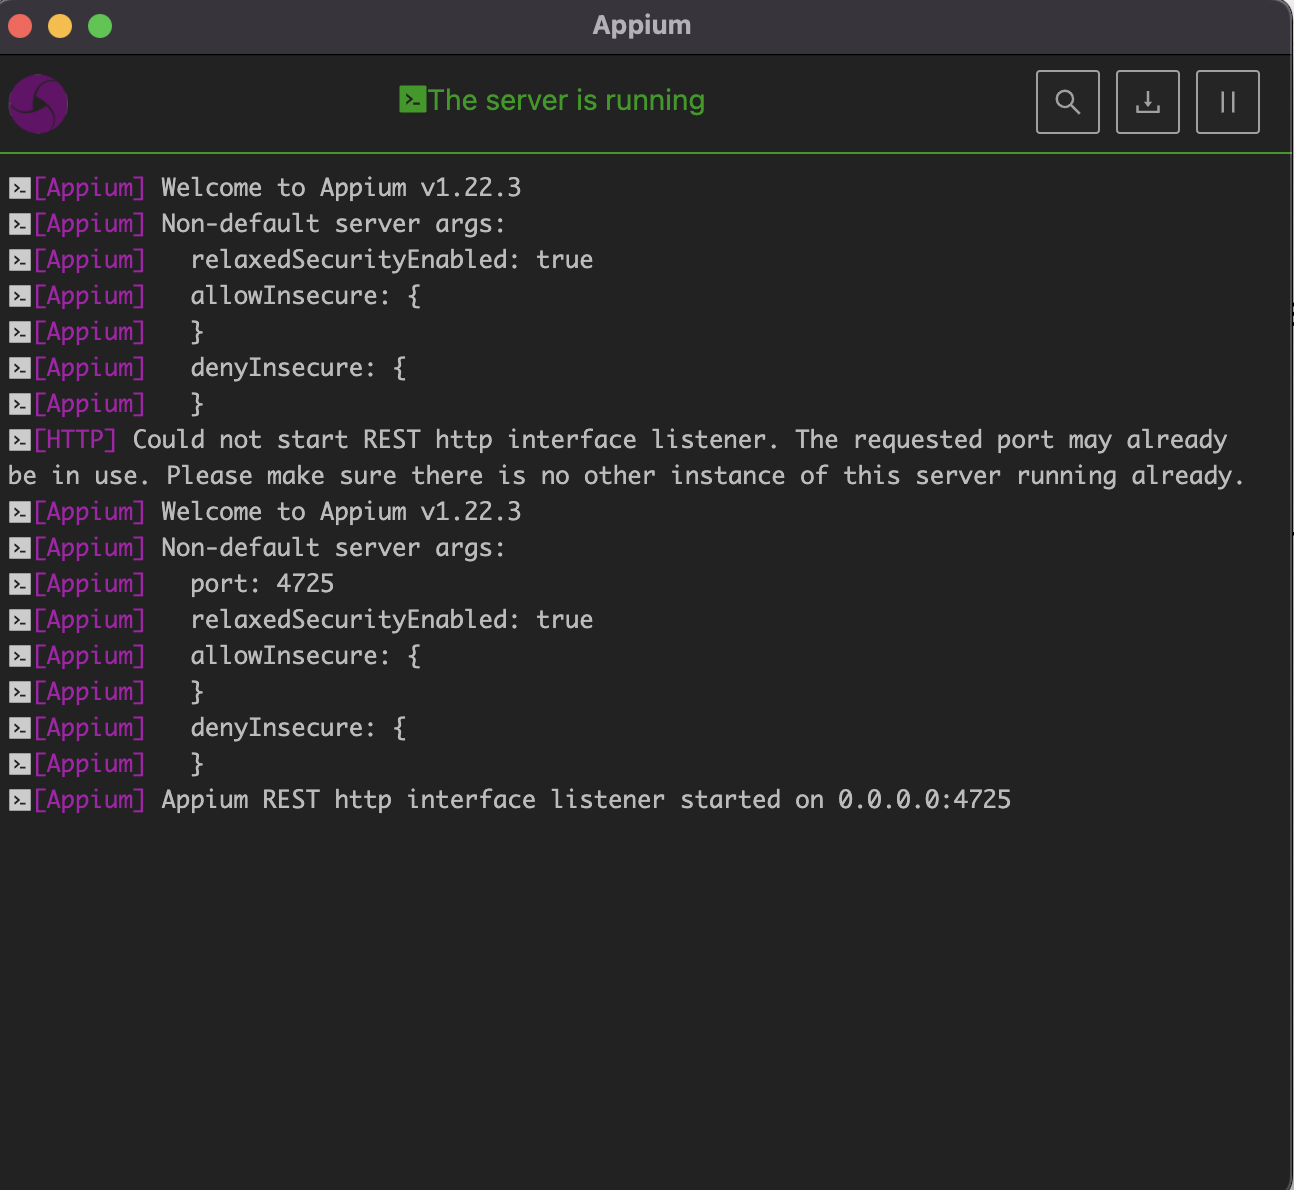
appium --use-plugins=imagesTo run the Appium Server, use the Server GUI or the command line, for example:
appium server -ka 800Or the GUI application:
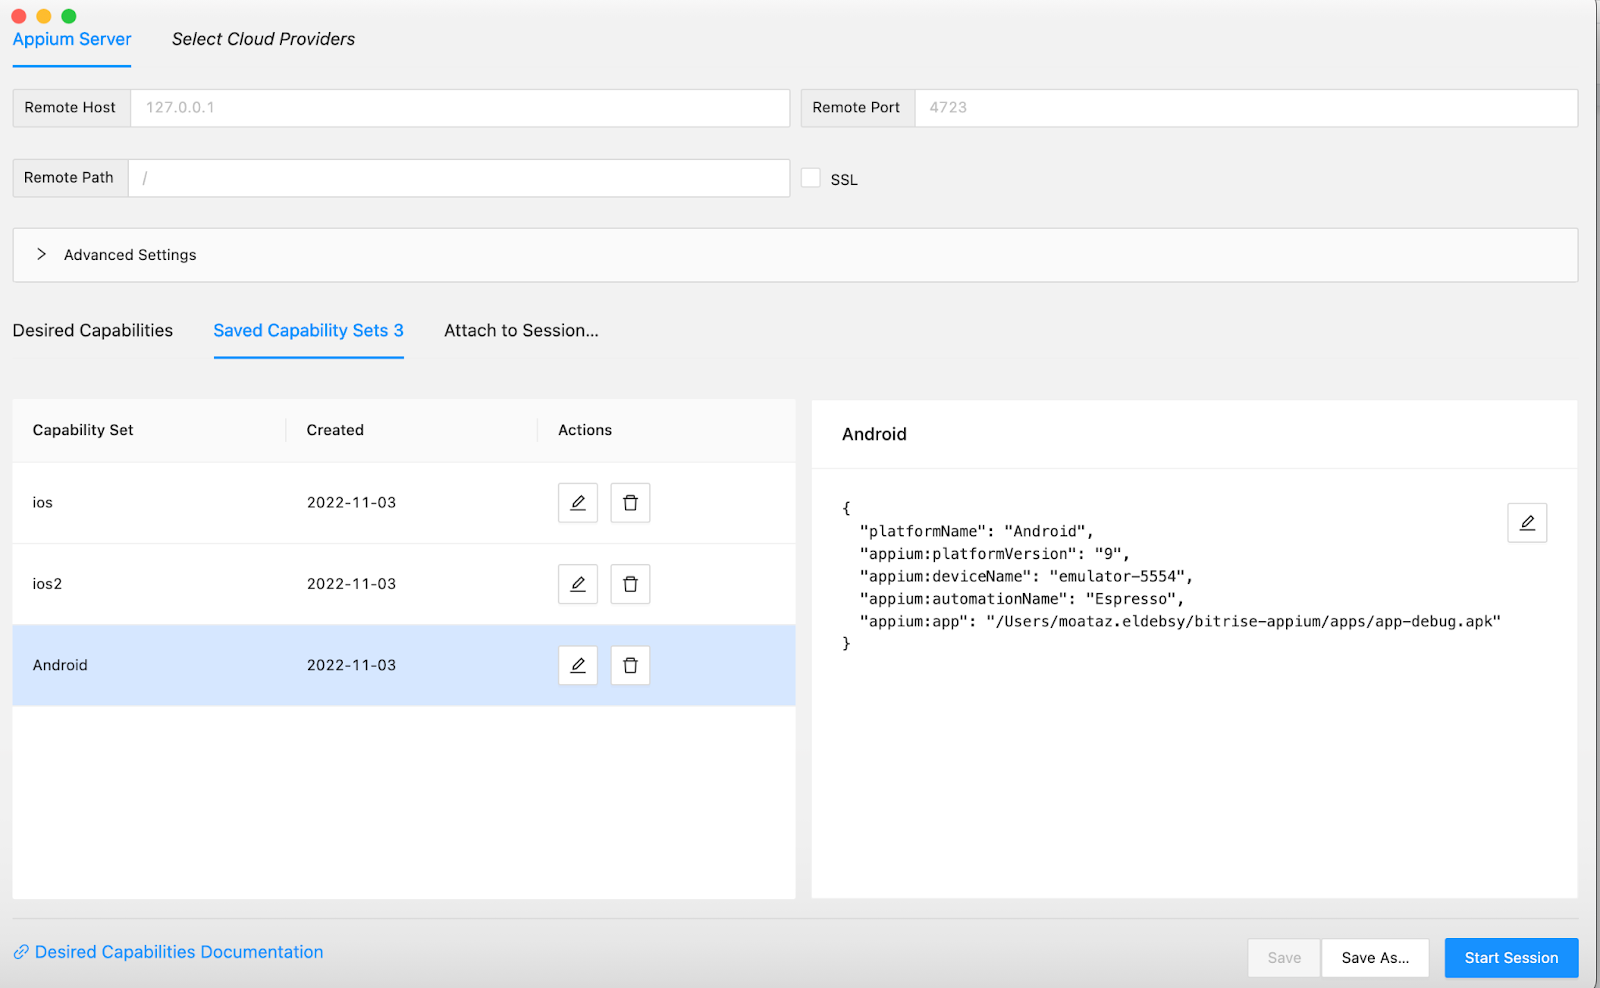
And if you want to inspect the elements, you need to open the Inspector application:
Step 4: Install the Appium client library
Install an Appium client library in your language or choice (we’ll be using the Java client with Maven).
<dependency>
  <groupId>io.appium</groupId>
  <artifactId>java-client</artifactId>
  <version>${version.you.require}</version>
  <scope>test</scope>
</dependency>
Step 5: Run an Appium automation script
Write and run a simple Appium automation script using a sample application.
public class AppiumAndroidTest {
    public static AppiumDriver driver;

    @BeforeClass
    public void Android_setUp() throws MalformedURLException {
        DesiredCapabilities capabilities = new DesiredCapabilities();
        capabilities.setCapability("appium:automationName", "espresso");
        capabilities.setCapability("appium:platformVersion", "9");
        capabilities.setCapability("appium:deviceName", "Android Emulator");
        capabilities.setCapability("platformName", "Android");
        capabilities.setCapability("appium:app", System.getProperty("user.dir") + "/apps/app-debug.apk");
        driver = new AndroidDriver(new URL("http://127.0.0.1:4723"), capabilities);
    }

    @Test
    public void calcDemo(){
        driver.findElement(By.id("buttonFive")).click();
        driver.findElement(By.id("buttonAdd")).click();
        driver.findElement(By.id("buttonFour")).click();
        driver.findElement(By.id("buttonEqual")).click();
    }

    @AfterClass
    public static void tearDown() {
        if (null != driver) {
            driver.quit();
        }
    }
}
You can find the full project in this GitHub repository.
Now, you can run your project locally, but as you know it’s required to have an Android Emulator and iOS Simulator installed.
The Appium Troubleshooting Guide
Using appium-doctor, you can verify your installation and manually install anything that is missing if necessary.
You will notice that appium-doctor is deprecated

And you can install it using the following command as mentioned here:
npm install @appium/doctor -gYou can check the iOS and Android setup by running the following command:
appium-doctorIf something is wrong, you can fix it manually and run the command again.
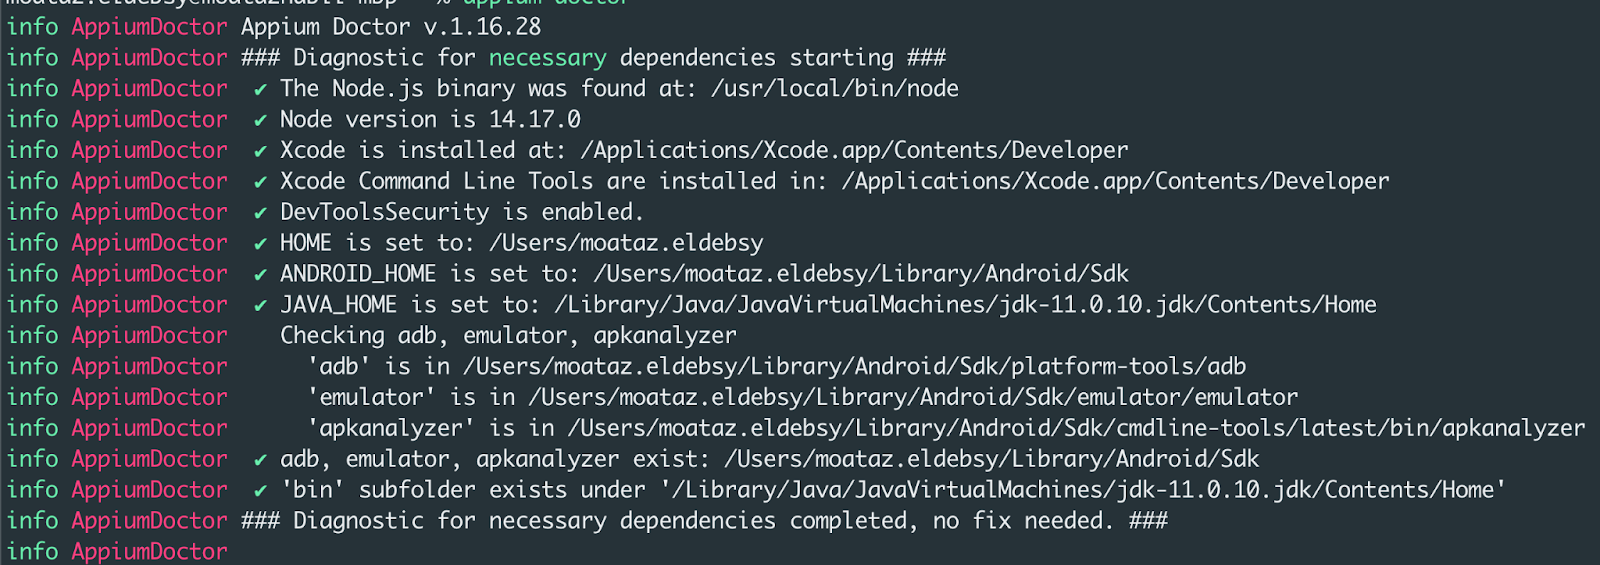
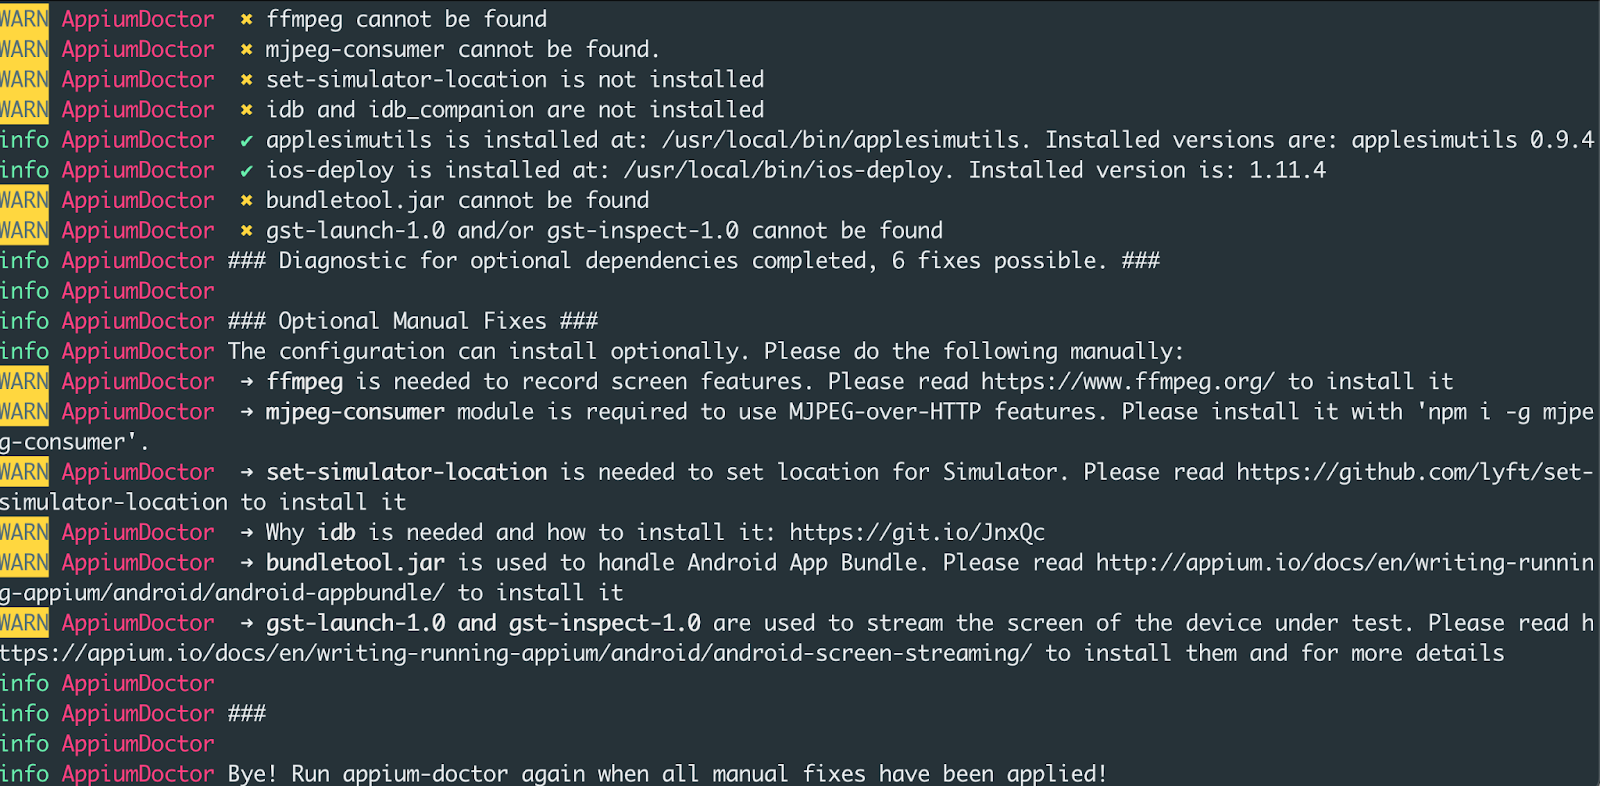
If you are facing issues with Appium with iOS apps — or can’t run your tests on iOS real devices — check out how to set up iOS real devices and also Enable the Developer Mode on the device.
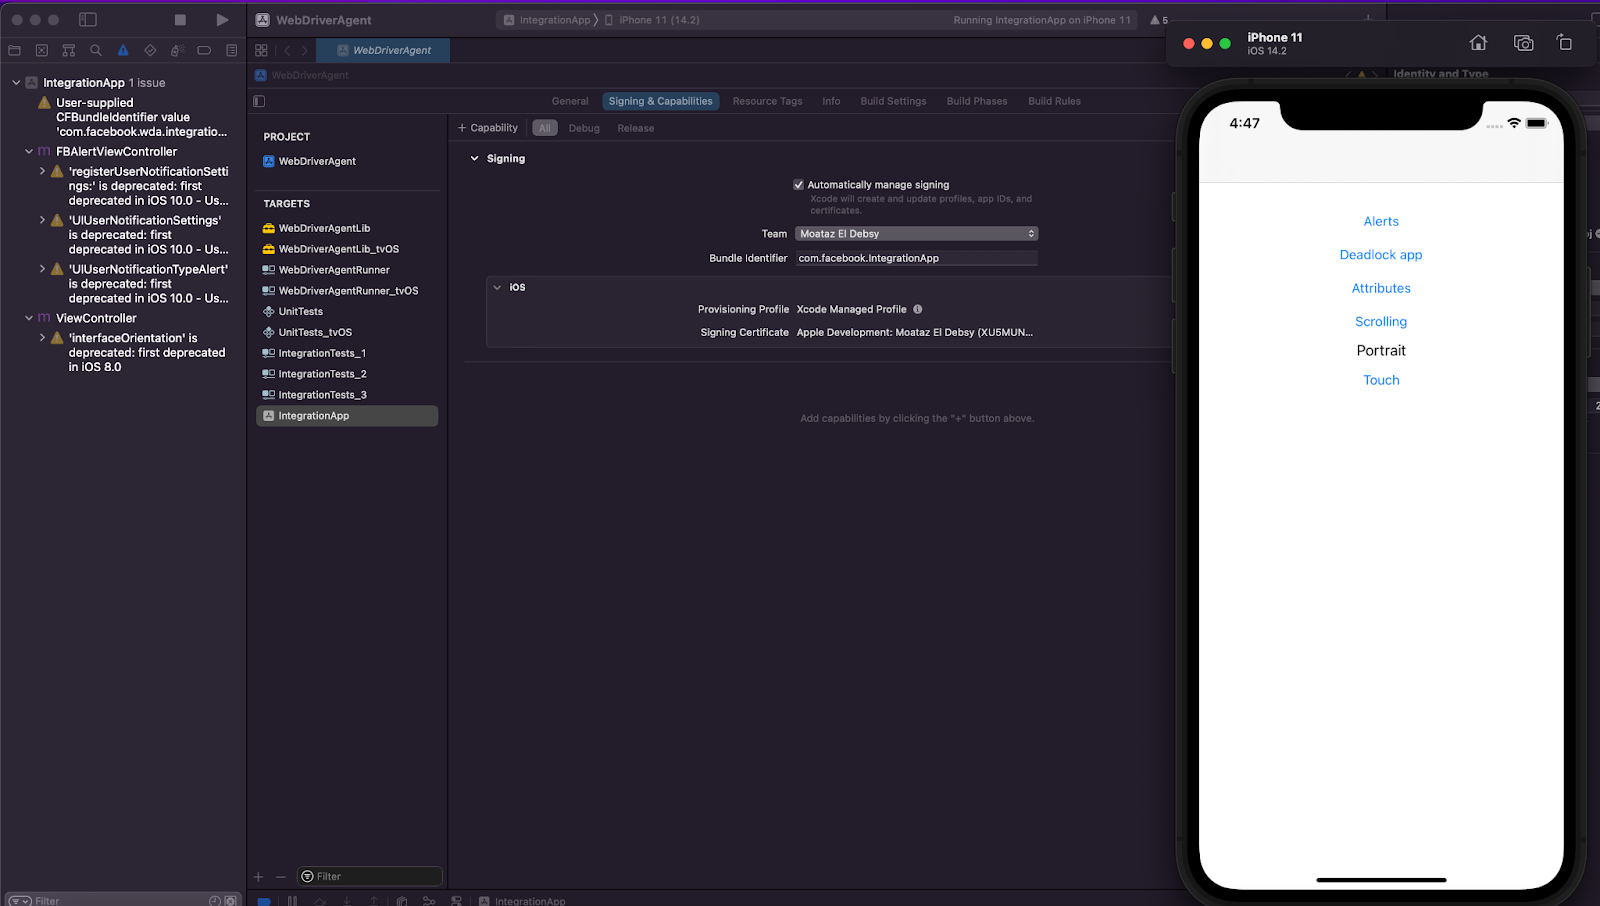
If you are facing a problem with the WebDriverAgent — or can’t be installed on the device — you can also try to locate the Xcode project. Add your team account in the code signing setting and try to build the app for an iOS device to make sure that there is no problem.
You can use the following command to find the project directory:
echo "$(dirname "$(find "$HOME/.appium" -name WebDriverAgent.xcodeproj)")"And the output will give you the path of the project

Open the project in Xcode, add a team or your developer account and build the project to make sure that there is no issue with the WebDirverAgent.
Migration from Appium 1.x to Appium 2.x
Here is a guide that walks you through some potential breaking changes and other useful tips for migrating your test code from Appium 1.x to Appium 2.x.
Utilize Bitrise's CI/CD Workflow to run Appium tests
Bitrise and Appium integrate seamlessly. You can run your test automation with Appium on virtual devices in the cloud without needing to use a 3rd party cloud service.
For testing mobile applications on Bitrise and Appium, you’ll be able to:
- Integrate test automation into your CI/CD pipelines.
- Multiple platforms can be used to scale your existing Appium testing.
- Using the Test Report add-on to find and fix bugs faster.
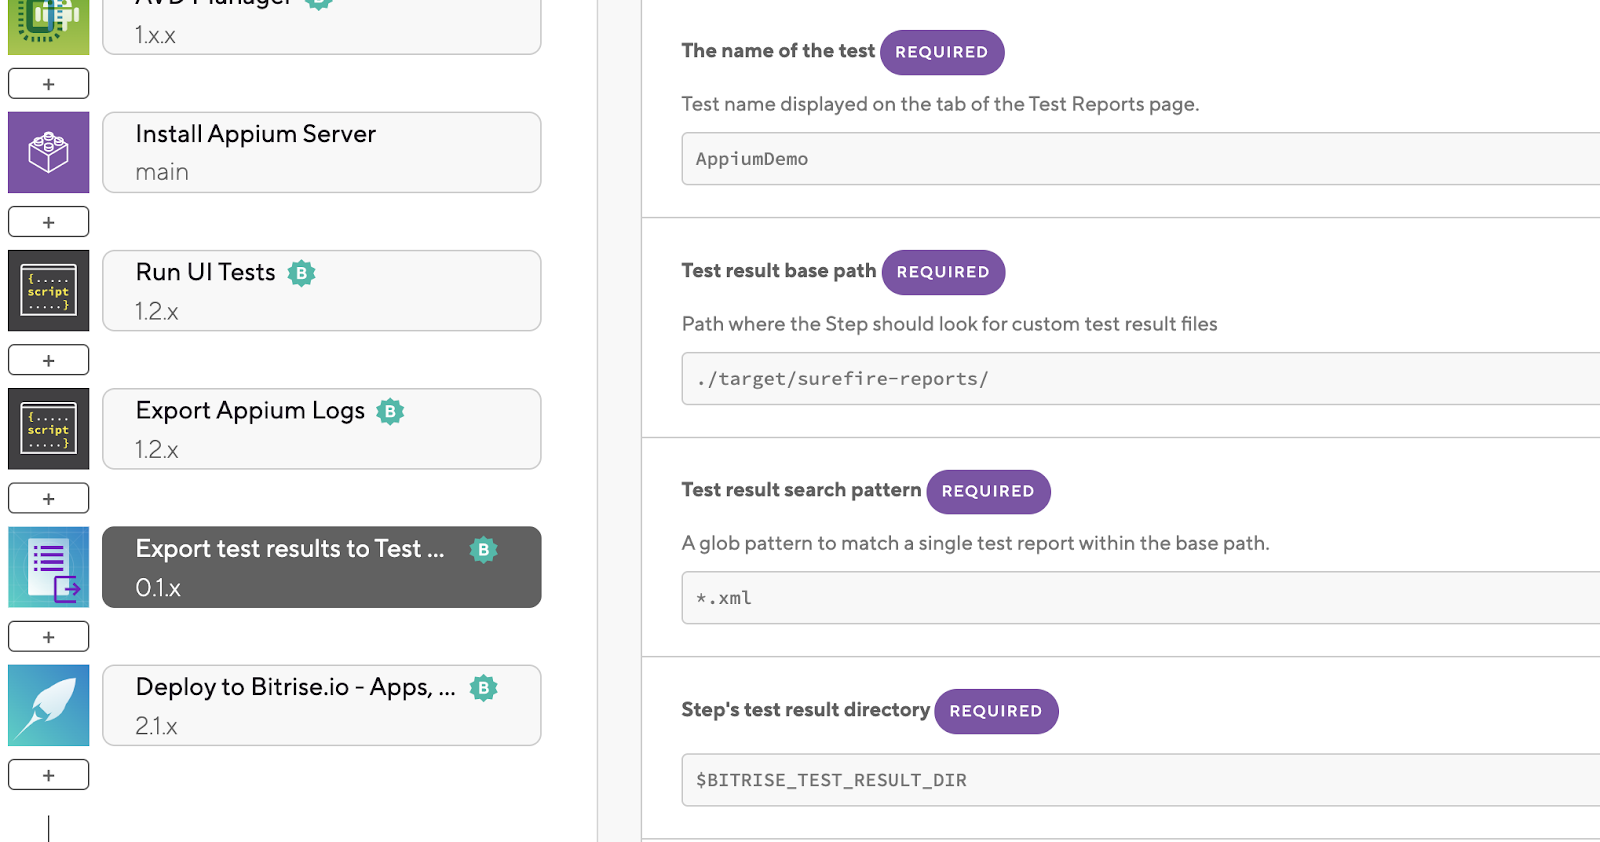
The integration is simple and straightforward, I created a Bitrise integration step to simplify the installation of the Appium Server, Drivers (XCUITest, Espresso, and Flutter) and run the server as a background task.
You need only to add the Step in your Bitrise Workflow and in case you need to run UI tests on Android you need to spin up the emulator first but with iOS, the execution will initialize the Simulator.
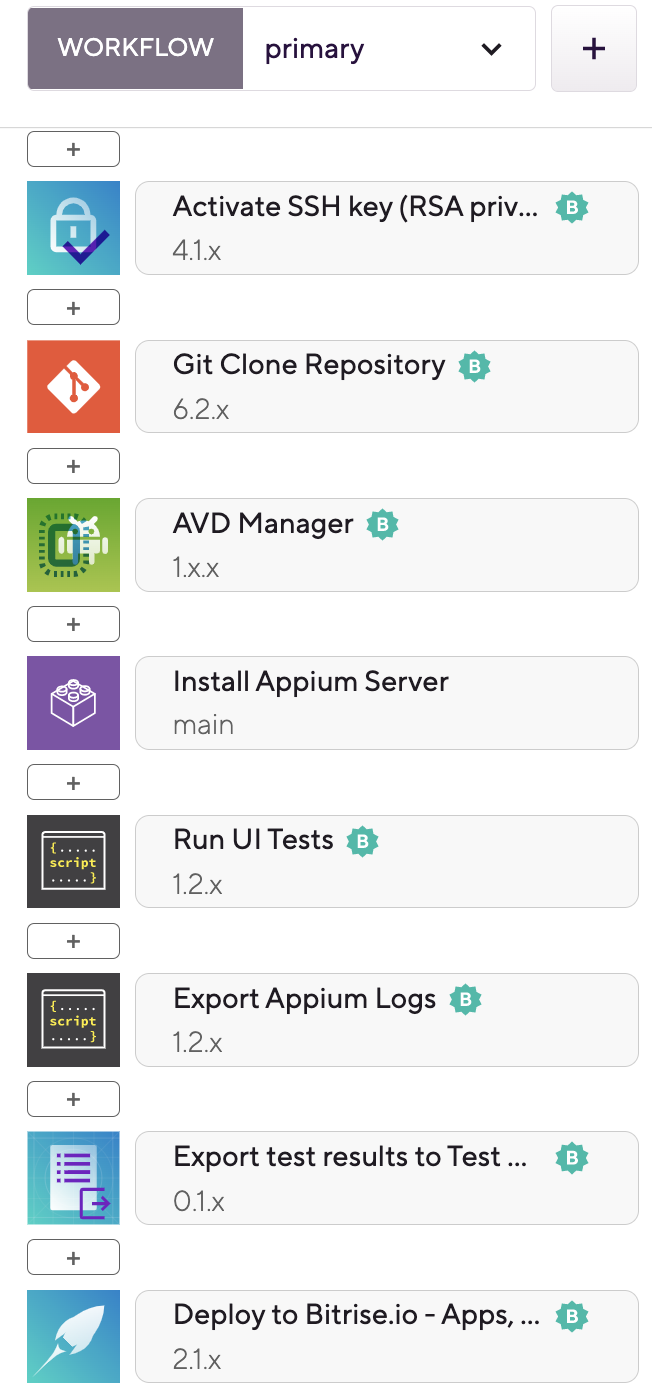

Run the UI tests via the Maven command

Copy the Appium Log to the Deploy directory to view it via the Artifacts section

Finally, export the test results to the Test Report add-on.
Run the Build and the results should be like the following images.
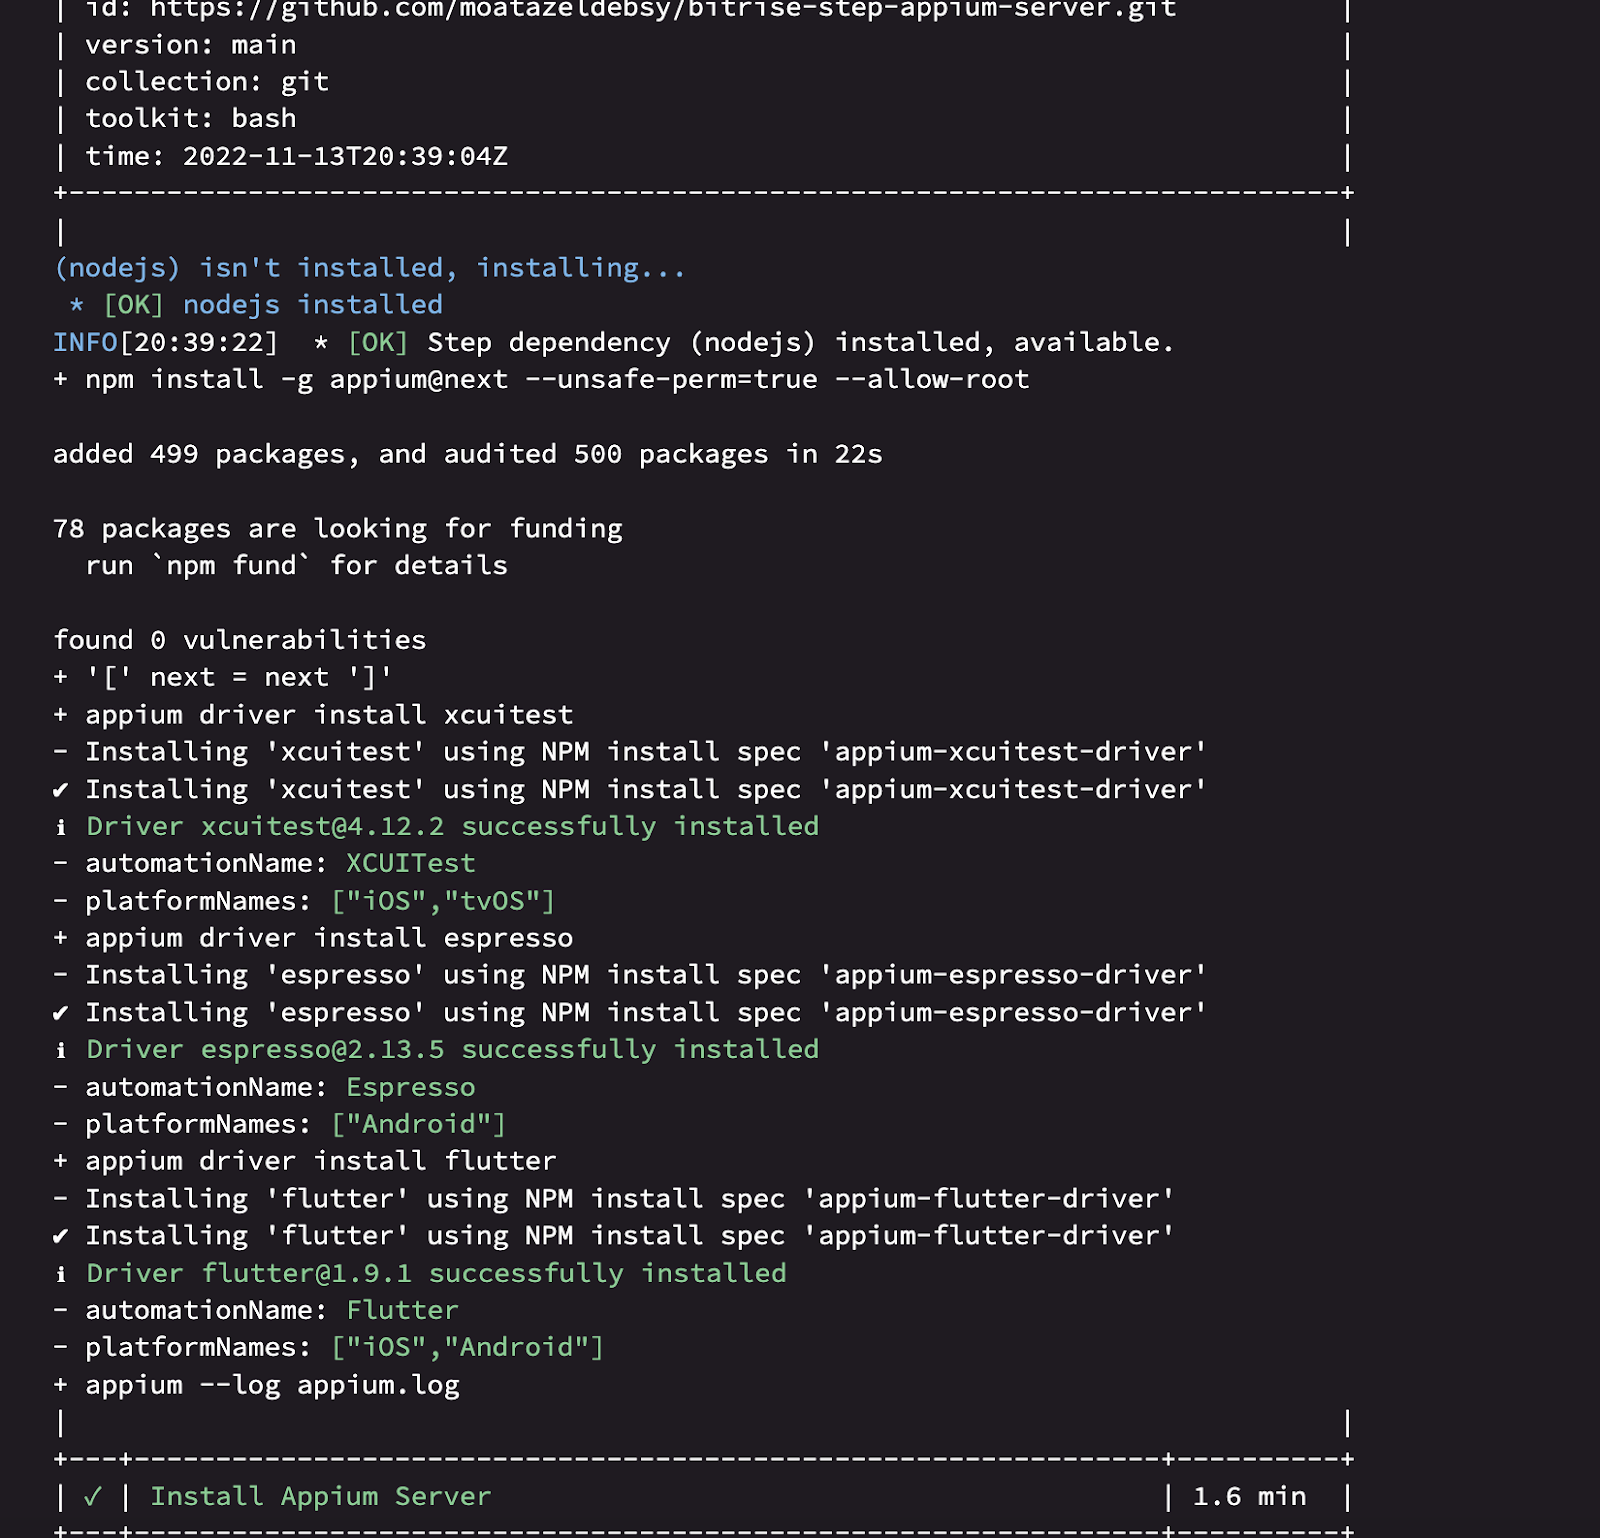
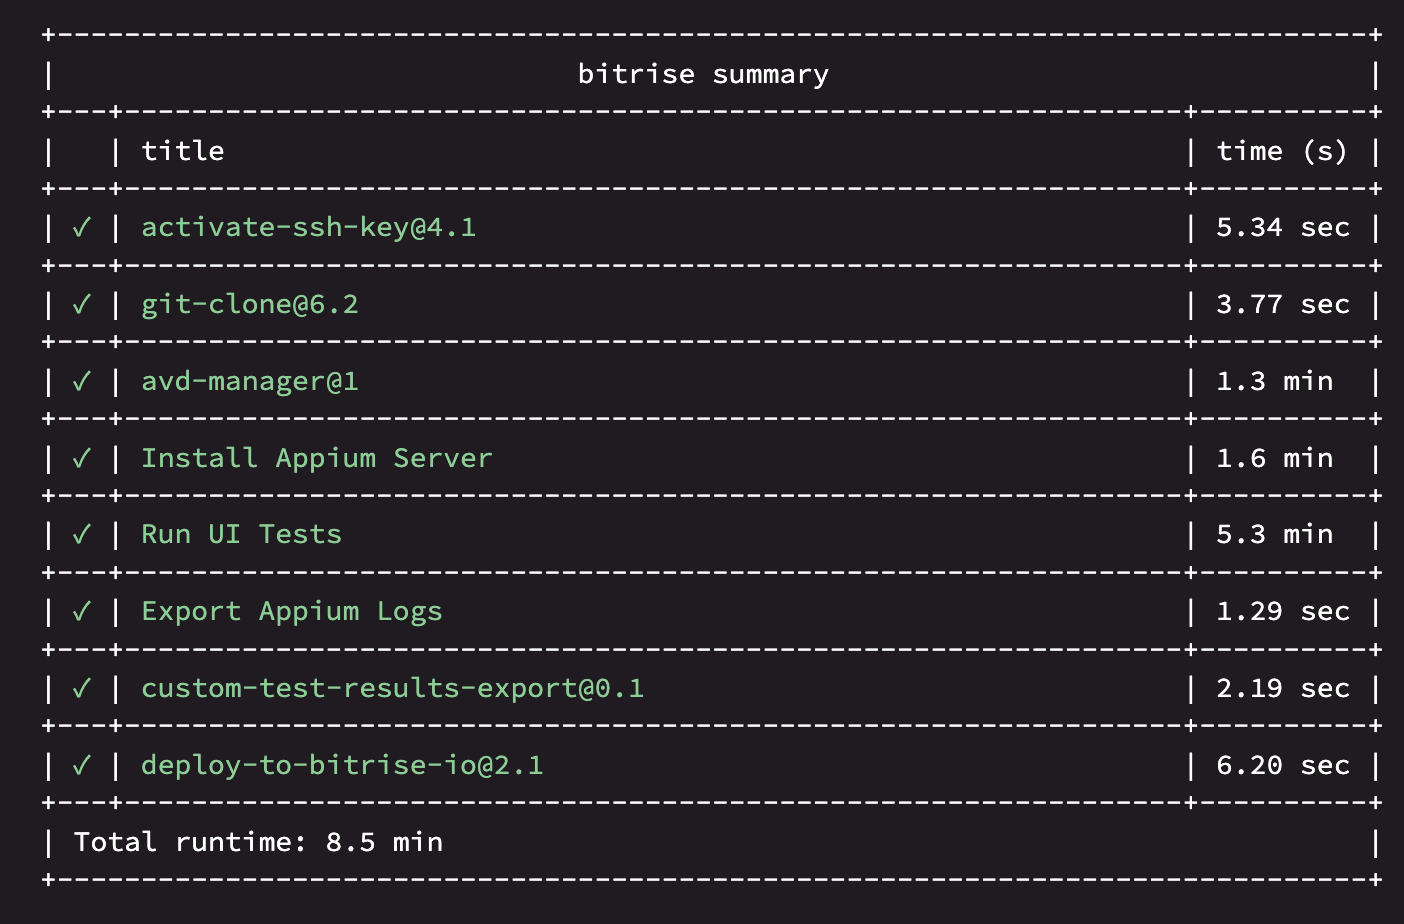

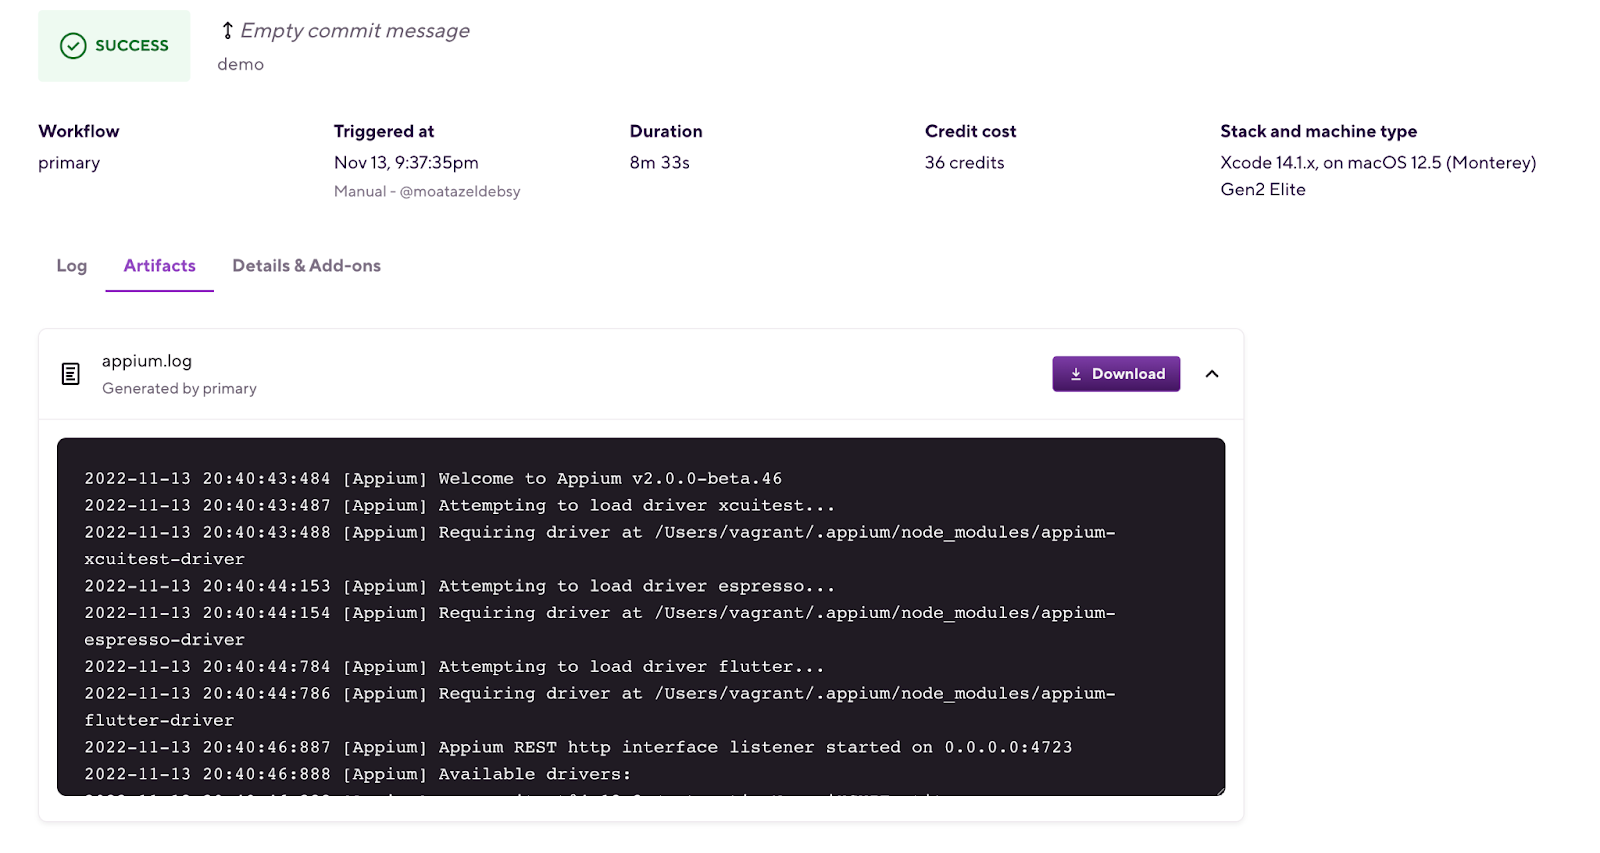

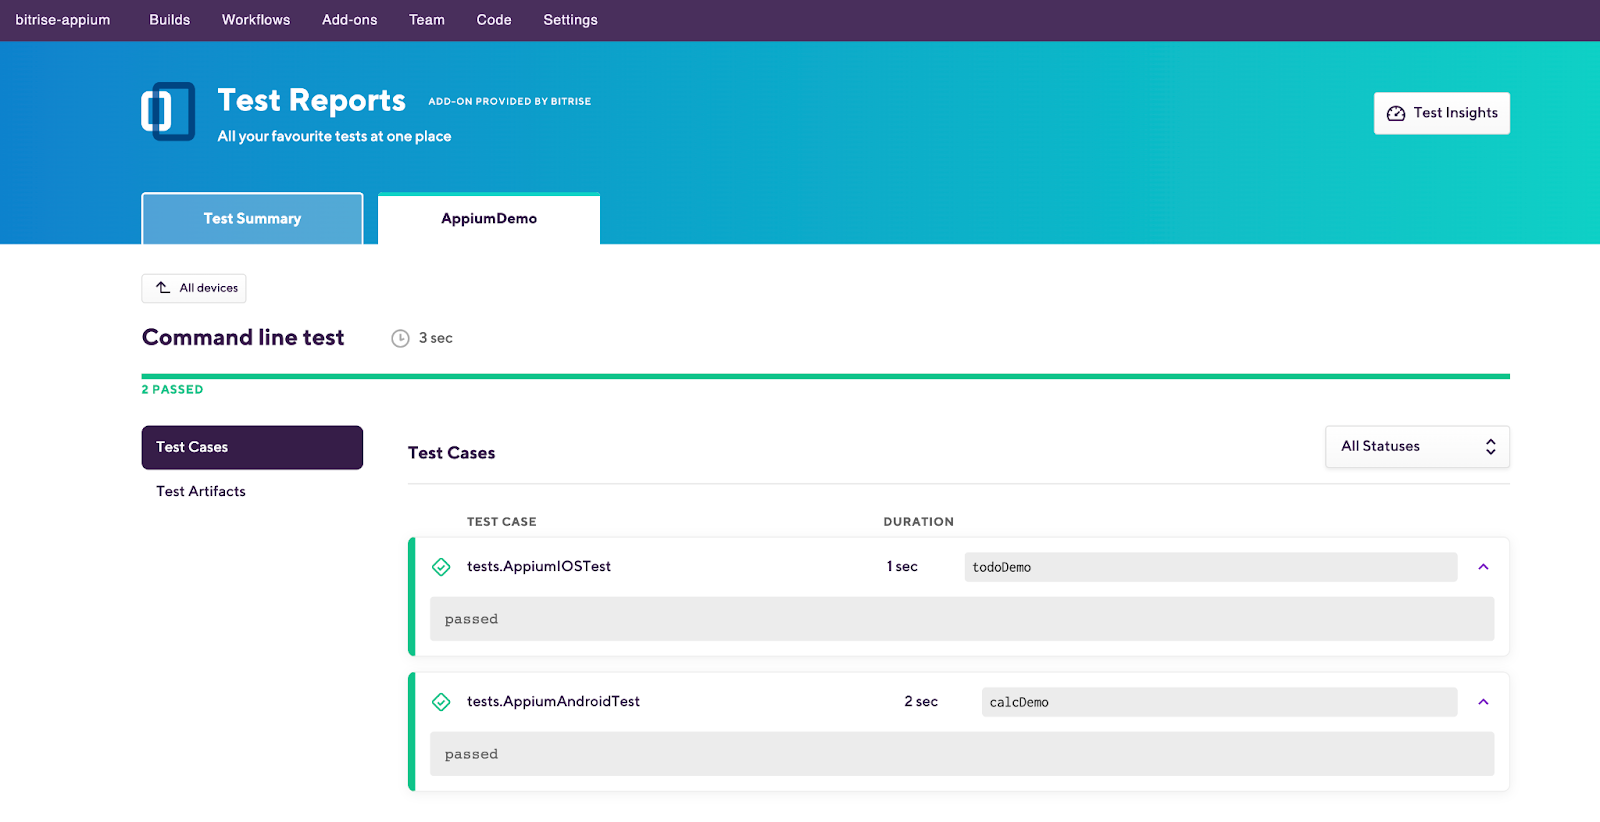
Congratulations 🎉, you have successfully run your Android and iOS test cases with Appium v2 on Bitrise.
Resources
In this section, you'll find links to additional Appium resources around the web, including my Appium course with Test Automation University.

.jpg)
.jpg)
