Previously, I wrote an article on using the Xcode Archive & Export for iOS Step to automatically pull in the appropriate code signing assets and sign Flutter apps. In that article, I piggybacked on an even earlier article for auto code signing native iOS apps using the same Bitrise Step. While using the Xcode Archive & Export for iOS Step is certainly a viable option for automatically signing and exporting a Flutter iOS app, the wonderful thing about Bitrise is that there are often multiple ways to get the job done.
So, in that spirit, we’re going to see what it takes to use the Manage iOS Code Signing Step, in combination with the Flutter Build and Export iOS and tvOS Xcode archive Steps, to facilitate auto code signing and exporting Flutter iOS apps.
How does automatic code signing work?
Signing an application allows the system to identify who signed the application and to verify that the application has not been modified since it was signed. So, automatic code signing, in this context, means automatically managing the provisioning profiles that are available on your Apple Developer Portal account. This is done by setting up some form of authentication to your Apple account and then using Bitrise to download and install the provisioning profile for your app during the build process.
So, from a high level, to use auto code signing with Bitrise, you will need to:
- Upload the code signing certificates to Bitrise.
- Connect your Apple Developer Portal account to Bitrise either via Apple ID or via the App Store Connect API.
- Use one of the Bitrise steps that support automatically managing code signing assets
How do you auto code with Bitrise?
Recently, as detailed in this article, we’ve simplified the code signing process. The gist is that there are now two ways to automate code signing on Bitrise: using the Xcode Build/Archive Step (with iOS Auto Provision Step merged into it) and not using these steps, but the Manage iOS Code Signing Step instead. In both cases, we've reduced the number of things that could go wrong.
In this tutorial, we’ll be specifically looking at the process of using the “Manage iOS Code Signing” Step to automatically sign assets for a Flutter (iOS) application.
Manage iOS Code Signing
As I previously mentioned, the Manage iOS Code Signing Step automatically manages your code signing assets. So, by combining the Flutter Build Step, which will build and use the code signing assets to actually sign the app, with the Export iOS and tvOS Xcode Archive Step we can build, sign, and export an iOS App Store Package (.ipa) file.
Alright, let’s get to it!
Create the code
First things first, in order to be able to sign an app you’re going to need to have some assets like certificates, app identifiers, and provisioning profiles already created and ready to use.
If you don’t already have the necessary code signing files ready, you can generate new files by following the instructions here.
It’s important to note that before you can proceed, all Bitrise iOS code signing methods require you to export and upload your iOS code signing certificates directly to Bitrise.
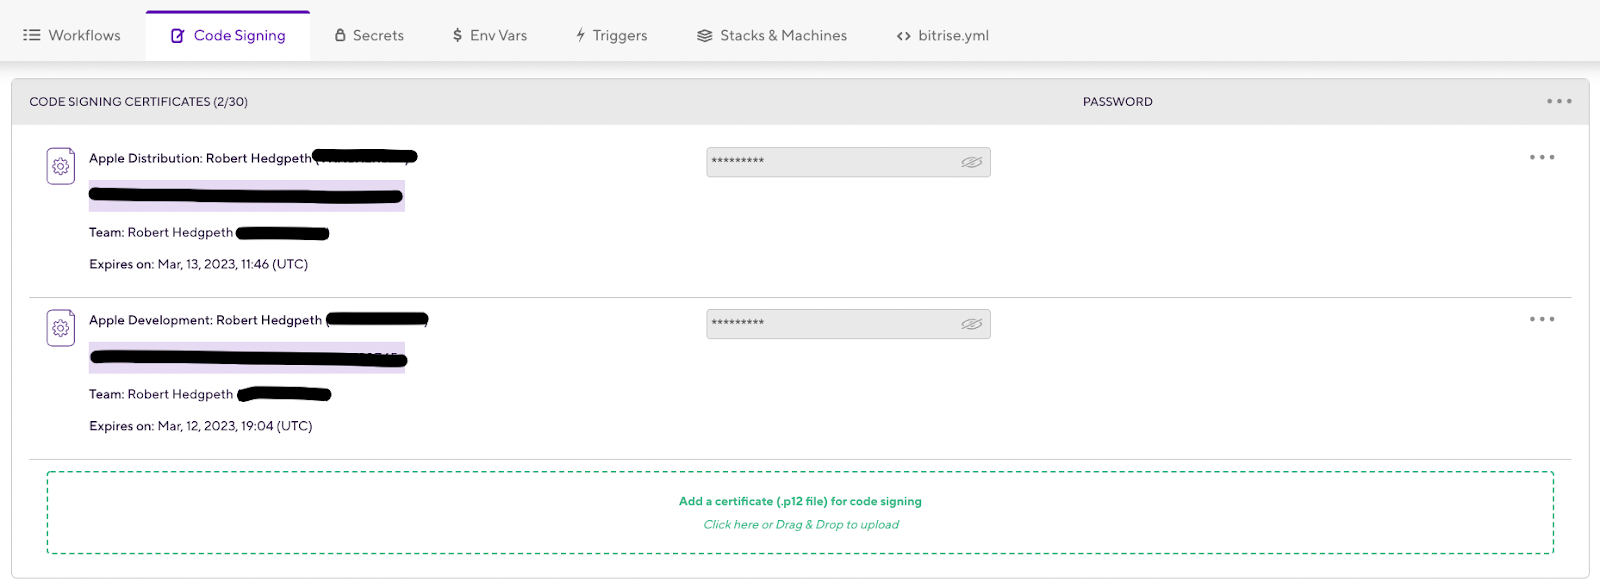
Provide access to App Store Connect
Next, Bitrise requires access to App Store Connect to be able to access your app’s signing assets.
So, to do this, log into the Apple Developer Portal and navigate to App Store Connect. Then, from there, click “Users and Access”.

Within “Users and Access” in App Store Connect, you’ll have the ability to configure two different approaches that Bitrise will use (later on in this tutorial) to connect.
Configure Bitrise for App Store Connect
After configuring your desired approach for establishing an Apple Service connection within the Apple Developer Portal, it’s time to jump into Bitrise to hook everything up.
Once you’ve logged into your Bitrise account, navigate to your “Profile settings” within your user context menu.
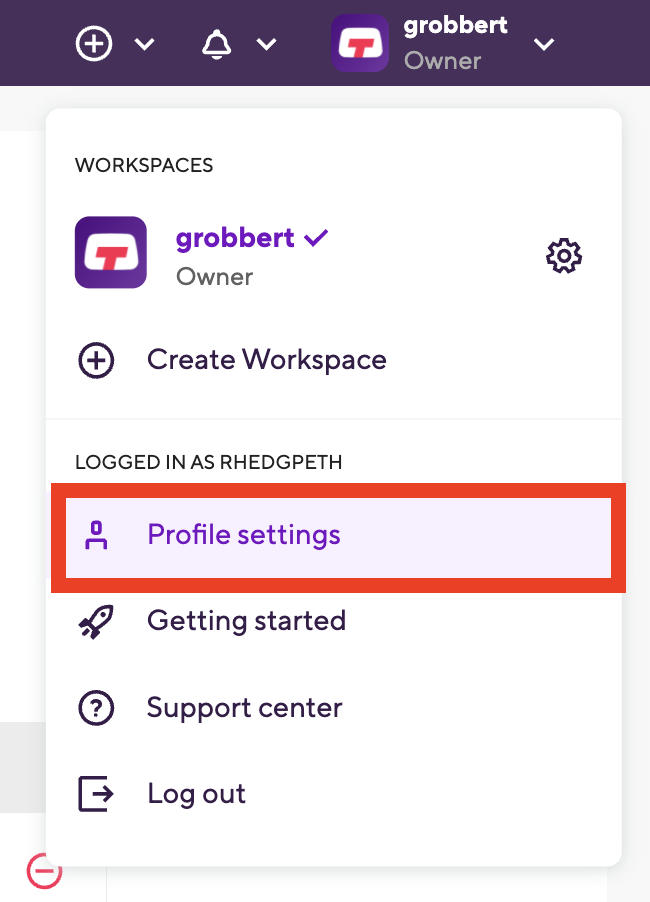
Within your profile settings, select the “Apple Service Connection” in the left navigation menu. There, you’ll have the ability to configure your Apple Service connection using an API Key (recommended) or Apple ID.

Set up Apple Service connection within your app
Assuming you have an existing Flutter project within Bitrise, head back to the Bitrise Dashboard and select your app.
Tip: If you haven’t added a Flutter project yet be sure to check out this guide to walk you through the process!
Click the “Teams” and scroll down to the “Apple Service connection” where you can select the connection you’d like to use.
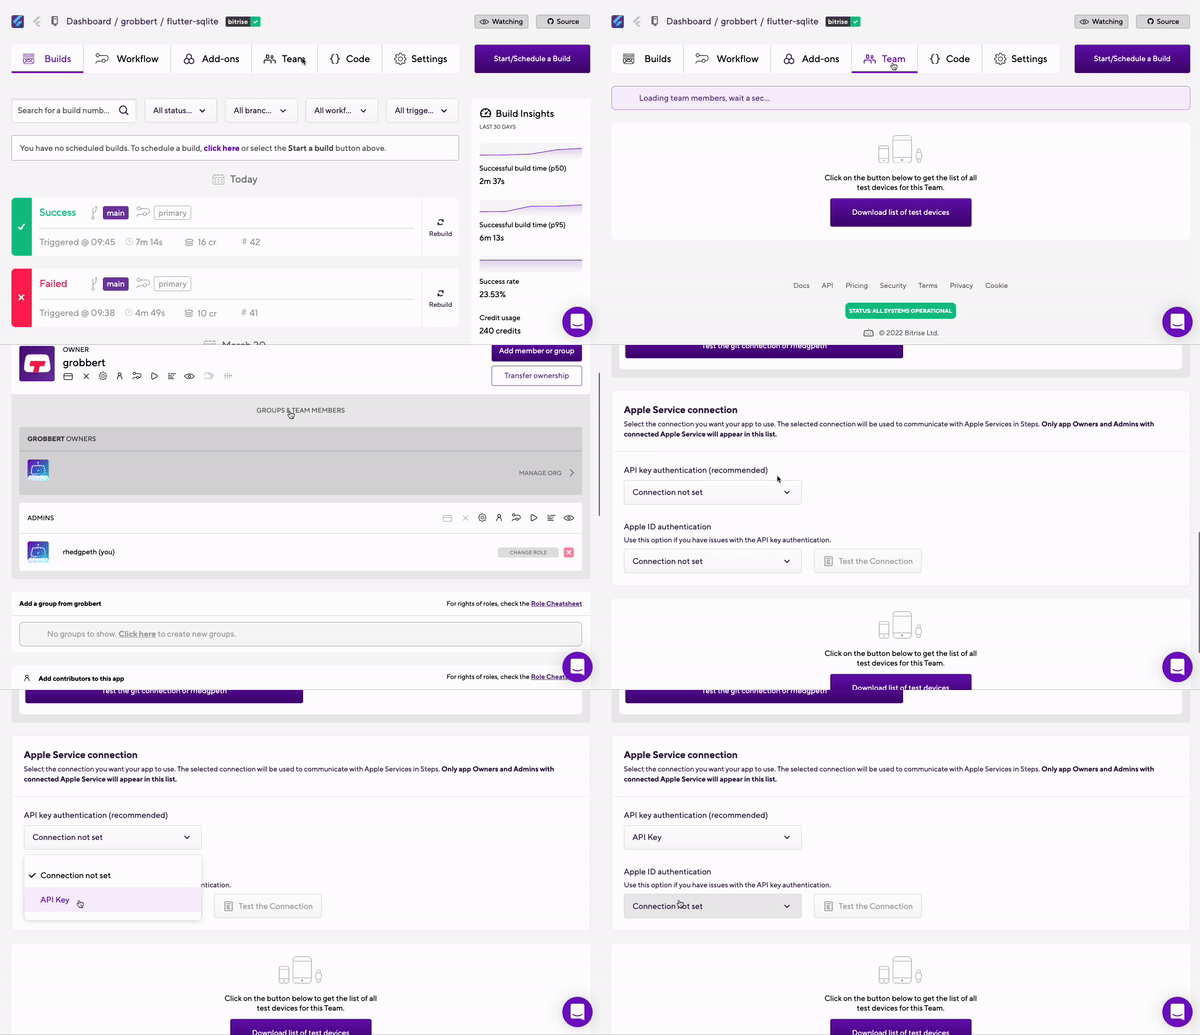
Set up the Bitrise workflow
Finally, it’s time to configure our project workflow. Start by navigating to the “Workflow” tab. If you’ve created a new Flutter project, your workflow will look the same or similar to the following by default.
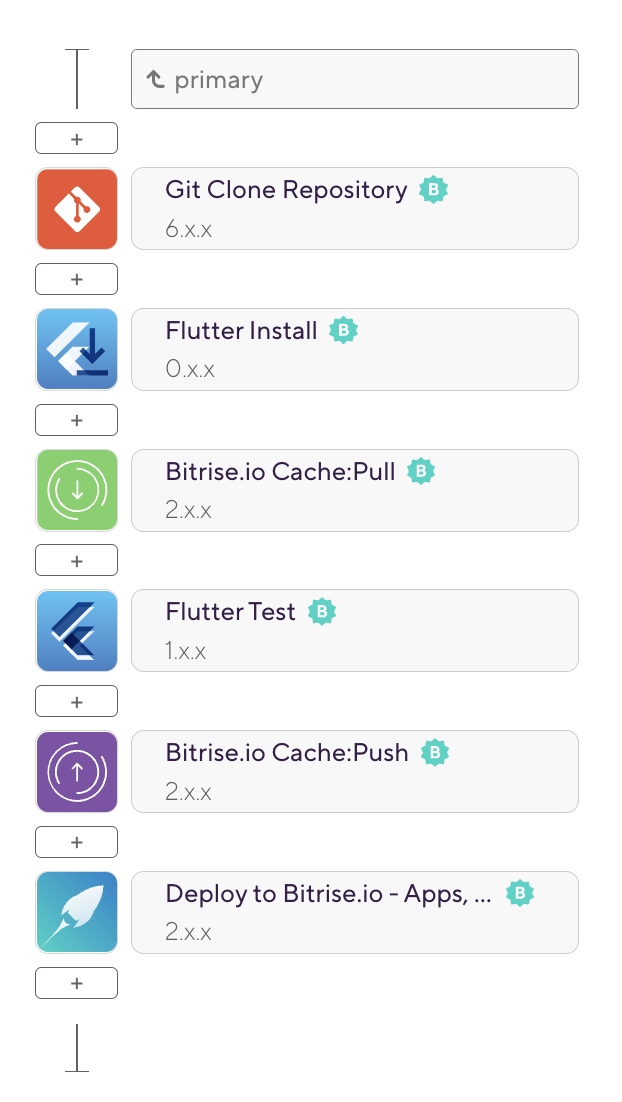
To set up auto code signing and export of a Flutter iOS app, we’re going to be modifying the workflow by adding and configuring three additional steps; Manage iOS Code Signing, Flutter Build, and Export iOS and tvOS Xcode Archive.
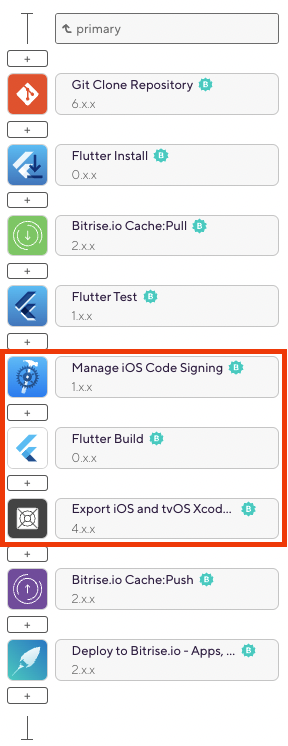
Manage iOS Code Signing
The Manage iOS Code Signing Step takes care of setting up the required code signing assets before the project is built on Bitrise. This Step will be responsible for:
- Downloading and installing certificates uploaded to Bitrise.
- Generating, updating, and downloading the provisioning profiles needed for your iOS project.
- Verifying and registering the project's Bundle IDs on the Apple Developer Site.
- Registering the iOS devices connected to your Bitrise account with the Apple Developer site.
The gist? It’s going to pull down and set up the code signing assets you’ll need in the next step.
So, to start you’ll need to add a Manage iOS Code Signing Step to your workflow, which can be done by clicking on the (+) button in the Workflow Editor. Search for and click on the Manage iOS Code Signing Step, which will add it into your workflow.

Next, all you need to do is add some code that the Step will execute. To do that click the Manage iOS Code Signing Step within the workflow editor, which will load the step in the pane directly to the right.
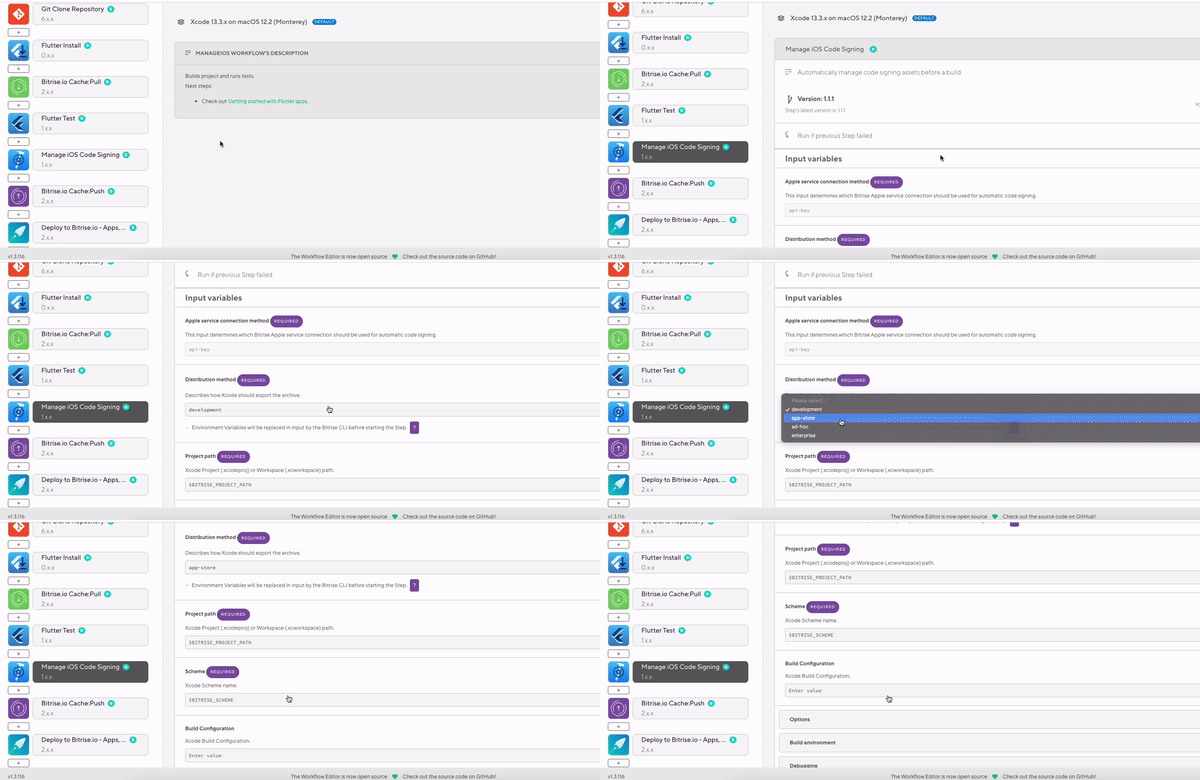
In the Step pane, you’ll see several configuration options under the Input variables section.
- Apple service connection method: determines which Bitrise Apple Service connection should be used for automatic code signing.
- Distribution method: how you’d like to distribute the app. Your options are development, app-store, ad-hoc, and enterprise.
- Project path: the Xcode Project (.xcodeproj) or Workspace (.xcworkspace) path, which will be used to locate the native iOS project or workspace within your Flutter project.
- Scheme: Xcode schemes define a collection of targets to build, a configuration to use when building, and a collection of tests to execute, depending on how you’ve configured your app.
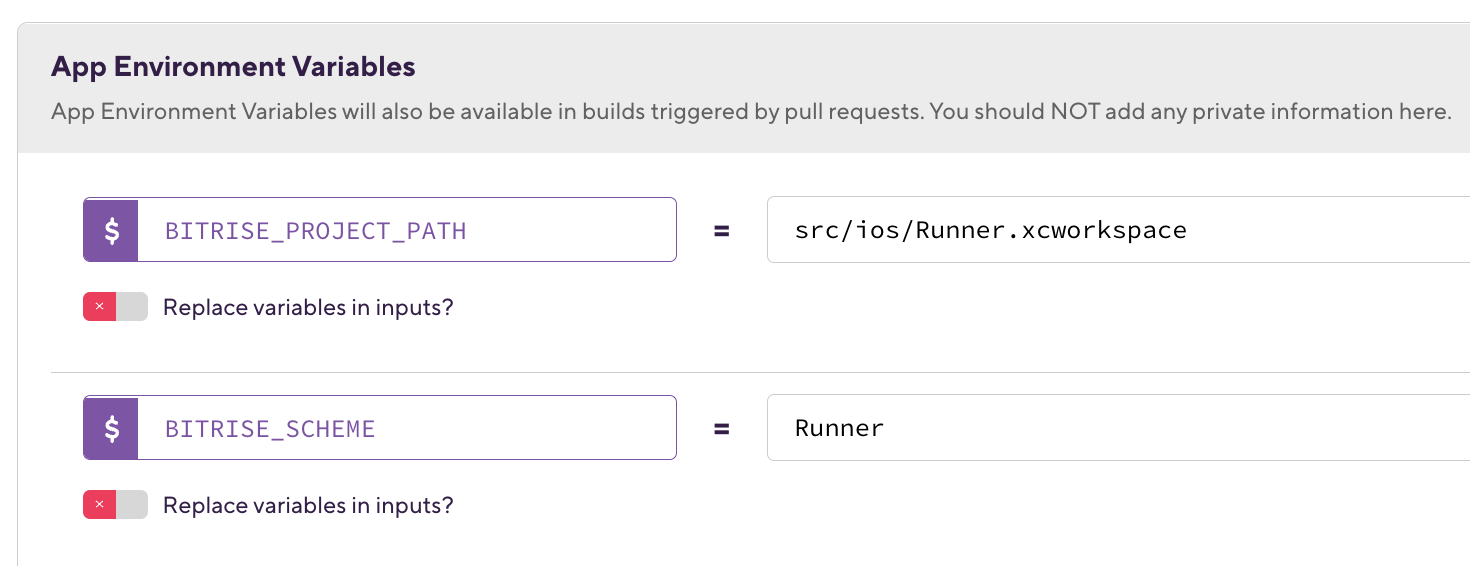
You can specify the Project path and Scheme by defining new environmental variables, within the Env Vars tab.
Flutter Build
Next, add the Flutter Build Step after the Manage iOS Code Signing Step. This Step will be used to build and sign a Flutter iOS app using the assets that were downloaded and installed in the previous Step.

Following the same steps as before, add the “Flutter Build” Step, by clicking the (+) button and searching for the Step to add to your workflow.
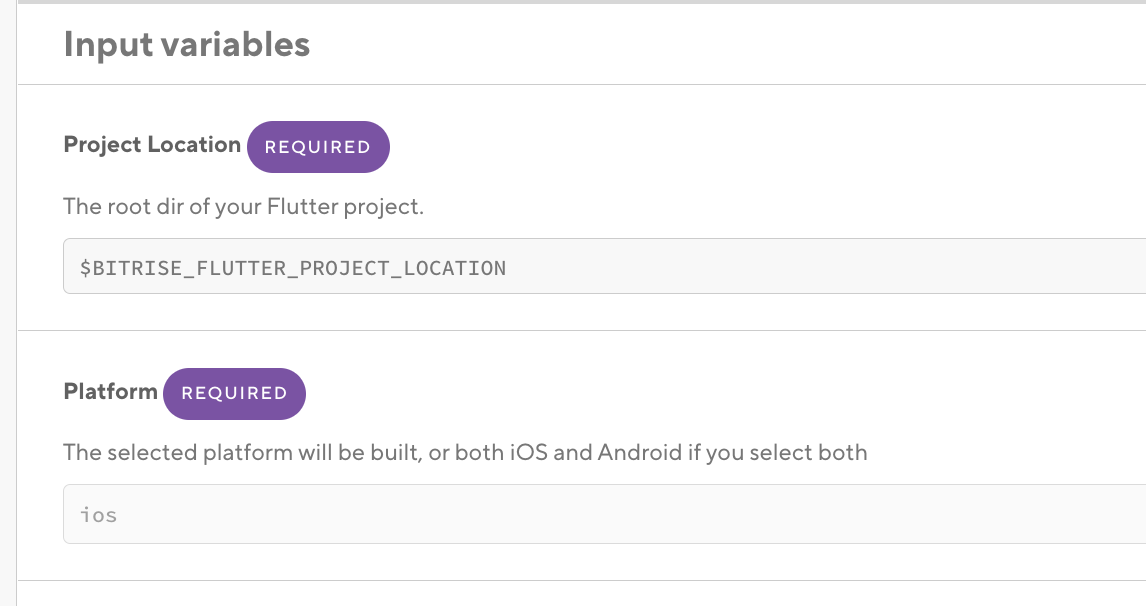
After targeting the Flutter Build Step and loading the details in the pane to the right, scroll to the Input variables section. There, you’ll want to make sure that your Project Location is targeting the root directory of your Flutter project.
You also have the option of targeting a specific platform or building the Flutter project for both iOS and Android.
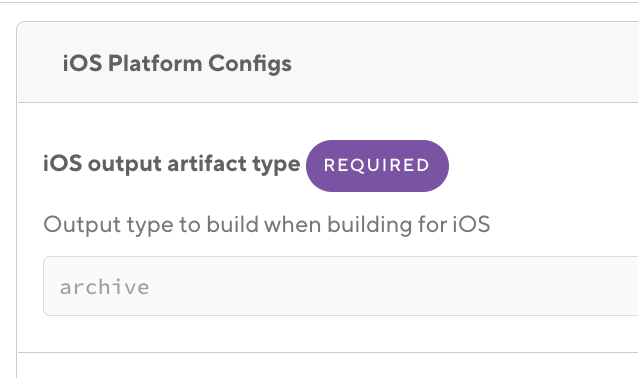
Next, scroll down to the iOS Platform Config panel and expand it. Then, set the iOS output artifact type to archive, which will build an iOS archive via flutter build ipa.
Export iOS and tvOS Xcode Archive
Finally, it’s time to add the last Step, Export iOS and tvOS Xcode archive, which will be used to export an .ipa file from an existing iOS .xcarchive file, which will be created via the Flutter Build Step.

After adding the Step, scroll down, within the pane to the right, to the Distribution method and change the dropdown value to your targeted distribution method of development, app-store, ad-hoc, or enterprise.

Build & output artifacts
And that’s it, that’s all there is to it. Now that you’ve finished the workflow configuration, save the changes and navigate back to the project landing page to start a new build.
Once the build has been completed (hopefully successfully), navigate into the build and view the output within the Artifacts tab.

Next steps
Thank you for reading this article! As you can see, the process of signing your Flutter iOS app is easier than ever with Bitrise and the Manage iOS Code Signing Step. Now all that’s left to do is try it out for yourself! If you’d like to check out this process or any of the other 350+ integration steps available through Bitrise, you can sign up for free here.
If you have any questions or feedback, please reach out to us on Twitter, email, or join the Bitrise Slack to chat with us directly.
Happy building!

.jpg)
.jpg)
