
In this article, I will explain the integration between AWS Device Farm and Bitrise for running Android UI tests with Espresso.
What is Espresso?
Espresso is a native testing framework for Android to write reliable UI tests. Google released the Espresso framework in October 2013 and, as of release version 2.0, Espresso is part of the Android Support Repository.
One of the important features of Espresso is that it automatically synchronizes your test actions with the user interface of your application.
The framework also ensures that your activity is started before the test runs. It can also force a test to wait until all observer background activities have finished, which is sometimes a problem with other testing frameworks.
Android automated UI test types
There are two types of Android automated UI tests:
- UI tests for a single app, which verify that the target app behaves as expected when a user performs a specific action or stops an activity. They allow you to check that the target app returned the correct UI output and response to user interactions in the app's activities. UI testing frameworks like Espresso allow you to programmatically simulate user actions and to test complex, intra-app user interactions.
- The second type is UI tests for multiple apps. This type of test verifies the correct behavior of interactions between different user apps or between user apps and system apps. For example, you might want to test that your camera app shares images correctly with a third-party social media application or with a default Android photo application. UI testing frameworks that support adjacent app interactions such as UI Automator allow you to test such scenarios.
Hint:
Espresso supports writing test scripts in Java and Kotlin.
What is AWS Device Farm?
AWS Device Farm is a testing service from AWS that can help us to improve the quality of our web and mobile applications by testing them across a wide range of desktop browsers and real mobile devices without the need to deploy and manage a test infrastructure.
AWS Device Farm helps you to test your app in parallel against a massive collection of physical devices in the cloud to test your applications without having to write or maintain test scripts or use one of the AWS supported automation testing frameworks.
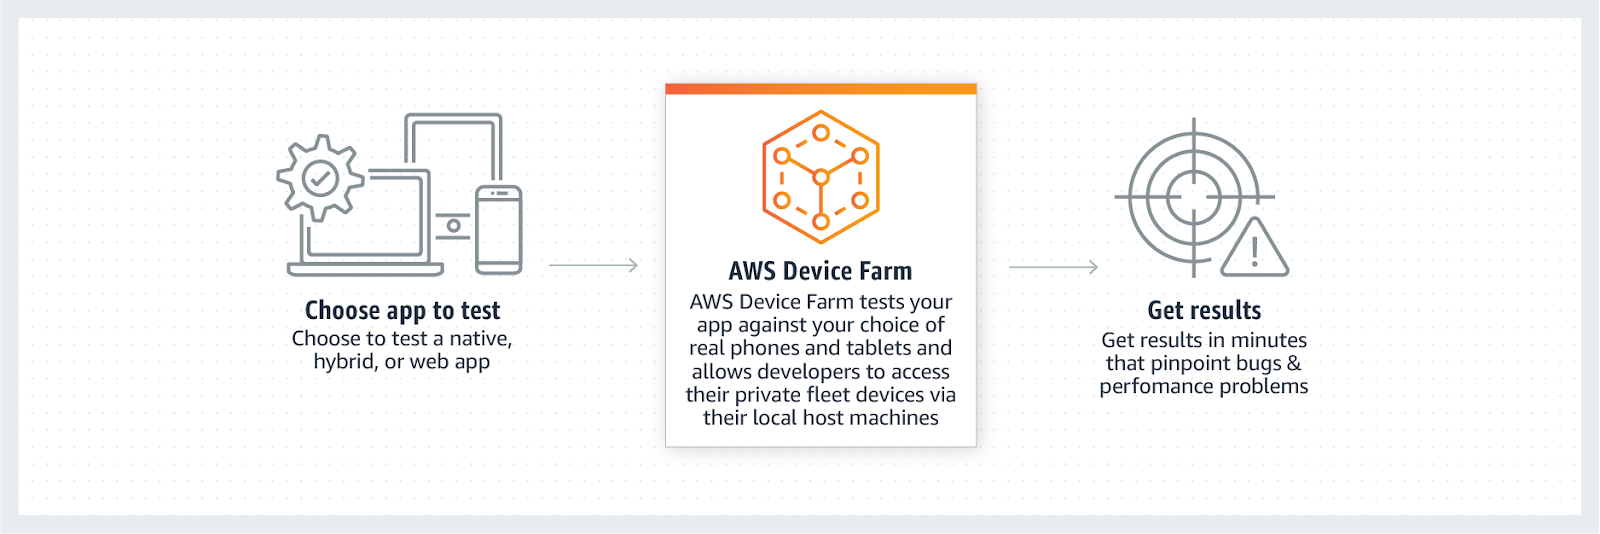
Image source: AWS
Getting started with AWS Device Farm
In the beginning, you should create an AWS Device Farm project using the following steps:
1. Sign-in with your AWS account (if you don’t have an account you can create a free-tier account to start using the AWS services).
2. From the AWS Management Console, select Identity and Access Management (IAM) service.
3. From the User Groups, create a new group (e.g. testers) and in the permissions policies section, search for devicefarm, then select Full Access.

4. Then click Create Group
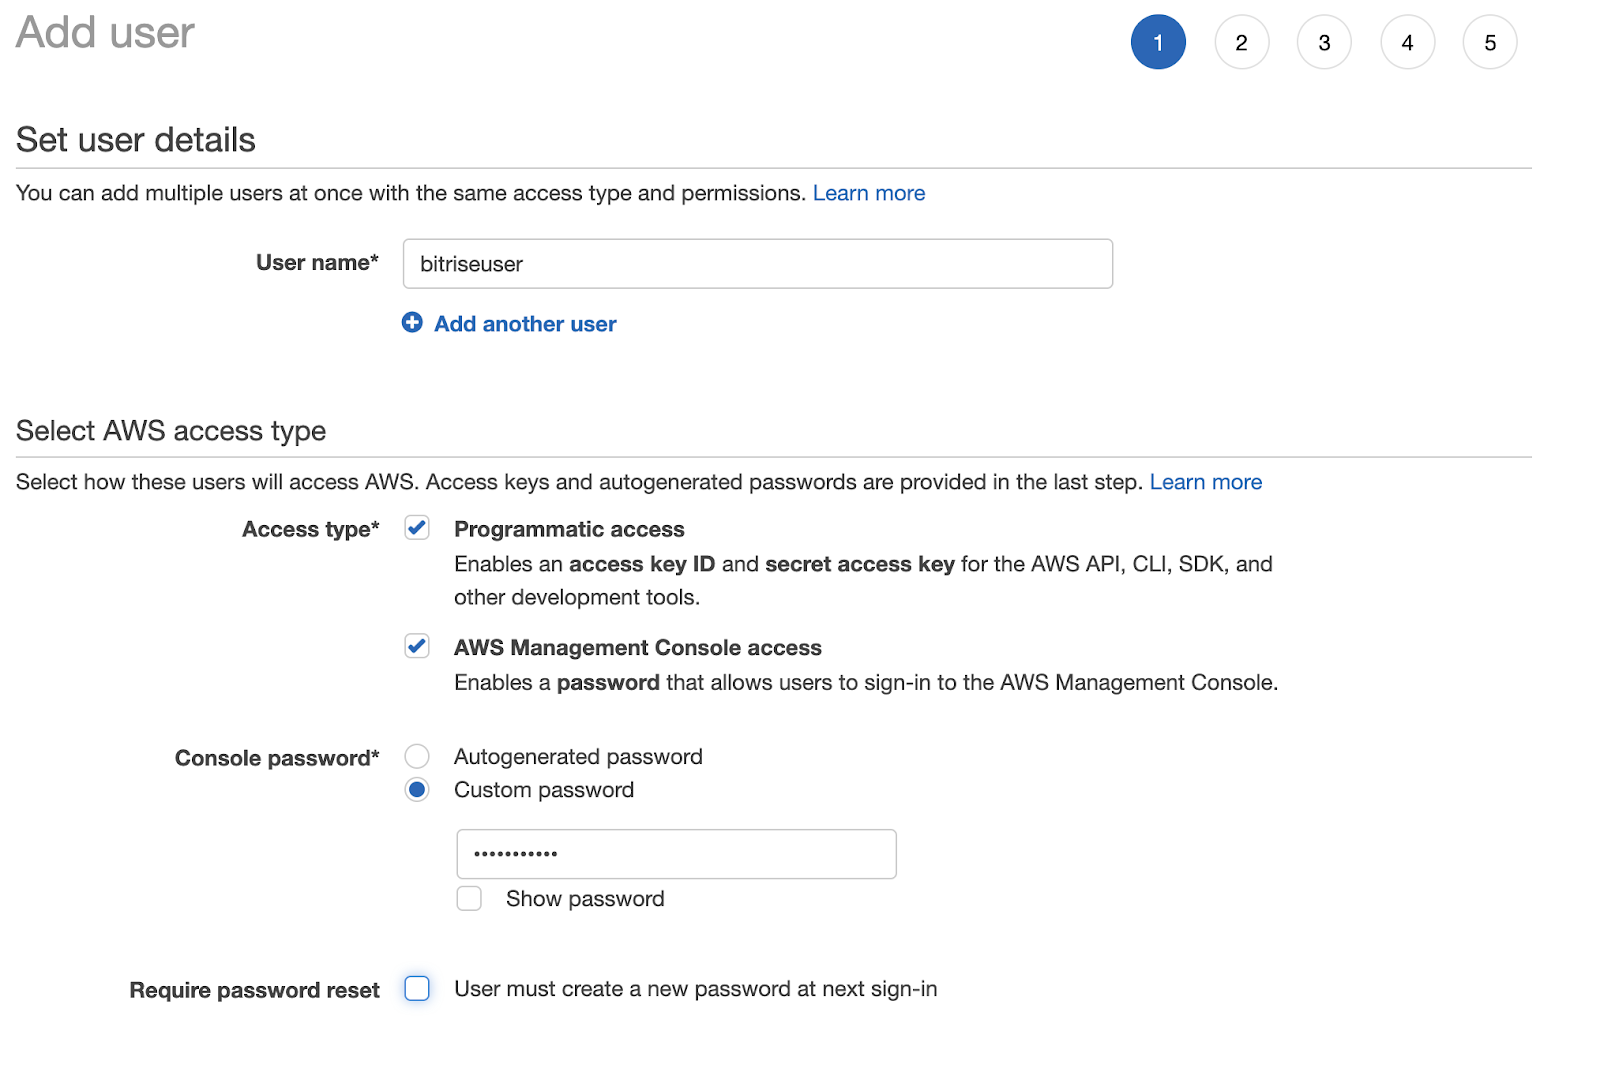
5. Click on Users and select Add user, and select the following configuration:
6- Click Next:Permissions and select the group that we created before

7. Click Next:Tags (add tags for the user if you want) and click Next:Review.
8. Then click Create User.
9. The user is created successfully and now you can copy the Access key ID, Secret Access Key, and the custom sign-in URL (save the data in a secret txt. file to use them after that).
10. Log out and log back in with the new user you created with the custom URL.
11. From the AWS Management Console, select the Device Farm service.
12. Select Mobile device testing projects and click on Create a new project.
13. Enter the project name (bitrise-android).
We need to prepare our device pool to select the Android devices that we need to use in our tests.
14. Click on Project Settings and select Device pools and click on Create a new device pool.
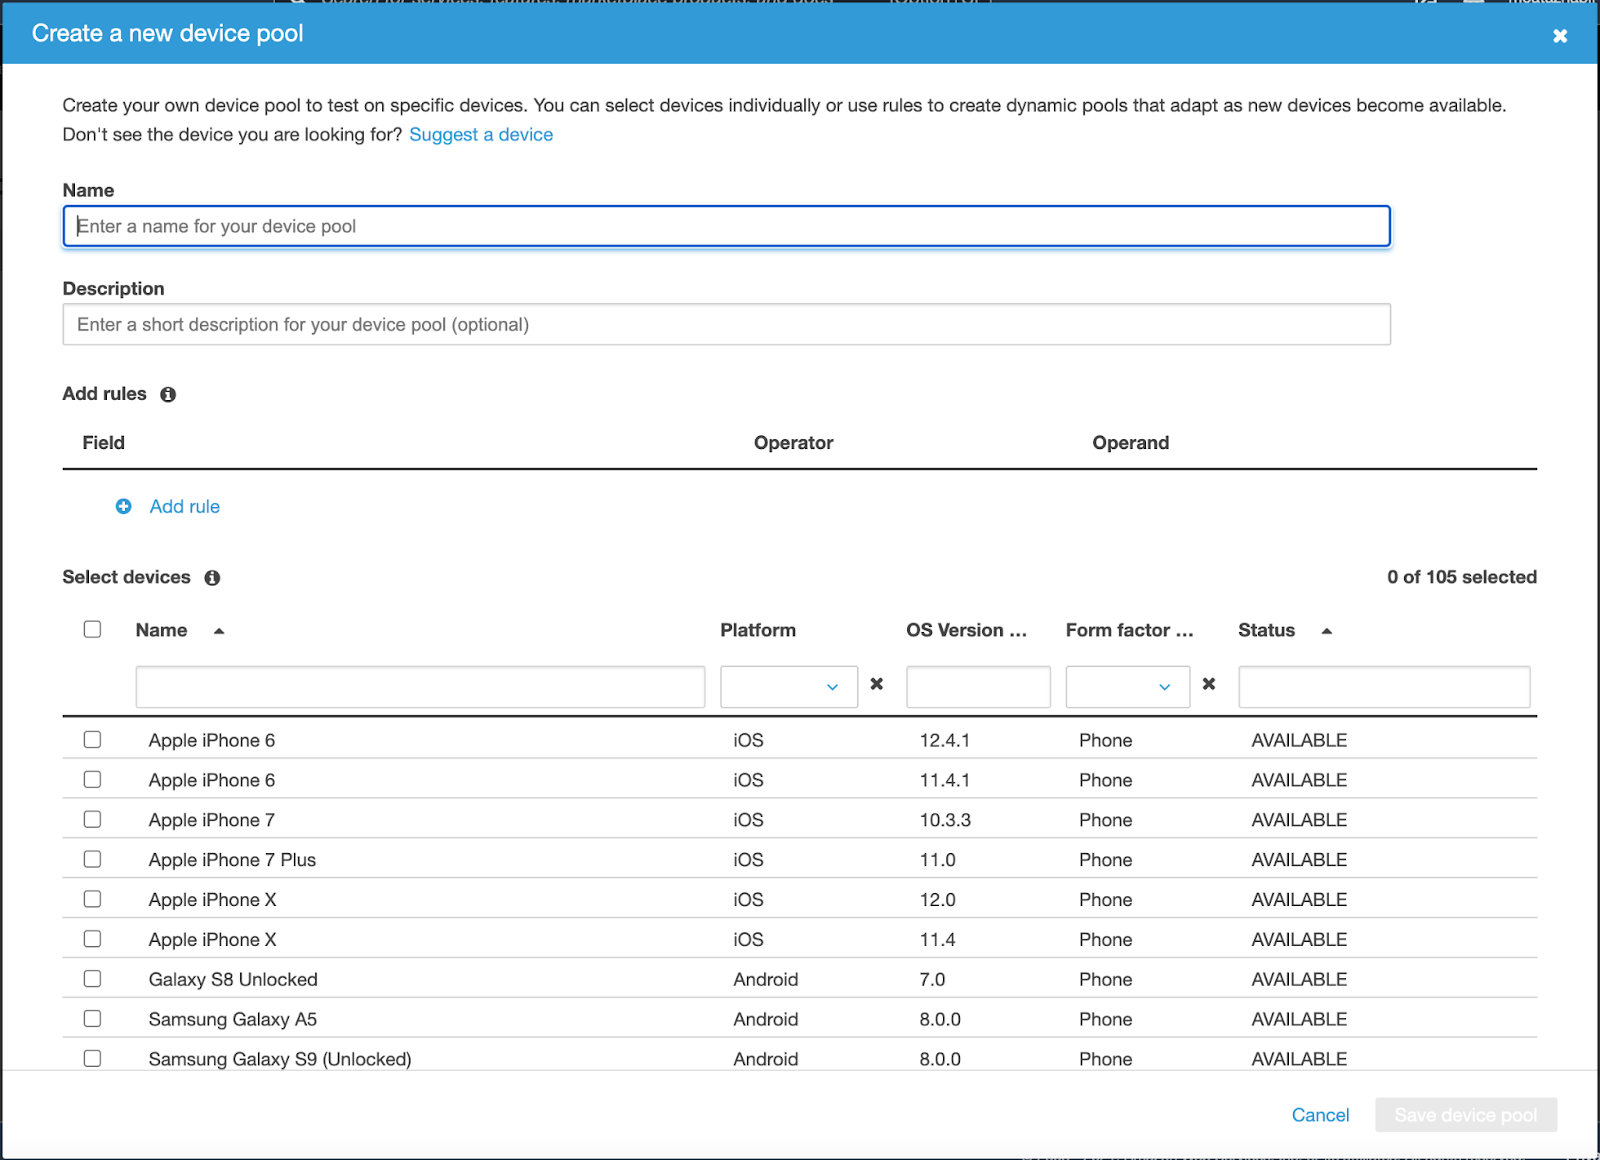
15. Enter the name (e.g. “pixel”) and filter the devices by the platform and OS version. E.g. I selected three Pixel devices with different OS versions (11,10,9).

16. Select Save the device pool and now our Device Farm project is ready to start our tests.
To be able to connect Device Farm with Bitrise or any CI server, you should have the following prerequisites.
Prerequisites:
- Install AWS CLI. More information can be found in the AWS Documentation.
- After installing AWS CLI you need to configure your account using the command line interface with the aws configure command.
- You need to add the following credentials:
- AWS Access Key ID
- AWS Secret Access Key
- Default Region Name - for example, us-west-2
- The Device Farm Project Amazon Resource Name (ARN) — to find it, you can run the following command: aws devicefarm list-projects
17. You will get the following output. Copy the Project ARN because we will use it with Bitrise.

18. Then we need to know the device pool ARN using the following command:

You will have different device pools and you should find the private pool that we created.

19. Save both ARNs (project and device pool) because we will use them with our Bitrise Steps.
Integrate Espresso tests with AWS Device Farm and Bitrise
I will assume that you already have your android CI workflow in Bitrise, like in the image below, but if you need to know how to create one you can review our guide.
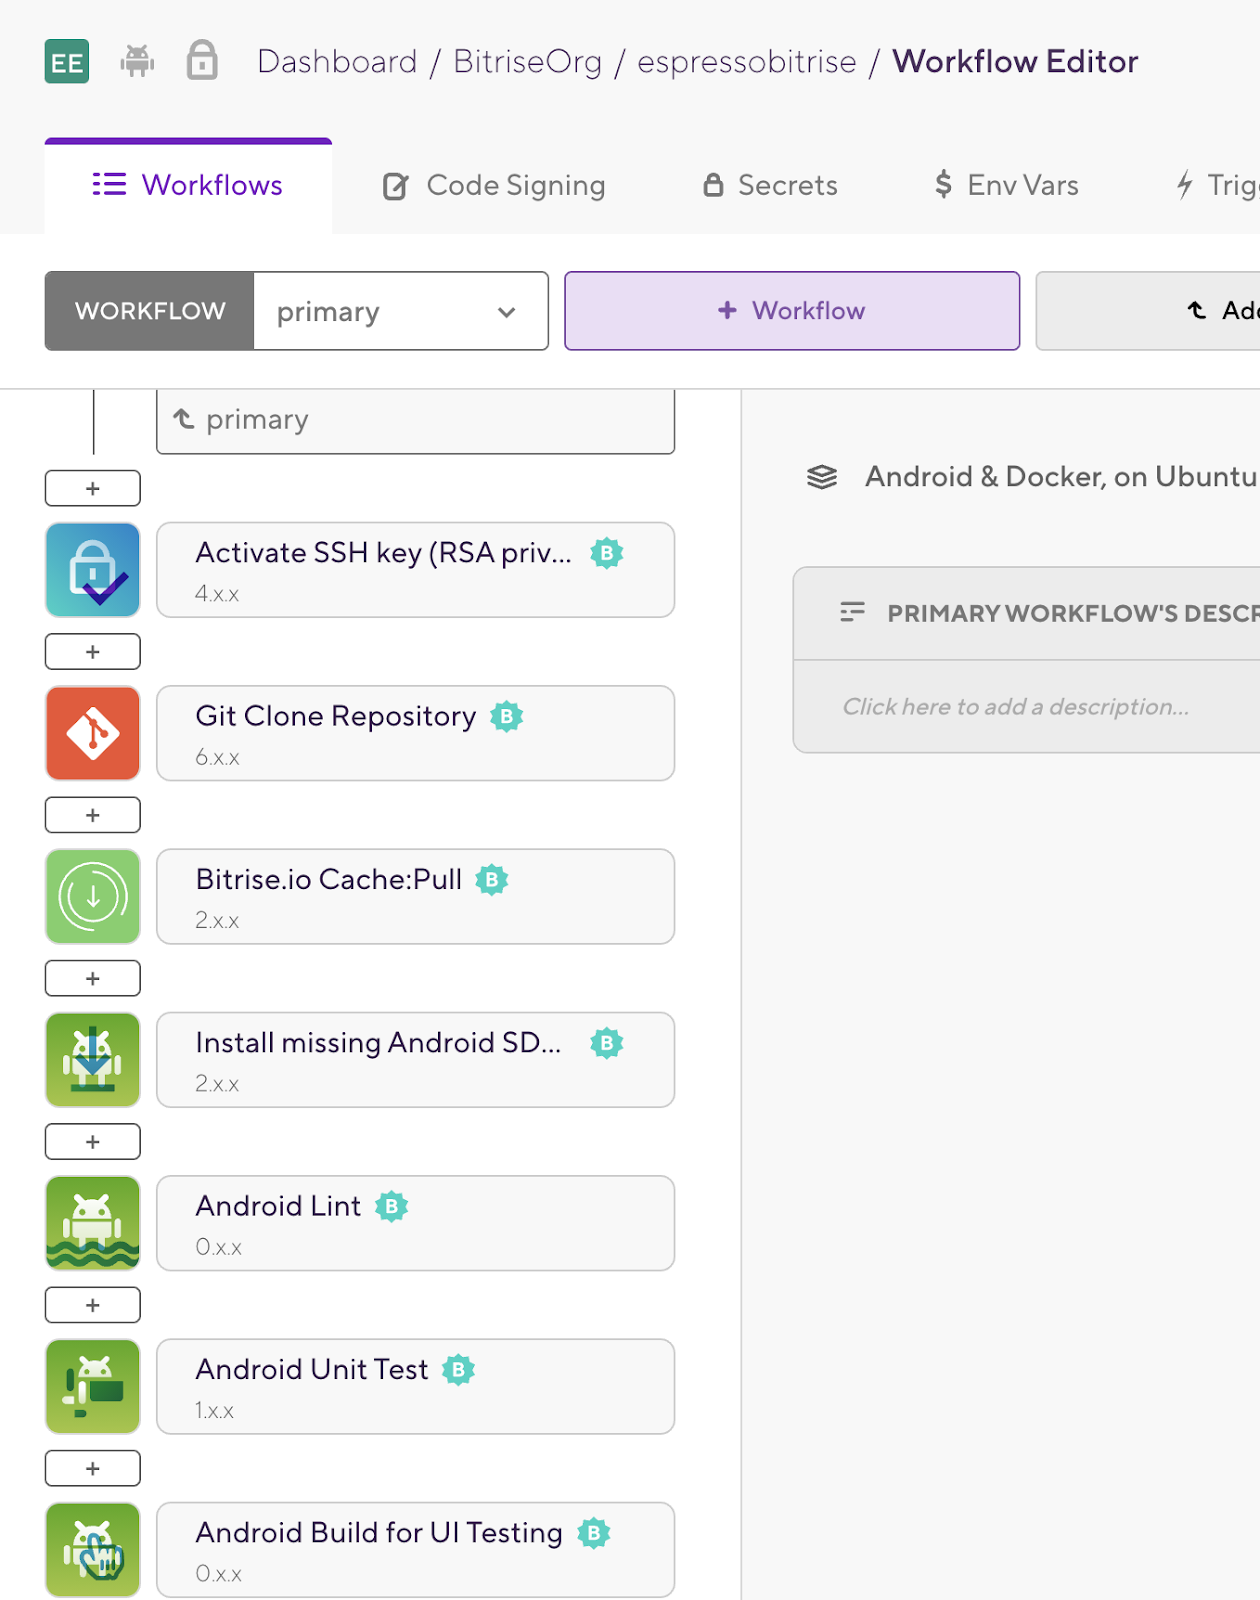
Now you need to configure the CI workflow with the new steps required for AWS Device Farm with the following Steps:
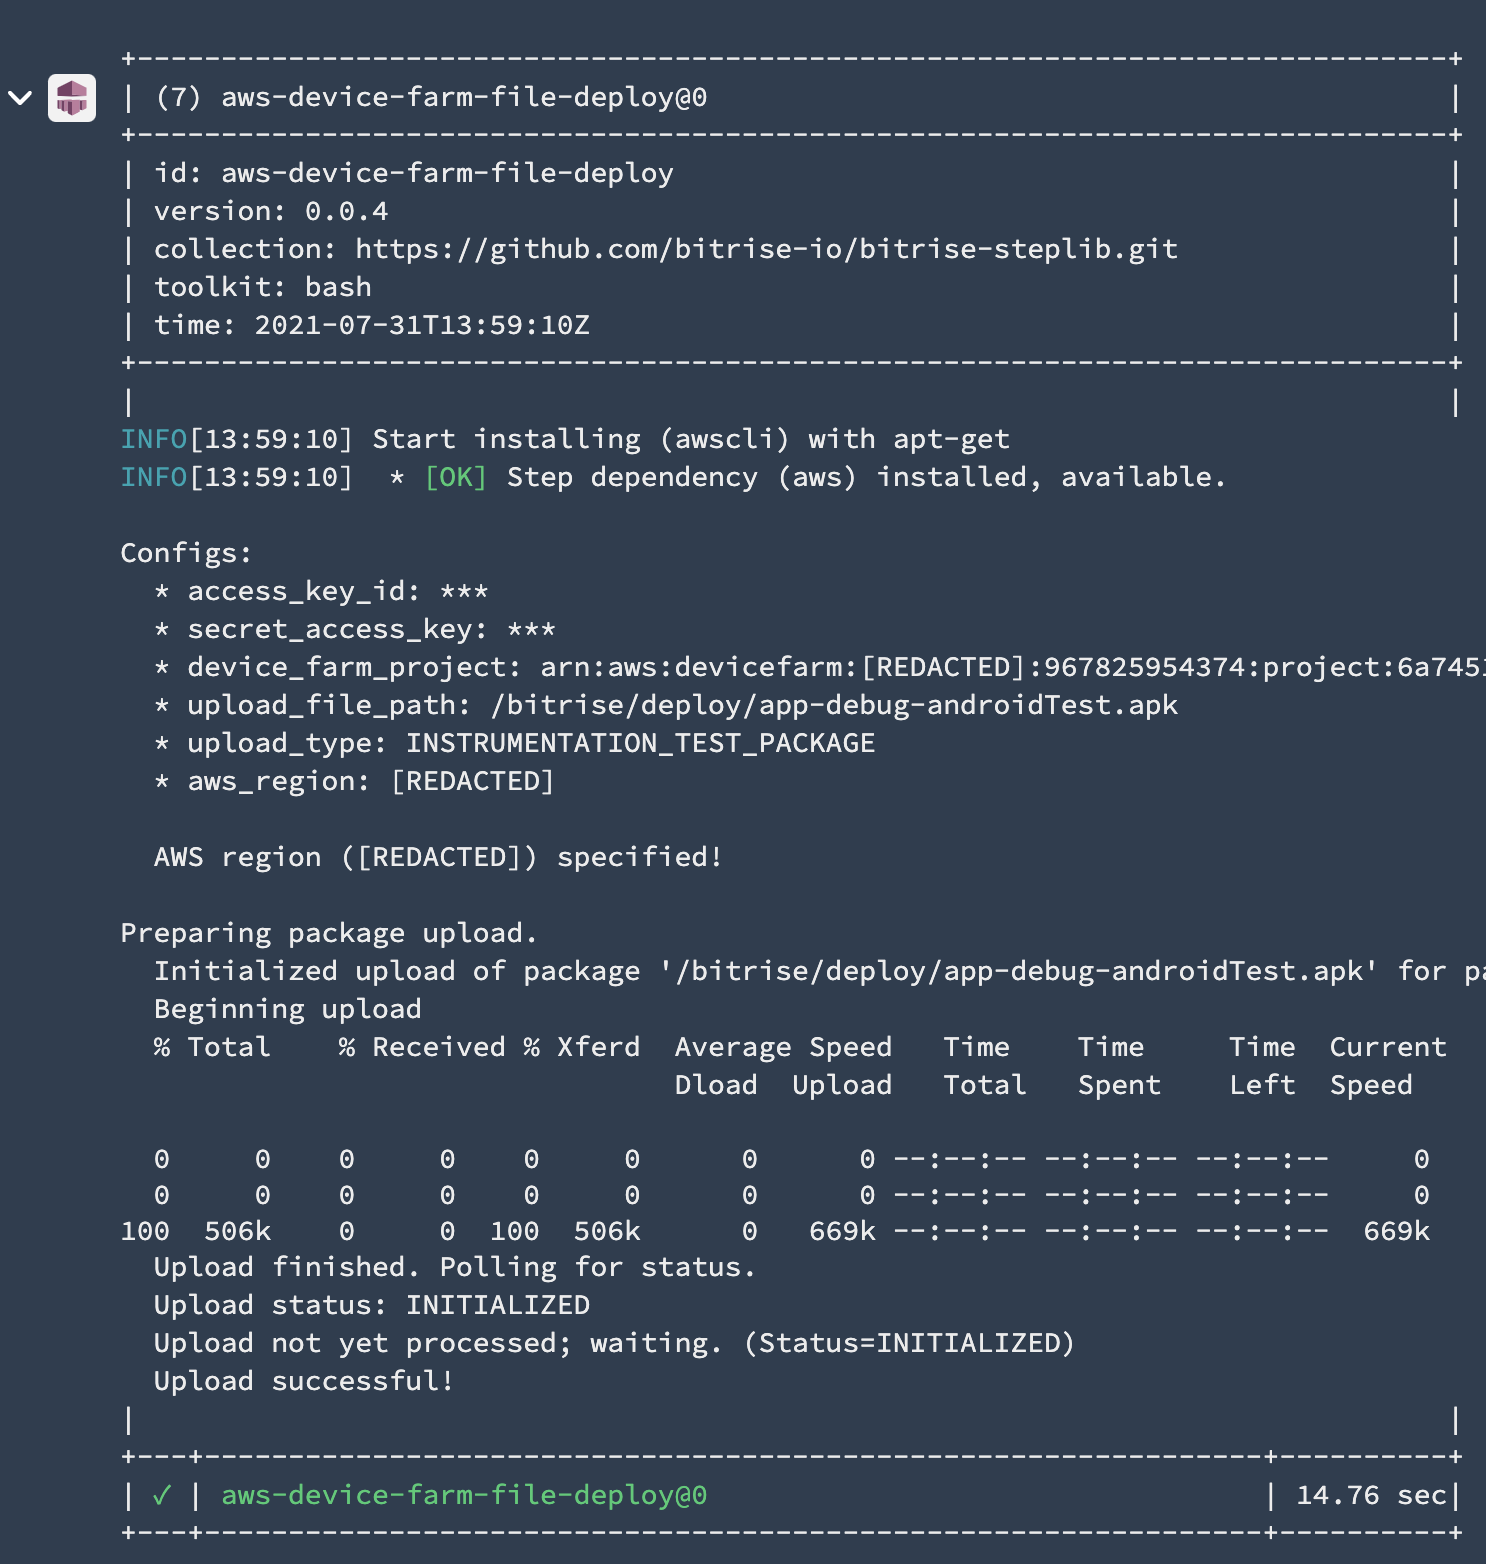
1. After the Android Build for UI Testing Step, we need to add a new Step, Amazon Device Farm File Deploy, to upload files (e.g. test package, app data, etc.) to the device farm.
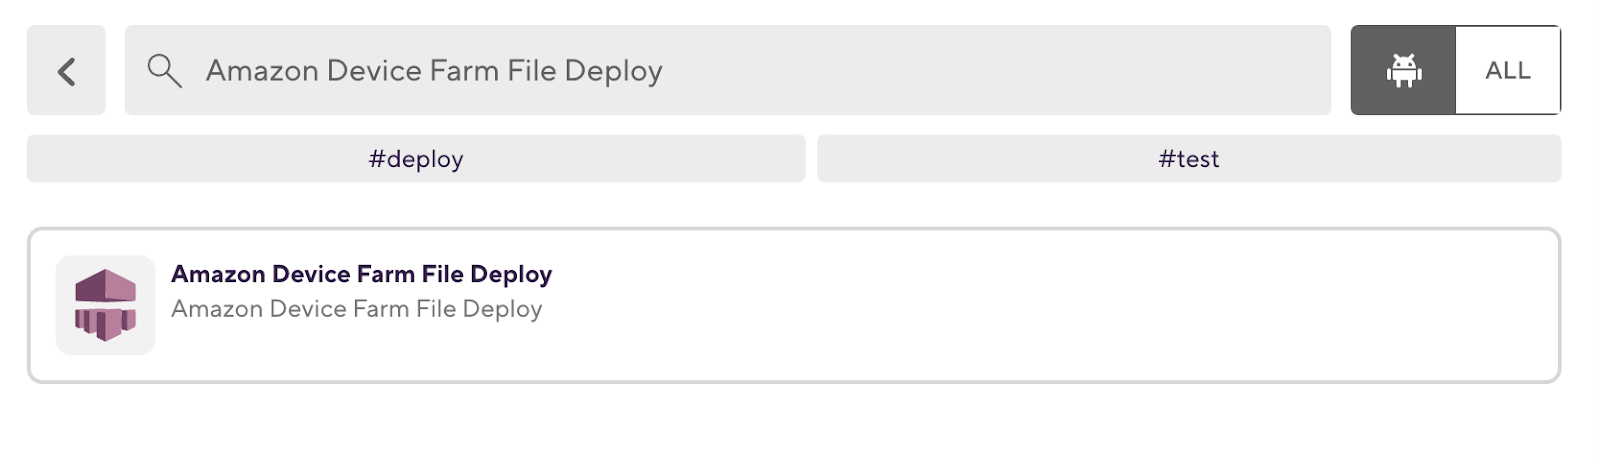
NOTE: Don’t forget to add the AWS Credentials as Secrets in our Bitrise project
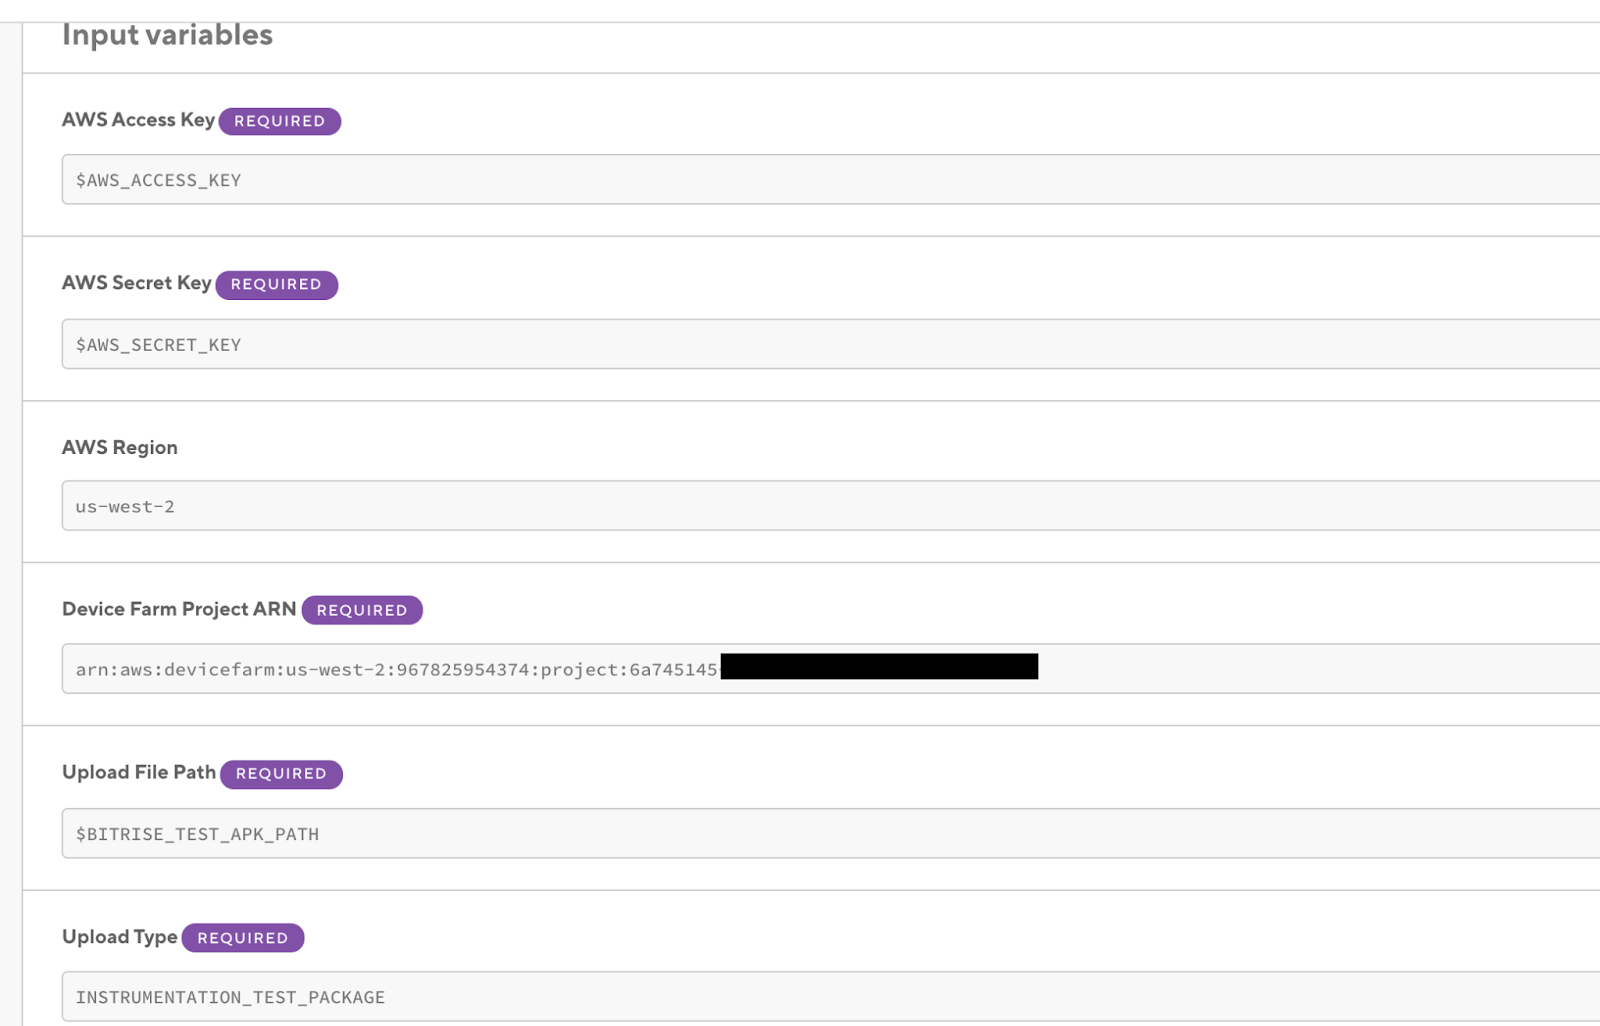
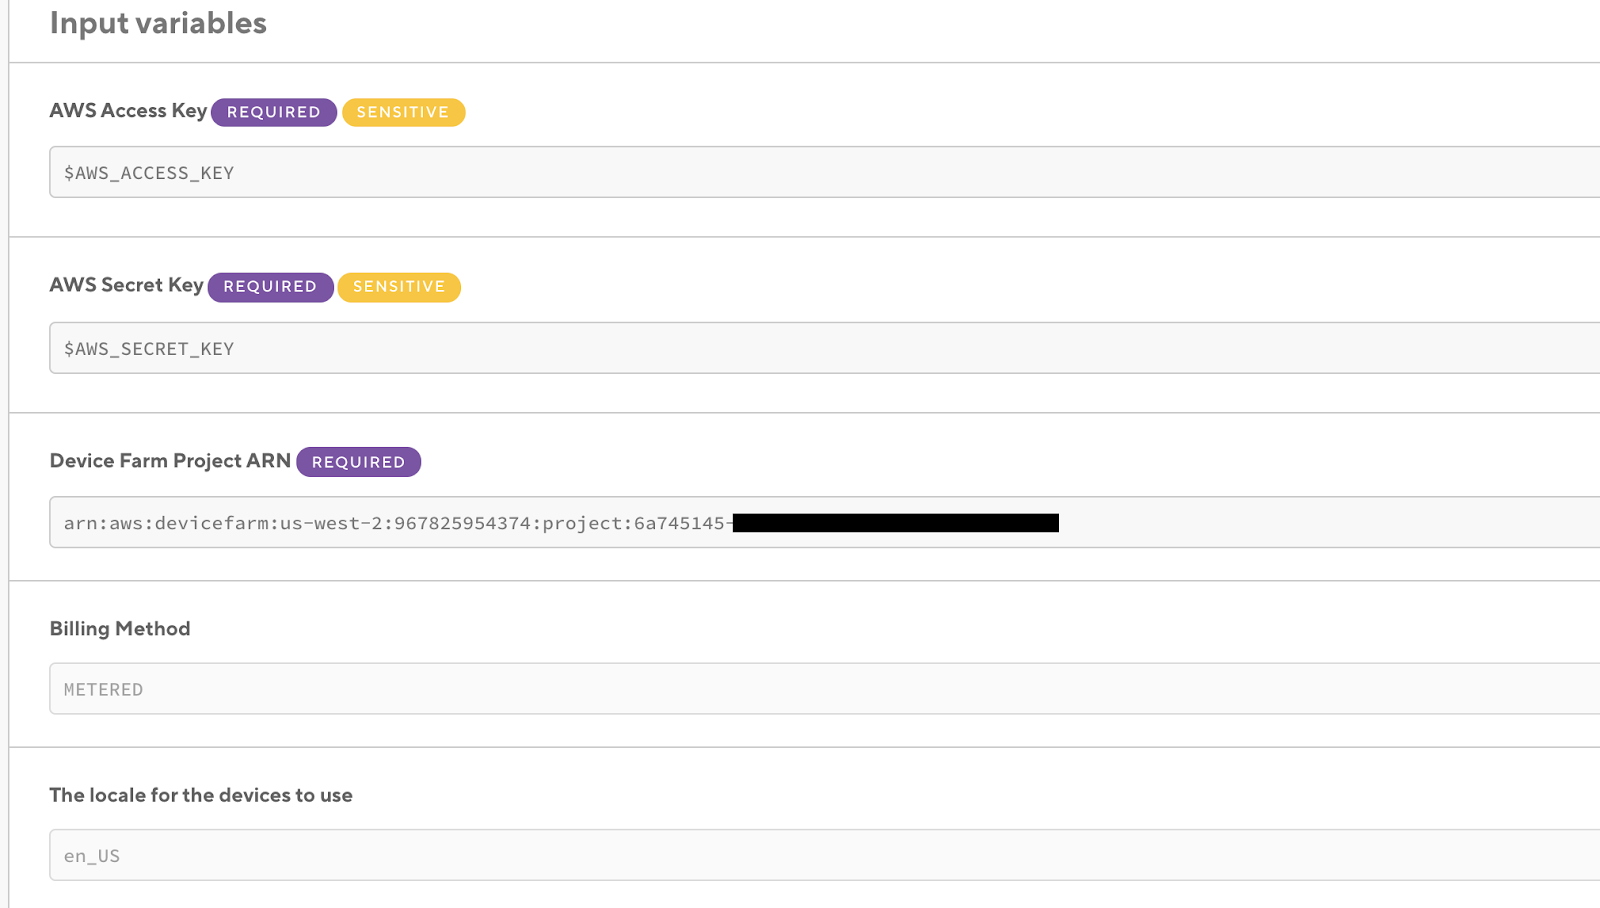
2. You should add the following required parameters with the Step:
- AWS Access Key
- AWS Private Key
- AWS Region
- Device Farm Project ARN
- Upload File Path: The Test APK
- Upload Type: Test Type which, in my case, because I’m using Espresso, will be INSTRUMENTATION_TEST_PACKAGE
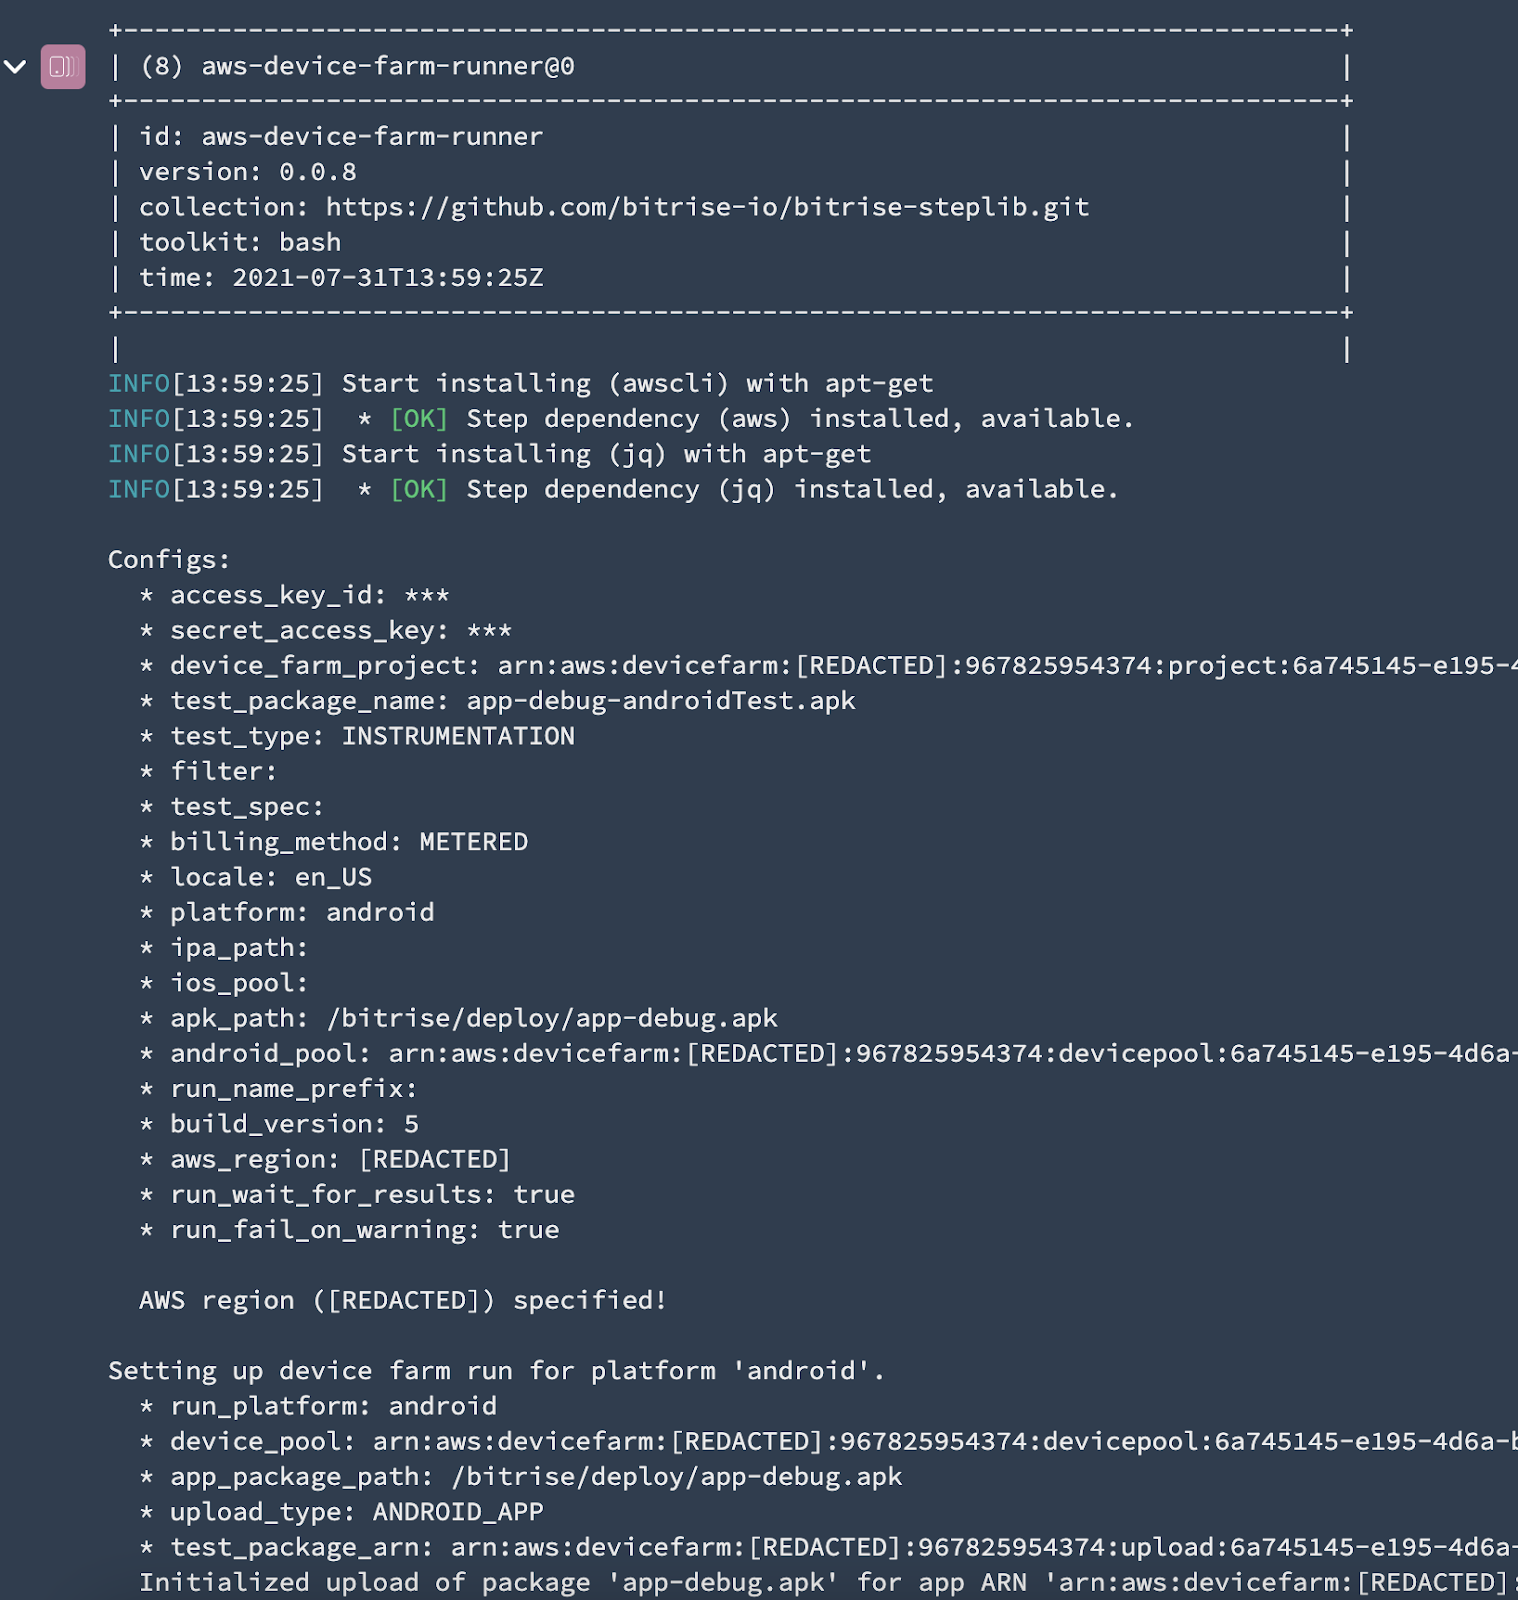
3. Add a new Step, Amazon Device Farm Runner, to run our tests on Device Farm.

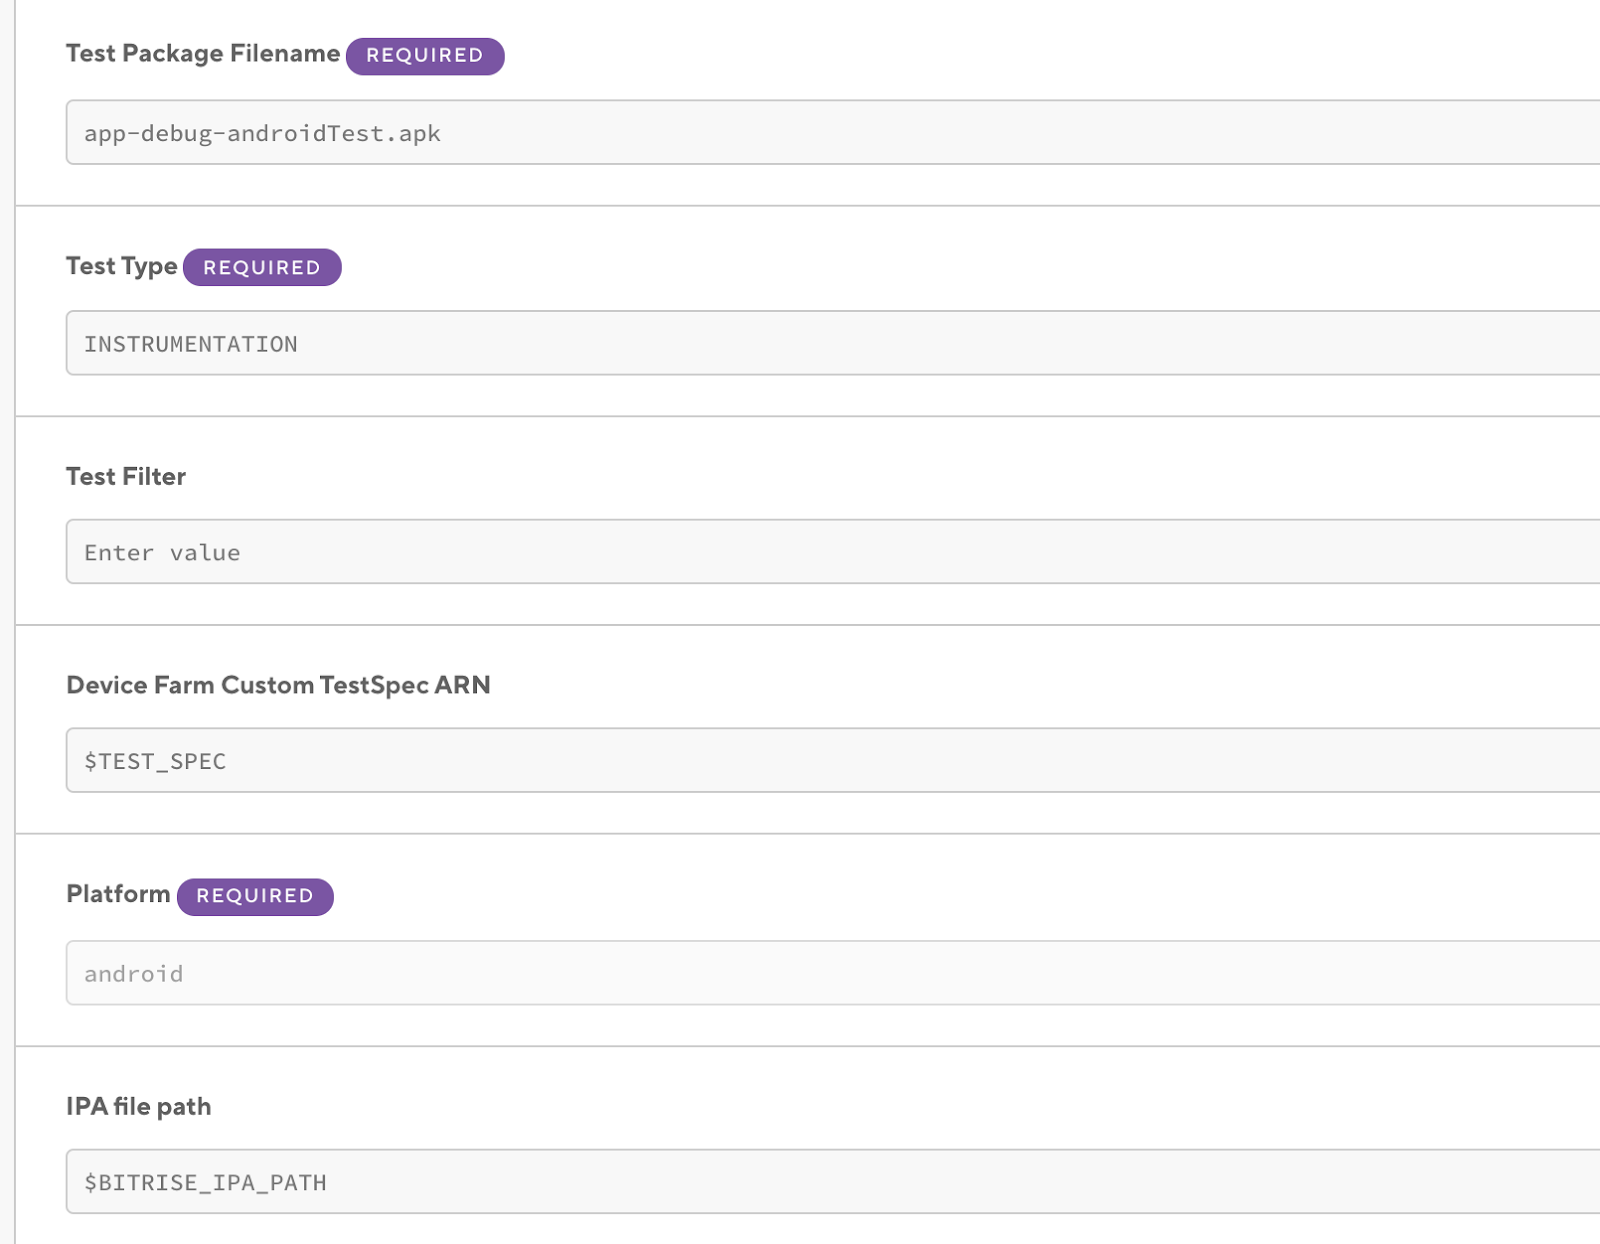
4. You should add the following required parameters with the Step:
- AWS Access Key
- AWS Private Key
- Device Farm Project ARN
- Test Package Filename: The Test APK Name not the Path
- Test Type: Test Type which is my case because I’m using Espresso will be INSTRUMENTATION
- Device Farm Android Device Pool ARN
- AWS Region

5. The Bitrise Workflow is now ready and we can start our builds.
You will have noticed that we didn’t need to add any prerequisites for our CI server, like AWS CLI and Android SDK — we only need to configure the AWS Device Farm Steps.
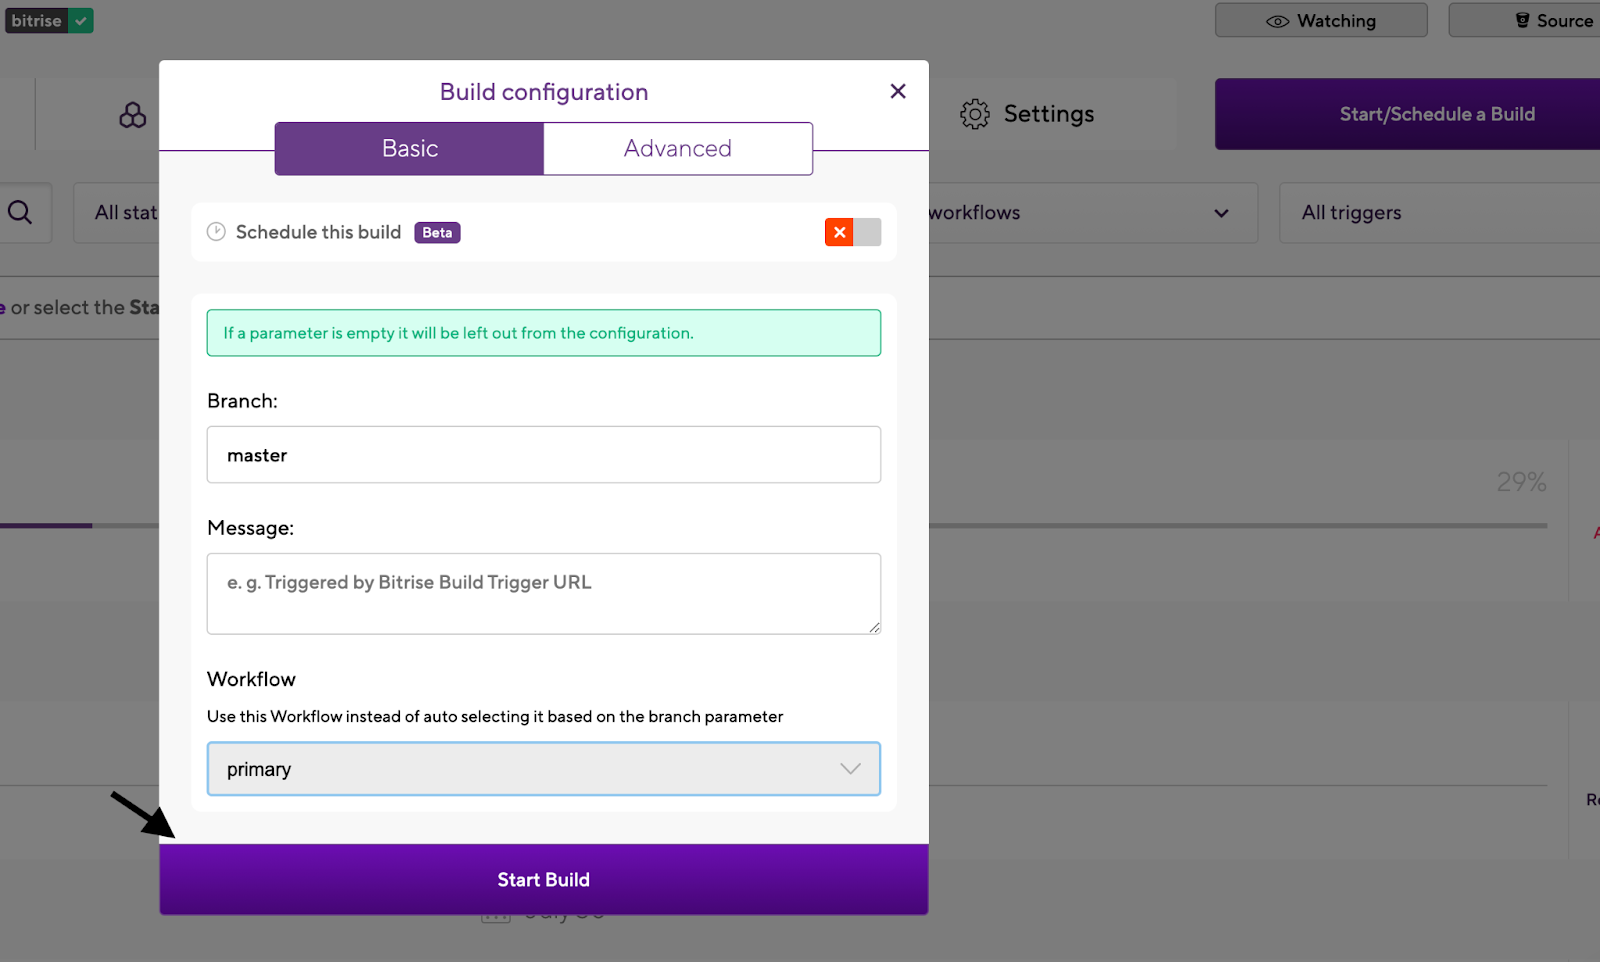
To run the Workflow, go to the application page and click on Start/Schedule Build, select the Workflow, then click Start Build.


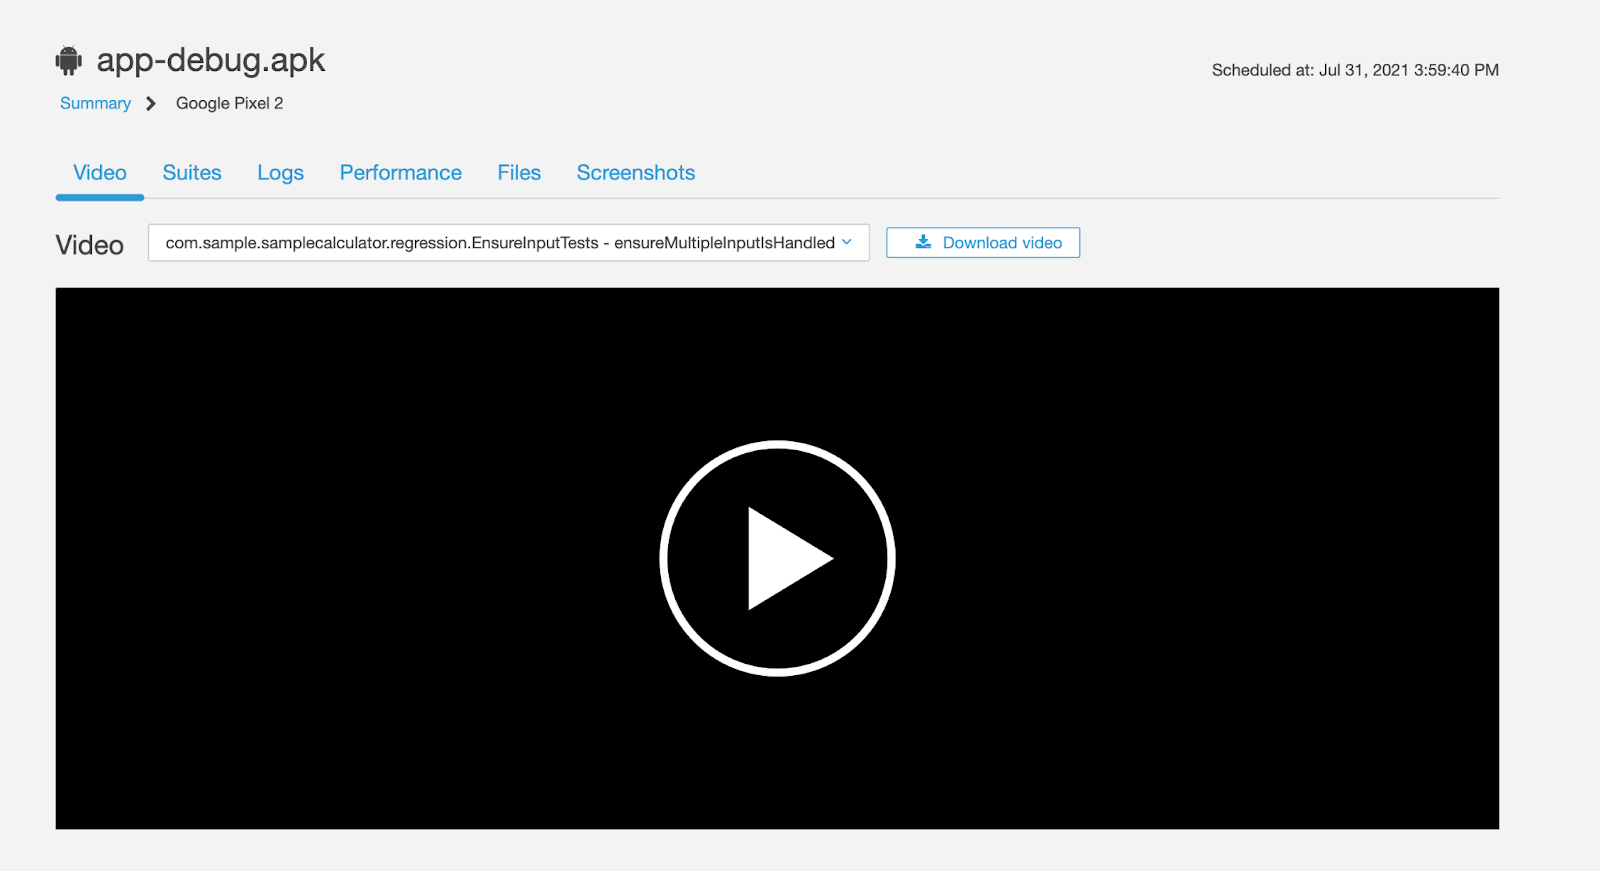
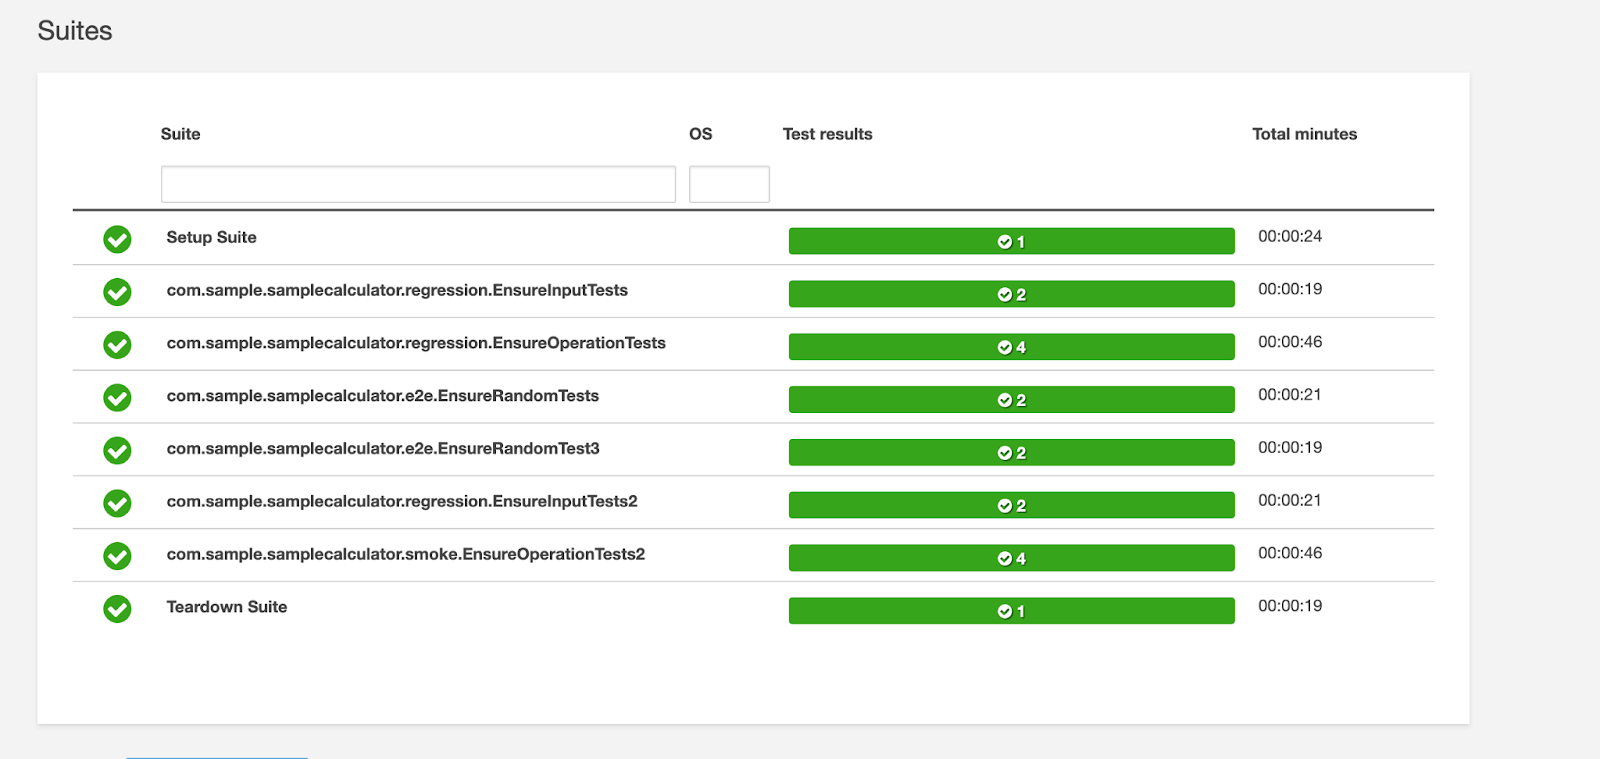
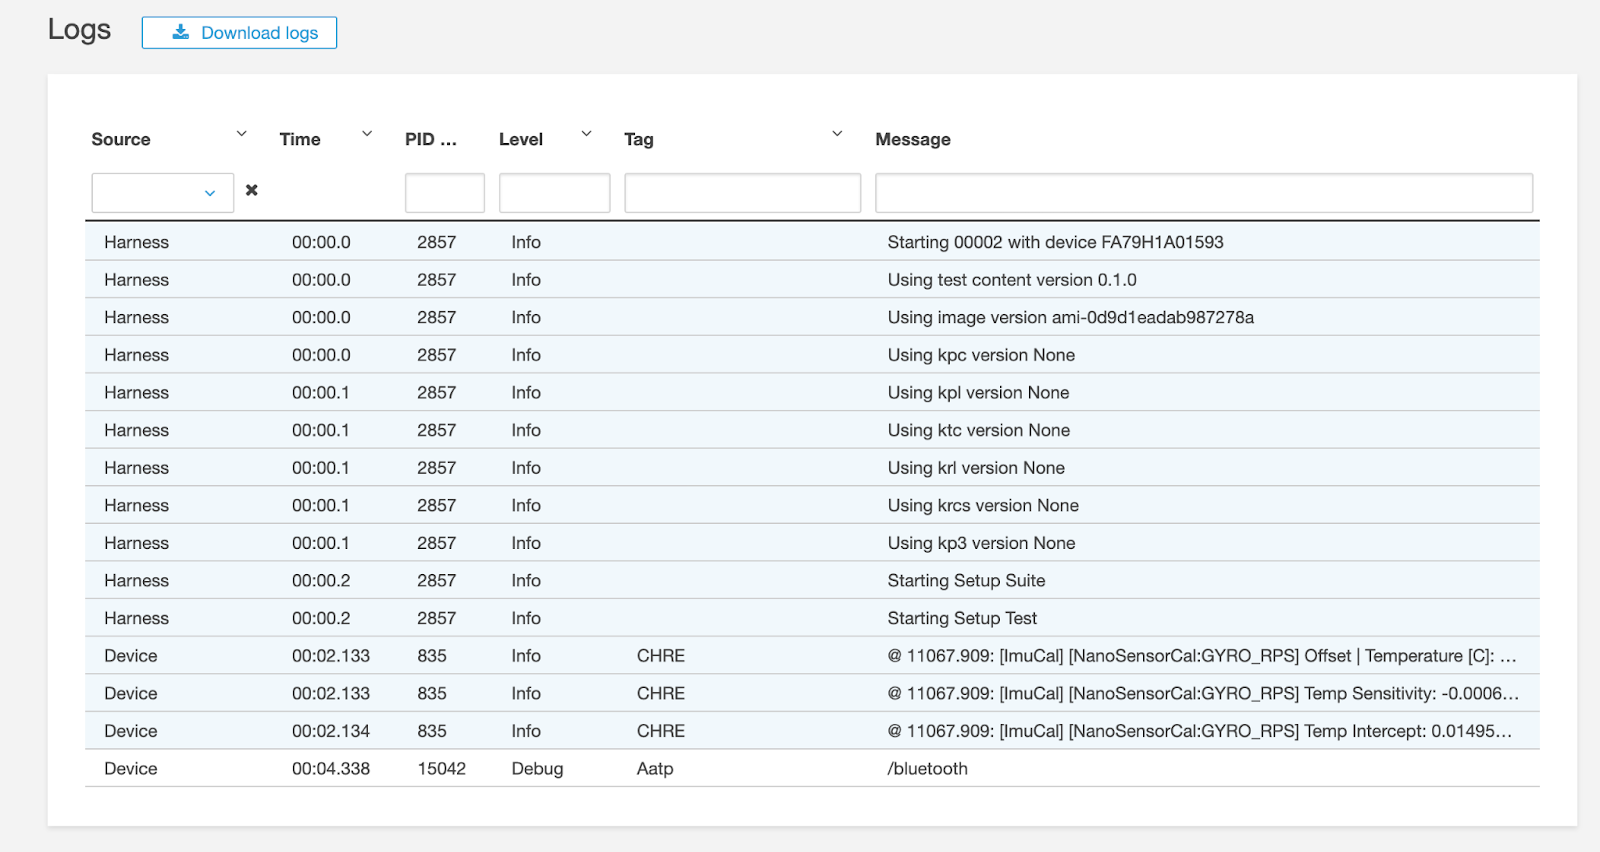
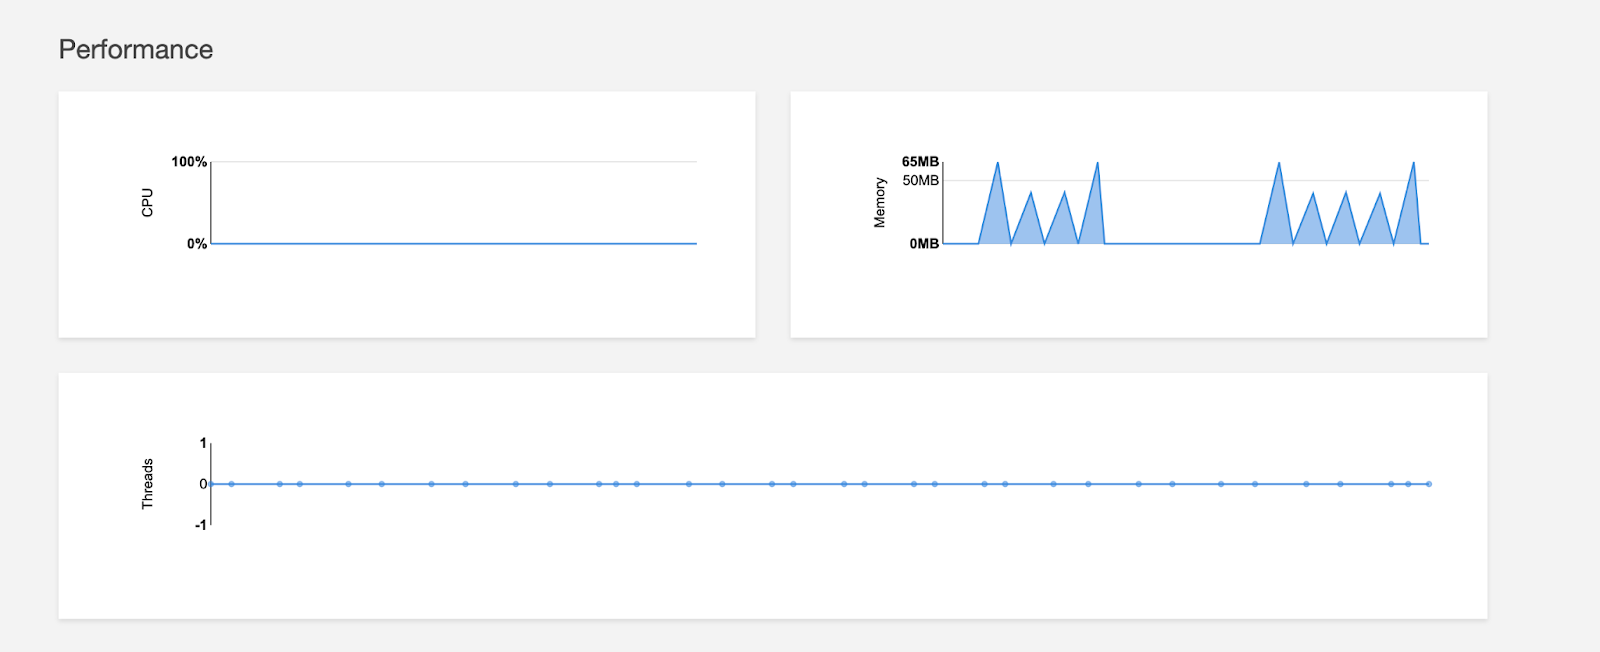
And in the Device Farm Project, you will notice that the tests start running on our device pool.


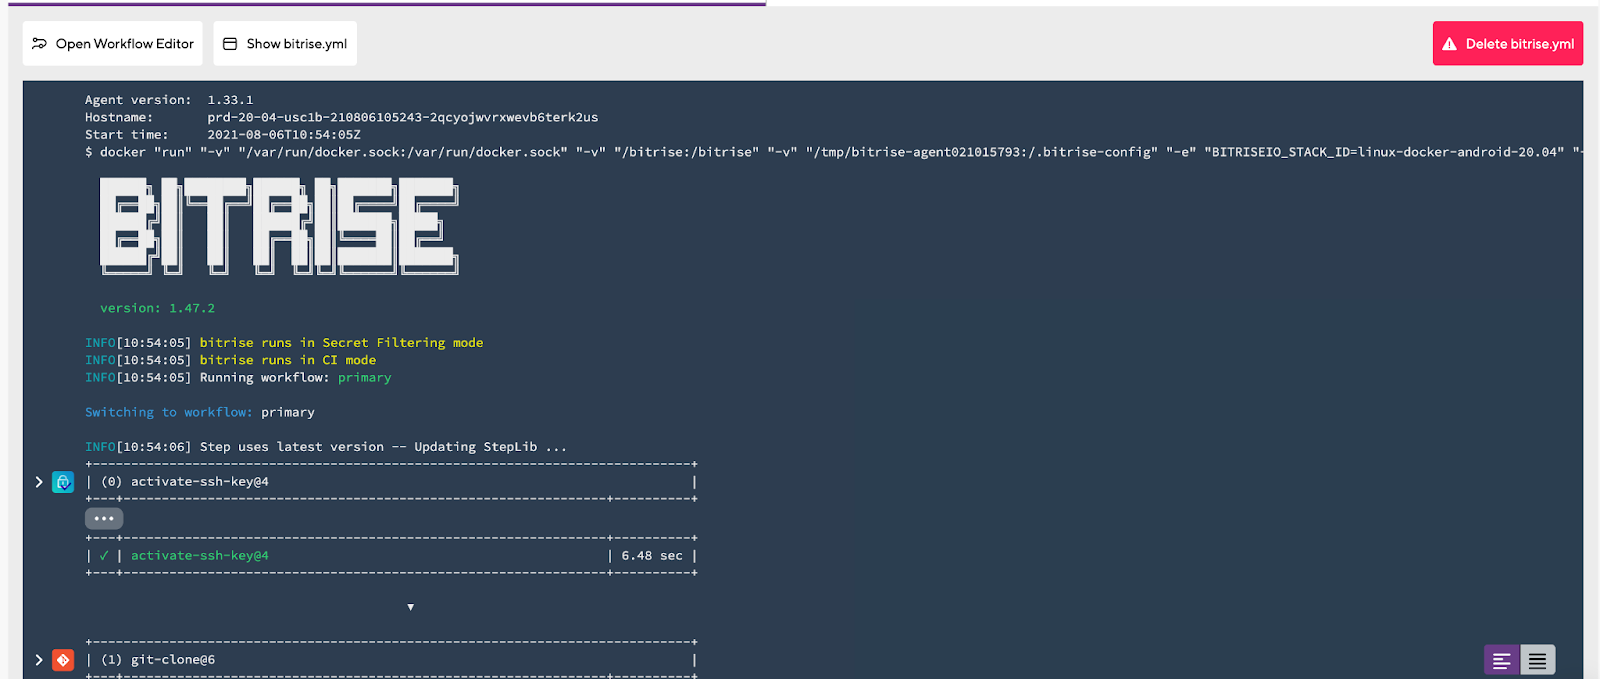
If everything runs successfully, you will find a green build at the end and an email notification with the build status.


Congratulations! 🎉 You have successfully integrated and run your Espresso Android UI tests with AWS Device Farm and Bitrise.
Resources
Further Reading
I hope you found this article useful and If you have any questions, feel free to contact us on our Twitter or via email. If you’d like to find out more about how Bitrise can help you release better apps, faster, you can also request a demo here.
